
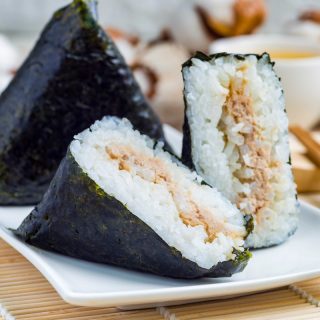
Onigiri, Japanese rice triangles or Japanese rice balls with savory fillings, are great to eat on the go. This onigiri recipe provides an easy step-by-step guide for how to make onigiri rice balls at home.
Learn How to Make Onigiri at Home
The Japanese have been making filled rice snacks since before chopsticks were invented. Called onigiri, these Japanese rice balls are an easy way to eat without utensils.
But they’re great for another reason, too: The rice preserves the savory fillings inside. And they make a great brown bag lunch.
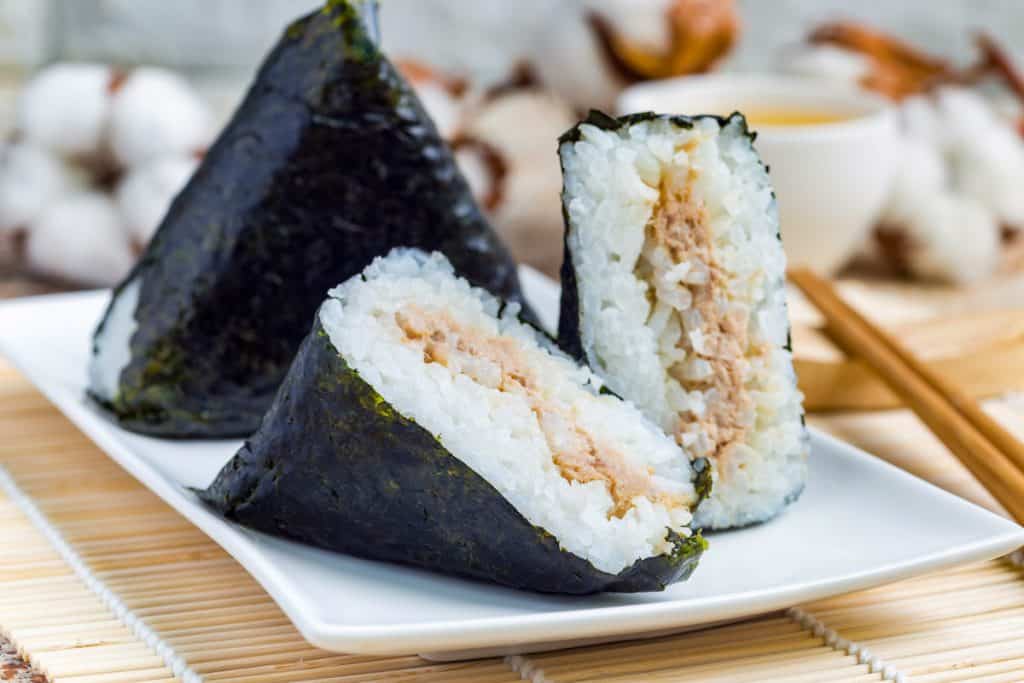
At Japanese convenience stores or grocery stores, you’ll often find actual balls of rice or rice molded into a round shape, a cylinder shape, or cute shapes like kitties and bunny rabbits. The triangle shape is the most common. No matter how you shape them, these compact wonders hide delicious surprises inside.
These onigiri are adorable, delicious self-contained meals. Less boring than a sandwich, they’re the ideal snack to take to work, to school, or to the park. Sneak them into the movies or bring them along for a long plane, train, or bus ride.
What ingredients do you need for this onigiri recipe?
You can make this onigiri recipe with just a few ingredients or you can make a large batch with a variety of fillings. It’s totally up to you. Here are the basic ingredients:
- Japanese rice like Kokuho Rose Rice or other sushi rice. White rice is the best rice to use. Brown rice can be tricky since it is not as sticky as white rice. Glutinous or sticky rice, on the other hand, is too sticky.
- Water
- Salt
- Roasted seaweed (nori) or onigiri wrappers
- Filling or fillings of your choice
- Sesame seeds, fish roe, or scallions for optional garnishes

How do you make It?
This onigiri recipe is easier to prepare than it looks. The only time-consuming part is cooking the rice and letting it cool enough so that you can shape it with your hands.
- Cook the rice.
- Let the rice cool until it is cool enough to handle.
- Use a mold (you can use a triangular shape, cylinder shapes, or other fun shapes) or your hands to form the cooked rice into the traditional triangle shape or rice ball, putting some of the filling in the center.
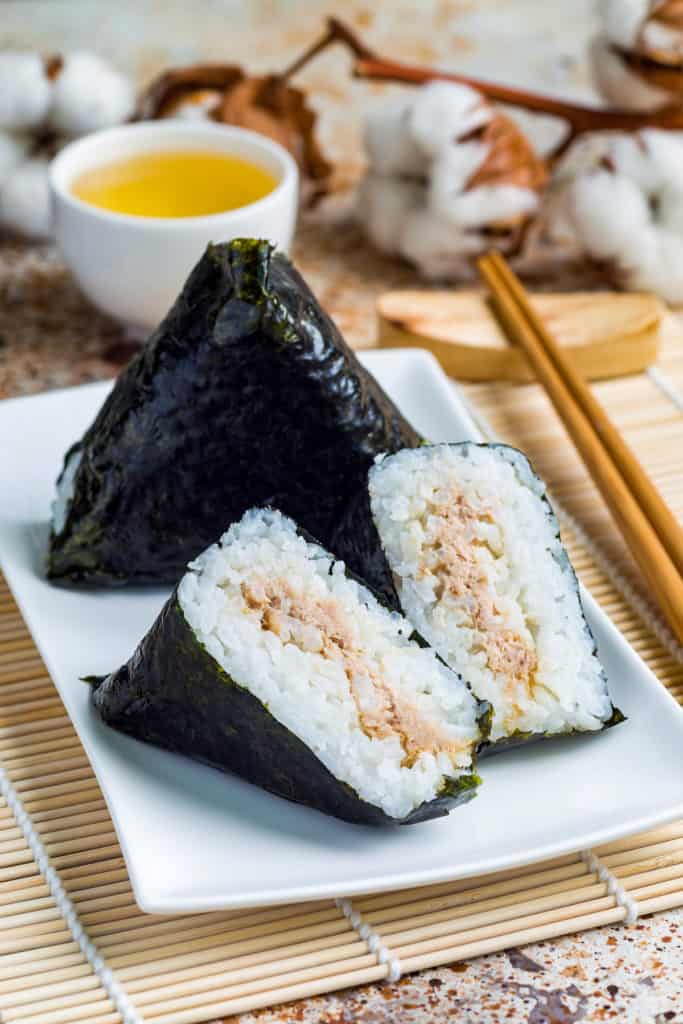
- When ready to serve or eat the onigiri, wrap them in the nori seaweed sheet and enjoy them at room temperature.

This rice cooker not only cooks perfect rice every time, but it also has a ceramic nonstick pot, which is great if you prefer to avoid teflon coated cookware. We've tried a lot of rice cookers and this is our hands-down favorite.
What Kind of Rice Should You Use to make onigiri?
Use short- or medium-grain Japanese-style rice (japonica), which is the same type of rice used to make sushi. Other types of rice may not be starchy enough to stick together in a ball.
How to Cook onigiri rice
You can cook your onigiri rice either in a rice cooker or on the stovetop. Whichever method you choose, start by rinsing the rice very well.
To rinse the rice, place the uncooked rice in a bowl or the pot you will be cooking it in. Cover with cold water and swish the rice around several times with your hand. Drain through a fine mesh strainer. Repeat at least 3 more times, until the water is mostly clear.
To cook the onigiri rice in a rice cooker, place the rinsed rice in the rice cooker pot and add an equal amount of water (for 2 cups of rice, add 2 cups of water). Select the appropriate function on your rice cooker (ie “white rice”) and hit start.
To cook the rice on the stovetop, place the rice in a medium saucepan and add water (use 1 1/4 cups water for each cup of rice). Bring to a boil over high heat. Cover the pot and reduce the heat to the lowest setting on your stove.
Simmer for 15 minutes, without removing the lid. After 15 minutes, remove the pot from the heat and let stand, without removing the lid, for 10 minutes more.
How to Season the Rice
Onigiri is usually made with rice seasoned only with salt. I like to make it with sushi rice, which is seasoned with salt, sugar, and rice vinegar. Yum. But according to onigiri experts, this is totally wrong and I would never suggest that anyone else should do it this way. LOL.
Whether you use plain or sushi rice, start with short or medium grain Japanese (japonica) rice and rinse it well before cooking.
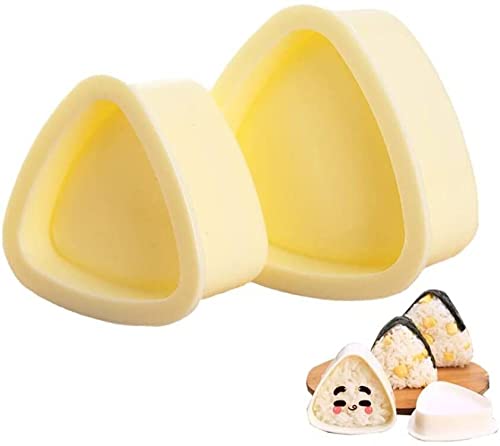
This handy rice ball mold makes it easy to form perfect onigiri triangles.
How to Shape Onigiri
Shaping the onigiri may seem intimidating, but don’t fret. It’s easier than it looks. You can buy an inexpensive, easy-to-use onigiri mold. They come in fun shapes from basic triangles to flowers or assorted animals.

Tips for Success with this Onigiri Recipe
1. Use the right type of rice
Use short- or medium-grain Japanese rice (japonica), the type that is used to make rice for sushi. This rice has the right amount of starch to hold together in a ball.
2. Use rice that is still warm
Cook the rice and let it cool until it is cool enough to handle. Shape and fill the rice balls. Let them cool to room temperature before wrapping in seaweed (this will keep the seaweed from immediately getting soggy.)
3. Use wet hands to shape the rice balls
Wet your hands with water to keep the rice from sticking to your hands. This will make it easier to make attractive rice balls. Keep a bowl of water on your countertop and dip your hands in as necessary to keep the rice from sticking.
4. Wrap your seaweed separately or use individually-wrapped seaweed sheets
If you plan to take it to go, wrap the seaweed separately or use individually-wrapped nori sheets. This will keep the seaweed fresh and crisp until you are ready to eat your onigiri.
What do you put inside onigiri?
From cooked salmon onigiri to onigiri filled with marinated seaweed, tempura shrimp, or even American-style tuna salad, they’re all delicious. Fill your onigiri with just about anything you like.
Suggested Fillings
The list of possible onigiri fillings is endless. Here are some suggested onigiri fillings, but let your imagination run wild.
- Salted and baked or broiled salmon, mackerel, or other fish
- Miso Glazed Salmon
- Japanese pickles
- Shrimp tempura
- Sweet and Sour Tofu
- Ika
sansai (Japanese spicy squid salad) - Tuna salad (traditional or made with wasabi paste, Sriracha, or other ingredients)
- Umeboshi (pickled plums)
- Chicken Karaage
- Teriyaki chicken
- Chicken Satay
- Seaweed salad
- Bonito flakes
- Cod roe
- Cucumber Kimchi
- Eggs (hard-boiled with wasabi paste or scrambled with a bit of soy sauce)
- Lox or smoked salmon and thinly sliced green onions
- Smoked trout with wasabi paste or prepared horseradish
- Leftover fried chicken, chopped
- Chicken liver pate
- Air Fryer Pork Belly
- Char Siu or BBQ pork, diced or shredded
Can you make onigiri Rice balls ahead of time and refrigerate or freeze them?
I used to think that onigiri had to be made fresh and eaten the same day, but it’s not true! Onigiri can be refrigerated or even frozen! Here’s how:
- Wrap the onigiri (without the seaweed) tightly in plastic wrap.
- Refrigerate for up to 3 days or freeze for up to 3 months.
- To serve, thaw them in the refrigerator overnight.
- To refresh the onigiri, wrap them in a damp paper towel and microwave for 30 to 45 seconds.
- Wrap in seaweed and enjoy!
more japanese recipes you’ll love
If you love Japanese food as much as I do, you might want to try a Matcha Milk Tea to go with your Onigiri.
try my Spicy Miso Ramen or Chicken Karaage. For sides and snacks, don’t miss my Soy Sauce Eggs, Stir-Fried Lotus Root, or Chawanmushi.
For breakfast or brunch, try Japanese Souffle Pancakes!
Onigiri AKA Japanese Rice Balls or Rice Triangles
Ingredients
For the rice:
- 2 cups short grain Japanese japonica rice
- 3 cups water
For the sushi rice seasoning (optional):
- 1/3 cup rice vinegar
- 3 tablespoons sugar
- 1 teaspoon salt
For the rice balls:
- 8 sheets roasted seaweed nori or [onigiri wrappers]* (optional)
- One or more fillings enough to fill 8 balls, which is about ½ to 3/4 cup
Instructions
- Rinse the rice in cold water at least 5 times and drain well in a fine-mesh sieve. If using a rice cooker, simply add the rice and cold water to the rice cooker and cook according to the cooker’s instructions. To cook the rice in a pot on the stovetop, place the rice in a pot with a tight-fitting lid. Add the cold water and bring to a boil. Reduce heat to a very low simmer, cover the pot, and simmer for about 20 minutes, until all of the liquid is absorbed and the rice is tender.
- If using the sushi rice seasoning, while the rice is cooking, combine the vinegar, sugar, and salt in a small saucepan and heat over medium heat, stirring, just until the sugar is dissolved. When the rice is finished cooking, stir the vinegar mixture into it until well combined.
- Transfer the rice from the rice cooker or cooking pot to a large bowl and let cool until it is cool enough to handle.
- Shape your onigiri while the rice is still warm. If using a mold, wet the inside of the mold and, using wet hands, fill it about halfway with rice. Make an indentation in the middle of the rice with your thumb and add your filling, about a tablespoon or so. Add more rice on top to fill the mold. Place the top half of the mold on top and press down gently. Remove the top of the mold and invert the bottom half over a plate. Press down on the button in the middle to help the onigiri slide out. Wet the inside of the mold again and repeat the process until you have used up all of your rice and filling or have made the desired number of onigiri.
- If shaping the onigiri by hand, use wet hands and shape into a ball, make an indentation in the middle, fill with about 1 tablespoon of filling, and close up the hole with a bit more rice. Leave it in a ball shape, or use your hands to form it into a triangular shape, if desired.
- If using individually-wrapped onigiri wrappers, leave the plastic wrap on them and wrap them around your rice balls. If using regular nori sheets cut into strips, wrap in plastic wrap. Onigiri can be stored at room temperature for several hours. If you wish to store them longer than that, store in the refrigerator and bring to room temperature before serving.
- To serve, remove the plastic wrap from the nori wrapper, if necessary, and wrap the onigiri in the nori or simply remove the plastic wrap and serve at room temperature.


I like this recipe. But if I put the nori on it get soggy: so i am looking for this kind of wrapped nori that is showing in your picture. Where can I buy it in USA?
Hello! Alternately, you can leave the nori off and slip it in a ziplock bag or you can buy the to taste nori sheets in pack of ten and take a pack with you. If you have bento, I find that if you cut the nori in sheets in quarters and slip them in a baggie they fit neatly under the onigiri and do not get wet. Then just unwrap the sheets and grab your onigiri when hungry! My husband prefers the dry nori sheet, and I do not mind the sheets not being crispy. Enjoy!
I get mine through Amazon. Here is a link to the ones I use: http://www.amazon.com/gp/product/B00U321JNC/ref=oh_aui_detailpage_o01_s00?ie=UTF8&th=1
I usually make Spam musubi for my daughter’s school lunch but these filling ideas have inspired me.
Hi Toby, Yes, I have Amazon links for the wrappers in the recipe above (and below in a previous reply). Definitely try some different fillings! My son loves getting a surprise in his onigiri!
Keiko, you can buy the individually wrapped nori sheetsfor onigiri at Japanese or Asian specialty food markets or on Amazon.com. To buy online, see the link in the recipe or use this one: http://www.amazon.com/dp/B003XUE92Y/ref=as_li_qf_sp_asin_til?tag=twola-20&camp=0&creative=0&linkCode=as1&creativeASIN=B003XUE92Y&adid=04BZKXH7B0Q47VEQEZXK
Thanks for sharing recipe.
I’m with you – sushi rice is so much tastier! For easy transport, Daiso has silicone molds -I just leave them in the molds, pack my nori separately, and pack them like that to go.
The Koreans have this too. Its called Triangle Kimbap. They sell paper with the wrap already on there