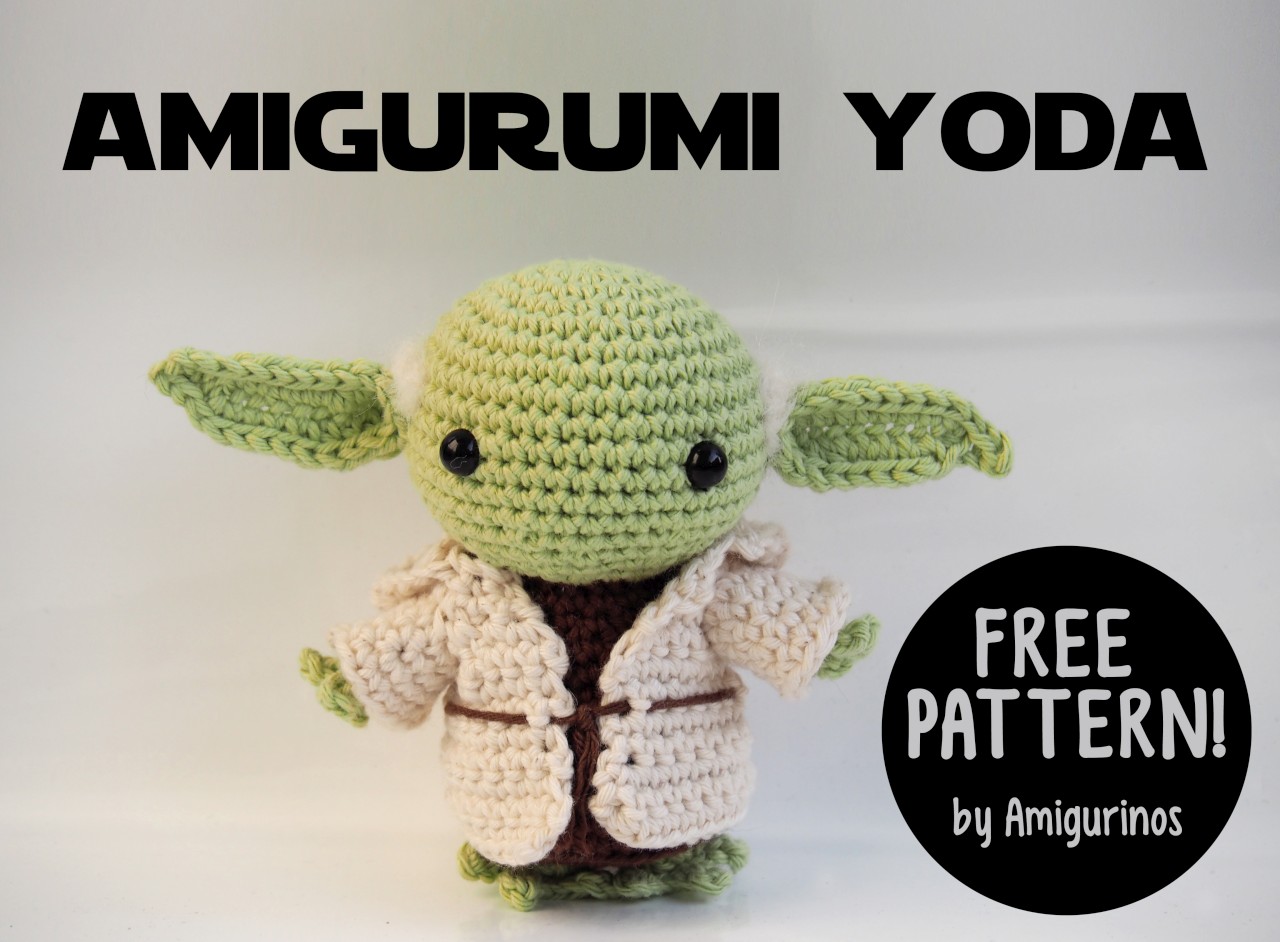
ENGLISH PATTERN
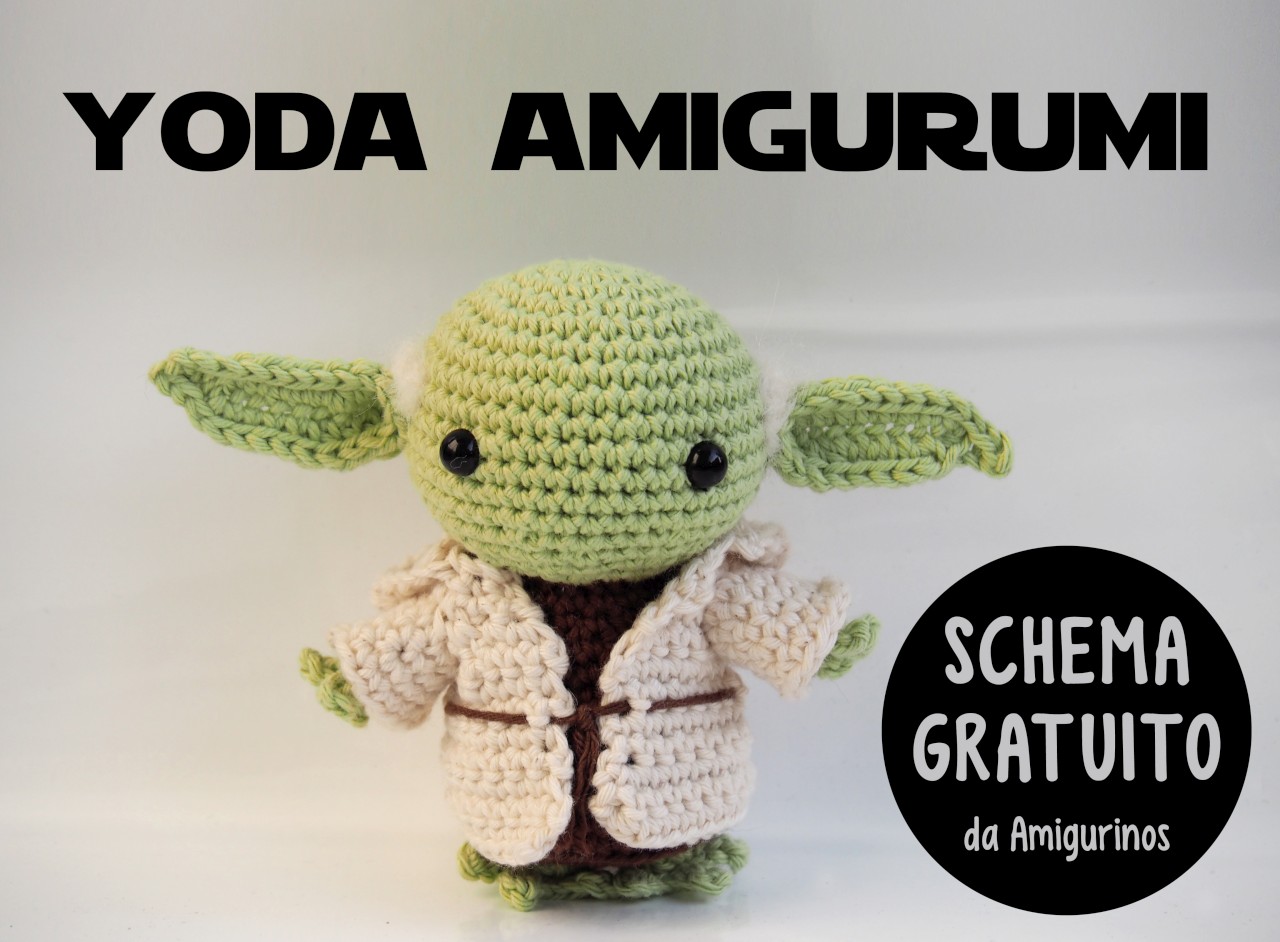
SCHEMA IN ITALIANO
¡Hola a todos!
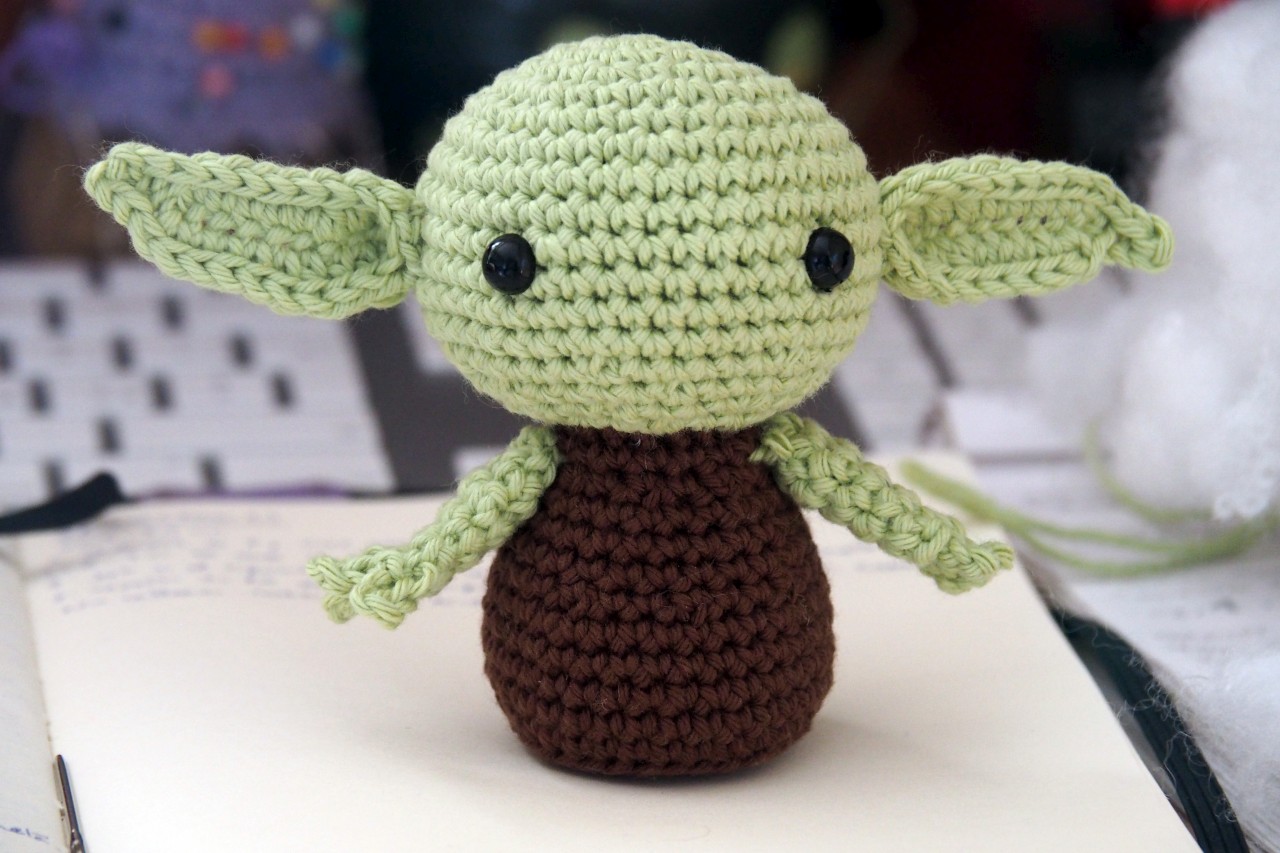
Hoy quiero compartir con vosotros un patrón amigurumi gratis de Yoda.
Creé a esta versión chibi a ganchillo hace algunos años, como encargo de un super fan del personaje de La Guerra de las Galaxias. La he revisado recientemente, mejorándola y pasando a limpio el patrón de manera (espero) clara, ya que se trataba más de instrucciones generales que de un verdadero patrón.
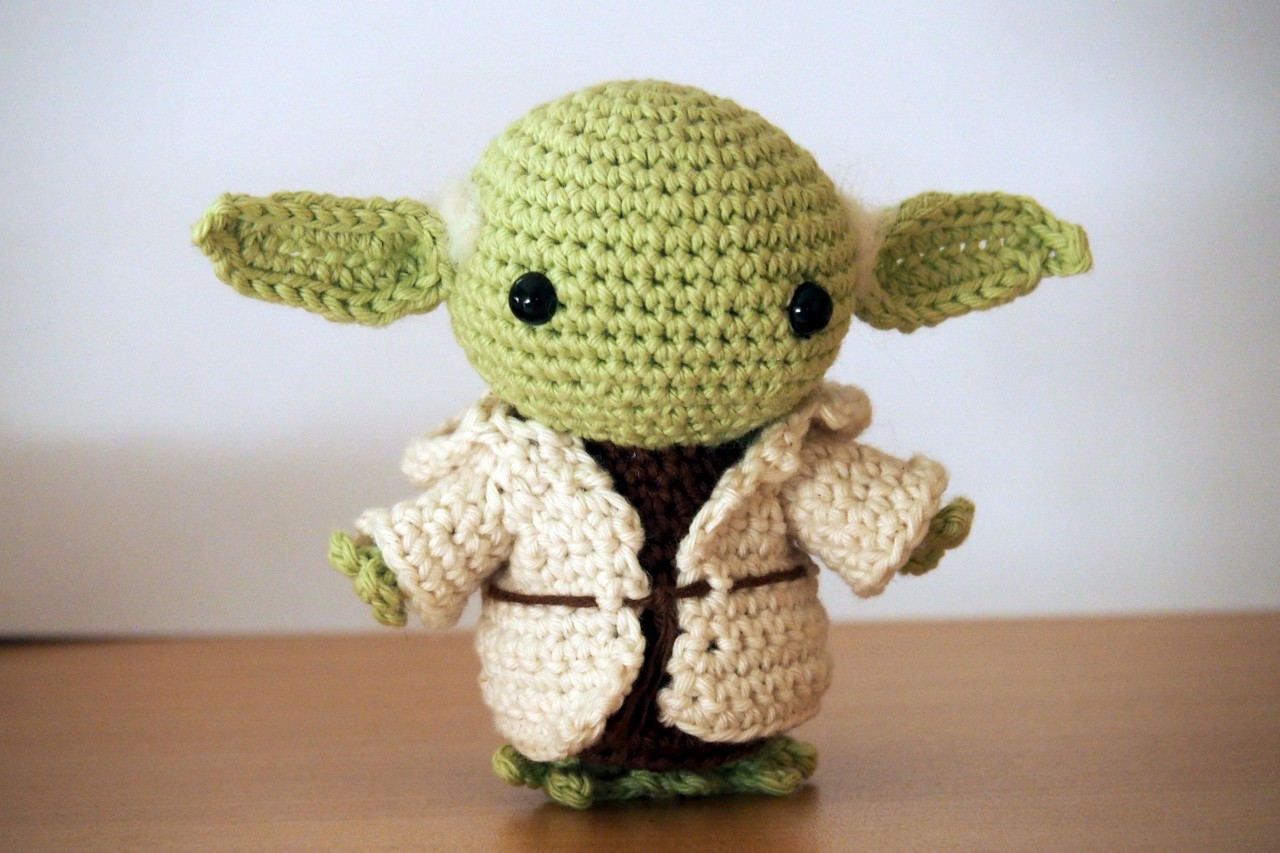
He hecho a Yoda con hilo de algodón y un ganchillo de 3.5 mm y es bastante pequeño, unos 10’5 cm. Además de la carita regordeta, la chaqueta añade adorabilidad ya que se puede poner y quitar (¡puedes usar el mismo patrón para otro amigurumi del mismo tamaño!).
Este amigurumi tiene algunas formas particulares así que he hecho muchas fotos para guiarte a través del patrón. Como dice Yoda, «Siempre transmite lo que has aprendido«.
Si prefieres seguir el patrón en formato PDF descargable en cualquier dispositivo, puedes comprarlo AQUÍ por muy poco – encontrarás todas las fotos y explicaciones sin ningún anuncio.
Coge ganchillo y lanas y, ¡a tejer!.
MATERIALES
– Ovillos de color: verde, marrón y beige
– Un ganchillo de 3.5mm o el más adecuado para tu hilo
– Un par de ojos de seguridad de 8 mm
– Relleno
– Para el pelo de Yoda: yo he usado lana afieltrada pero puedes usar relleno o algodón médico
– Aguja lanera, marcador de vueltas y alfileres de cabeza de bola.
ABREVIATURAS (términos españoles)
pb = punto bajo
mpa = medio punto alto
pr = punto raso
aum = aumento
dism = disminución
p = puntos
PATRÓN
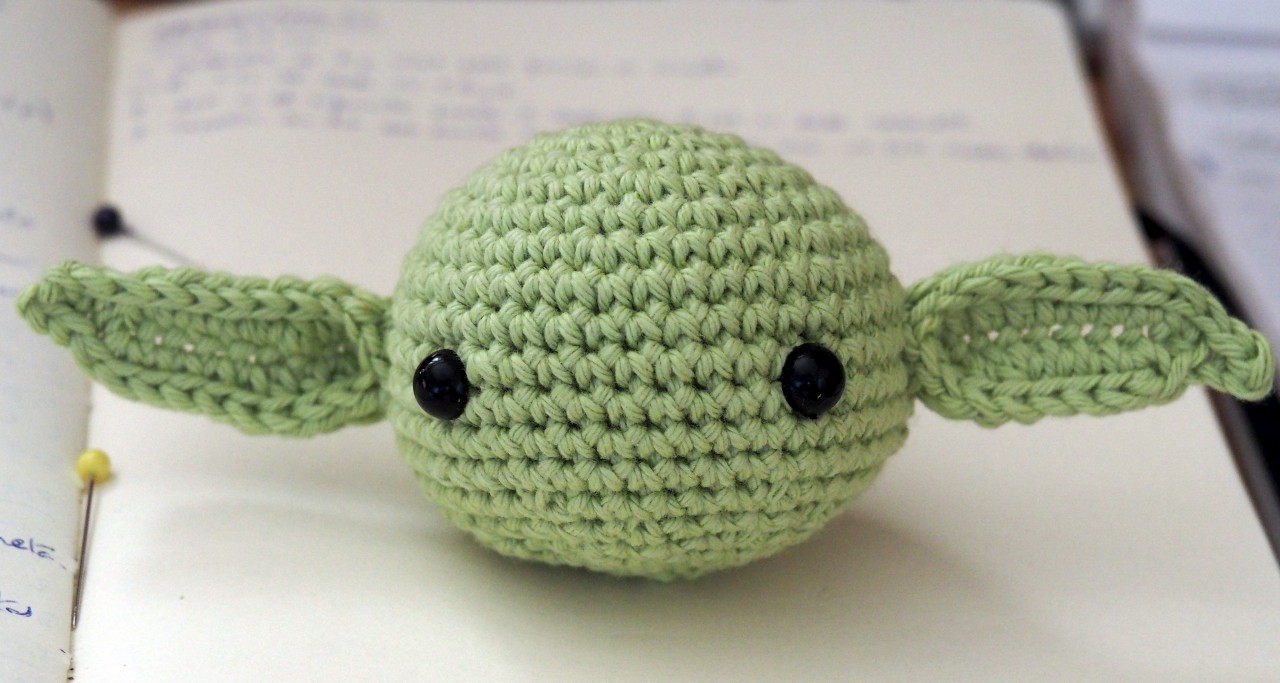
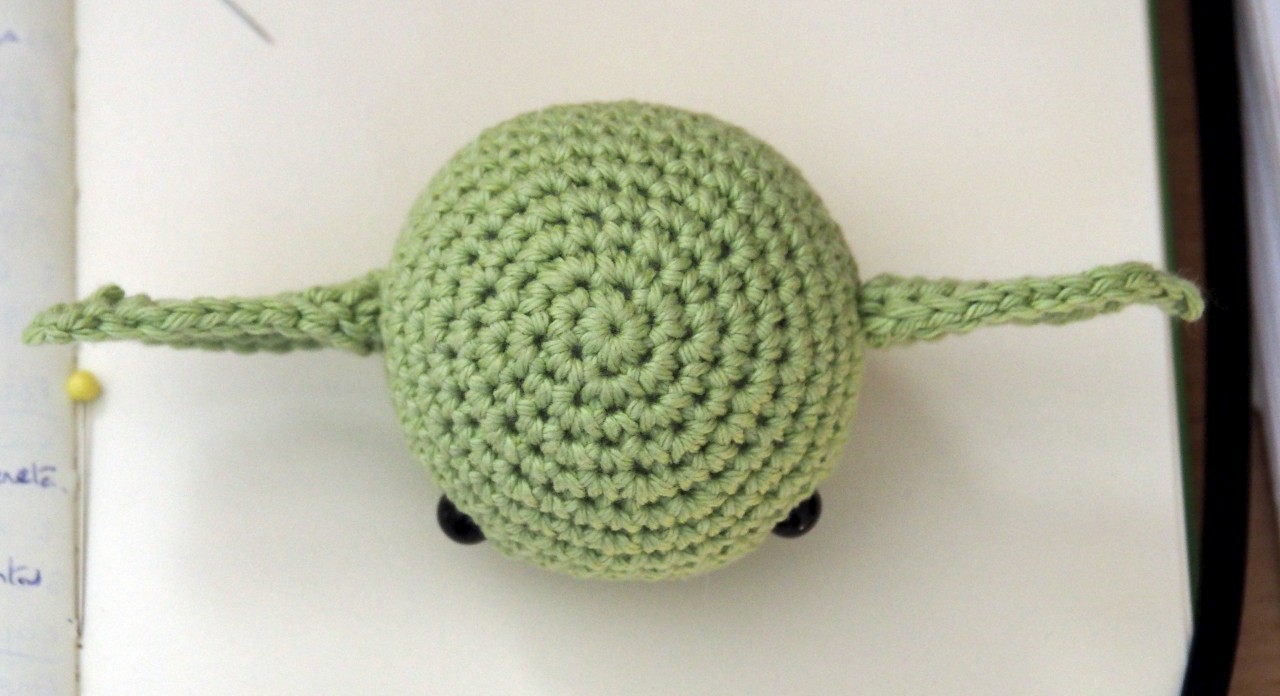
CABEZA
Con color verde,
V1: Anillo mágico de 6 puntos (6 p)
V2: (1 aum)x6 (12 p)
V3: (1 pb, 1 aum)x6 (18 p)
V4: (2 pb, 1 aum)x6 (24 p)
V5: (3 pb, 1 aum)x6 (30 p)
V6: (4 pb, 1 aum)x6 (36 p)
V7: (5 pb, 1 aum)x6 (42 p)
V8-13: un pb en cada pb (42 p)
V14: (5 pb, 1 dism)x6 (36 p)
V15: (4 pb, 1 dism)x6 (30 p). Coloca los ojos entre las vueltas 10 y 11 con 9 puntos de diferencia entre ellos
V16: (3 pb, 1 dism)x6 (24 p). Empieza a rellenar
V17: (2 pb, 1 dism)x6 (18 p)
V18: (1 pb, 1 dism)x6 (12 p)
V19: (1 dism)x6 (6 p).
Termina de rellenar y cierra. Remata el hilo.
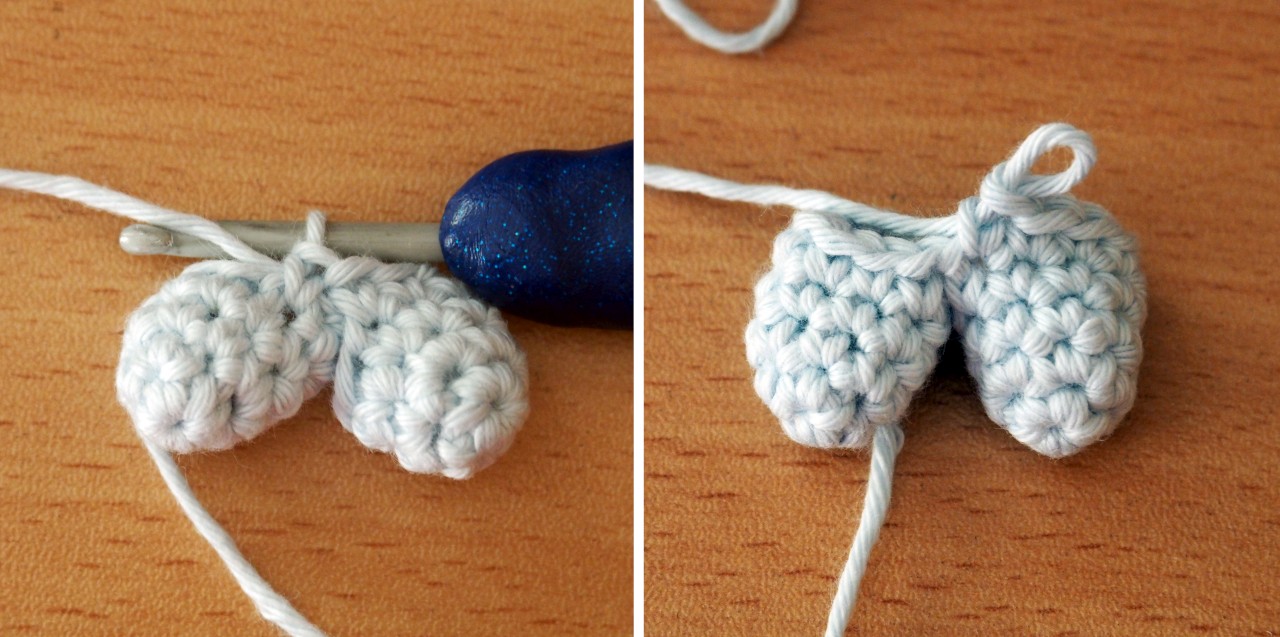
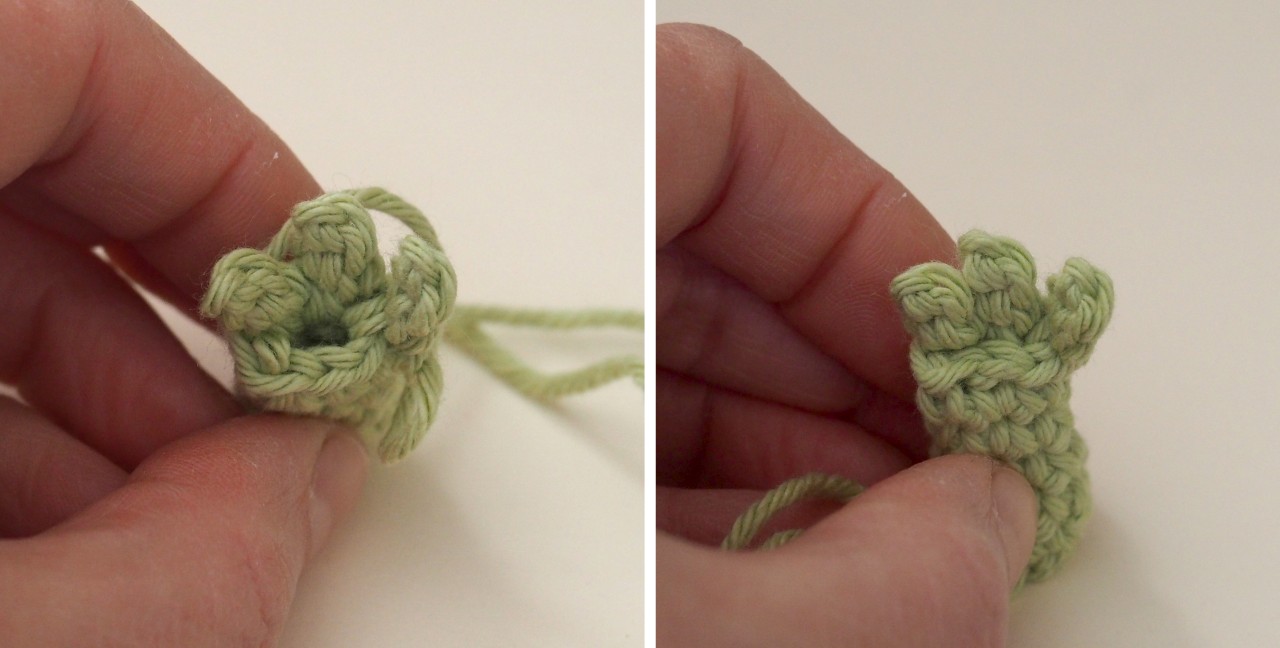
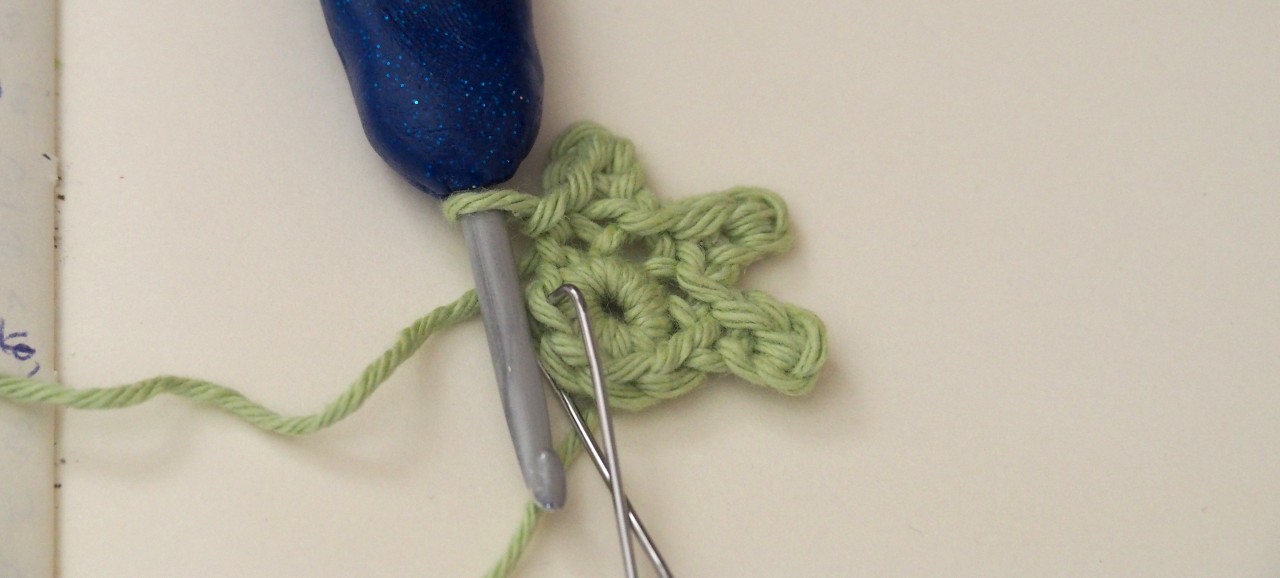
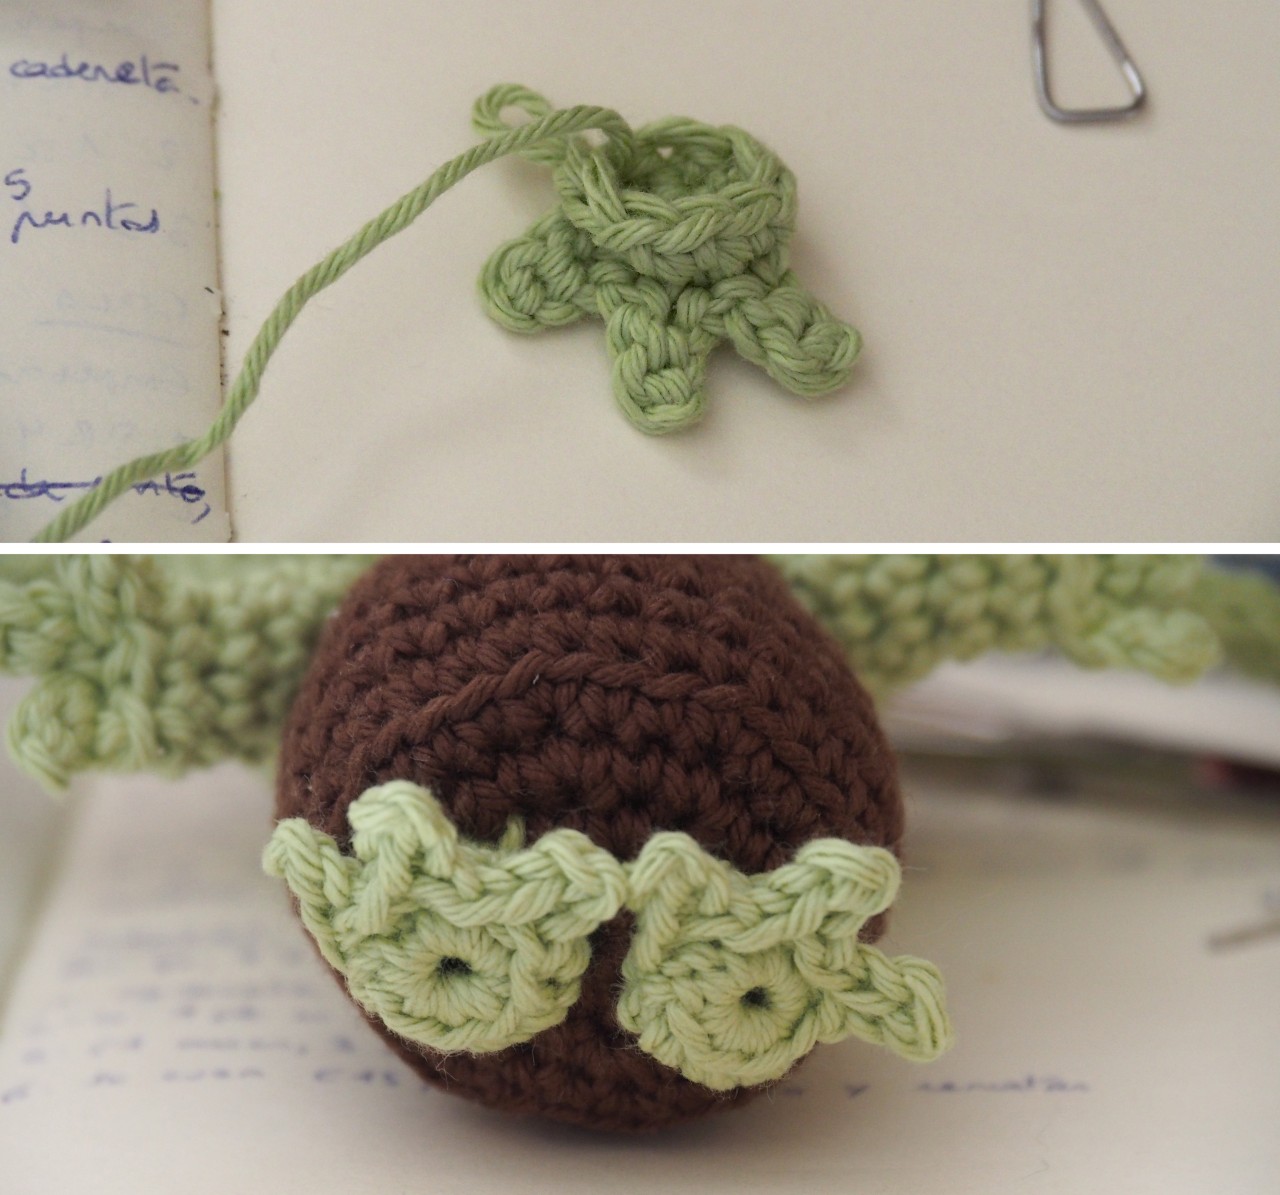
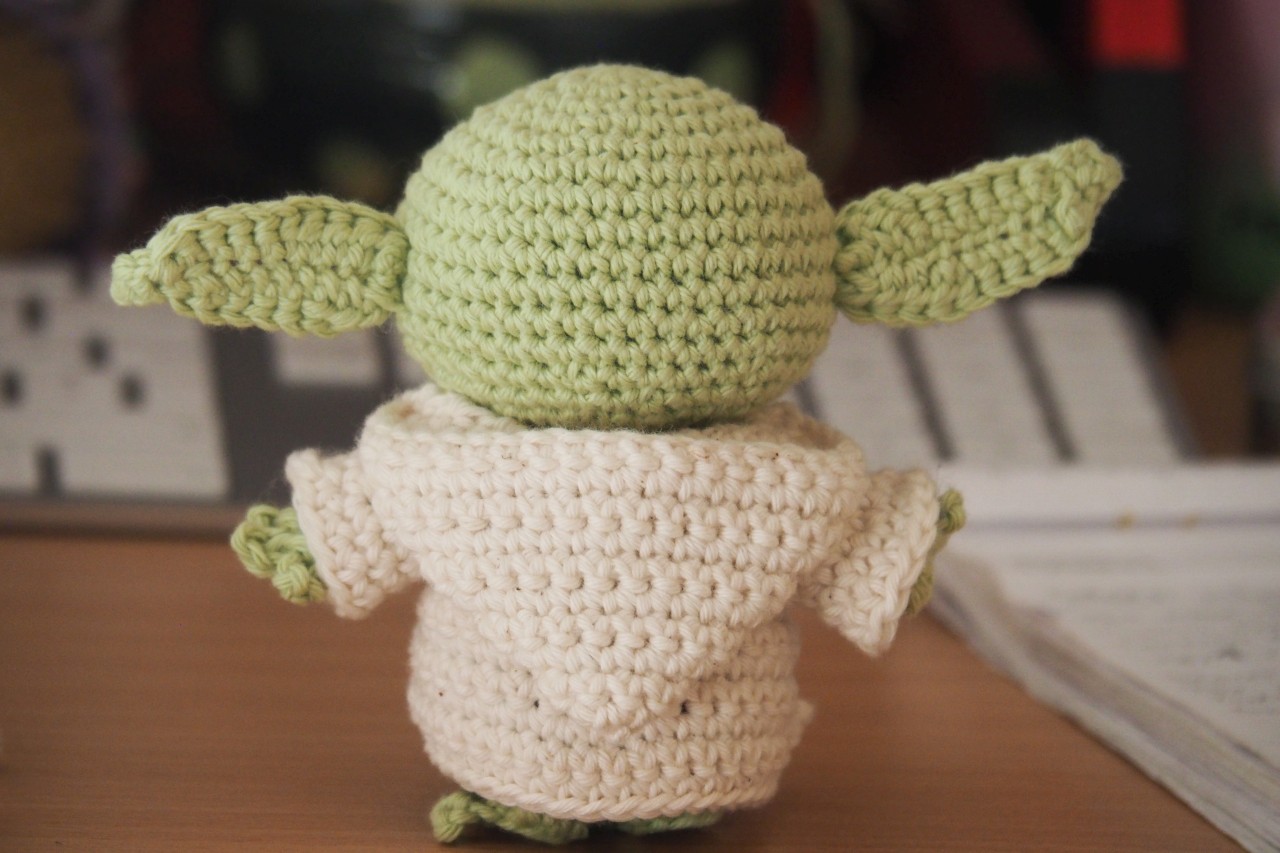
OREJA IZQUIERDA
Con color verde,
V1: Teje una cadeneta de 10 puntos
V2: Empezando por la segunda cadeneta desde el ganchillo, teje 5 pb, 4 mpa, dale la vuelta, 4 mpa, 5 pb (18 p)
V3: Teje una cadeneta de 3 puntos y, a partir de la segunda cadeneta desde el ganchillo, teje un punto raso en cada una de las cadenetas. Termina la vuelta tejiendo un punto raso en cada uno de los puntos bajos de la vuelta 2 (20 p). Corta el hilo y remata.
Pasa el hilo sobrante por los bucles traseros de los puntos, en la parte de atrás de la oreja.
OREJA DERECHA
Con color verde,
V1: Teje una cadeneta de 11 puntos
V2: Empezando por la segunda cadeneta desde el ganchillo, teje un punto raso, 5 pb, 4 mpa, dale la vuelta, 4 mpa, 5 pb, 1 punto raso (20 sts)
V3: Teje una cadeneta de 3 puntos y, a partir de la segunda cadeneta desde el ganchillo, teje un punto raso en cada una de las cadenetas. Salta el primer punto raso de la vuelta 2 y teje un punto raso en cada uno de los puntos bajos. Salta el último punto raso de la vuelta 2 y termina la vuelta tejiendo un punto bajo en la hebra trasera de las cadenetas del principio (22 p). Corta el hilo y remata.
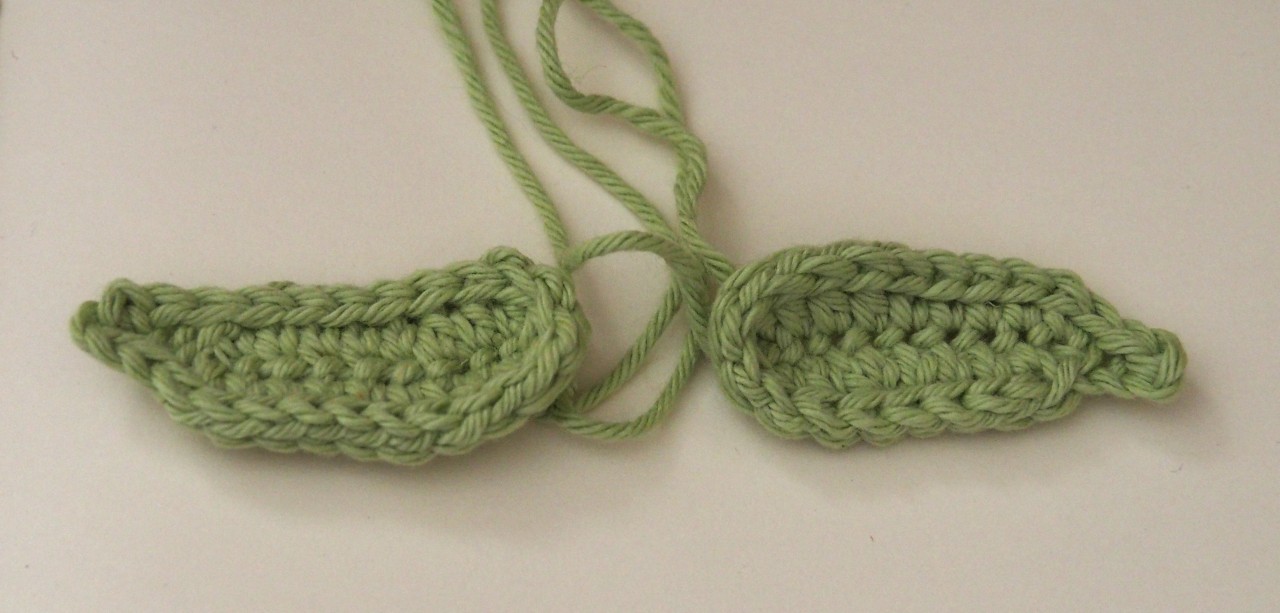
¡No te preocupes mucho por las puntas de las orejas! Las orejas de Yoda son inconfundibles.
Cose las orejas en línea con los ojos, más o menos a mitad de la cabeza.
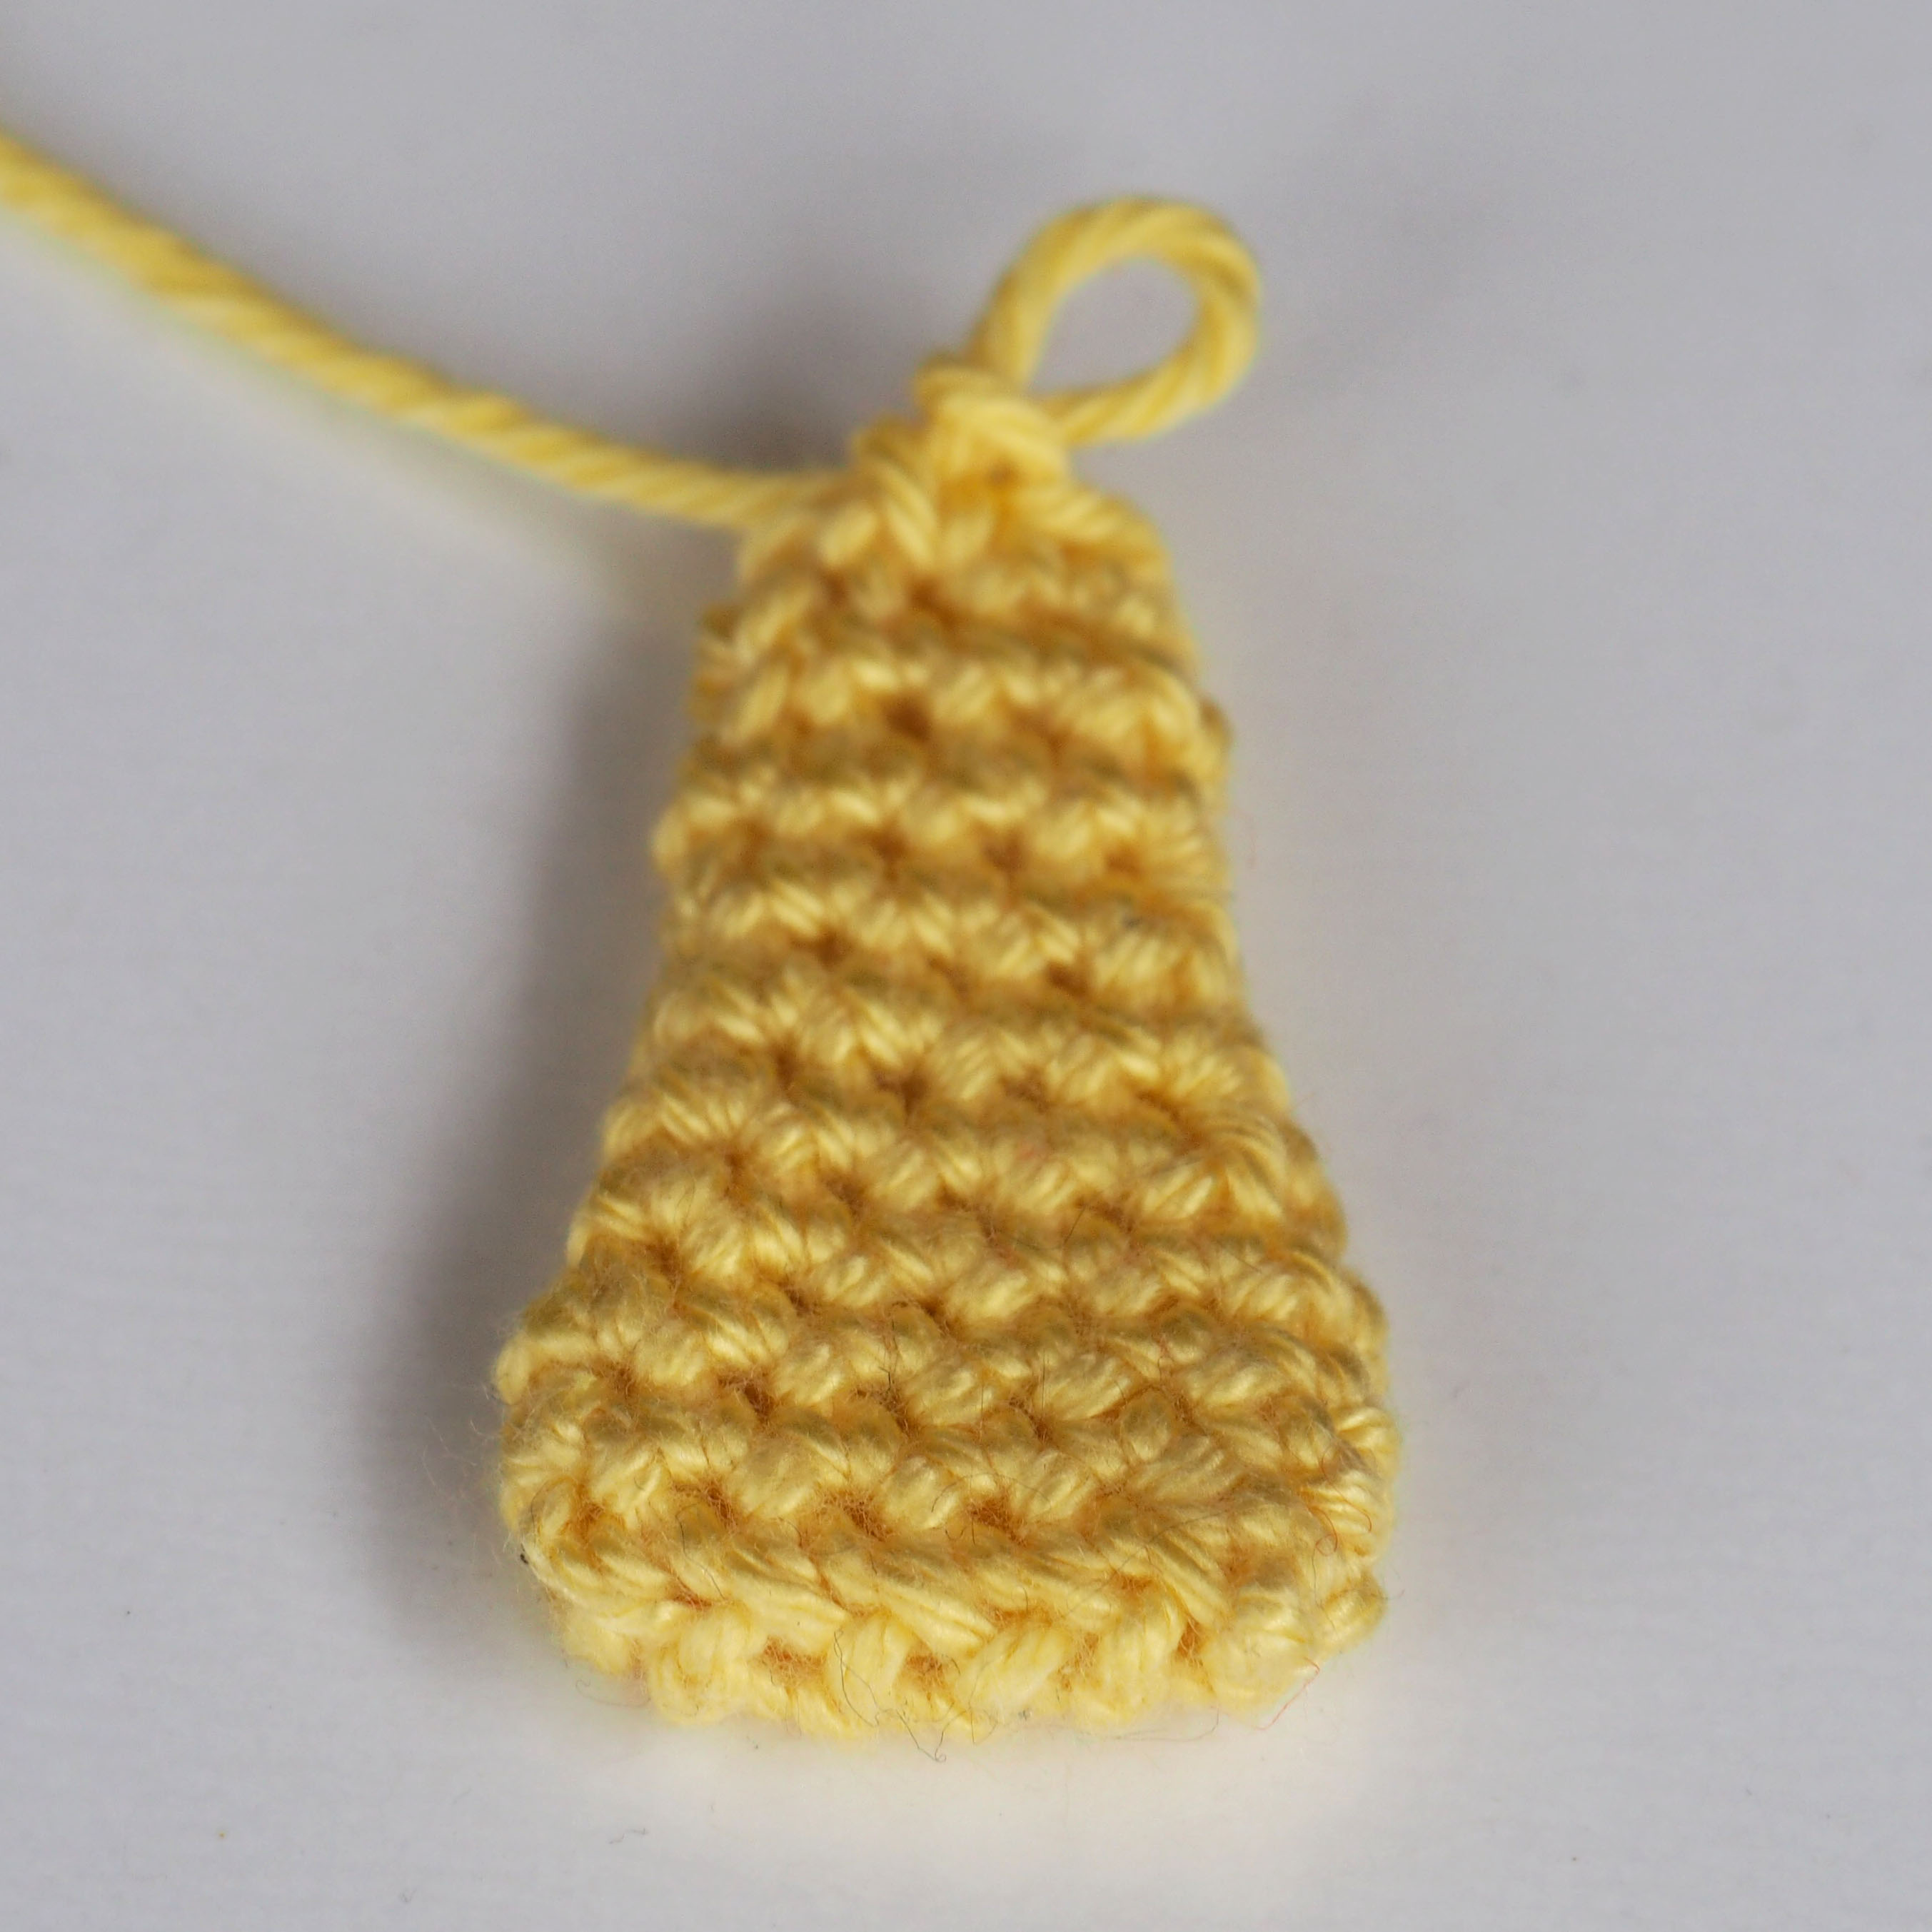
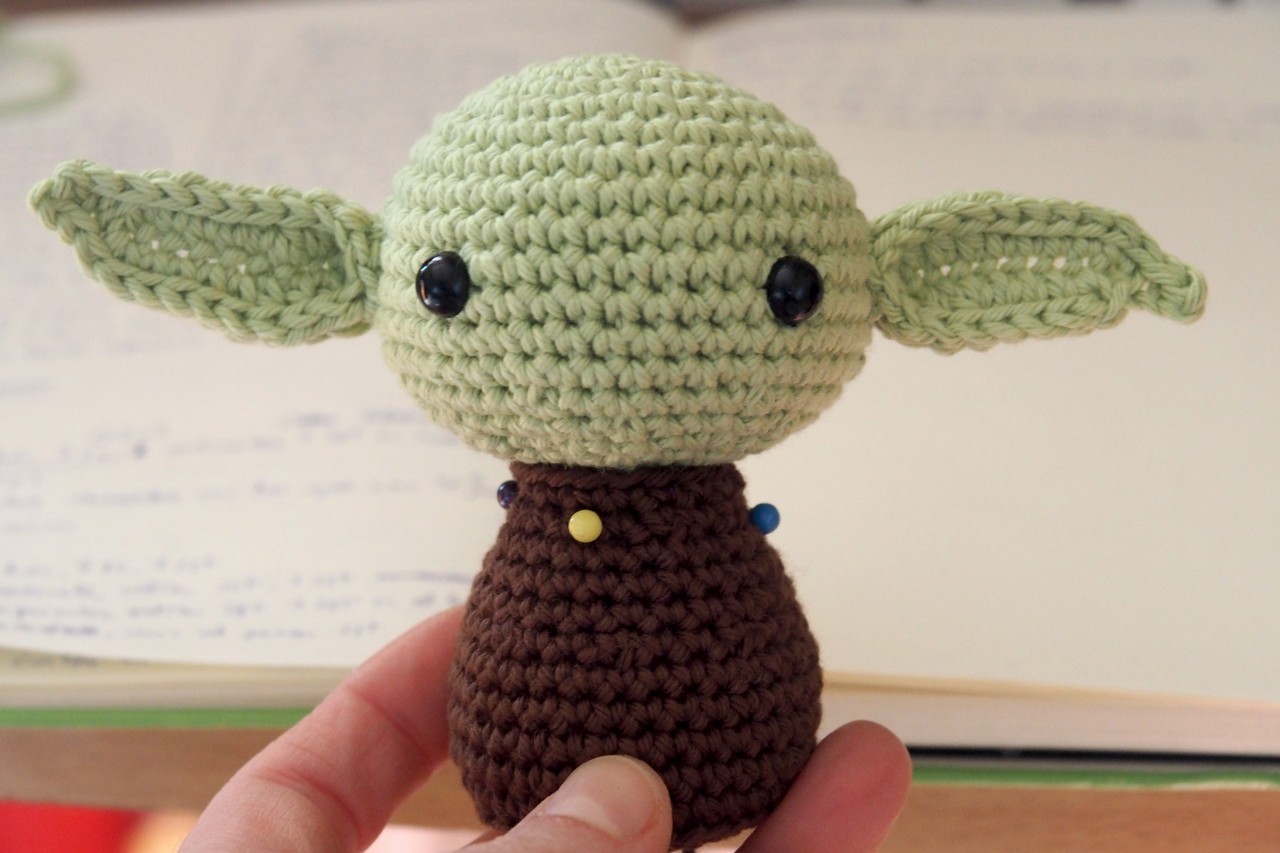
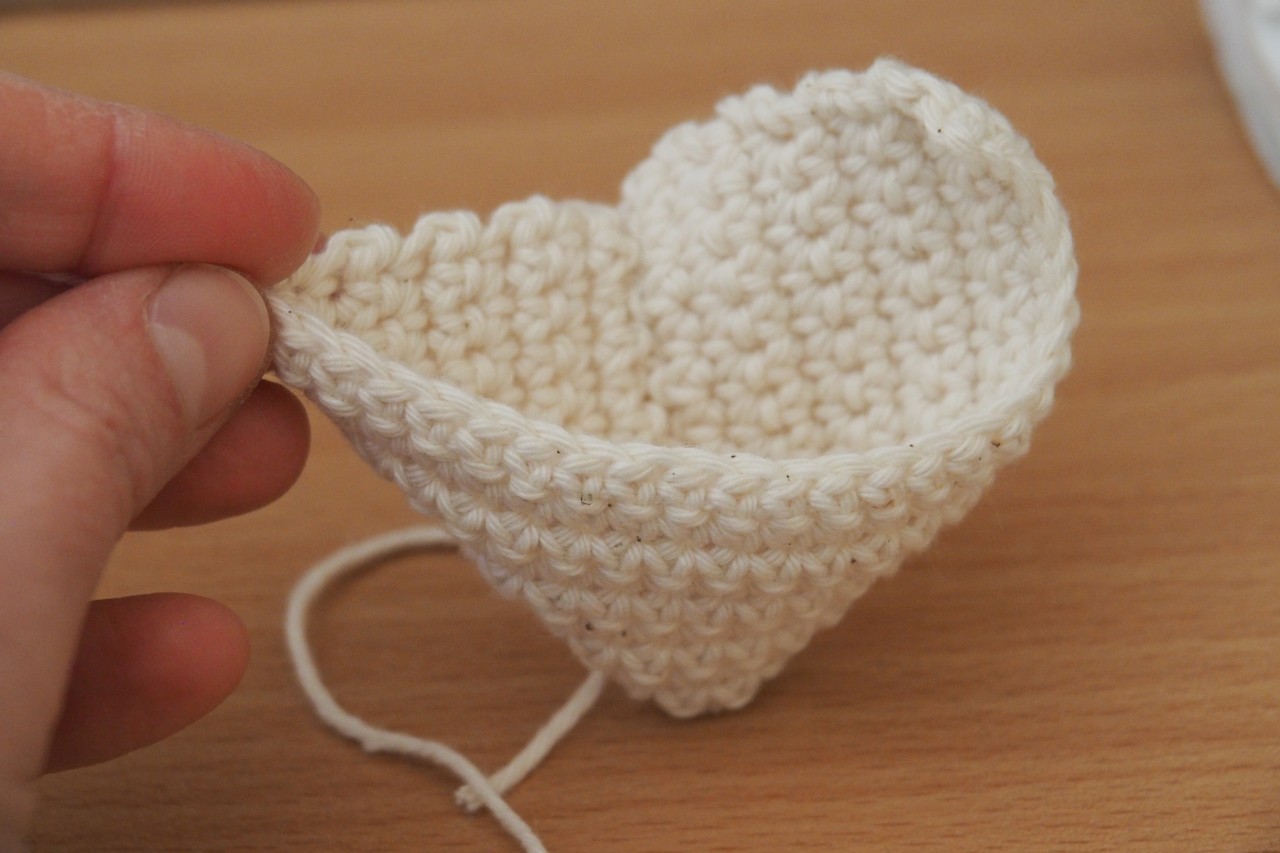
TÚNICA
Con color marrón,
V1: Anillo mágico de 8 puntos (8 p)
V2: (1 aum)x8 (16 p)
V3: (1 pb, 1 aum)x8 (24 p)
V4: (2 pb, 1 aum)x8 (32 p)
V5: (en la hebra trasera – back loop) un pb en cada pb (32 p)
V6-9: un pb en cada pb (32 p)
V10: (2 pb, 1 dism)x8 (24 p)
V11-13: un pb en cada pb (24 p)
V14: (1 pb, 1 dism)x8 (16 p)
V15: un pb en cada pb (16 p)
Corta el hilo, dejando una hebra larga. Rellena y cose a la cabeza.
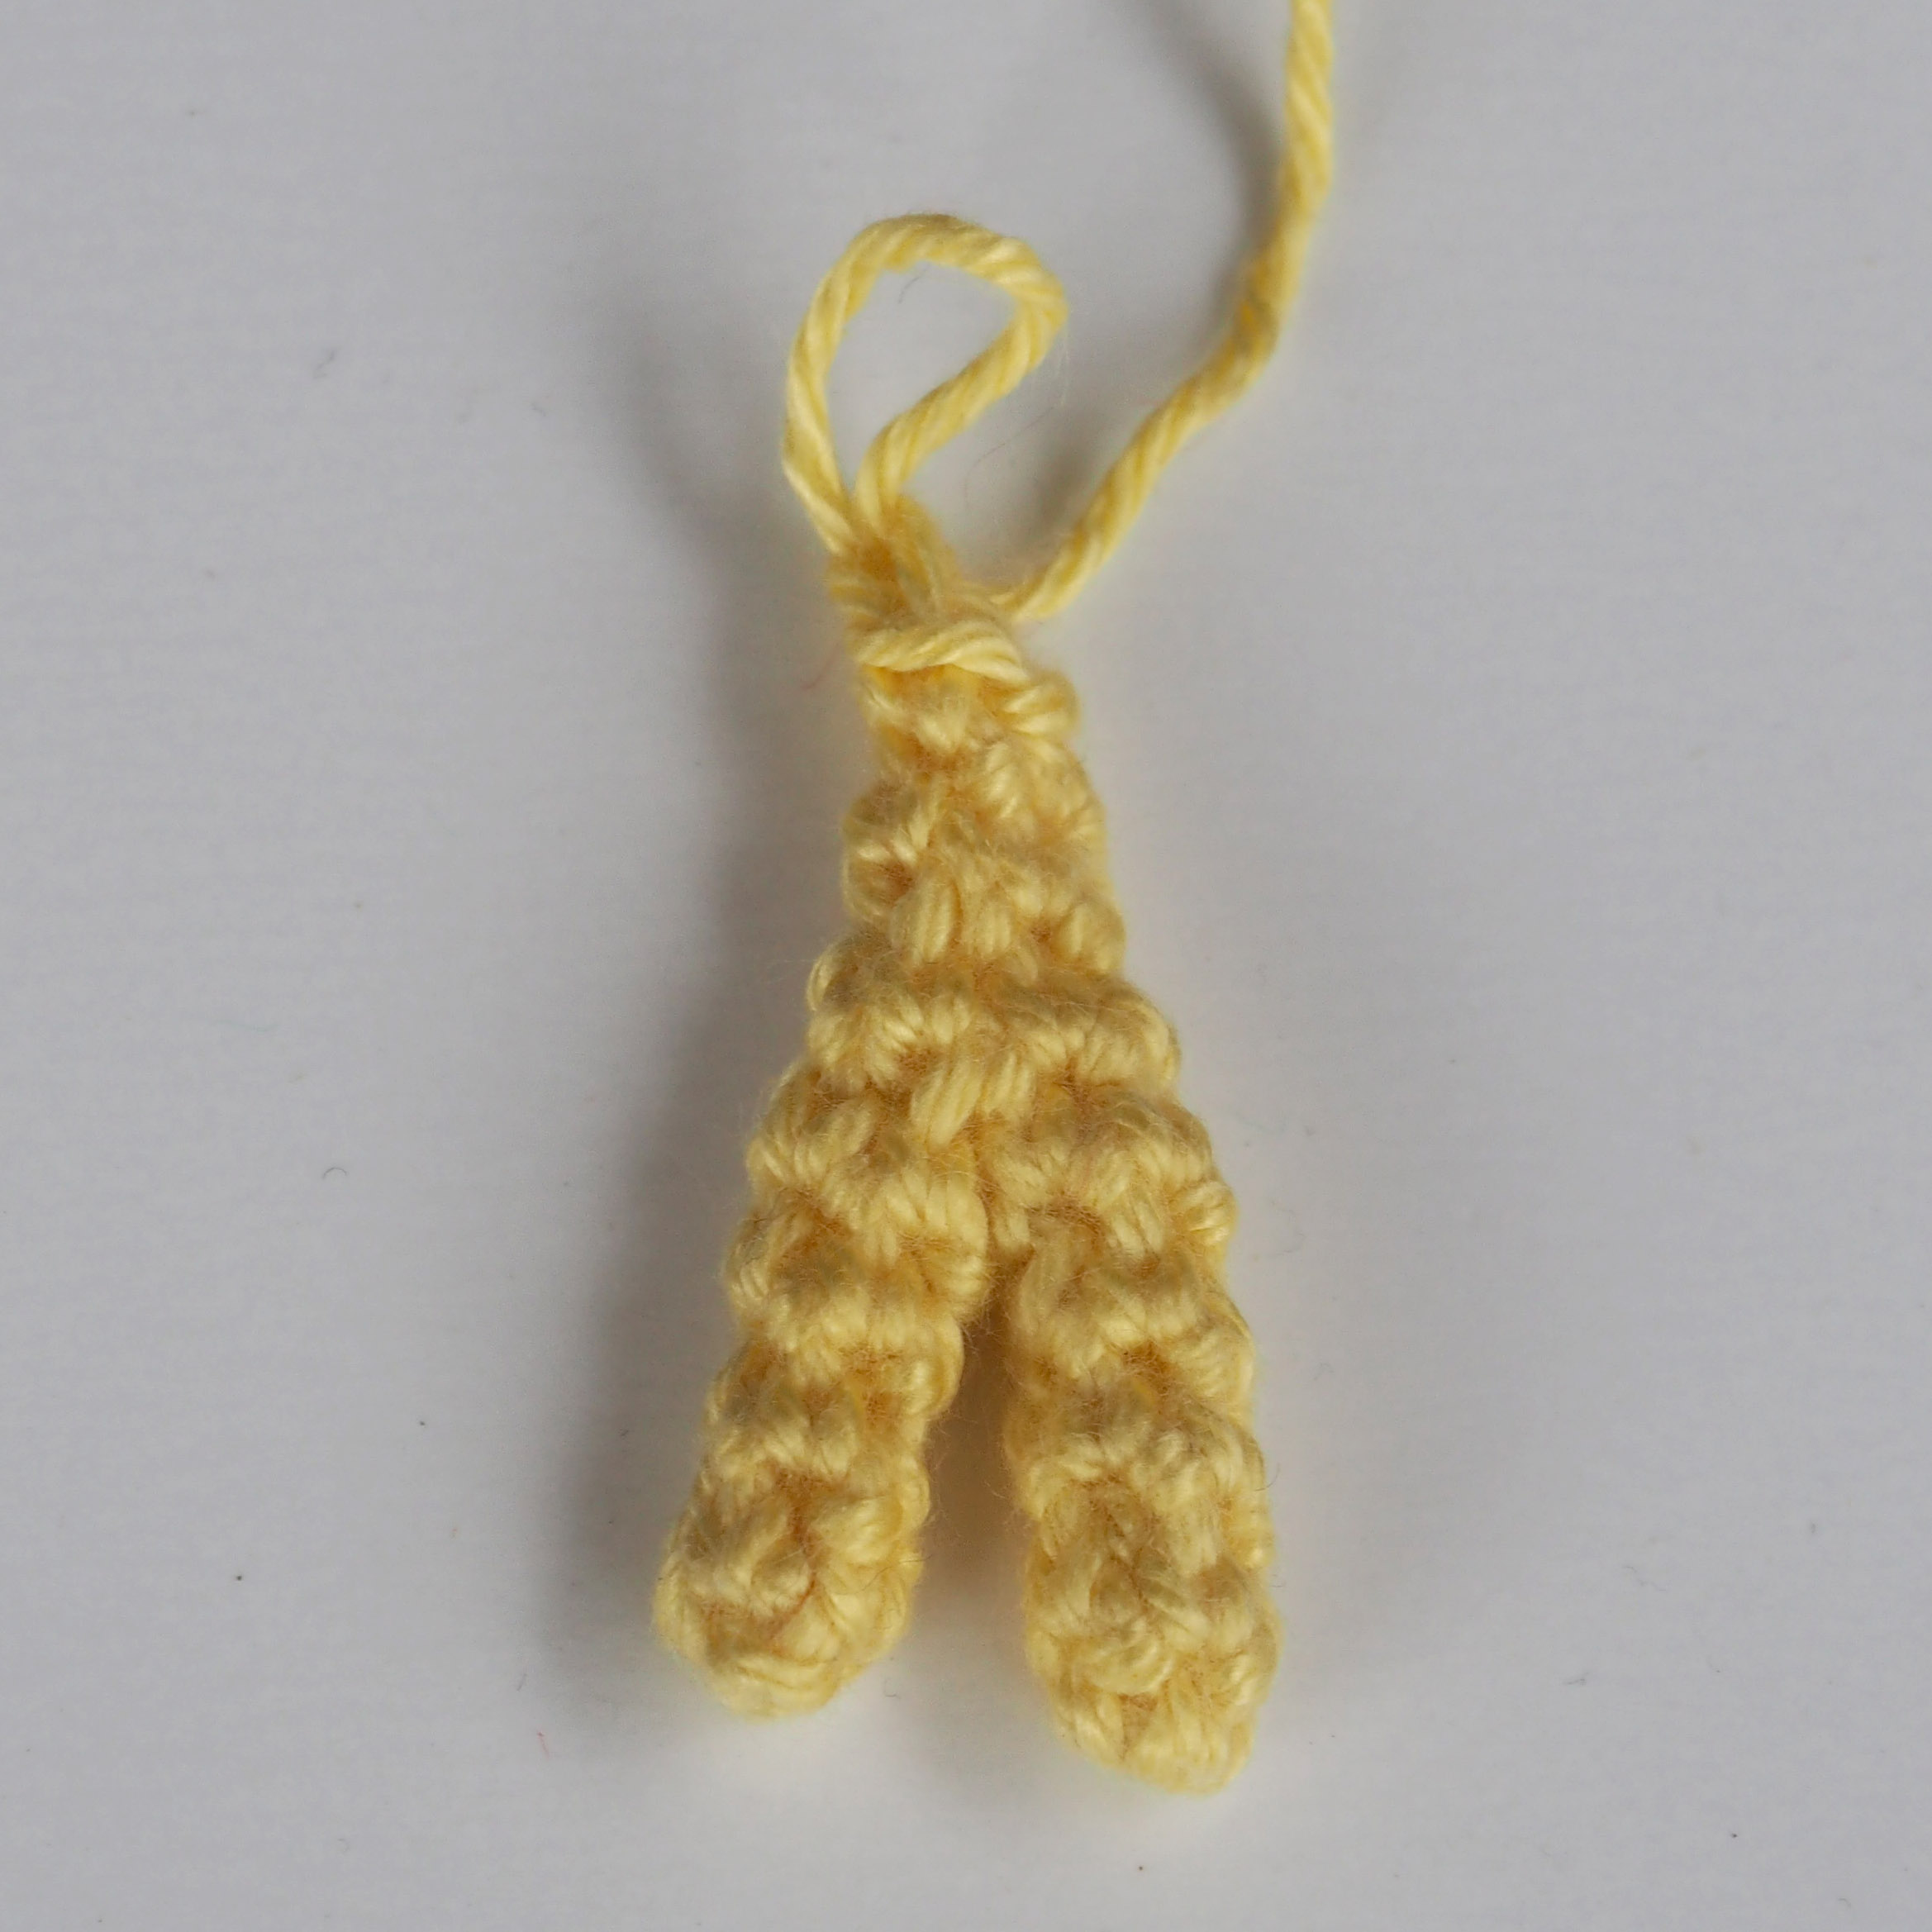
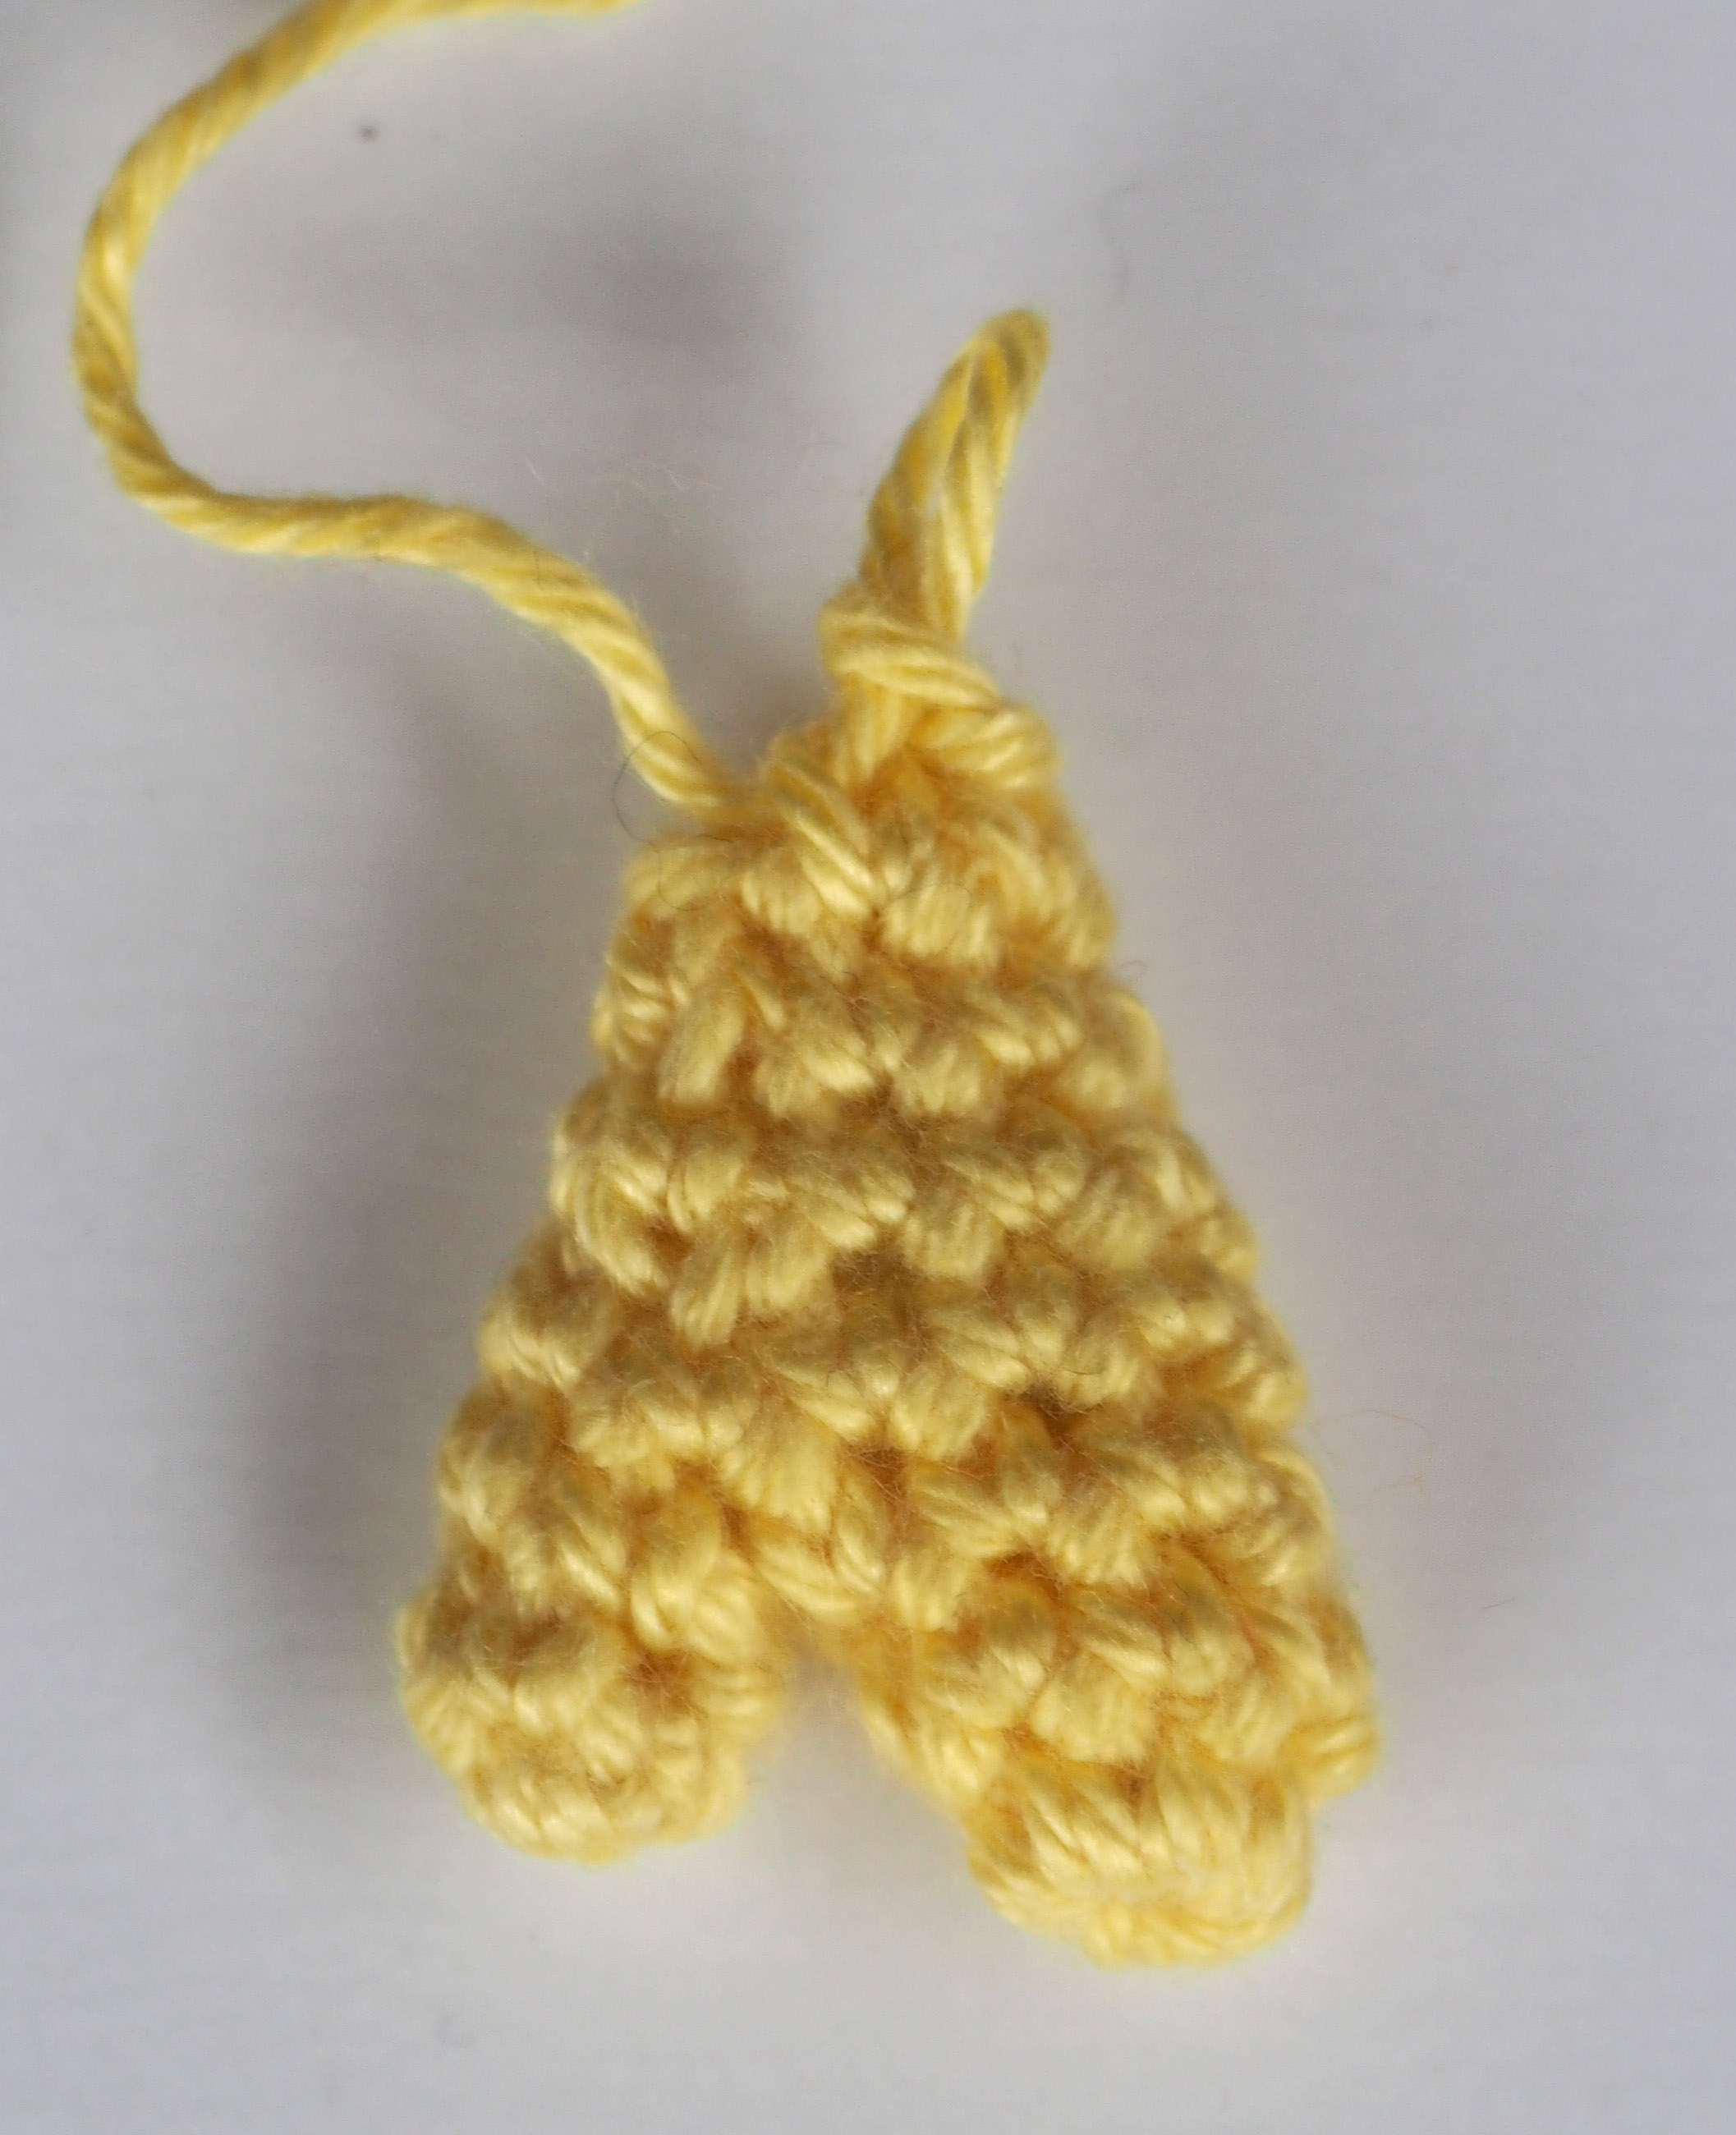
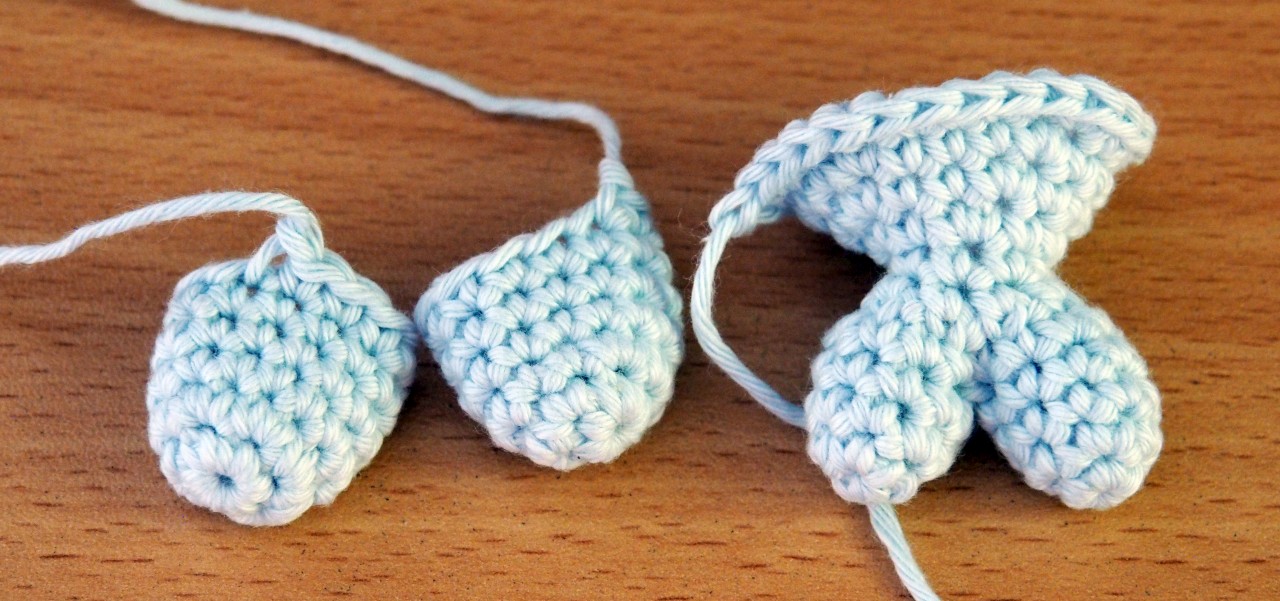
BRAZO (haz 2)
Con color verde,
V1: Dejando bastante hilo al principio, teje una cadeneta de 6 puntos y une para formar un anillo
V2-6: un pb en cada pb (6 p)
V7: *punto raso en el siguiente pb, teje 3 cadenetas y, a partir de la segunda cadeneta desde el ganchillo, teje un punto raso en cada cadeneta*. Repite * en los dos puntos bajos siguientes. Termina con un punto raso en el siguiente punto bajo. Corta el hilo, dejando una hebra larga. No rellenar.
Usa la hebra sobrante para coser el agujero de la mano.
Cose los brazos entre las vueltas 14 y 15 del cuerpo.
PIE (haz 2)
Con color verde,
V1: Anillo mágico de 8 puntos (8 p)
V2: (en la hebra delantera – front loop) *punto raso en el siguiente pb, teje 3 cadenetas y, a partir de la segunda cadeneta desde el ganchillo, teje un punto raso en cada cadeneta*. Repite * en los dos puntos bajos siguientes. Teje un punto raso en el siguiente pb y coloca el marcador de vueltas en el punto bajo sucesivo.
V3: (en la hebra trasera – back loop) 1 pb en cada uno de los 4 pb que no hemos trabajado, y un pb en la hebra trasera de los 4 pb con los dedos de los pies. Une con un punto raso al punto con el marcador de vueltas. Corta el hilo, dejando una hebra larga, y cose los pies a la parte de abajo del cuerpo. No rellenar.
¡El pequeño Yoda está casi listo! Ahora vamos a hacer el chaqueta. Primero tejeremos las mangas y después las uniremos a la parte principal de la chaqueta.
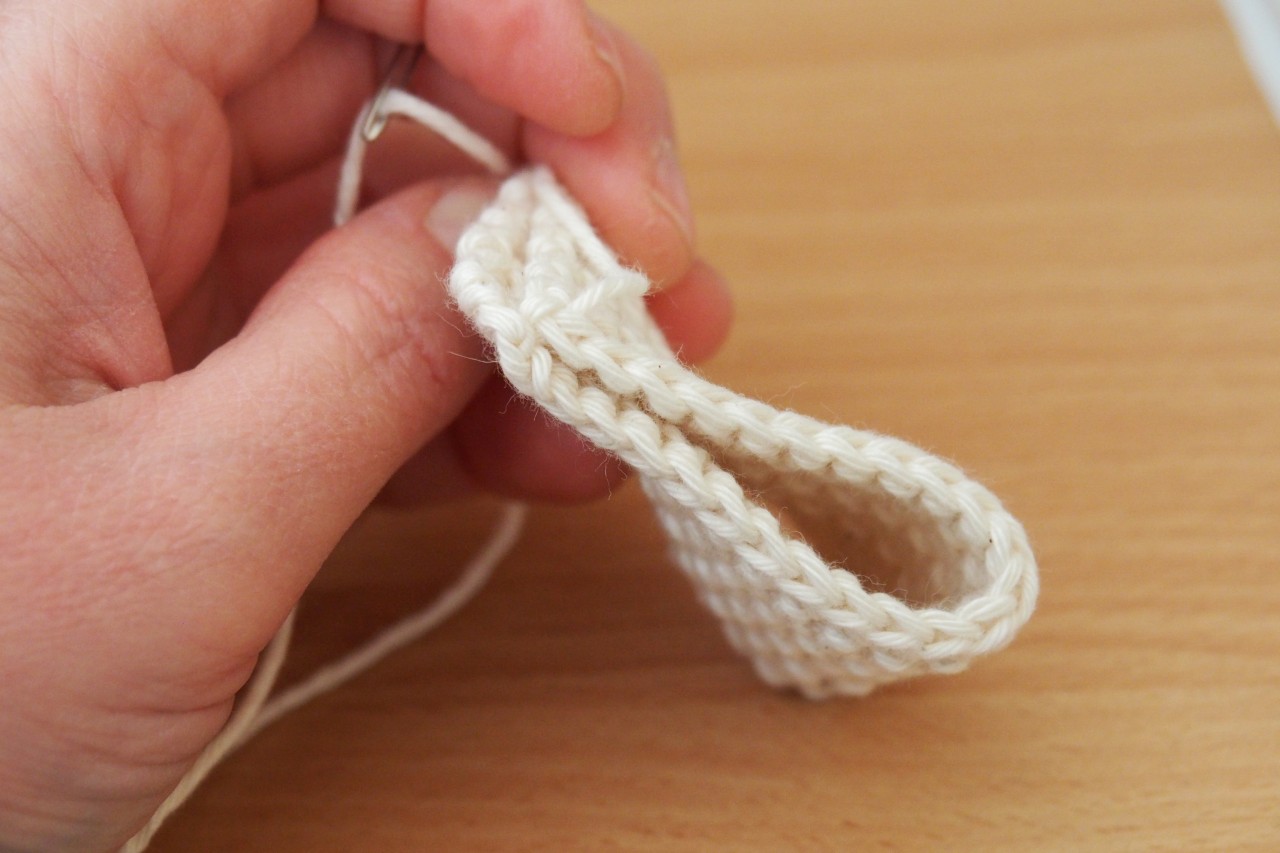
MANGA (haz 2)
Con color beige,
V1: Teje una cadeneta de 12 puntos y une para formar un anillo
V2-4: un pb en cada pb (12 p)
V5: (3 pb, 1 aum)x3 (15 p)
V6: un pb en cada pb (15 p). Corta el hilo y remata.
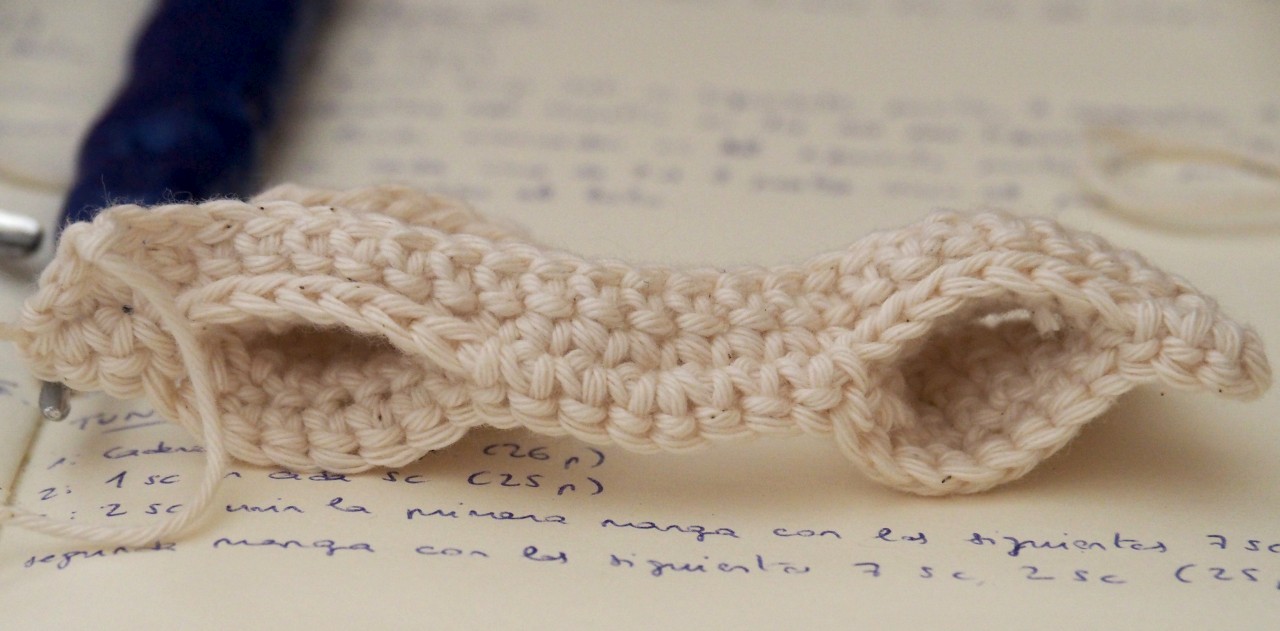
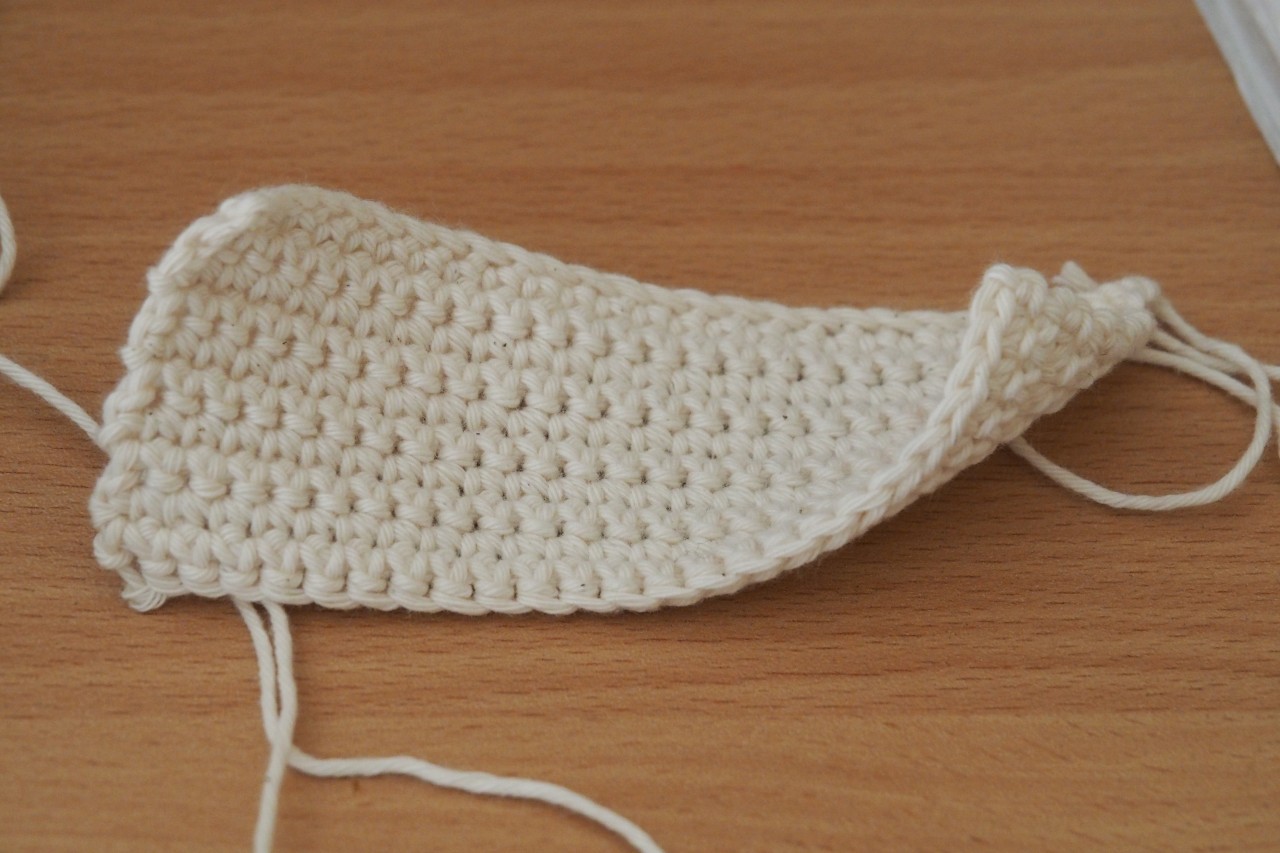
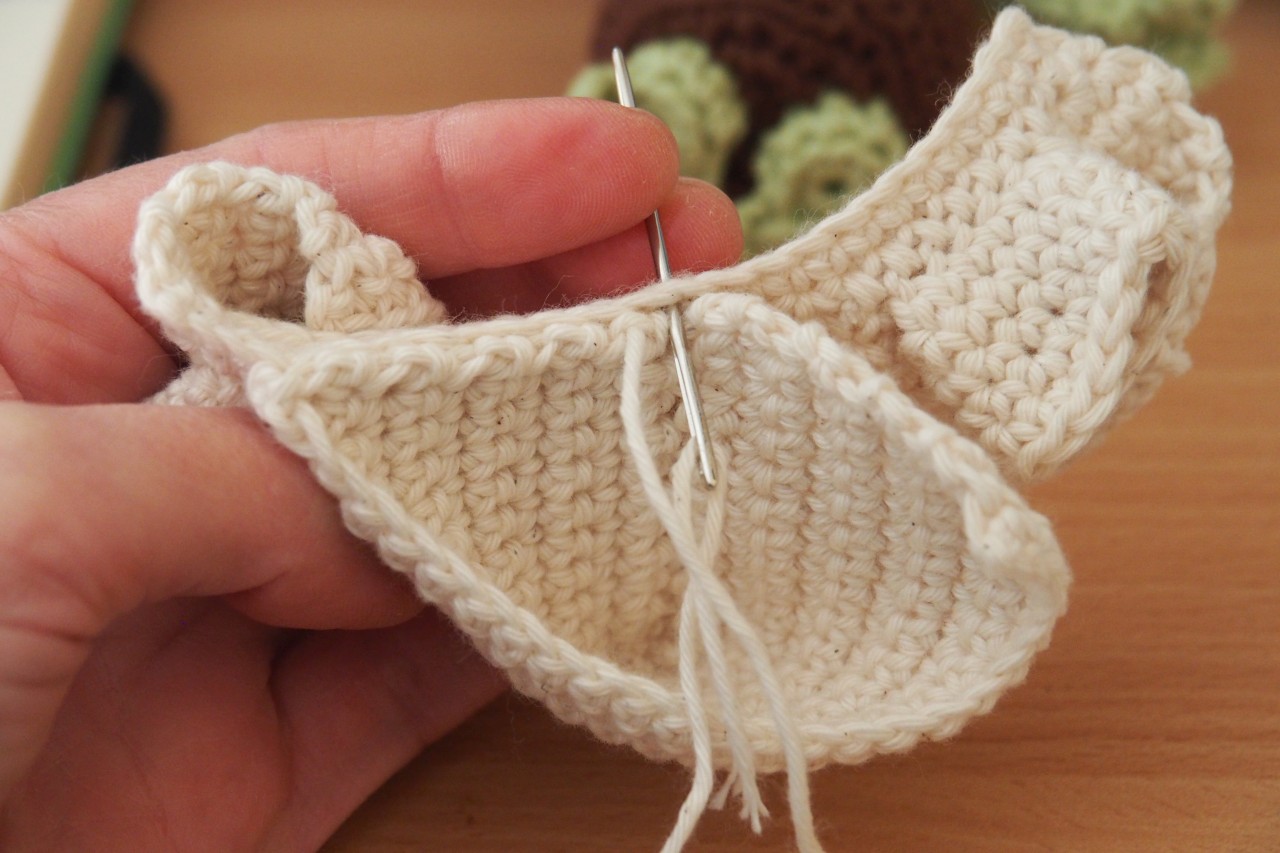
CHAQUETA
Con color beige,
V1: Teje una cadeneta de 26 puntos. Trabajaremos en plano
V2: un pb en cada pb (25 p). Gira
V3: 3 pb, une la primera manga tejiendo 6 pb a través de los puntos de la chaqueta y los puntos de la cadena inicial de la manga (ver foto), 7 pb, une la segunda manga tejiendo 6 pb a través de los puntos de la chaqueta y los puntos de la cadena inicial de la manga, 3 pb (25 p). Gira
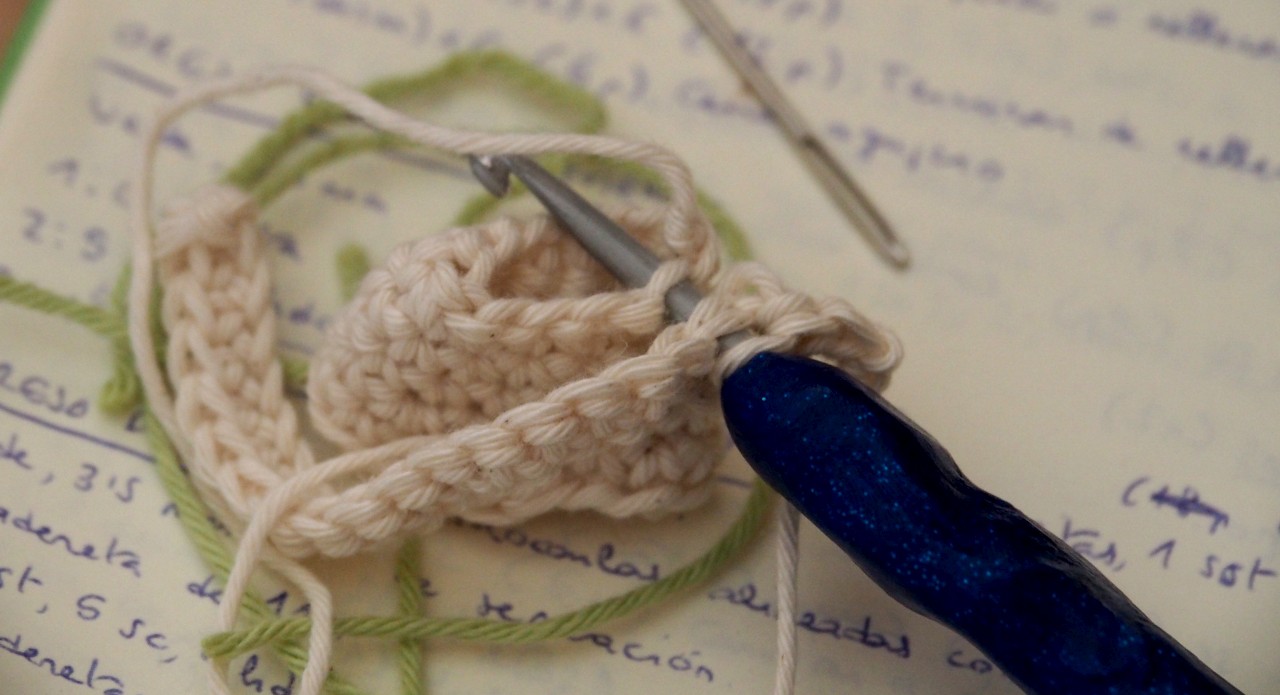
V4: 1 aum, 2 pb, salta los siguientes 6 puntos de la chaqueta y teje en su lugar los 6 puntos restantes de la segunda manga, 2 pb, 1 aum, 1 pb, 1 aum, 2 pb, salta los siguientes 6 puntos de la chaqueta y teje en su lugar los 6 puntos restantes de la primera manga, 2 pb, 1 aum (29 p). Gira
V5-9: un pb en cada pb (29 p). Gira
V10: 1 aum, 13 pb, 1 aum, 13 pb, 1 aum (32 p). Gira
V11-12: un pb en cada pb (32 p). Corta el hilo y remata.
CAPUCHA
Con color beige,
V1: Dejando una hebra larga al inicio, teje una cadeneta de 26 puntos. Trabajaremos en plano
V2-11: un pb en cada pb (25 p). Corta el hilo, dejando una hebra larga.
Dobla la capucha por la mitad por la parte más larga y cose uno de los lados doblados.
Ábrela.
Coloca la capucha sobre el cuello de la chaqueta y cósela. La parte cosida anteriormente va hacia dentro.
¡Solo un pequeño detalle más y habremos terminado!
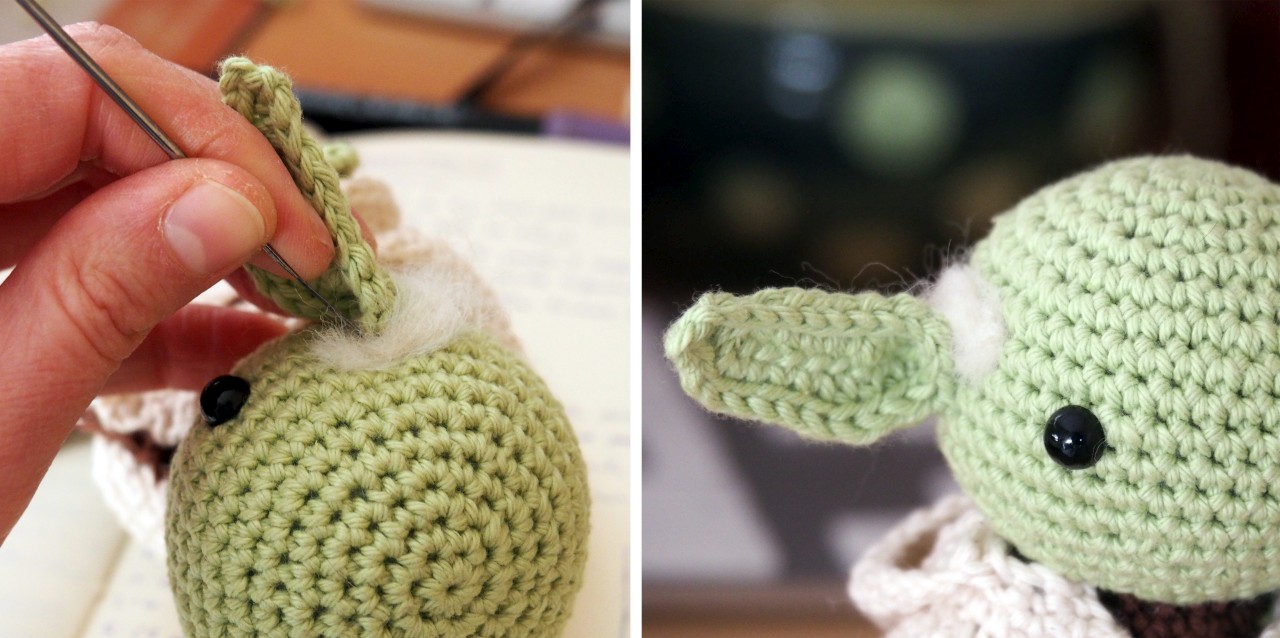
Para el pelo de este Yoda he usado lana afieltrada, pero a veces he simplemente pegado un poco de relleno sobre las orejas. Un poco de algodón hidrófilo (el de uso médico) seguramente va también bien.
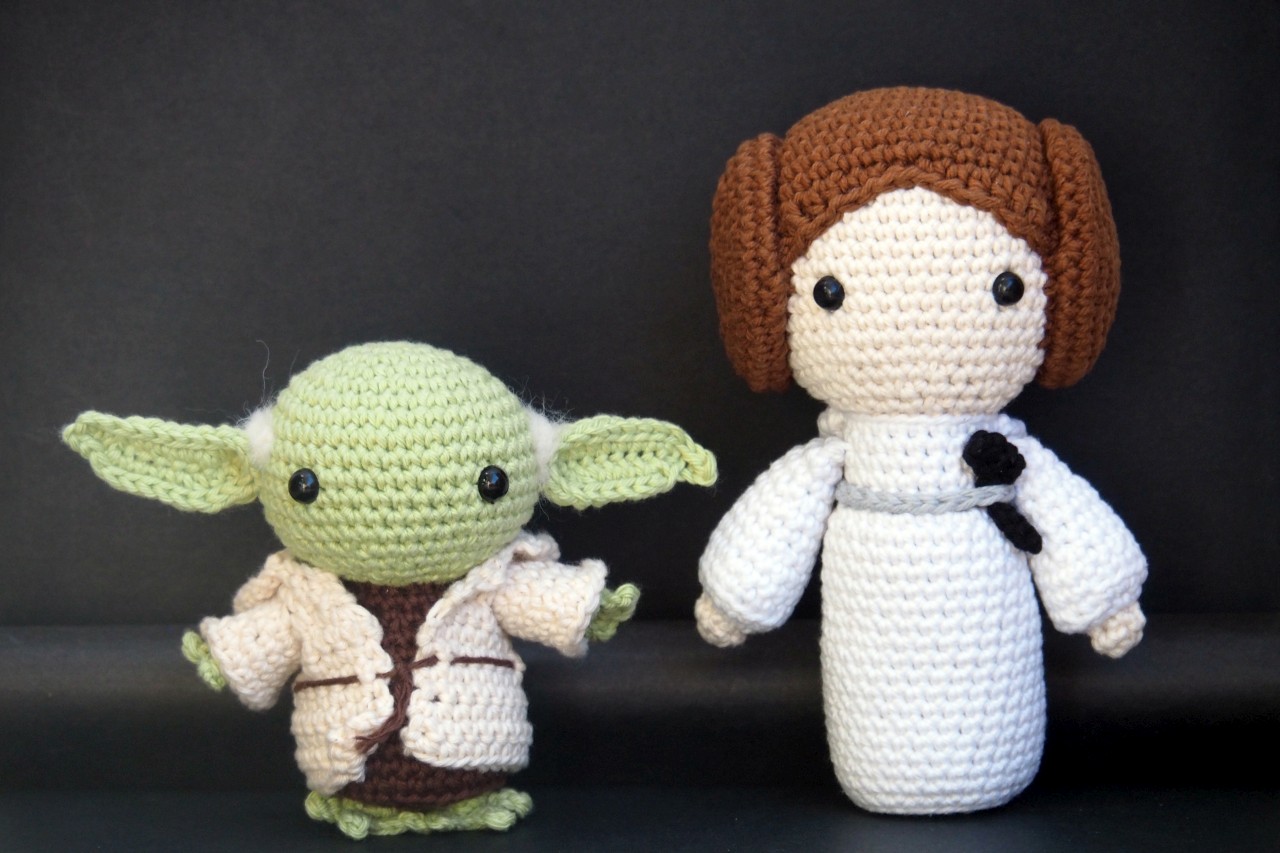
¡Tu Yoda Amigurumi está listo! Puedes emparejarlo con mi Princesa Leia Amigurumi. El patrón premium lo encuentras aquí.
Me encantaría ver tu creación así que publica libremente fotos en mi blog, mi página de Facebook Amigurinos, etiquétame en Facebook o en Instagram (@Amigurinos), o registra el proyecto en Ravelry.
Sígueme en las redes sociales para enterarte de nuevos patrones.
También tengo algunos patrones de pago interesantes en mi tienda Etsy Amigurinos.
©2018 – Diseñado Belén Galán para Amigurinos – todos los derechos reservados. Este patrón es para uso exclusivamente personal. No puedes vender, distribuir ni publicar este patrón o declararlo tuyo, parcial o totalmente. Si compartes el patrón en un blog, página web o en las redes sociales escribe el enlace a esta entrada en vez de copiar y pegar. No te está permitido usar las fotos para uso personal o comercial.
Te está permitido vender el producto final localmente (mercadillos, familia y amigos, recaudación de fondos…); lo único que te pido es que me acredites como la diseñadora del amigurumi. O puedes comprar el patrón AQUÍ y obtener los derechos de venta del producto final en cualquier sitio.
Y por favor, ten en cuenta que Yoda es un personaje registrado de Disney.
Gracias y ¡que te diviertas tejiendo!