

I used to struggle with applique; I’d be holding and pinning tiny shapes to fabric and trying to stitch them in place with great frustration. Then I discovered the secret element of using an iron-on adhesive and my world changed. So this post is for anyone who, like me, has been muddling through. It focuses on hand applique (although you can of course do machine applique). Read on for some step by step instructions.

As mentioned, you will need a double-sided web adhesive on paper, such as bondaweb; characterised by a side for drawing on (that peels off) and a side that is slightly sticky. Your first job is to trace your desired shape onto your bondaweb. Just remember, if you are appliqueing something asymmetrical (such as letters) you’ll need to trace them in reverse.
Draw onto the plain side of the paper (not the sticky side).
I was working on my Lazy Daisy Pillow Case when I wrote this tutorial, so I needed to trace the parts of my flower.

Next, roughly cut around your shape, and iron onto your fabric. Follow your manufacturer’s guidance for this, but it usually involves placing an iron over your shape for a few seconds (with no steam and no moving about).

Now you can cut out your shape more accurately.

Next, peel off the backing paper to reveal another slightly sticky side. Place your shape where ever you want it to be on your main fabric. (This is why asymmetrical shapes need to be drawn in reverse, as now they will be the correct way around).

Your bondaweb will now keep your shape in place as you secure with your choice of stitches (it also helps prevent against fraying). I chose to do a blanket stitch (which, if you don’t know already, involves…)
Bringing your needle up from behind your fabric…

…pulling your thread through until you have a small loop…

…passing your needle back through that loop…

…gently pulling your thread to create the stitch.
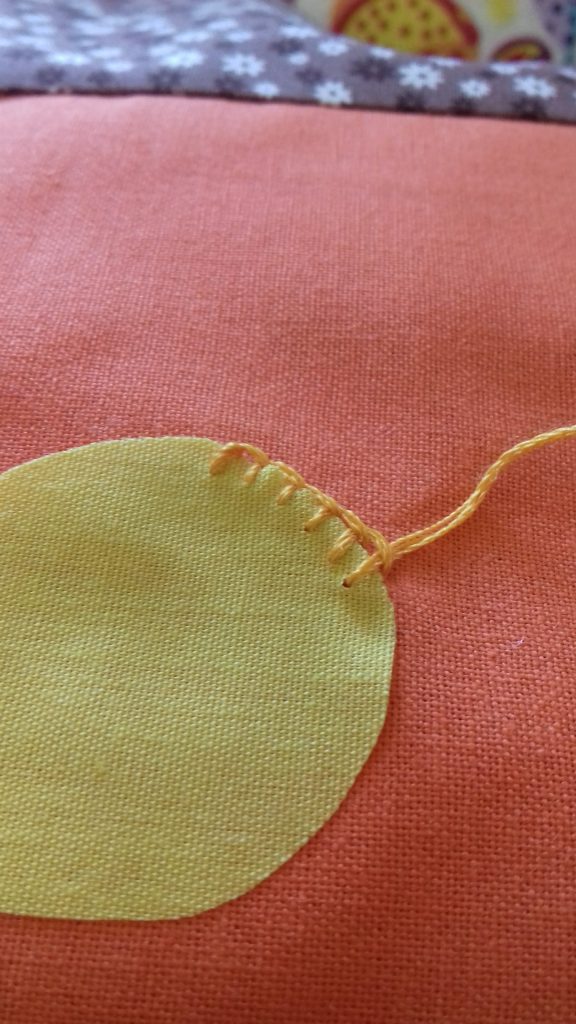
The trick is to position each stitch the same distance down and apart from each other to keep it looking even (I’ve still yet to completely master this!)

I followed the exact same steps to create the petals of my daisy.

But this time I used a small running stitch to secure the petals in place. Gave my cushion a cute, rustic feel.

And that’s hand applique in a nutshell. You can use whatever stitches you fancy to create a different look and feel, and applique in general can be great for adding details and shapes that might other ways be difficult to recreate through needle and thread alone. It can be a really creative element to add to your sewing.
And if creativity is something you are interested in, why not sign up for my Creative Sewing Challenge? You’ll receive a prompt each month, delivered to your inbox, along with ideas and tutorials tied to that theme. Its free, fun, and open to anyone to join. Find out more here, or sign up below:
The form you have selected does not exist.
And here’s a lovely pin if you wanted to share – thank you!


