Micro Robot Disregards Gears, Embraces Explosions

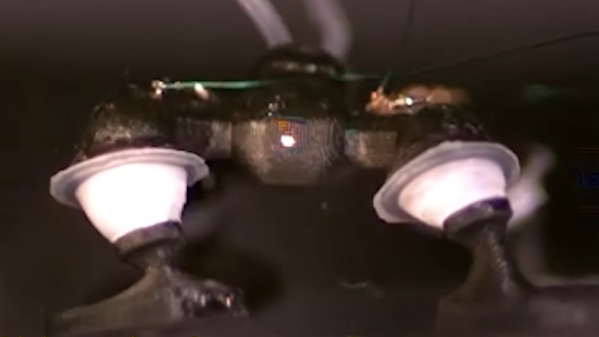
Researchers at Cornell University have developed a tiny, proof of concept robot that moves its four limbs by rapidly igniting a combination of methane and oxygen inside flexible joints.

The device can’t do much more than blow each limb outward with a varying amount of force, but that’s enough to be able to steer and move the little unit. It has enough power to make some very impressive jumps. The ability to navigate even with such limited actuators is reminiscent of hopped-up bristebots.

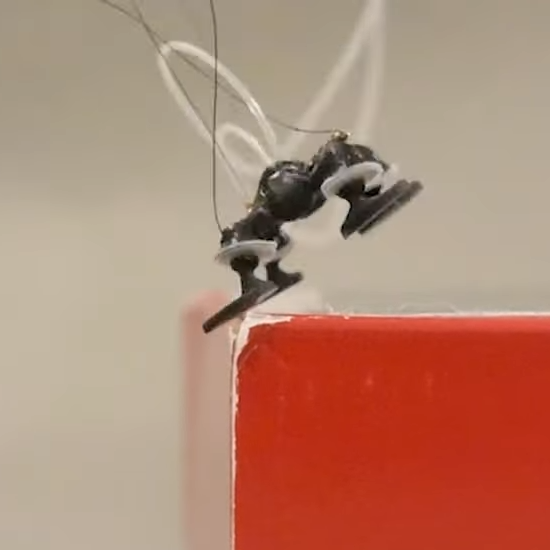
Electronic control of combustions in the joints allows for up to 100 explosions per second, which is enough force to do useful work. The prototype is only 29 millimeters long and weighs only 1.6 grams, but it can jump up to 56 centimeters and move at almost 17 centimeters per second.

The prototype is tethered, so those numbers don’t include having to carry its own power or fuel supply, but as a proof of concept it’s pretty interesting. Reportedly a downside is that the process is rather noisy, which we suppose isn’t surprising.

Want to see it in action? Watch the video (embedded below) to get an idea of what it’s capable of. More details are available from the research paper, as well.

Continue reading “Micro Robot Disregards Gears, Embraces Explosions”

CNC Soldering Bot Handles Your Headers

Soldering pin headers by hand is a tedious task, especially when your project has a huge number of them. [iforce2d] has a large number of boards with a lot of headers, and has created a rather special CNC machine to to do the job. It’s a soldering robot, controlled by LinuxCNC and you can see it below the break.

Superficially it resembles a 3D printer made in aluminium, with an X-Y movable table and a Z-direction represented by a soldering iron and solder feeder on an arm. The solder feeder uses a Bowden tube, with a 3D-printer extruder motor pushing the solder wire down a PTFE tube and finally into a fine aluminium tube from which it’s fed to the iron tip.

Though he’s done a beautiful job of it, creating the machine is not all that’s required, because the tool path requires more attention than simply moving the iron to each pin and supplying some solder. There’s a need to consider the effect of that heat, how much each pad needs, and how much neighbouring pads contribute.

We’ve had repetitive soldering tasks just like this one though not on this scale, so we can understand the tedium this machine will relieve. We can’t however help being reminded of XKCD 1319.

Continue reading “CNC Soldering Bot Handles Your Headers”

A purple PCB with a Raspberry Pi Pico and an MK3870 mask ROM microcontroller

A 1970s Mask ROM MCU Spills Its Secrets

If you buy any kind of electronic gadget today, chances are it’s powered by a microcontroller with a program stored in its internal flash ROM. That program’s code is often jealously guarded by the manufacturer, who will try their best to make sure you can’t just read back the chip’s contents by using lock bits or some sort of encryption. Things were more laid back in the 1970s and ’80s, when code was stored unencrypted in standard EPROM chips, or, for high-volume applications, in mask ROMs integrated in microcontrollers. Reading back the code of such micros was still very difficult because chips simply didn’t have a way of dumping their contents. [Andrew Menadue] ran into this issue when trying to repair an old HP calculator printer, and had to apply a clever hack to dump the contents of its Mostek MK3870 chip.

The main trick [Andrew] used was one discovered by [Sean Riddle] and explained on his website. It makes use of the fact that the MK3870 has a TEST pin that can be used to disable the mask ROM and load alternative program code directly into the micro’s processing core. By setting up a LOAD instruction pointing at a ROM location and briefly disabling test mode while that instruction is executed, the ROM’s contents can be read out by the externally loaded program.

Simple as this hack may seem, actually implementing it was tricky enough because of the strict timing requirements between signals on the clock pins, the data bus, and the TEST pin. [Andrew] got it to work on his Raspberry Pi Pico setup most of the time, but somehow the micro still returned a plainly wrong value every few hundred bytes. Not willing to spend too much time debugging this issue, [Andrew] applied a rather crude hack to his code: instead of reading each byte once, it runs the read cycle 200 times, and only returns a result when all 200 runs return the same value. Dumping the entire 4 kB of ROM now takes several minutes, but this isn’t much of an issue since [Andrew] only has one chip to read out.

If you do have a bucketload of MK3870 chips that you need to dump, you might want to try and optimize the code on [Andrew]’s GitHub page. It’s a lucky coincidence that the ‘3870 has the exploitable TEST feature; often, the only way to get inside mask ROM code is by decapping the chip and optically reading the bits one by one. Mask ROMs are great for very long term data storage, however.

Continue reading “A 1970s Mask ROM MCU Spills Its Secrets”

Simple Add-On Makes Cheap Plasma Cutter Suitable For CNC Use

Plasma cutters are ridiculously cheap these days, just cruise by the usual online sources or your local Harbor Freight if you’ve got any doubt about that. But “cheap” and “good” don’t always intersect on a Venn diagram, and even when they do, not every plasma cutter is suitable for use on the spanking new CNC table you’re building. But luckily, there’s a mod for that.

As [Jake von Slatt] explains it, there are two kinds of plasma cutters on the market: high-frequency (HF) start and pilot arc start. The basic difference is that HF start cutters, which comprise the majority of cheap cutters on the market, need direct electrical contact with the workpiece to start the cutting action. Pilot arc torches, which are more suitable for CNC cutters, can strike the arc through a separate conductor without the need to contact the workpiece.

While there are homebrew bodges that claim to turn an HF torch into a pilot arc, [Jake]’s approach is a bit more complicated, and necessarily so. His add-on box intercepts the ground clamp — which is actually the positive conductor for plasma cutting — and switches it through a heavy-duty HVAC contactor. The 24 VDC coil of the contactor is controlled by a homebrew current sensor made from a huge toroid ferrite core wrapped with 20 turns of 6 AWG welding wire.

Before winding, the core is split in two and epoxied back together with a small magnetic reed switch bridging the gap. A simple 24 VDC power supply runs the whole thing. When the torch starts, the nozzle is connected to ground through the contactor, but as soon as the arc strikes and starts pulling cutting current through that toroid, the magnetic field closes the reed switch, which opens the contactor via a small DC relay. This removes the connection between the nozzle and ground, leaving the plasma to carry all the cutting current.

We’ve featured many, many CNC plasma cutter tables before, but most of these builds have concentrated on the table more than the cutter. It’s a refreshing change to get some insider tips on what kinds of cutters work best, and how to adapt what you’ve got for the job.

Continue reading “Simple Add-On Makes Cheap Plasma Cutter Suitable For CNC Use”

Horrendous Mess Of Wires

When do you post your projects? When they’re done? When they’re to the basic prototype stage? Or all along the way, from their very conception? All of these have their merits, and their champions.

In the post-all-along-the-way corner, we have Hackaday’s own [Arya Voronova], who outlines the many ways that you can start documenting your project before it’s even a fully fledged project. She calls these tidbits “breadcrumbs”, and it strikes me as being a lot like keeping a logbook, but doing it in public. The advantages? Instead of just you, everyone on the Internet can see what you’re up to. This means they can offer help, give you parts recommendations, and find that incorrect pinout that one pair of eyes would have missed. It takes a lot of courage to post your unfinished business for all to see, but ironically, that’s the stage of the project where you stand to gain the most from the exposure.

On the opposite end of the spectrum are the folks who document their projects at the very end. We see a ton of these on Hackaday.io and in people’s personal blogs. It’s a great service to the community, frankly, because at that point, you’re already done with the project. This is the point where the reward, for you, is at its minimum, but it’s also the point where you feel least inhibited about sharing if you’re one of those people who are afraid of showing your work off half-done. The risk here, if you’re like me, is that you’re already on to the next project when one is “done”, and going back over it to make notes seems superfluous. Those of you who do it regardless, we salute you!

And then there’s the middle ground. When you’re about one third of the way done, you realize that you might have something half workable, and you start taking a photo or two, or maybe even typing words into a computer. Your git logs start to contain more than just “fixed more stuff” for each check-in, because what if someone else actually reads this? Maybe you’re to the point where you’ve just made the nice box to put it in, and you’re not sure if you’ll ever go back and untangle that rat’s nest, so you take a couple of pictures of the innards before you hot glue it down.

I’m a little ashamed I’m probably on the “post only when it’s done” end of things than is healthy, mostly because I don’t have the aforementioned strength of will to go back. What about you?

Analog ASIC Design Built Using Digital Standard Cells

Tiny Tapeout is a way for students, hobbyists, and home gamers to get their own ASICs designs fabbed into real custom chips. Tiny Tapeout 3 was the third running, with designs mandated to be made up of simple digital standard cells. Only, a guy by the name of [Harald Pretl] found a way to make an analog circuit using these digital cells anyway.

In a video on YouTube, [Harald] gave an interview on how he was able to create a temperature sensor within the constraints of the Tiny Tapeout 3 requirements. The sensor has a range of -30 C to 120 C, albeit in a relatively crude resolution of 5 degrees C. The sensor works by timing the discharge of a pre-charged parasitic capacitor, with the discharge current being the subthreshold current of a MOSFET, which is highly dependent on temperature.  [Harald] goes deep into the details on how the design achieves its full functionality using the pre-defined digital cells available in the Tiny Tapeout 3 production run.

You can checkout a deeper breakdown of [Harald]’s design on the submission page. Meanwhile, Tiny Tapeout creator [Matt Venn] gave a great talk on the technology at Hackaday Supercon last year.

Continue reading “Analog ASIC Design Built Using Digital Standard Cells”

CPU Built From Discrete Transistors

We all know, at least intellectually, that our computers are all built with lots of tiny transistors. But beyond that it’s a little hard to describe. They’re printed on a silicon wafer somehow, and since any sufficiently advanced technology is indistinguishable from magic, they miraculously create a large part of modern society. Even most computers from 40 or 50 years ago were built around various inscrutable integrated circuits. On the other hand, this computer goes all the way back to first principles and implements a complete processor out of individual transistors instead.

The transistor computer uses over 2000 individual transistors to implement everything comprising the 11-bit CPU. The creator, Reddit user [ Weekly_Salamander_78] also has an online interactive book that walks through each of the steps that is required to get to the point of having a working computer like this. Starting with a guide on building logic gates from transistors it will eventually cover the arithmetic logic unit, adders, memory, clocks, and everything else that is needed for the complete CPU to get up and running. The design does rely on an Arduino for memory to simplify some things, and in the end it’s able to run a Hello, World! program and play a simple dinosaur game as well.

Building a computer out of discrete components like this is an impressive accomplishment, although we might not envy the creator of it when it comes time for troubleshooting or maintenance of all of those individual components. Presumably it would be much easier to work on than something like a relay computer, but for now we’ll all take a moment to be thankful that almost no one needs to work on debugging vacuum tube computers anymore.