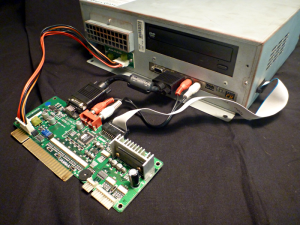
System 246 from Namco was introduced in 2001 along with its first game; Ridge Racer V. It is based on Sony PlayStation 2 hardware modified for arcade purposes.
Much like Sega did with the Naomi, the System 246 was widely licensed by Namco. Therefore there’s no exact specification for the System 246 as it was slightly modified for many of the games. Both Capcom and Taito released their own versions of the System 246. There’s four different revisions of System 246; A, B, C and a driving variant. Some games are very tightly coupled with a certain revision whereas other games work on two or all three and even the newer System 256. The 246 is capable of outputting both 31 kHz (VGA) and 15 kHz (CGA). Resolution, output level, sync frequency and sync signal are controlled via the DIP switches on the front of the unit.
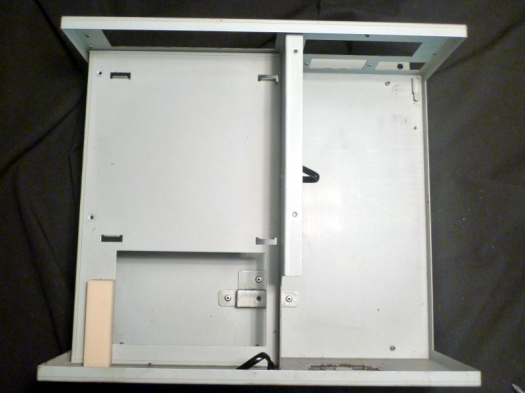
The case fully disassembled. The motherboard slides in under the DVD shelf.
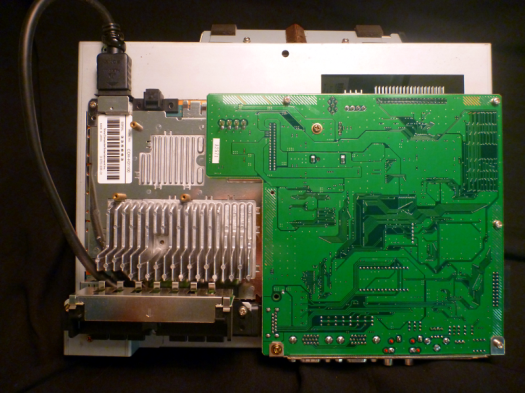
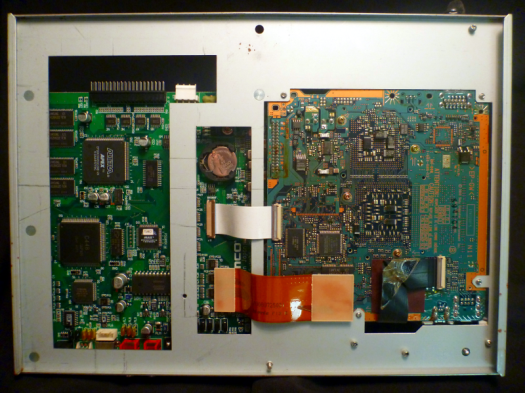
Top and bottom views of the 246 B motherboards (including the mounting plate). Didn’t take it apart further this time since the boards apparently had been recently cleaned. The battery needs a change from time to time.
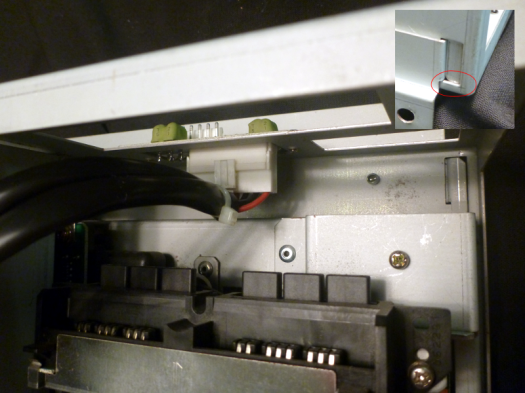
The motherboard fits snugly under the DVD rig. Sliding it in place gave me a bit of headache. Took me a while to figure out that the guides got stuck on the case (the red circle). I needed to press the guides from below for it to slide all the way in.
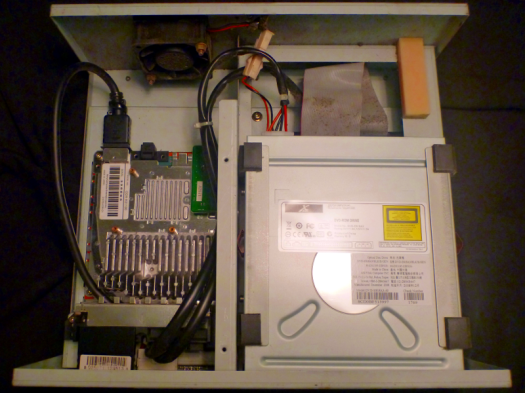
The inside of the case with everything in place, except for the DVD cover. As you can see the DVD player isn’t screwed to the case. It’s only kept in place by the rubber feet on all sides. Not sure if the case fan is original but sounds horrible and needs to go. It’s a standard 60 mm fan so there shouldn’t be any problems finding a quiet(er) replacement.
Connecting the 246 to your JAMMA cabinet
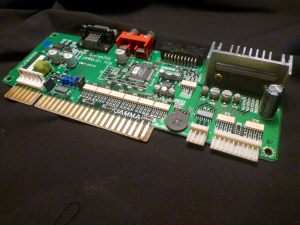
In order to connect the System 246 to a JAMMA cabinet you’ll need an adapter board. The most common being the one on the left.
The JAMMA connector serves buttons one through three. All other buttons can be found on the 10 pin AMP EI connector to the right. For fighting games you’d normally find the punch buttons on the JAMMA and the kick buttons on the AMP EI. Hence its commonly used name “kick harness”. Exactly which buttons are served on each connector differs between games. For instance, in Tekken 4 only two buttons (punch) are connected through the JAMMA and the other two through the kick harness (kick). But in Soul Calibur 2 all three buttons on the JAMMA are used (punch/kick) and only one button on the kick harness (guard).
| 10 pin AMP EI pinout | |
|---|---|
| 1 | GND |
| 2 | NC |
| 3 | P1 Button 4 |
| 4 | P1 Button 5 |
| 5 | P1 Button 6 |
| 6 | NC |
| 7 | P1 Button 4 |
| 8 | P1 Button 5 |
| 9 | P1 Button 6 |
| 10 | GND |
The 4 pin AMP EI connector is used for connecting the right speaker in stereo mode. The left speaker (or mono) is on the JAMMA.
| 4 pin AMP EI pinout | |
|---|---|
| 1 | Not used |
| 2 | Not used |
| 3 | Right speaker (+) |
| 4 | Right speaker (-) |
On the front of the case you find four DIP switches. They control game mode, output level of the video signal, sync frequency and sync signal.
| DIP Switch Settings | ||
|---|---|---|
| ON | OFF | |
| 1: Mode | Test mode | Game mode |
| 2: Video signal output level | ||
| – 31 kHz | 0.7 V p-p | 0.7 V p-p |
| – 15 kHz | 3.0 V p-p | 0.7 V P-P |
| 3: Monitor sync frequency | 31 kHz | 15 kHz |
| 4: Video sync signal | Composite sync | Separate sync |
Specifications
The hardware is based on Sony PlayStation 2 and as noted before the specs for the System 246 differs some due to modifications for specific games.
| CPU – 128 bit “Emotion Engine” | |
|---|---|
| System Clock | 300 MHz |
| System Memory | 32 MB |
| Memory Bus Bandwidth | 3.2 GB per second |
| Co-CPU | 1 (FPU) |
| Floating Point Performance | 6.2 GFLOPS |
| Vector units | 2 (VU0, VU1) |
| 3D CG Geometric Transformation | 66 million polygons per second |
| Image Decoder | MPEG |
| GPU – “Graphics Synthesizer” | |
|---|---|
| Clock Frequency | 150 MHz |
| Memory Bus Bandwidth | 48 GB per second |
| Memory Bus Width | 256 bits |
| Maximum Polygon Rate | 75 million polygons per second |
| Sound – SPU2 + CPU | |
|---|---|
| Voices | 48 channels on SPU2 (definable by software) |
| Sampling Frequency | 44.1 kHz or 48 kHz |
| I/O | |
|---|---|
| CPU Core | Current PlayStation CPU |
| Clock Frequency | 33.8 MHz or 37.5 MHz |
| Sub Bus Width | 32 bits |
Links
- Namco System 246/256 Software List by subbie at AO
- Arcade Otaku Wiki (has a list of working/non working DVD players)
- Namco System 246 Documentation Project

Nice write-up dude, would love to get my hands on one for the Soul Calibur games.
What games do you have?
That was my primary reason as well! At the moment I only have Tekken 4 but I’m expecting SCII from Japan any day now. Got hold of two Tekken 5 panels complete with card readers so I’ll be looking for a 256 and Tekken 5.1 too. Would love the T5 Dark Resurrection but that one needs an extra 256 unit for running the Live Monitor server 😦
Hello Mister I have a system I changed 246 Time crisis3 dvd-rom after this system does not boot Please help me what should I do thank you in advance.
Sorry for the late reply. I totally missed your comment. I hope you have solved your problem already. If not, let me know.
we hook up the Namco 246 c system (small case) blank screen don’t know what’s happen. test switch #2 3 ON #1 4 OFF
What kind of monitor are you trying to hook up to?
Does anybody have a step by step on how to set this system up to a flat screen tv
The 246/256 outputs VGA so it all depends on what inputs your TV has.
If the 10-pin connector on the right is the kick harness, then what is the 6-pin connector on the far left?
It’s for hooking up the power cable to the 246. Check the top pic of the post.