


So, wondering how to make Hardstyle? Especially that early 2010s Headhunterz classic sound?
That’s what we’ll explore in this guide!
Hardstyle is a genre that has gone in and out of fashion over time. However, it has always kept a diehard fan base. In recent years, it has even crossed into the mainstream, infiltrating genres such as Big Room.
But what makes a classic Hardstyle track work? What are the main ingredients you need?
Together, we’ll cover everything you need to know to make a classic Hardstyle banger. In particular, we’ll look at:
- How to make a pitched Hardstyle kick drum
- Designing your own supersaw leads
- Which key to use and how to write your main melody
- How to arrange a Hardstyle track
- and a lot more!
Ready to dive into the world of Hardstyle? Let’s go 👇
Table of contents
- What is Hardstyle Music?
- How to Make Hardstyle – Step 1: The Hardstyle Kick
- How to Make Hardstyle – Step 2: Designing Our Lead
- How to Make Hardstyle – Step 3: Writing a Melody
- How to Make Hardstyle – Step 4: Processing our Lead
- How to Make Hardstyle – Step 5: Adding Chords
- How to Make Hardstyle – Step 6: Building Tension
- That’s It For This Guide on How to Make Hardstyle!
What is Hardstyle Music?
If you’ve found your way to this guide, chances are you already know what Hardstyle is.
Super-fast tempo, lasers everywhere, and a euphoric feeling? Yep, you’re listening to Hardstyle:

The exact roots of Hardstyle are hard to pinpoint. Most people tend to agree that the genre emerged from the late 90s Hard Trance scene. Nowadays, Hardstyle is a genre that is strongly associated with the Netherlands.
As with most genres, Hardstyle has changed and evolved to incorporate elements from other genres. It has also influenced mainstream genres such as Big Room.
Similarly to Synthwave, Hardstyle is an extremely coded genre. Some of these codes include:
- Fast BPM (140-150)
- Pitched and distorted kick drums (often playing the role of the bass too)
- Lack of other drum elements (especially during the drop)
- Euphoric supersaw leads
- Names with a lot of Qs and Zs 😅. My Hardstyle alias would be Millstreetz, and my track would be called “Breaqdownz” for example.
Today, we will recreate the classic Hardstyle sound of the late 00s and early 10s.
In particular, I will be using the classic “Rock Civilization” by Headhunterz as our template:
Let’s dive in 👇
How to Make Hardstyle – Step 1: The Hardstyle Kick
By far the most defining characteristic of Hardstyle is the kick drum.
If you mess up the kick drum, your track is screwed. So it makes sense to start there 😅.
Like with any drum sound, you have 2 options: find good samples, or design your own. Because this is an in-depth guide, let’s design our own.

When designing your Hardstyle kick drum, you have 2 basic methods:
- Take a standard kick a distort it
- Design a kick from scratch
We are going to look at the first method here. The second method is very similar. The only difference is that you will need to design a basic kick first in a synth like Serum or Vital.
The Proven Method: Sample + Distortion
Let’s start with a standard 909 kick:

Here’s what it sounds like:
The key to getting a great Hardstyle lies in distortion and EQ.
On the one hand, the distortion will bring out that over-driven sound. The EQ will allow us to shape the kick and bring out certain frequencies.
For this, you can use any distortion you like. Ideally, something aggressive like the free CamelCrusher is perfect. Here is the effects chain I used on the kick:

As you can see, I am using a succession of EQs and distortions. Each EQ affects how the following distortion will act.
I am going to turn on each plugin in succession so you hear how they affect the sound:
Here are a few rules of thumb you can follow:
- Use the first saturation plugin to “thicken” the kick
- Boost in the 500Hz – 1kHz region to get the Hardstyle resonance
- Use CamelCrusher’s compressor in “Phat” mode to bring out harmonics
- Make sure to clean out any resonances with the EQs
Let’s render this kick, and add a few more magic touches 🤩
Adding the magic touches
First, I am going to cut out the tail, copy it a reverse it:

Send this section to a new mixer track. Apply a high-pass filter, and add the free plugin Wider. This is what it should sound like:
Let’s listen to how this changes our kick:
Nice 😍
Finally, what we can do is process the attack and the tail of the kick separately.
To do this, simply cut out the attack from the rest of the kick, then send both parts to different mixer channels:

This will allow us to process our attack a bit more. I’ve added some bitcrushing and some more distortion to the attack, and this is what it sounds like:
Finally, route all 3 layers (attack, tail, and reversed tail) to a single bus channel. Add some compression to glue everything together, a bit more distortion, and EQ if you want.
Let’s leave our kick there for now. We can always come back and tweak it later if needed.
Note: you can also add a bit of reverb on the attack section to give it more space.
How to Make Hardstyle – Step 2: Designing Our Lead
Let’s move on to some more melodic elements.
First, let’s design a supersaw lead. This is one of the most recognizable leads in EDM.
In Hardstyle, this lead will be used on the drop. I am going to design it in the free synth Vital, but you can use any synth you want. In most cases, you might even have some supersaw presets already. If not, follow these steps:

Load up two standard saw waves, and add a bunch of voices. Detune them, add then detune OSC 2.
Next, set LFO 1 to a sine wave, and set the tempo to 1/8 notes. Apply LFO 1 to the fine-tune of both OSC 1 and 2:

Play with the amount until you get a bit of movement. However, the detuning should not become too noticeable. I’ve set mine to around 35%.
If you’re new to the world of LFO and modulation, make sure to check out our full extensive guide here 😉
Next, draw a very short envelope in ENV 2, and route it to the main pitch of OSC 1 and OSC 2. This will give the sound a bit more attack. Make sure to set the amount relatively low so you don’t get a full “laser” sound:

Here’s what our lead sounds like for now:
Tweaking our lead further
Let’s add a white noise layer to it. Enable the Sampler, and route it to Filter 2 in high-pass mode. Apply ENV 2 to the main pitch, and decrease the amount.
Now our lead should sound like this:
Finally, add a bit of release to ENV 1. And that’s layer 1 done! Only 7 more layers to go! 😅
Of course, I’m joking. However, what does make a supersaw lead really “thick” are the layers.
At this stage, you can duplicate your lead, and make minor tweaks between the layers. You can also resample leads, and layer them with your own.
I’ve decided to add 2 layers in Vital, and this is what it sounds like:
Note that I haven’t applied any processing yet!
But before we work on our lead any further, let’s lay down a melody we can actually work with 👇
How to Make Hardstyle – Step 3: Writing a Melody
A Hardstyle melody needs two main components:
- it needs to be uplifting;
- it needs to be simple.
To create an uplifting melody, you can try using major scales instead of minor scales. And to make a melody simple, just… keep it simple 😅. By this I mean try to limit the number of notes you use.
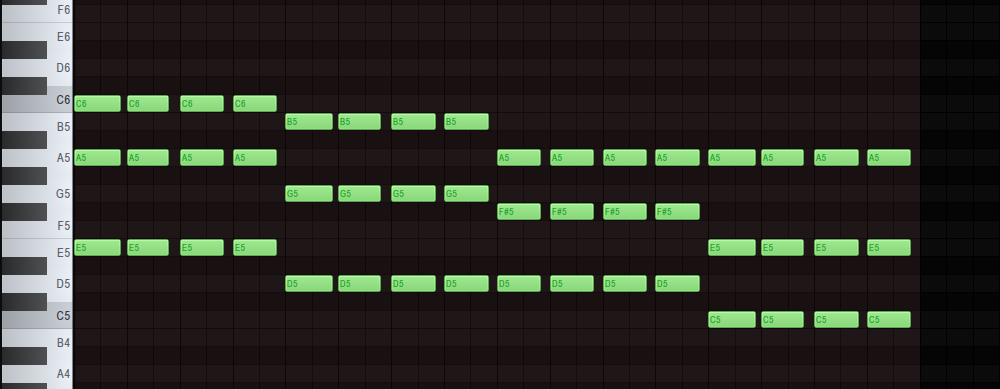
This is the melody I came up with:
Next, I am going to fill out the blank spaces with some octaves:

To get a better idea of what we have so far, let’s re-introduce our kick.
Here, make sure to pitch your kick to follow the melody. This is the most crucial part of any Hardstyle track:
Now it’s starting to take shape 😍
If you’re not sure how to write melodies, make sure to check our free guide on writing memorable melodies 🔥
How to Make Hardstyle – Step 4: Processing our Lead
Up until now, we haven’t added any processing to our lead. So let’s do that!
First, I am going to apply a healthy dose of compression and distortion to each layer in Vital:

Next, I am going to route all 3 layers to a single mixer channel. From there, I am going to set up two Send tracks: one for reverb and one for delay.
First, let’s set up our reverb. Because this is a Send track, make sure to set it to 100% Wet. Next, add some sidechain compression so that the reverb ducks when the melody is playing. In FL Studio, you can do this with Fruity Limiter in “compressor” mode and by selecting the Leads channel as the sidechain input:

In Ableton Live, load up the stock Compressor on the Reverb channel. Enable Sidechain, and select your Leads channel under “Audio From”:

Next, we are going to do the same with the delay. Make sure it is set to 100% Wet, and sidechain to the leads as well.
Finally, we can apply some processing to both our reverb and delay channels. This can include:
- Both a low-pass and high-pass filter to give them their own sound
- Saturation
- Compression
Here’s what we’ve got now:
Now to make our drop complete, let’s layer in some chords under the melody 👇
How to Make Hardstyle – Step 5: Adding Chords
For the chords, I am going to re-use the layers from the melody and tweak them slightly:
The chords are meant to support the lead melody. So it’s very important that they follow the same rhythm.
I’ve also routed the chords to the same reverb and delay sends that I used on the leads:
And in context:
Nice 😍
How to Make Hardstyle – Step 6: Building Tension
Now that we have our main drop, let’s build some tension before it.
A classic Hardstyle buildup features 3 main parts:
- A melody “teasing”
- A melody “drop” without the kicks
- The actual buildup
To create a tease, take your main melody, and remove most of the “filler” notes:
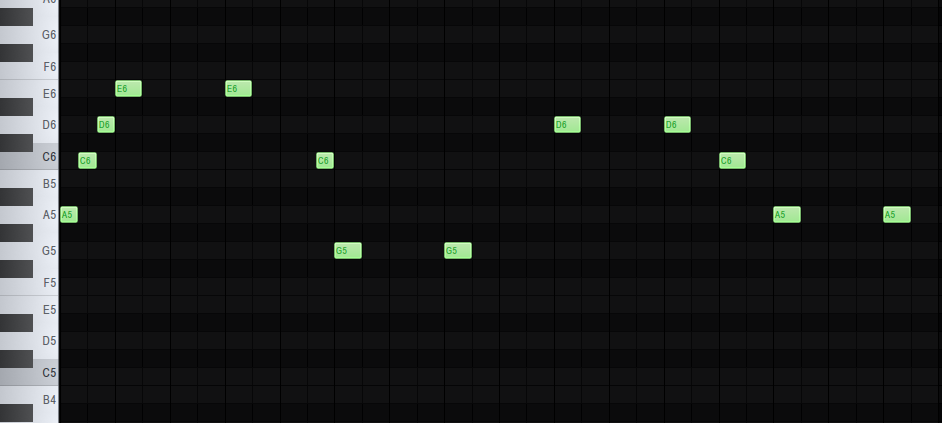
For this, any sort of bell or pluck sound works really well.
Underneath, I’m going to layer some vocal atmospheres. This will create a more dramatic atmosphere:
This section is then going to lead into our main melody:
To keep it simple here, I’ve just copy-pasted the leads and chords from our drop. Here are some of the other elements I used to transition between the 2 sections:
The actual buildup
The last section we need before our drop is the actual buildup.
For this, I am going to cut and loop the first part of my leads:
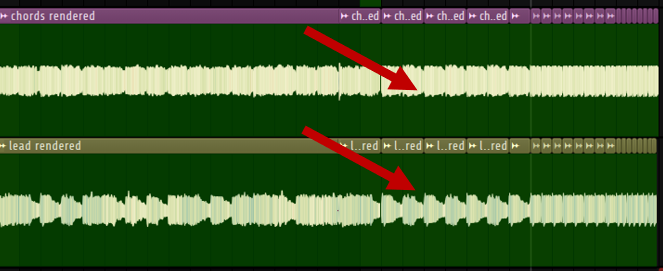
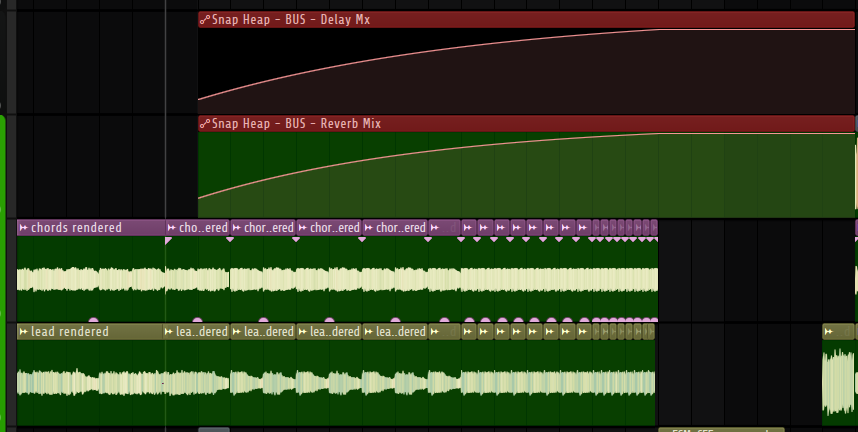
Next, I am going to apply a low-pass filter. I will gradually open up the filter, and also layer a snare underneath:
I’ve also re-introduced the sweeps, reverbed kick, and added some reverb and delay. I am automating the delay and reverb mix like I did with the filter to create more tension:
Finally, introduce a little pre-drop vocal just before the drop! Here’s what the whole buildup sounds like:
That’s It For This Guide on How to Make Hardstyle!
That’s a wrap for this guide on how to make Hardstyle!
There are a lot more subtleties and elements we could have also covered. But hopefully, this gives you a solid foundation to write your first Hardstyle tracks 🙏
Got any questions? Feel free to reach out to me at [email protected]
