instructions home cinema dvd/cd control center rx-dv3rsl - JVC
instructions home cinema dvd/cd control center rx-dv3rsl - JVC
instructions home cinema dvd/cd control center rx-dv3rsl - JVC

You also want an ePaper? Increase the reach of your titles
YUMPU automatically turns print PDFs into web optimized ePapers that Google loves.
STB VCR TV AUDIO<br />
TV TAPE CDR FM/AM<br />
TV DIRECT<br />
TV/VIDEO<br />
REPEAT<br />
SOUND<br />
ANALOG<br />
/DIGITAL<br />
INPUT<br />
AUDIO<br />
SUBTITLE<br />
ANGLE<br />
ZOOM<br />
CHOICE<br />
ON SCREEN<br />
STB<br />
VCR<br />
DVD<br />
REW/( TUNING 9/FF<br />
SLEEP<br />
EFFECT<br />
TEST<br />
SURR ON/OFF<br />
SURR MODE<br />
DIMMER<br />
MUTING<br />
STANDBY/ON<br />
FM MODE<br />
TV/STB CH<br />
CENTER<br />
100+ TV RETURN<br />
PROGRESSIVE<br />
TV VOL<br />
ENTER<br />
REAR·L<br />
REAR·R<br />
STROBE<br />
– SUBWOOFER +<br />
TA/NEWS/INFO<br />
DIGEST TOP MENU MENU<br />
( PTY PTY SEARCH PTY9<br />
HOME CINEMA<br />
DVD/CD CONTROL CENTER<br />
VOLUME<br />
RETURN<br />
DISPLAY<br />
STANDBY/ON<br />
STANDBY<br />
INPUT<br />
ANALOG/DIGITAL<br />
COMPACT<br />
SUPER VIDEO<br />
HOME CINEMA DVD/CD CONTROL CENTER<br />
RX-DV3RSL<br />
REMOTE CONTROL RM-SRXDV3R<br />
1<br />
4<br />
7<br />
10/0 +10<br />
2 3<br />
5 6<br />
8 9<br />
VFP<br />
DVD<br />
RX-DV3R HOME CINEMA DVD/CD CONTROL CENTER<br />
STB<br />
VCR<br />
TV<br />
TAPE/CDR<br />
FM/AM<br />
SOURCE NAME<br />
TV DIRECT<br />
MASTER VOLUME<br />
+<br />
–<br />
+<br />
–<br />
SURROUND<br />
ON/OFF MODE<br />
SETTING ADJUST MEMORY<br />
INPUT ATT.<br />
REC MODE<br />
CONTROL<br />
DVD/SUPER VCD/VCD/CD<br />
INSTRUCTIONS<br />
LVT0875-009A<br />
[B]
Warnings, Cautions and Others<br />
IMPORTANT for the U.K.<br />
DO NOT cut off the mains plug from this equipment. If the plug fitted is<br />
not suitable for the power points in your <strong>home</strong> or the cable is too short<br />
to reach a power point, then obtain an appropriate safety approved<br />
extension lead or consult your dealer.<br />
BE SURE to replace the fuse only with an identical approved type, as<br />
originally fitted.<br />
If nonetheless the mains plug is cut off ensure to remove the fuse and<br />
dispose of the plug immediately, to avoid a possible shock hazard by<br />
inadvertent connection to the mains supply.<br />
If this product is not supplied fitted with a mains plug then follow the<br />
<strong>instructions</strong> given below:<br />
IMPORTANT<br />
DO NOT make any connection to the terminal which is marked with the<br />
letter E or by the safety earth symbol or coloured green or green-andyellow.<br />
The wires in the mains lead on this product are coloured in accordance<br />
with the following code:<br />
Blue :<br />
Brown :<br />
Neutral<br />
Live<br />
As these colours may not correspond with the coloured markings<br />
identifying the terminals in your plug proceed as follows:<br />
The wire which is coloured blue must be connected to the terminal<br />
which is marked with the letter N or coloured black.<br />
The wire which is coloured brown must be connected to the terminal<br />
which is marked with the letter L or coloured red.<br />
IF IN DOUBT—CONSULT A COMPETENT ELECTRICIAN.<br />
CAUTION<br />
To reduce the risk of electrical shocks, fire, etc.:<br />
1. Do not remove screws, covers or cabinet.<br />
2. Do not expose this appliance to rain or moisture.<br />
Caution— STANDBY/ON button!<br />
Disconnect the mains plug to shut the power off completely. The<br />
STANDBY/ON button in any position does not disconnect the<br />
mains line. The power can be remote <strong>control</strong>led.<br />
G-1
CAUTION<br />
• Do not block the ventilation openings or holes.<br />
(If the ventilation openings or holes are blocked by a newspaper<br />
or cloth, etc., the heat may not be able to get out.)<br />
• Do not place any naked flame sources, such as lighted candles,<br />
on the apparatus.<br />
• When discarding batteries, environmental problems must be<br />
considered and local rules or laws governing the disposal of<br />
these batteries must be followed strictly.<br />
• Do not expose this apparatus to rain, moisture, dripping or<br />
splashing and that no objects filled with liquids such as vases,<br />
shall be placed on the apparatus.<br />
Caution: Proper Ventilation<br />
To avoid risk of electric shock and fire and to protect from damage.<br />
Locate the apparatus as follows:<br />
Front: No obstructions open spacing.<br />
Sides: No obstructions in 10 cm from the sides.<br />
Top: No obstructions in 10 cm from the top.<br />
Back: No obstructions in 15 cm from the back<br />
Bottom: No obstructions, place on the level surface.<br />
In addition, maintain the best possible air circulation as illustrated.<br />
Spacing 15 cm or more<br />
Wall or<br />
obstructions<br />
RX-DV3RSL<br />
Front<br />
Stand height<br />
15 cm or more<br />
Floor<br />
G-2
IMPORTANT FOR LASER PRODUCTS<br />
REPRODUCTION OF LABELS<br />
1 CLASSIFICATION LABEL, PLACED ON EXTERIOR SURFACE<br />
2 WARNING LABEL, PLACED INSIDE THE UNIT<br />
1. CLASS 1 LASER PRODUCT<br />
2. CAUTION: Visible and invisible laser radiation when open and<br />
interlock failed or defeated. Avoid direct exposure to beam.<br />
3. CAUTION: Do not open the top cover. There are no user<br />
serviceable parts inside the Unit; leave all servicing to<br />
qualified service personnel.<br />
G-3
SAFETY INSTRUCTIONS<br />
“SOME DOS AND DON’TS ON THE SAFE USE OF EQUIPMENT”<br />
This equipment has been designed and manufactured to meet international safety standards but, like any electrical equipment, care must be<br />
taken if you are to obtain the best results and safety is to be assured.<br />
Do read the operating <strong>instructions</strong> before you attempt to use the equipment.<br />
Do ensure that all electrical connections (including the mains plug, extension leads and interconnections between pieces of equipment) are<br />
properly made and in accordance with the manufacturer’s <strong>instructions</strong>. Switch off and withdraw the mains plug when making or changing<br />
connections.<br />
Do consult your dealer if you are ever in doubt about the installation, operation or safety of your equipment.<br />
Do be careful with glass panels or doors on equipment.<br />
DON’T continue to operate the equipment if you are in any doubt about it working normally, or if it is damaged in any way–switch off, withdraw<br />
the mains plug and consult your dealer.<br />
DON’T remove any fixed cover as this may expose dangerous voltages.<br />
DON’T leave equipment switched on when it is unattended unless it is specifically stated that it is designed for unattended operation or has<br />
a standby mode.<br />
Switch off using the switch on the equipment and make sure that your family know how to do this.<br />
Special arrangements may need to be made for infirm or handicapped people.<br />
DON’T use equipment such as personal stereos or radios so that you are distracted from the requirements of traffic safety. It is illegal to watch<br />
television whilst driving.<br />
DON’T listen to headphones at high volume as such use can permanently damage your hearing.<br />
DON’T obstruct the ventilation of the equipment, for example with curtains or soft furnishings.<br />
Overheating will cause damage and shorten the life of the equipment.<br />
DON’T use makeshift stands and NEVER fix legs with wood screws — to ensure complete safety always fit the manufacturer’s approved<br />
stand or legs with the fixings provided according to the <strong>instructions</strong>.<br />
DON’T allow electrical equipment to be exposed to rain or moisture.<br />
ABOVE ALL<br />
— NEVER let anyone, especially children, push anything into holes, slots or any other opening in the case -this could result in a fatal<br />
electrical shock.;<br />
— NEVER guess or take chances with electrical equipment of any kind — it is better to be safe than sorry!<br />
G-4
Table of Contents<br />
Parts Identification ...................................... 2<br />
Front Panel ................................................................................. 2<br />
Remote Control .......................................................................... 3<br />
Getting Started........................................... 4<br />
Before Installation ...................................................................... 4<br />
Checking the Supplied Accessories ........................................... 4<br />
Putting Batteries in the Remote Control .................................... 4<br />
Connecting the FM and AM Antennas ....................................... 5<br />
Connecting the Speakers ............................................................ 6<br />
Connecting Audio/Video Components ....................................... 7<br />
7 About connecting cables/cords ........................................... 7<br />
7 Cassette deck/CD recoder connection ................................ 8<br />
7 Digital connection............................................................... 8<br />
7 SCART connection ............................................................. 9<br />
Basic Operations ....................................... 11<br />
1 Turn On the Power ............................................................... 11<br />
2 Select the Source to Play ..................................................... 11<br />
3 Adjust the Volume ................................................................ 11<br />
Turning Off the Sounds Temporarily ....................................... 12<br />
Turning Off the Power with the Sleep Timer ........................... 12<br />
Changing the Display Brightness ............................................. 12<br />
Activating TV Direct ................................................................ 12<br />
Selecting the Analog or Digital Input Mode ............................ 13<br />
Changing the Digital Input Mode Manually ............................ 13<br />
Attenuating the Input Signal .................................................... 14<br />
Changing the Source Name ...................................................... 14<br />
Activating the Recording Mode ............................................... 14<br />
Basic DVD Player Operations ...................... 15<br />
1 Open the Disc Tray .............................................................. 15<br />
2 Load a Disc .......................................................................... 15<br />
3 Start Playback ...................................................................... 15<br />
4 Adjust the Volume ................................................................ 16<br />
5 Activate Realistic Sound Field............................................. 16<br />
6 Select Surround Mode ......................................................... 16<br />
7 Stop Playback ...................................................................... 16<br />
8 Turn Off the Power (into Standby) ...................................... 16<br />
Tuner Operations ....................................... 17<br />
Tuning into Stations Manually ................................................. 17<br />
Using Preset Tuning ................................................................. 17<br />
Selecting the FM Reception Mode ........................................... 18<br />
Using the RDS (Radio Data System)<br />
to Receive FM Stations ...................................................... 19<br />
Searching for a Program by PTY Codes .................................. 20<br />
Switching to Broadcast Program of<br />
Your Choice Temporarily ................................................... 21<br />
7 How the Enhanced Other Network function<br />
actually works ................................................................... 21<br />
7 Description of the PTY codes ........................................... 22<br />
Basic Settings ........................................... 23<br />
Operation Buttons .................................................................... 23<br />
Operating Procedure................................................................. 23<br />
7 Speaker information—“SUBWFR,” “FRNT SP,”<br />
“CNTR SP,” and “REAR SP” ........................................... 24<br />
7 Speaker distance<br />
—“FRNT D,” “CNTR D,” and “REAR D” ...................... 24<br />
7 Crossover frequency—“CROSS” ..................................... 25<br />
7 Low frequency effect attenuator—“LFE” ........................ 25<br />
7 Dynamic range compression—“D.COMP” ...................... 25<br />
7 Digital input (DIGITAL IN) terminals—“DGT” ............. 25<br />
7 Auto surround—“AUTO SR” ........................................... 26<br />
7 Auto mode—“MODE” ..................................................... 26<br />
1<br />
Sound Adjustments.................................... 27<br />
Operation Buttons .................................................................... 27<br />
Operating Procedure................................................................. 27<br />
7 Front speaker output balance—“BAL”............................. 28<br />
7 Tone—“BASS” and “TREBLE” ...................................... 28<br />
7 Speaker output levels—“SUBWFR,” “CENTER,”<br />
“REAR L,” and “REAR R” .............................................. 28<br />
7 DAP effect level—“EFFECT” .......................................... 28<br />
Creating Realistic Sound Fields ................... 29<br />
Activating Surround Mode ........................................................ 31<br />
Selecting Surround Modes ........................................................ 31<br />
Adjusting Surround Mode Using Remote Control................... 32<br />
DVD Player Operations .............................. 33<br />
Disc Information ....................................................................... 33<br />
Using the On-screen Bar .......................................................... 35<br />
Basic Operation through the On-screen Bar ............................ 36<br />
Changing the Time Indication .................................................. 36<br />
Locating a Desired Scene from the Disc Menu ....................... 37<br />
Selecting a View Angle—ANGLE ........................................... 38<br />
Changing the Languages—SUBTITLE and AUDIO ............... 39<br />
Playing from a Specified Position on a Disc ............................ 41<br />
7 Locating a desired chapter—Chapter Search ................... 41<br />
7 Locating a desired position—Time Search ....................... 41<br />
7 Locating a desired scene—DIGEST................................. 42<br />
Special Picture Playback .......................................................... 43<br />
7 Frame-by-frame playback................................................. 43<br />
7 Showing continuous still pictures—STROBE .................. 43<br />
7 Playing back in slow-motion ............................................ 43<br />
7 Zooming in—ZOOM ........................................................ 43<br />
7 Changing the VFP setting—VFP ...................................... 44<br />
Program Playback and Random Playback ............................... 45<br />
Repeat Playback ....................................................................... 46<br />
MP3 Disc Playback .................................... 47<br />
Basic Operations ...................................................................... 47<br />
Operations through the MP3 CONTROL Screen .................... 48<br />
Repeat Playback ....................................................................... 48<br />
JPEG Disc Playback ................................... 49<br />
Slide-show Playback ................................................................ 49<br />
Operations through the JPEG CONTROL Screen ................... 50<br />
Repeat Playback ....................................................................... 50<br />
Choice Menu Operations............................. 51<br />
Operation Buttons .................................................................... 51<br />
Configuration of Choice Menu ................................................ 51<br />
Operating Procedure................................................................. 52<br />
7 LANGUAGE menu .......................................................... 53<br />
7 PICTURE menu ................................................................ 53<br />
7 AUDIO menu .................................................................... 54<br />
• Language code list ......................................................... 54<br />
7 SPK. SETTING menu ...................................................... 55<br />
7 OTHERS menu ................................................................. 56<br />
Restricting Playback by Parental Lock .................................... 57<br />
7 Setting Parental Lock ........................................................ 57<br />
7 Changing the setting of Parental Lock ............................. 58<br />
7 Releasing Parental Lock temporarily................................ 58<br />
• Country/Area codes list for Parental Lock ..................... 59<br />
Glossary for DVD Player............................. 60<br />
Operating <strong>JVC</strong>’s Audio/Video Components........ 61<br />
Operating Audio Components .................................................. 61<br />
Operating Video Components .................................................. 62<br />
Operating Other Manufacturers’ Equipment ..... 63<br />
Changing the Preset Signal Codes ........................................... 63<br />
Maintenance ............................................. 66<br />
Troubleshooting ......................................... 67<br />
Specifications ............................................ 70
COMPACT<br />
SUPER VIDEO<br />
Parts Identification<br />
Front Panel<br />
1 2 3 4 5 6<br />
7<br />
RX-DV3R HOME CINEMA DVD/CD CONTROL CENTER<br />
DVD<br />
STB<br />
VCR<br />
TV<br />
TAPE/CDR<br />
FM/AM<br />
TV DIRECT<br />
MASTER VOLUME<br />
STANDBY/ON<br />
STANDBY<br />
SOURCE NAME<br />
INPUT<br />
ANALOG/DIGITAL<br />
SURROUND<br />
ON/OFF MODE<br />
SETTING ADJUST MEMORY<br />
CONTROL<br />
INPUT ATT.<br />
REC MODE<br />
DVD/SUPER VCD/VCD/CD<br />
8 9 p<br />
q w e r t y u<br />
See pages in the parentheses for details.<br />
1 STANDBY/ON button and STANDBY lamp (11)<br />
2 Disc tray and illumination lamp (15)<br />
3 DVD player operation buttons<br />
0 (open/close), 4 (reverse skip), ¢ (forward skip),<br />
7 (stop), 3 (play), 8 (pause)<br />
4 Source selecting buttons and lamps (11, 13)<br />
• DVD, STB, VCR, TV, TAPE/CDR, FM/AM<br />
5 SOURCE NAME button (14)<br />
6 TV DIRECT button (12)<br />
7 MASTER VOLUME <strong>control</strong> (11, 16)<br />
8 INPUT ANALOG/DIGITAL button (13)<br />
INPUT ATT. (Attenuator) button (14)<br />
9 SURROUND ON/OFF button (16, 31)<br />
p SURROUND MODE button (16, 31)<br />
REC MODE button (14)<br />
q Display<br />
• For details, see “Display” below.<br />
w SETTING button (23 – 26)<br />
e ADJUST button (27, 28)<br />
r MEMORY button (17)<br />
t CONTROL 5 / ∞ / 2 / 3 buttons (17, 18, 23 – 28)<br />
y (phones) jack (11)<br />
u Remote sensor<br />
Display<br />
1 2 3 4 5<br />
ANALOG DIGITAL AUTO PRO LOGIC DSP PROGRAM REPEAT 1A-B RANDOM<br />
RDS TA NEWS INFO<br />
AUTO SURROUND<br />
DIGITAL L C R RESUME SPK.<br />
TUNED STEREO AUTO MUTING SLEEP<br />
SUBWFR LFE<br />
LS<br />
S<br />
RS<br />
kHz<br />
MHz<br />
INPUT ATT<br />
VOLUME<br />
6 7 8 9 0<br />
- = ~ ! @<br />
1 Input mode indicators (13)<br />
• ANALOG, DIGITAL AUTO<br />
2 Surround mode indicators (29, 30)<br />
• PRO LOGIC , DSP<br />
3 Play mode indicators (45, 46, 48, 50)<br />
• PROGRAM, REPEAT 1A-B, RANDOM<br />
4 RDS indicators (19)<br />
• RDS, TA, NEWS, INFO<br />
5 INPUT ATT indicator (14)<br />
6 Sound signal indicators (13)<br />
• DIGITAL (Dolby Digital), (DTS Digital Surround)<br />
7 Signal and speaker indicators (31)<br />
• L, C, R, SUBWFR (Subwoofer), LFE (Low Frequency Effect), LS,<br />
S, RS<br />
8 Surround indicators (31)<br />
• AUTO SURROUND, SURROUND<br />
9 RESUME indicator (16)<br />
0 SPK. (speaker) indicator (11)<br />
- Main display<br />
= Tuner mode indicators (17, 18)<br />
• TUNED, STEREO, AUTO MUTING<br />
~ SLEEP indicator (12)<br />
! Frequency unit indicators<br />
• MHz (for FM station), kHz (for AM station)<br />
@ VOLUME indication<br />
2
Parts Identification<br />
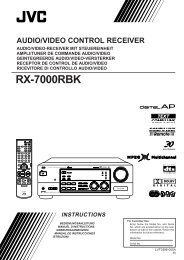
Remote Control<br />
See pages in the parentheses for details.<br />
1<br />
2<br />
3<br />
4<br />
5<br />
6<br />
7<br />
8<br />
9<br />
p<br />
q<br />
w<br />
e<br />
r<br />
t<br />
y<br />
u<br />
REMOTE CONTROL RM-SRXDV3R<br />
STB VCR TV AUDIO<br />
TV TAPE CDR FM/AM<br />
TV DIRECT<br />
TV/VIDEO<br />
REPEAT<br />
STB<br />
VCR<br />
TV/STB CH<br />
SOUND EFFECT CENTER<br />
1 2 3<br />
ANALOG<br />
/DIGITAL TEST<br />
REAR·L<br />
INPUT 4 5 6<br />
AUDIO SURR ON/OFF REAR·R<br />
7 8 9<br />
SUBTITLE SURR MODE – SUBWOOFER +<br />
10/0 +10 VFP<br />
100+ TV RETURN<br />
ANGLE<br />
ZOOM<br />
+<br />
–<br />
DVD<br />
REW/( TUNING 9/FF<br />
SLEEP<br />
FM MODE<br />
STROBE<br />
+<br />
–<br />
DIGEST TOP MENU<br />
TA/NEWS/INFO<br />
MENU<br />
( PTY PTY SEARCH PTY9<br />
CHOICE<br />
ENTER<br />
ON SCREEN<br />
DIMMER<br />
MUTING<br />
STANDBY/ON<br />
TV VOL<br />
HOME CINEMA<br />
DVD/CD CONTROL CENTER<br />
PROGRESSIVE<br />
VOLUME<br />
RETURN<br />
DISPLAY<br />
i<br />
o<br />
;<br />
a<br />
s<br />
1 STANDBY/ON buttons (11, 62 – 65)<br />
• STB, VCR, TV, AUDIO<br />
2 Source selecting buttons (11, 13, 61 – 65)<br />
• TV, TAPE, CDR, FM/AM, STB, VCR, DVD<br />
3 TV DIRECT button (12)<br />
4 TV/VIDEO button (15, 62, 63)<br />
5 REPEAT button (46, 48, 50)<br />
6 SLEEP button (12)<br />
7 SOUND button (28, 31, 32)<br />
8 ANALOG/DIGITAL INPUT button (13)<br />
9 AUDIO button (39, 40)<br />
p SUBTITLE button (39)<br />
q DIMMER button (12)<br />
w ANGLE button (38)<br />
e ZOOM button (43)<br />
r MUTING button (12)<br />
t DIGEST button (42)<br />
y CHOICE button (51, 52)<br />
u ON SCREEN button (35, 36, 38 – 42, 45, 46)<br />
i Multi operation buttons<br />
• 4, 3, ¢, 7, 8, REW, FF<br />
• TUNING 9 and ( buttons (17)<br />
• FM MODE button (18)<br />
• STROBE button (43)<br />
• TV/STB CH (channel) + and – buttons (62, 63)<br />
o Number buttons<br />
• For selecting preset channels (18)<br />
• For adjusting sound (28, 32, 61)<br />
• For operating audio/video components (61 – 65)<br />
• SURR (surround) ON/OFF button (16, 31)<br />
• SURR (surround) MODE button (16, 31)<br />
• VFP button (44)<br />
• TV RETURN button (62)<br />
; TV VOL (volume) + and – buttons (62, 63)<br />
a VOLUME + and – buttons (11, 16)<br />
s Menu operation buttons<br />
• TOP MENU button (37)<br />
• MENU button (37)<br />
• RETURN button (37)<br />
• ENTER button<br />
• Cursor 5/∞/3/2 buttons<br />
RDS operation buttons<br />
• TA/NEWS/INFO button (21)<br />
• PTY SEARCH button (20)<br />
• PTY 9 and ( buttons (20)<br />
• DISPLAY button (19)<br />
3
Getting Started<br />
Before Installation<br />
General Precautions<br />
• DO NOT insert any metal object into the unit.<br />
• DO NOT disassemble the unit or remove screws, covers, or<br />
cabinet.<br />
• DO NOT expose the unit to rain or moisture.<br />
Locations<br />
• Install the unit in a location that is level and protected from<br />
moisture.<br />
• The temperature around the unit must be between 5˚C and 35˚C.<br />
• Make sure there is good ventilation around the unit. Poor<br />
ventilation could cause overheating and damage the unit.<br />
Handling the unit<br />
• DO NOT touch the power cord with wet hands.<br />
• DO NOT pull on the power cord to unplug it. When unplugging<br />
the cord, always grasp the plug so as not to damage the cord.<br />
• Keep the power cord away from the connecting cords and the<br />
antenna. The power cord may cause noise or screen interference. It<br />
is recommended to use a coaxial cable for antenna connection,<br />
since it is well-shielded against interference.<br />
• When a power failure occurs, or when you unplug the power cord,<br />
the preset settings such as preset FM or AM channels and sound<br />
adjustments may be erased in a few days.<br />
Putting Batteries in the Remote Control<br />
Before using the remote <strong>control</strong>, put two supplied batteries first.<br />
• When using the remote <strong>control</strong>, aim the remote <strong>control</strong> directly at<br />
the remote sensor on the unit.<br />
1 On the back of the remote <strong>control</strong>, remove the<br />
battery cover.<br />
2 Insert batteries. Make sure to match the polarity:<br />
(+) to (+) and (–) to (–).<br />
Checking the Supplied Accessories<br />
Check to be sure you have all of the following supplied accessories.<br />
The number in the parentheses indicates the quantity of the pieces<br />
supplied.<br />
3 Replace the cover.<br />
• Remote Control (1)<br />
• Batteries (2)<br />
• AM Loop Antenna (1)<br />
• FM Antenna (1)<br />
If anything is missing, contact your dealer immediately.<br />
If the range or effectiveness of the remote <strong>control</strong> decreases, replace<br />
the batteries. Use two R6P(SUM-3)/AA(15F) type dry-cell batteries.<br />
CAUTION:<br />
Follow these precautions to avoid leaking or cracking cells:<br />
• Place batteries in the remote <strong>control</strong> so they match the polarity:<br />
(+) to (+) and (–) to (–).<br />
• Use the correct type of batteries. Batteries that look similar may<br />
differ in voltage.<br />
• Always replace both batteries at the same time.<br />
• Do not expose batteries to heat or flame.<br />
4
Getting Started<br />
Connecting the FM and AM Antennas<br />
AM loop antenna<br />
(supplied)<br />
If AM reception is poor,<br />
connect an outdoor single<br />
vinyl-covered wire (not<br />
supplied).<br />
If FM reception is poor, connect<br />
outdoor FM antenna (not supplied).<br />
B<br />
FM 75<br />
COAXIAL<br />
FM 75<br />
COAXIAL<br />
AM LOOP<br />
FM antenna (supplied)<br />
Snap the tabs on the loop into<br />
the slots of the base to<br />
assemble the AM loop antenna.<br />
AM<br />
EXT<br />
ANTENNA<br />
FM 75<br />
COAXIAL<br />
1 2 3<br />
1<br />
FRONT<br />
SPEAKERS<br />
RIGHT<br />
LEFT<br />
CENTER<br />
SPEAKER<br />
RIGHT<br />
LEFT<br />
REAR<br />
SPEAKERS<br />
SUB-<br />
WOOFER<br />
OUT<br />
AV IN/OUT<br />
DIGITAL 1<br />
(DBS)<br />
DIGITAL IN<br />
DIGITAL 2<br />
(TV)<br />
DIGITAL OUT<br />
PCM/STREAM<br />
VCR<br />
AV IN<br />
STB<br />
2<br />
CAUTION:<br />
SPEAKER<br />
IMPEDANCE<br />
8 16<br />
AV COMPU LINK-<br />
TAPE / CDR AUDIO<br />
LEFT<br />
RIGHT<br />
RGB<br />
OUT IN<br />
(REC) (PLAY)<br />
YC<br />
TV<br />
AM EXT<br />
AM LOOP<br />
FM 75<br />
COAXIAL<br />
ANTENNA<br />
Rear panel of the unit<br />
AM antenna connection<br />
Connect the AM loop antenna supplied to the AM LOOP<br />
terminals.<br />
1 Remove the insulation if the AM loop antenna<br />
wire is covered with vinyl.<br />
2 Press and hold the clamp of the terminal (1),<br />
then insert the wire (2).<br />
FM antenna connection<br />
Connect the FM antenna supplied to the FM 75 Ω COAXIAL<br />
terminal as temporary measure.<br />
Extend the supplied FM antenna horizontally.<br />
• If the reception is poor, connect an outdoor FM antenna (not<br />
supplied). Before attaching a 75 Ω coaxial cable (with a<br />
standard type connector), disconnect the supplied FM antenna.<br />
3 Release the clamp.<br />
Turn the loop until you have the best reception.<br />
• If the reception is poor, connect an outdoor single vinylcovered<br />
wire (not supplied) to the AM EXT terminal. Keep the<br />
AM loop antenna connected.<br />
Note:<br />
• Make sure the antenna conductors do not touch any other<br />
terminals, connecting cords and power cord. This could cause poor<br />
reception.<br />
5
etting Started<br />
Connecting the Speakers<br />
After connecting the front, <strong>center</strong> and rear speakers, and/or a<br />
subwoofer, set the speaker setting information properly to obtain the<br />
best possible Surround effect. For details, see page 24.<br />
CAUTIONS:<br />
• Use speakers with the SPEAKER IMPEDANCE indicated by the<br />
speaker terminals (8 – 16 Ω).<br />
• DO NOT connect more than one speaker to one speaker terminal.<br />
Connecting the front, <strong>center</strong>, and rear speakers<br />
1 2 3<br />
2 1<br />
Connecting the subwoofer speaker<br />
By connecting a subwoofer, you can enhance the bass or reproduce<br />
the original LFE signals recorded in the digital software.<br />
FRONT<br />
SPEAKERS<br />
CAUTION:<br />
SPEAKER<br />
IMPEDANCE<br />
8 16<br />
RIGHT LEFT RIGHT LEFT<br />
CENTER<br />
SPEAKER<br />
REAR<br />
SPEAKERS<br />
Powered subwoofer<br />
(example)<br />
SUB-<br />
WOOFER<br />
OUT<br />
Connect the input jack of a powered subwoofer to the SUB-<br />
WOOFER OUT jack on the rear panel, using a cable with RCA pin<br />
plugs (not supplied).<br />
• Refer also to the manual supplied with your subwoofer.<br />
For each speaker, connect the (+) and (–) terminals on the rear panel<br />
to the (+) and (–) terminals marked on the speakers respectively.<br />
1 Cut, twist and remove the insulation at the end of<br />
each speaker cord (not supplied).<br />
2 Press and hold the clamp of the speaker terminal<br />
(1), then insert the speaker cord (2).<br />
Note:<br />
• You can place a subwoofer wherever you like since bass sound is<br />
non-directional. Normally place it in front of you.<br />
Speaker Layout Diagram<br />
Center speaker<br />
Subwoofer<br />
3 Release the clamp.<br />
FRONT<br />
SPEAKERS<br />
RIGHT LEFT RIGHT LEFT<br />
CENTER<br />
SPEAKER<br />
REAR<br />
SPEAKERS<br />
SUB-<br />
WOOFER<br />
OUT<br />
Left front<br />
speaker<br />
Right front<br />
speaker<br />
CAUTION:<br />
SPEAKER<br />
IMPEDANCE<br />
8 16<br />
To right front<br />
speaker<br />
To left front speaker<br />
To left rear<br />
speaker<br />
To right rear<br />
speaker<br />
To <strong>center</strong> speaker<br />
Left rear<br />
speaker<br />
Right rear<br />
speaker<br />
FRONT<br />
SPEAKERS<br />
CAUTION:<br />
SPEAKER<br />
IMPEDANCE<br />
8 16<br />
RIGHT LEFT RIGHT LEFT<br />
CENTER<br />
SPEAKER<br />
AV COMPU LINK-<br />
LEFT<br />
RIGHT<br />
TAPE / CDR<br />
OUT<br />
(REC)<br />
IN<br />
(PLAY)<br />
AUDIO<br />
RGB<br />
REAR<br />
SPEAKERS<br />
YC<br />
SUB-<br />
WOOFER<br />
OUT<br />
VCR<br />
TV<br />
AV<br />
IN/OUT<br />
DIGITAL 1<br />
(STB)<br />
AV IN<br />
DIGITAL IN<br />
DIGITAL 2<br />
(TV)<br />
STB<br />
AM LOOP<br />
AM EXT<br />
DIGITAL OUT<br />
PCM/STREAM<br />
FM 75<br />
COAXIAL<br />
ANTENNA<br />
To obtain the best possible sound from this system, place all the<br />
speakers except the subwoofer at the same distance from the<br />
listening position with each speaker’s front faced toward the<br />
listener.<br />
Then, change the subwoofer and speaker settings to fit your<br />
listening conditions (see page 24).<br />
6
Getting Started<br />
Connecting Audio/Video Components<br />
TV connection<br />
Turn off all the components and the unit before connection.<br />
■ About connecting cables/cords<br />
For SCART connections<br />
The SCART cable is not supplied with this unit.<br />
Use the cables supplied with the other components or<br />
purchase them at your dealer.<br />
SCART cable (not supplied)<br />
For an analogue decoder<br />
To watch or record a scrambled program on your VCR, connect the<br />
analogue decoder to your VCR and select the scrambled channel<br />
on your VCR.<br />
If there is not an appropriate terminal for the decoder on your VCR,<br />
connect the decoder to your TV.<br />
Refer also to the manuals supplied with these equipments.<br />
For recording pictures from STB<br />
When you connect an STB and a VCR directly with a SCART<br />
cable, you can enjoy recording the pictures from the STB onto VCR<br />
without using menu screens of STB. For details, refer also to the<br />
manuals supplied with the STB.<br />
For digital sounds<br />
To enjoy the digital sounds, use both the SCART cable connection<br />
and the digital connection (see page 8).<br />
For audio connections<br />
Connect the external components to this unit with the audio cords.<br />
Use the cord supplied with the other components or purchase them at your dealer.<br />
A<br />
B<br />
C<br />
Digital coaxial cord (not supplied)<br />
Optical digital cord (not supplied)<br />
Audio cord (not supplied)<br />
White<br />
Red<br />
• When the unit is shipped from the factory, the DIGITAL IN<br />
terminals are set for use with the following components:<br />
– DIGITAL 1 (coaxial): For STB<br />
– DIGITAL 2 (optical): For TV<br />
• If you connect CDR, change the digital input (DIGITAL IN)<br />
terminal setting (see “Digital input (DIGITAL IN) terminals” on<br />
page 25) and the source name (see “Changing the Source<br />
Name” on page 14) correctly.<br />
• Select the digital input mode correctly (see “Selecting the<br />
Analog or Digital Input Mode” on page 13).<br />
If you connect a sound-enhancing device such as a graphic<br />
equalizer between the source components and this unit, the sound<br />
output through this unit may be distorted.<br />
7
ing Started<br />
Turn off all the components and the unit before connection.<br />
Illustrations of the input/output terminals are typical examples.<br />
When you connect other components, refer also to their<br />
manuals since the terminal names actually printed on the rear<br />
vary among the components.<br />
■ Cassette deck/CD recorder connection<br />
Cassette deck<br />
FRONT<br />
SPEAKERS<br />
RIGHT<br />
LEFT<br />
CENTER<br />
SPEAKER<br />
RIGHT<br />
LEFT<br />
REAR<br />
SPEAKERS<br />
SUB-<br />
WOOFER<br />
OUT<br />
DIGITAL 1<br />
(STB)<br />
DIGITAL IN<br />
DIGITAL 2<br />
(TV)<br />
DIGITAL OUT<br />
AV IN/OUT<br />
PCM/STREAM<br />
VCR<br />
AV IN<br />
STB<br />
CAUTION:<br />
SPEAKER<br />
IMPEDANCE<br />
8 16<br />
LEFT<br />
TAPE / CDR<br />
AUDIO<br />
TV<br />
AM LOOP<br />
AV COMPU LINK-<br />
RIGHT<br />
OUT<br />
(REC)<br />
IN<br />
(PLAY)<br />
RGB<br />
YC<br />
AM EXT<br />
FM 75<br />
COAXIAL<br />
ANTENNA<br />
TAPE / CDR<br />
C<br />
LEFT<br />
White<br />
White<br />
LEFT<br />
RIGHT<br />
OUT<br />
(REC)<br />
IN<br />
(PLAY)<br />
Red<br />
C<br />
Red<br />
OUT<br />
RIGHT<br />
AUDIO<br />
IN<br />
Red<br />
Red<br />
White<br />
White<br />
CD recorder<br />
■ Digital connection<br />
TV<br />
B<br />
DIGITAL<br />
OUT<br />
DIGITAL 1<br />
(STB)<br />
DIGITAL IN<br />
DIGITAL 2<br />
(TV)<br />
STB (Set Top Box)<br />
A<br />
DIGITAL<br />
OUT<br />
CD recorder<br />
LEFT<br />
REAR<br />
SPEAKERS<br />
AUDIO<br />
RGB YC<br />
SUB-<br />
WOOFER<br />
OUT<br />
VCR<br />
TV<br />
AV<br />
IN/OUT<br />
DIGITAL 1<br />
(STB)<br />
AV IN<br />
DIGITAL IN<br />
DIGITAL 2<br />
(TV)<br />
STB<br />
AM LOOP<br />
AM EXT<br />
DIGITAL OUT<br />
PCM/STREAM<br />
FM 75<br />
COAXIAL<br />
ANTENNA<br />
Before connecting an<br />
optical digital cord,<br />
unplug the protective<br />
plug.<br />
CD recorder<br />
DIGITAL OUT<br />
B<br />
DIGITAL<br />
IN<br />
PCM/STREAM<br />
8
Getting Started<br />
Turn off all the components and the unit before connection.<br />
Illustrations of the input/output terminals below are typical<br />
examples. When you connect other components, refer also to<br />
their manuals since the terminal names actually printed on the<br />
rear vary among the components.<br />
■ SCART connection<br />
DO NOT connect a TV through a VCR or a TV with a built-in<br />
VCR; otherwise, the picture may be distorted.<br />
FRONT<br />
SPEAKERS<br />
RIGHT<br />
LEFT<br />
CENTER<br />
SPEAKER<br />
RIGHT<br />
LEFT<br />
REAR<br />
SPEAKERS<br />
SUB-<br />
WOOFER<br />
OUT<br />
DIGITAL 1<br />
(STB)<br />
DIGITAL IN<br />
DIGITAL 2<br />
(TV)<br />
DIGITAL OUT<br />
AV IN/OUT<br />
PCM/STREAM<br />
VCR<br />
AV IN<br />
STB<br />
CAUTION:<br />
SPEAKER<br />
IMPEDANCE<br />
8 16<br />
LEFT<br />
TAPE / CDR<br />
AUDIO<br />
TV<br />
AM LOOP<br />
AV COMPU LINK-<br />
RIGHT<br />
OUT<br />
(REC)<br />
IN<br />
(PLAY)<br />
RGB<br />
YC<br />
AM EXT<br />
FM 75<br />
COAXIAL<br />
ANTENNA<br />
AV<br />
IN/OUT<br />
VCR<br />
AV<br />
IN<br />
STB<br />
RGB/YC selector<br />
TV<br />
RGB<br />
YC<br />
Setting the RGB/YC selector<br />
Set the RGB/YC selector as follows while the unit is<br />
turned off:<br />
RGB YC<br />
• When the TV is compatible with RGB signal, set to “RGB.”<br />
• When the TV is compatible with S-video signal, set to “YC.”<br />
• When the TV is compatible with composite video signal only, set<br />
to “RGB.”<br />
Note:<br />
• If you change the RGB/YC selector setting while the unit is turned<br />
on, this setting will not take effect until the unit is turned off.<br />
SCART Terminal Specifications<br />
TV VCR STB<br />
AUDIO L/R <br />
IN<br />
Composite <br />
VIDEO S-video − <br />
RGB − <br />
AUDIO L/R *1 *1<br />
*1 The signals input from a SCART terminal cannot be output<br />
through the same SCART terminal.<br />
*2 The video format of the output video signals are consistent<br />
with that of the input video signals. For example, if S-video<br />
signals are input to this unit, no signals other than S-video<br />
signals can be output from this unit.<br />
Refer to the manuals supplied with the video components to<br />
check the setting of the input/output video signals.<br />
OUT<br />
Composite *1*2 *1*2<br />
VIDEO S-video *2 −<br />
RGB *2 −<br />
T-V LINK *3 *3 *3<br />
*3 The signals for T-V LINK function are always going through<br />
the unit.<br />
9
ng Started<br />
VCR<br />
STB (Set Top Box)<br />
TV<br />
For TV and video format<br />
When the TV is equipped with the plural SCART terminals,<br />
refer to the manual supplied with the TV to check the<br />
available video signals for each terminal, then connect<br />
SCART cable correctly.<br />
This unit cannot convert the video signals (S-video or<br />
Composite). When the video signal of one video component<br />
is different from that of the other (for example, one is<br />
S-video, the other is Composite), you may not see the<br />
pictures appropriately. In this case, unify the video signals of<br />
all the video components into S-video or Composite, or you<br />
need to switch the video signal of TV each time you change<br />
the source.<br />
For T-V LINK<br />
• You can use T-V LINK function if you connect the T-V LINK<br />
compatible TV and VCR to this unit with a fully wired<br />
SCART cables. For details on T-V LINK, refer also to the<br />
manuals supplied with the TV and the VCR.<br />
• Connect SCART cable to EXT-2 terminal on your <strong>JVC</strong>'s<br />
T-V LINK compatible TV for T-V LINK function.<br />
• Some TV, VCR, and STB support this type of data<br />
communication. For complete details, refer also to the<br />
manuals supplied with these equipments.<br />
Now, you can plug the power cord of the unit into the AC outlet.<br />
CAUTIONS:<br />
• Do not touch the power cord with wet hands.<br />
• Do not pull on the power cord to unplug the cord. When unplugging<br />
the cord, always grasp the plug so as not to damage the cord.<br />
Notes:<br />
• Keep the power cord away from the connecting cords and the<br />
antenna cables. The power cord may cause noise or screen<br />
interference.<br />
• The preset settings such as preset channels and sound adjustment<br />
may be erased in a few days in the following cases:<br />
– When you unplug the power cord.<br />
– When a power failure occurs.<br />
10
Basic Operations<br />
1 Turn On the Power<br />
3 Adjust the Volume<br />
STANDBY/ON<br />
On the front panel<br />
STANDBY<br />
STANDBY/ON<br />
STB VCR TV AUDIO<br />
From the remote <strong>control</strong><br />
On the front panel:<br />
To increase the volume,<br />
turn MASTER VOLUME clockwise.<br />
To decrease the volume,<br />
turn MASTER VOLUME counterclockwise.<br />
MASTER VOLUME<br />
Press STANDBY/ON on the front panel or<br />
STANDBY/ON AUDIO on the remote <strong>control</strong>.<br />
The STANDBY lamp goes off and the illumination lamp lights up.<br />
The current source name appears on the display.<br />
• If the built-in DVD player is the current source, “READING”<br />
appears while the unit is detecting the type of the loaded disc<br />
(see page 33).<br />
– Playback starts automatically when you load some DVD<br />
VIDEO.<br />
– “NO DISC” appears on the display when no disc is loaded.<br />
From the remote <strong>control</strong>:<br />
To increase the volume,<br />
press and hold VOLUME +.<br />
To decrease the volume,<br />
press and hold VOLUME –.<br />
CAUTION:<br />
Always set the volume to the minimum before starting any sources. If<br />
the volume is set at a high level, the sudden blast of sound energy<br />
can permanently damage your hearing and/or ruin your speakers.<br />
+<br />
–<br />
VOLUME<br />
To turn off the power (into standby)<br />
Press STANDBY/ON on the front panel or<br />
STANDBY/ON AUDIO on the remote <strong>control</strong> again.<br />
The illumination lamp goes off and the<br />
STANDBY lamp lights up.<br />
STANDBY/ON<br />
STANDBY<br />
Notes:<br />
• The volume level can be adjusted within the range of “0” (minimum)<br />
to “50” (maximum).<br />
• When DVD is selected as the source with your TV turned on, the<br />
volume level indication appears on the TV.<br />
Note:<br />
• A small amount of the power is consumed even in standby mode.<br />
To turn off the power completely, unplug the AC power cord.<br />
2 Select the Source to Play<br />
DVD<br />
On the front panel<br />
Press one of the source selecting buttons.<br />
STB<br />
From the remote <strong>control</strong><br />
DVD : Select the built-in DVD player.<br />
STB* : Select the STB.<br />
VCR : Select the VCR.<br />
TV* : Select the TV tuner.<br />
TAPE/CDR* : Select the cassette deck or the CD recorder (front<br />
panel ONLY).<br />
TAPE : Select the cassette deck (remote <strong>control</strong> ONLY**).<br />
CDR* : Select the CD recorder (remote <strong>control</strong> ONLY**).<br />
FM/AM : Select an FM or AM broadcast.<br />
VCR<br />
TV<br />
TAPE/CDR<br />
SOURCE NAME<br />
TV TAPE CDR FM/AM<br />
TV DIRECT<br />
STB<br />
VCR<br />
DVD<br />
FM/AM<br />
Listening with headphones<br />
Connect a pair of headphones to the (phones) jack on the<br />
front panel. This cancels the Surround mode currently<br />
selected, deactivates speakers, and activates the<br />
HEADPHONE mode.<br />
The SPK. indicator goes off from the display.<br />
• Disconnecting a pair of headphone from the (phones) jack<br />
cancels the HEADPHONE mode and activates speakers.<br />
HEADPHONE mode<br />
When using the headphones, the following signals are output<br />
regardless of your speaker setting:<br />
— For 2-channel sources, the front left and right channel signals<br />
are output directly from the left and right headphones.<br />
— For multichannel sources, the front left and right, <strong>center</strong> and<br />
rear channel signals are down-mixed and then output from the<br />
headphones without missing bass element.<br />
You can enjoy multichannel sound source using the<br />
headphones.<br />
CAUTION:<br />
Be sure to turn down the volume:<br />
• Before connecting or putting on headphones, as high volume can<br />
damage both the headphones and your hearing.<br />
• Before removing headphones, as high volume may output from the<br />
speakers.<br />
Notes:<br />
* Register the digital input terminal setting (see “Digital input<br />
(DIGITAL IN) terminals” on page 25) and digital input mode setting<br />
correctly (see “Selecting the Analog or Digital Input Mode” on page<br />
13). Source name and “DIGITAL” will be shown on the display when<br />
you select the source.<br />
**When the source name is not assigned correctly, these buttons<br />
cannot work (see “Changing the Source Name” on page 14).<br />
11
Operations<br />
Turning Off the Sounds Temporarily<br />
Changing the Display Brightness<br />
MUTING<br />
DIMMER<br />
From the remote <strong>control</strong> ONLY<br />
From the remote <strong>control</strong> ONLY<br />
Press MUTING to mute the sound.<br />
“MUTING” appears on the display and the volume turns off (the<br />
VOLUME indication goes off).<br />
• When DVD is selected as the source with your TV turned on,<br />
“VOLUME –” appears on the TV.<br />
DIGITAL AUTO<br />
Press DIMMER to dim the display.<br />
• Each time you press the button, the display and<br />
illumination lamp dim and brighten alternately.<br />
Activating TV Direct<br />
L<br />
R<br />
SPK.<br />
TV DIRECT<br />
TV DIRECT<br />
STB<br />
VCR<br />
DVD<br />
To restore the sound<br />
Press MUTING again.<br />
• Pressing VOLUME + or – on the remote <strong>control</strong> (or turn<br />
MASTER VOLUME on the front panel) also restores the sound.<br />
Turning Off the Power<br />
with the Sleep Timer<br />
From the remote <strong>control</strong> ONLY<br />
Press SLEEP repeatedly.<br />
The SLEEP indicator lights up on the display.<br />
• Each time you press the button, the shut-off time changes as<br />
follows:<br />
DIGITAL AUTO<br />
L<br />
R<br />
When the shut-off time comes<br />
The unit is turned off automatically.<br />
SPK.<br />
10 20 30 60<br />
0 (off)<br />
150<br />
120 90<br />
SLEEP<br />
SLEEP indicator<br />
VOLUME<br />
To check or change the remaining time until the shut-off time<br />
Press SLEEP once.<br />
The remaining time (in minutes) until the shut-off time appears.<br />
• To change the shut-off time, press SLEEP repeatedly.<br />
To cancel the Sleep Timer<br />
Press SLEEP repeatedly until “SLEEP 0” appears on the display.<br />
(The SLEEP indicator goes off.)<br />
• Turning off the unit also cancels the Sleep Timer.<br />
Note:<br />
• If Sleep Timer and Auto Standby (see page 56) are used at a time,<br />
one with the early shut-off time will turn off the unit.<br />
SLEEP<br />
On the front panel<br />
From the remote <strong>control</strong><br />
You can use this unit as a DVD player and an AV selector while the<br />
unit is not turned on. When this function is activated, the pictures<br />
and sounds go from the video components to the TV through this<br />
unit. In this case, you can use the video components and the TV as if<br />
they were connected directly—TV Direct.<br />
• This function takes effect only when the video components and<br />
TV are connected to this unit with SCART cables.<br />
• This function takes effect for the following sources—DVD, STB,<br />
and VCR.<br />
• This unit can be automatically turned on or off, and/or select the<br />
source automatically when you set the Auto Function mode to<br />
“AUTO1” or “AUTO2.” For details, see “Auto mode” on page 26.<br />
To activate (or deactivate) TV Direct, follow the procedure below:<br />
1 Press TV DIRECT.<br />
All the indications disappear (except when DVD is selected as<br />
the source), then the source indicator currently selected lights<br />
up.<br />
2 Turn on the video component and TV.<br />
3 Press one of the source selecting buttons—DVD,<br />
STB, or VCR.<br />
The indicator corresponding to the<br />
DVD<br />
STB<br />
VCR<br />
selected source lights up.<br />
Ex. : When DVD is selected.<br />
To cancel TV Direct and turn off the unit, press<br />
STANDBY/ON (or STANDBY/ON AUDIO on the remote<br />
<strong>control</strong>).<br />
The unit is turned off and the STANDBY lamp lights up.<br />
To cancel TV Direct and turn on the unit, press TV DIRECT.<br />
Notes:<br />
• When TV Direct is activated, you cannot enjoy any of the sound<br />
effects this unit produces, and cannot use the speakers connected<br />
to this unit.<br />
• You can use T-V LINK function between TV and VCR while the TV<br />
Direct is activated.<br />
12
Basic Operations<br />
Selecting the Analog or Digital Input Mode<br />
When you have connected digital source components using both the<br />
analog connection and the digital connection methods (see pages 7 to<br />
10), you can select the input mode.<br />
• Before selecting the digital input mode, register the digital input<br />
terminal setting correctly (see “Digital input (DIGITAL IN)<br />
terminals” on page 25).<br />
1 Press one of the source selecting buttons (STB,<br />
TV, or CDR) for which you want to change the<br />
input mode.<br />
DVD<br />
On the front panel<br />
STB<br />
VCR<br />
TV<br />
TAPE/CDR<br />
SOURCE NAME<br />
TV TAPE CDR FM/AM<br />
FM/AM<br />
Changing the Digital Input Mode Manually<br />
If the following symptoms occur while Dolby Digital or DTS<br />
Digital Surround software is played back, you can change the digital<br />
input mode:<br />
• Sound does not come out at the beginning of playback.<br />
• Noise comes out while searching for or skipping chapters or<br />
tracks.<br />
On the front panel<br />
CONTROL<br />
Press CONTROL 3 (or 2) to select “DGTL D.D.”<br />
or “DGTL DTS” while “DGTL AUTO” still remains<br />
on the display.<br />
• Each time you press the button, the digital input mode changes as<br />
follows:<br />
TV DIRECT<br />
STB<br />
VCR<br />
DVD<br />
DIGITAL AUTO<br />
From the remote <strong>control</strong><br />
L<br />
R<br />
VOLUME<br />
Note:<br />
• You cannot change the input mode when selecting DVD as the<br />
source. Digital input is always used for the built-in DVD player.<br />
2 Press INPUT ANALOG/DIGITAL (INPUT ATT.)<br />
on the front panel or ANALOG/DIGITAL INPUT<br />
on the remote <strong>control</strong>.<br />
INPUT<br />
ANALOG/DIGITAL<br />
INPUT ATT.<br />
On the front panel<br />
ANALOG<br />
/DIGITAL<br />
INPUT<br />
From the remote <strong>control</strong><br />
The current input mode appears on the display.<br />
• Each time you press the button, the input mode alternates<br />
between the analog input (“ANALOG”*) and the digital input<br />
(“DGTL AUTO”).<br />
ANALOG/DIGITAL AUTO indicator<br />
DGTL AUTO : Normally select this.<br />
The DIGITAL AUTO indicator lights up.<br />
The unit automatically detects the incoming<br />
signal format, then the sound signal indicator<br />
for the detected signal lights up.<br />
DGTL D.D.<br />
DGTL DTS<br />
DGTL AUTO<br />
DGTL DTS<br />
DGTL D.D.<br />
: Select this for playing back software encoded<br />
with Dolby Digital.<br />
The DIGITAL indicator lights up*.<br />
: Select this for playing back software encoded<br />
with DTS Digital Surround.<br />
The indicator lights up*.<br />
* These indicators flash when no signal or the signal without the<br />
proper format is played back.<br />
ANALOG DIGITAL AUTO<br />
L R<br />
SPK.<br />
DGTL AUTO<br />
ANALOG<br />
VOLUME<br />
When DVD is selected as the source, you can also<br />
change the digital input mode by pressing<br />
ANALOG/DIGITAL INPUT repeatedly on the remote<br />
<strong>control</strong>.<br />
ANALOG<br />
/DIGITAL<br />
INPUT<br />
* “ANALOG” is the initial setting except for the built-in DVD<br />
player.<br />
DGTL AUTO : Select this for the digital input mode.<br />
The DIGITAL AUTO indicator lights up.<br />
The unit automatically detects the incoming<br />
signal format, then the sound signal indicator<br />
for the detected signal— DIGITAL or<br />
lights up; otherwise, no sound signal indicators<br />
light up.<br />
ANALOG<br />
: Select this for the analog input mode.<br />
The ANALOG indicator lights up.<br />
Notes:<br />
• When “DGTL AUTO” cannot recognize the incoming signals, no<br />
sound signal indicators light up on the display.<br />
• When you turn off the unit or select another source, “DGTL DTS”<br />
and “DGTL D.D.” are canceled.<br />
The digital input mode is automatically reset to “DGTL AUTO.”<br />
13
asic Operations<br />
Attenuating the Input Signal<br />
When the input level of the analog source is too high, the sounds<br />
will be distorted. If this happens, you need to attenuate the input<br />
signal level to prevent the sound distortion.<br />
• You have to make this adjustment for each analog source.<br />
On the front panel ONLY<br />
Press and hold INPUT ATT. (INPUT ANALOG/<br />
DIGITAL) until the INPUT ATT indicator lights up<br />
on the display.<br />
• Each time you press and hold the button, the Input Attenuator<br />
turns on (“ATT ON”) or off (“ATT NORMAL”*).<br />
INPUT ATT indicator<br />
ANALOG<br />
* “ATT NORMAL” is the initial setting.<br />
ATT NORMAL : Normally select this. The analog sound is not<br />
attenuated.<br />
ATT ON<br />
L<br />
R<br />
ATT NORMAL<br />
ATT ON<br />
INPUT<br />
ANALOG/DIGITAL<br />
INPUT ATT.<br />
: Select this when the analog sound is<br />
distorted.<br />
Changing the Source Name<br />
INPUT ATT<br />
VOLUME<br />
Note:<br />
• Without changing the source name, you can still use the connected<br />
components. However, there may be some inconveniences:<br />
– The unexpected source name will appear on the display when<br />
you press TAPE/CDR (SOURCE NAME) on the front panel.<br />
– The CDR or TAPE button on the remote <strong>control</strong> cannot work for<br />
selecting the source.<br />
– You cannot use the digital input (see page 8) for the CD recorder.<br />
Activating the Recording Mode<br />
When you play back the multichannel sources, Recording mode<br />
enables you to record the sounds without missing surround elements<br />
by down-mixing the <strong>center</strong> and rear channel signals into the front<br />
channel signals.<br />
• When the multichannel software is played back with Recording<br />
mode activated, the sounds are down-mixed and come out through<br />
the front speakers only.<br />
On the front panel ONLY<br />
Press and hold REC MODE (SURROUND MODE)<br />
until “RECMODE ON” appears on the display.<br />
• Each time you press and hold the button, Recording mode is<br />
activated (“RECMODE ON”) and deactivated (“RECMODE<br />
OFF*”) alternately.<br />
* “RECMODE OFF” is the initial setting.<br />
RECMODE OFF : Normally select this. The down-mixing is<br />
canceled.<br />
RECMODE ON<br />
SURROUND<br />
ON/OFF MODE<br />
REC MODE<br />
: Select this for recording the down-mixed<br />
sounds.<br />
When you connect an CD recorder to the TAPE/CDR jacks on the<br />
rear panel, change the source name which will be shown on the<br />
display.<br />
On the front panel ONLY<br />
TAPE/CDR<br />
SOURCE NAME<br />
When recording with VCR:<br />
You can record the picture on your video tape without the volume<br />
level indication when Recording mode is activated.<br />
• When you do not want to record the on-screen guide icons, see<br />
page 56.<br />
• The choice menu and on-screen bar are always recorded when<br />
they appears on the TV.<br />
Ex. : When changing the source name from “TAPE ” to “CDR”<br />
1 Press TAPE/CDR (SOURCE NAME) to select as<br />
the source.<br />
2 Press and hold SOURCE NAME (TAPE/CDR)<br />
until “ASSGN. CDR” appears on the display.<br />
ANALOG<br />
L<br />
R<br />
ASSGN. TAPE<br />
ASSGN. CDR<br />
VOLUME<br />
CAUTION:<br />
When the front speakers are small, the output sound may be distorted<br />
by Recording mode. In this case, decrease the volume until the sound<br />
distortion diminishes.<br />
Notes:<br />
• When you turn off the unit or select another source, Recording<br />
mode is canceled (“RECMODE OFF”).<br />
• Sound adjustments (see pages 27 and 28) and Surround modes<br />
(see pages 29 to 32) do not affect the recording.<br />
• The following buttons do not work while Recording mode is<br />
activated (“RECMODE ON”):<br />
– SETTING and ADJUST on the front panel.<br />
– SURROUND ON/OFF and SURROUND MODE on the front<br />
panel.<br />
– Number buttons for adjusting sound on the remote <strong>control</strong>.<br />
To change the source name to “TAPE”<br />
Press and hold SOURCE NAME (TAPE/CDR) until “ASSGN.<br />
TAPE” appears on the display in step 2.<br />
14
Basic DVD Player Operations<br />
For details about DVD player operations, see pages 33 to<br />
46.<br />
• You can also play back MP3 and JPEG files. See pages 47<br />
to 50.<br />
• When using remote <strong>control</strong>, press DVD to change the<br />
remote <strong>control</strong> operation mode to the DVD player<br />
operation.<br />
1 Open the Disc Tray<br />
Before turning on the unit, turn on your TV and select the correct<br />
video input (see the manual supplied with your TV).<br />
• When you use a <strong>JVC</strong>’s TV, you can turn on your TV by pressing<br />
STANDBY/ON TV on the remote <strong>control</strong> and select the<br />
video input by pressing TV/VIDEO. (If your TV is not a <strong>JVC</strong>’s,<br />
see “Operating Other Manufacturers’ Equipment” on page 63.)<br />
• For changing the OSD messages—the information on the TV<br />
—into the desired language, see pages 51 and 53.<br />
On the front panel ONLY<br />
Press 0.<br />
The unit is turned on and the disc tray opens.<br />
The STANDBY lamp goes off and the illumination lamp lights up.<br />
• When a disc is already loaded, pressing 3 turns on the unit and<br />
starts playing back the loaded disc.<br />
2 Load a Disc<br />
Place a disc correctly with its label side up.<br />
DVD<br />
VCR<br />
TAPE/CDR<br />
SOURCE NAME<br />
RX-DV3 HOME CINEMA DVD/CD CONTROL CENTER<br />
STB<br />
TV<br />
CORRECT<br />
By pressing the following buttons, you can pause, advance, or reverse<br />
playback, and locate the beginning of the title, chapter, or track.<br />
On the front panel<br />
From the remote <strong>control</strong><br />
To stop playback temporarily<br />
Press 8.<br />
• Pressing 3 starts playback again.<br />
REW/( TUNING 9/FF<br />
FM MODE<br />
STROBE<br />
– TV/STB CH +<br />
To move back the playback position by 10 seconds<br />
(for DVD VIDEO only)<br />
Press 3 during DVD VIDEO playback.<br />
The unit moves the playback position about 10 seconds before the<br />
current position, then resumes playback.<br />
To advance or reverse playback rapidly<br />
Press and hold ¢ or 4.<br />
While you are pressing and holding ¢ (or 4), the unit advances<br />
(or reverses: for DVD VIDEO and audio CD) playback 5 times as<br />
fast as the normal speed. When you press and hold ¢ (or 4)<br />
further, the playback speed changes up to 20 times as fast as the<br />
normal speed.<br />
• Releasing the button resumes the normal playback.<br />
To locate the beginning of the chapter or track<br />
Press ¢ or 4.<br />
Press ¢ (or 4) to locate the beginning of the next (current or<br />
previous) chapter or track.<br />
To locate the chapter or track using the number buttons<br />
Press the number buttons (1–10, +10) to select the number of the<br />
desired chapter or track.<br />
EFFECT CENTER<br />
Ex. : To select 3, press 3.<br />
1 2 3<br />
To select 11, press +10, then 1.<br />
TEST REAR·L<br />
To select 20, press +10, then 10.<br />
4 5 6<br />
SURR ON/OFF REAR·R<br />
7 8 9<br />
From the remote <strong>control</strong> ONLY<br />
SURR MODE – SUBWOOFER +<br />
10/0 +10<br />
100+<br />
STANDBY/ON<br />
STANDBY<br />
INPUT<br />
ANALOG/DIGITAL<br />
INPUT ATT.<br />
ON/OFF<br />
SURROUND<br />
MODE<br />
D I G ITA L<br />
S U R R O U N D<br />
3 Start Playback<br />
TUNING<br />
INCORRECT<br />
About indication on the display while playing back a disc<br />
While you are playing back a disc, the playback information<br />
appears on the display as follows:<br />
Ex. : When DVD VIDEO is loaded<br />
DIGITAL AUTO<br />
AUTO SURROUND<br />
DIGITAL L C R<br />
SUBWFR<br />
LFE<br />
SPK.<br />
VOLUME<br />
LS<br />
RS<br />
On the front panel<br />
From the remote <strong>control</strong><br />
Press 3.<br />
The disc tray closes and the unit starts playing back the loaded disc.<br />
• You can also close the disc tray by pressing 0 on the front panel.<br />
Chapter number Elapsed playing time<br />
Ex. : When audio CD is loaded<br />
DIGITAL AUTO PRO LOGIC<br />
L R<br />
SPK.<br />
VOLUME<br />
SUBWFR<br />
Track number<br />
Elapsed playing time<br />
15
asic DVD Player Operations<br />
4 Adjust the Volume<br />
7 Stop Playback<br />
FM MODE<br />
MASTER VOLUME<br />
On the front panel<br />
For details, see “Basic Operations” on page 11.<br />
5 Activate Realistic Sound Field<br />
You can activate Surround mode for creating realistic sound fields.<br />
• You can activate Surround mode automatically when the digital<br />
multichannel source (Dolby Digital or DTS Digital Surround<br />
software) or 2-channel matrix source (Dolby Surround software) is<br />
played back—Auto Surround (see page 26).<br />
When you activate or deactivate Surround mode manually, do the<br />
following procedures:<br />
On the front panel:<br />
Press SURROUND ON/OFF.<br />
From the remote <strong>control</strong>:<br />
1) Press SOUND.<br />
2) Press SURR ON/OFF.<br />
• Each time you press SURROUND ON/OFF on the front panel or<br />
SURR ON/OFF on the remote <strong>control</strong>, Surround mode is activated<br />
and deactivated alternately.<br />
6 Select Surround Mode<br />
+<br />
–<br />
VOLUME<br />
From the remote <strong>control</strong><br />
SURROUND<br />
ON/OFF MODE<br />
SOUND<br />
SURR ON/OFF<br />
7<br />
REC MODE<br />
On the front panel From the remote <strong>control</strong><br />
Press 7.<br />
Playback stops.<br />
The unit memorizes the point where you stop playback and the<br />
RESUME indicator lights up on the display (except when an audio<br />
CD is loaded).<br />
While the RESUME indicator is lit on the display, you can start<br />
playback from the memorized point by pressing 3—Resume play.<br />
About Resume play<br />
This unit can memorize the point when you operate the following<br />
procedures:<br />
• Pressing 7 during playback—Pressing 3 starts Resume play<br />
• Changing the source—Pressing DVD or 3 starts Resume play<br />
• Turning off the unit (including Sleep Timer)<br />
—Pressing 3 starts Resume play<br />
Once you start Resume play, the RESUME indicator goes off<br />
(the unit clears the memorized point).<br />
The unit also clears the memorized point when you operate the<br />
following procedures:<br />
• Starting Resume play<br />
• Pressing 7 (while the RESUME indicator is lit on the display)<br />
• Selecting a track by pressing ¢ or 4 for video CD and<br />
super VCD when playback stops<br />
• Selecting program or random playback<br />
• Pressing TOP MENU<br />
• Ejecting the loaded disc<br />
• Turning on the unit by pressing STANDBY/ON on the<br />
front panel or STANDBY/ON AUDIO on the remote<br />
<strong>control</strong>.<br />
You can cancel Resume play (see “OTHERS menu” on page 56).<br />
To remove the loaded disc<br />
Press 0.<br />
The disc tray opens.<br />
To close the disc tray<br />
Press 0 again.<br />
When the PRO LOGIC II or DSP indicator is lit, you can select<br />
various Surround modes (see page 31).<br />
SURROUND<br />
ON/OFF MODE<br />
SURR MODE<br />
10/0<br />
8 Turn Off the Power (into Standby)<br />
REC MODE<br />
On the front panel<br />
From the remote <strong>control</strong><br />
STANDBY/ON<br />
STANDBY<br />
STANDBY/ON<br />
STB VCR TV AUDIO<br />
Press SURROUND MODE (REC MODE) on the<br />
front panel or SURR MODE on the remote <strong>control</strong>.<br />
• When you enjoy digital multichannel source such as Dolby Digital<br />
or DTS Digital Surround software, you cannot change Surround<br />
mode. When you enjoy Dolby Digital or DTS Digital Surround 2-<br />
channel including 2-channel matrix source such as Dolby Surround<br />
software, you can select Surround mode from between PRO<br />
LOGIC II MOVIE and PRO LOGIC II MUSIC (see page 31).<br />
On the front panel From the remote <strong>control</strong><br />
Press STANDBY/ON on the front panel or<br />
STANDBY/ON AUDIO on the remote <strong>control</strong>.<br />
The unit is turned off and the STANDBY lamp lights up on the front<br />
panel.<br />
• If you press the button while the disc tray is open, the disc tray<br />
closes automatically, then the unit is turned off.<br />
• A small amount of power is consumed even in standby mode. To<br />
turn off the power completely, unplug the AC power cord.<br />
16
Tuner Operations<br />
Tuning into Stations Manually<br />
On the front panel:<br />
FM/AM<br />
1 Press FM/AM to select the band.<br />
E<br />
The last received station of the selected band is<br />
tuned in.<br />
The CONTROL buttons now work for tuner<br />
operations.<br />
• Each time you press the button, the band alternates between<br />
FM and AM.<br />
ANALOG<br />
L<br />
R<br />
2 Press CONTROL ∞ (or 5)<br />
repeatedly until “< TUNING >”<br />
appears on the display.<br />
SPK.<br />
AUTO<br />
MUTING<br />
Ex. : When selecting the FM band<br />
MHz<br />
VOLUME<br />
CONTROL<br />
Using Preset Tuning<br />
Once a station is assigned to a channel number, the station can be<br />
quickly tuned. You can preset up to 30 FM and 15 AM stations.<br />
7 To store the preset stations<br />
Before you start, remember...<br />
There is a time limit in doing the following steps.<br />
If the setting is canceled before you finish, start from step 2 again.<br />
On the front panel ONLY:<br />
1 Tune into the station you want to preset (see<br />
“Tuning into Stations Manually”).<br />
• If you want to store the FM reception mode for this station,<br />
select the FM reception mode you want. See “Selecting the<br />
FM Reception Mode” on page 18.<br />
ANALOG<br />
L<br />
R<br />
SPK.<br />
TUNED STEREO AUTO MUTING<br />
MHz<br />
VOLUME<br />
Ex. : When selecting the FM band<br />
ANALOG<br />
3 While “< TUNING >” still remains<br />
on the display, press repeatedly or<br />
hold CONTROL 3 (or 2) until you<br />
find the frequency you want.<br />
ANALOG<br />
L<br />
L<br />
R<br />
R<br />
SPK. AUTO MUTING<br />
SPK.<br />
TUNED STEREO AUTO MUTING<br />
VOLUME<br />
CONTROL<br />
VOLUME<br />
MHz<br />
2 Press MEMORY.<br />
The channel number position starts flashing on the<br />
display for about 5 seconds.<br />
ANALOG<br />
L<br />
R<br />
SPK.<br />
TUNED STEREO AUTO MUTING<br />
3 Press CONTROL 3 (or 2) to select<br />
a channel number while the channel<br />
number position is flashing.<br />
MHz<br />
MEMORY<br />
VOLUME<br />
CONTROL<br />
• Pressing (or holding) CONTROL 3 increases the frequencies.<br />
• Pressing (or holding) CONTROL 2 decreases the frequencies.<br />
ANALOG<br />
L<br />
R<br />
SPK.<br />
TUNED STEREO AUTO MUTING<br />
VOLUME<br />
MHz<br />
From the remote <strong>control</strong>:<br />
1 Press FM/AM.<br />
2 Press repeatedly or hold TUNING 9 or ( until you find the<br />
frequency you want.<br />
• Pressing (or holding) TUNING 9 increases the frequencies.<br />
• Pressing (or holding) TUNING ( decreases the frequencies.<br />
Notes:<br />
• When you hold and release CONTROL 3 (or TUNING 9 on the<br />
remote <strong>control</strong>) or CONTROL 2 (or TUNING ( on the remote<br />
<strong>control</strong>), the frequency keeps changing until a certain station is<br />
tuned in.<br />
• When a station of sufficient signal strength is tuned in, the TUNED<br />
indicator lights up on the display.<br />
• When an FM stereo program is received, the STEREO indicator<br />
also lights up.<br />
4 Press MEMORY again while the selected<br />
channel number is flashing on the<br />
display.<br />
The station is assigned to the selected channel<br />
number.<br />
• The selected channel number stops flashing and then the<br />
frequency starts flashing.<br />
ANALOG<br />
L<br />
R<br />
SPK.<br />
TUNED STEREO AUTO MUTING<br />
5 Press CONTROL 3 (or 2) to select another<br />
frequency you want to store while the frequency<br />
is flashing on the display.<br />
6 Repeat steps 2 to 5 until you store all the<br />
stations you want.<br />
MHz<br />
MEMORY<br />
VOLUME<br />
To erase a stored preset station<br />
Storing a new station on a used channel number erases the<br />
previously stored one.<br />
17
uner Operations<br />
7 To tune in a preset station<br />
Selecting the FM Reception Mode<br />
On the front panel:<br />
1 Press FM/AM to select the band.<br />
The last received station of the selected band is<br />
tuned in.<br />
The CONTROL buttons now work for tuner<br />
operations.<br />
ANALOG<br />
E<br />
FM/AM<br />
When an FM stereo broadcast is hard to receive or noisy, you can<br />
change the FM reception mode while receiving an FM broadcast.<br />
• You can store the FM reception mode for each preset station.<br />
Before you start, remember...<br />
There is a time limit in doing the following steps.<br />
If the setting is canceled before you finish, start from step 1 again.<br />
L<br />
R<br />
2 Press CONTROL ∞ (or 5)<br />
repeatedly until “< PRESET >”<br />
appears on the display.<br />
SPK.<br />
AUTO<br />
MUTING<br />
VOLUME<br />
Ex. : When selecting the FM band<br />
MHz<br />
CONTROL<br />
On the front panel:<br />
1 While listening to an FM station,<br />
press CONTROL ∞ (or 5)<br />
repeatedly until “< FM MODE >”<br />
appears on the display.<br />
ANALOG<br />
CONTROL<br />
L<br />
R<br />
SPK.<br />
TUNED STEREO AUTO MUTING<br />
VOLUME<br />
ANALOG<br />
MHz<br />
L<br />
R<br />
SPK. TUNED STEREO AUTO MUTING<br />
VOLUME<br />
3 While “< PRESET >” still remains<br />
on the display, press CONTROL 3<br />
(or 2) to select a preset channel<br />
number you want.<br />
CONTROL<br />
2 While “< FM MODE >” still remains<br />
on the display, press CONTROL 3<br />
(or 2) to select “MONO.”<br />
• Each time you press the button, the FM<br />
reception mode alternates between “AUTO<br />
MUTING”* and “MONO.”<br />
ANALOG<br />
CONTROL<br />
ANALOG<br />
L<br />
R<br />
SPK.<br />
TUNED STEREO AUTO MUTING<br />
VOLUME<br />
L<br />
R<br />
SPK.<br />
TUNED STEREO AUTO MUTING<br />
VOLUME<br />
MHz<br />
MHz<br />
• Pressing (or holding) CONTROL 3 increases the preset<br />
channel numbers.<br />
• Pressing (or holding) CONTROL 2 decreases the preset<br />
channel numbers.<br />
From the remote <strong>control</strong>:<br />
1 Press FM/AM.<br />
The last received station of the selected band is tuned in.<br />
The number buttons now work for tuner operations.<br />
2 Press the number buttons to select a preset channel number.<br />
• For channel number 5, press 5.<br />
• For channel number 15, press +10 then 5.<br />
• For channel number 30, press +10, +10, then 10.<br />
* “AUTO MUTING” is the initial setting. If you have already<br />
changed the setting, “MONO” will be shown.<br />
AUTO MUTING: Normally select this.<br />
When a program is broadcasted in stereo,<br />
you will hear stereo sound; when in<br />
monaural, you will hear monaural sounds.<br />
This mode is also useful to suppress static<br />
noise between stations. The AUTO<br />
MUTING indicator lights up on the display.<br />
MONO<br />
AUTO MUTING<br />
MONO<br />
: Select this to improve the reception (but<br />
stereo effect will be lost).<br />
In this mode, you will hear noise while<br />
tuning into the stations. The AUTO<br />
MUTING indicator goes off from the<br />
display. (The STEREO indicator also goes<br />
off.)<br />
To restore the stereo effect<br />
Repeat step 1, then select “AUTO MUTING” in step 2.<br />
From the remote <strong>control</strong>:<br />
1 Press FM/AM to select an FM station.<br />
Number buttons now work for tuner operations.<br />
2 Press FM MODE.<br />
• Each time you press the button, the FM reception mode<br />
alternates between “AUTO MUTING” and “MONO.”<br />
18
Tuner Operations<br />
Using the RDS (Radio Data System)<br />
to Receive FM Stations<br />
What information can RDS signals provide?<br />
You can see the RDS signals the station sends on the display.<br />
RDS allows FM stations to send an additional signal along with their<br />
regular program signals. For example, the stations send their station<br />
names, as well as information about what type of program they<br />
broadcast, such as sports or music, etc.<br />
When tuned in to an FM station which provides the RDS service, the<br />
RDS indicator lights up on the display.<br />
ANALOG<br />
RDS indicator<br />
RDS<br />
Press DISPLAY while listening to an FM<br />
station to show the RDS signals.<br />
• Each time you press the button, the display changes to<br />
show you the following information:<br />
PS<br />
Frequency<br />
(Normal indication)<br />
PTY<br />
RT<br />
RETURN<br />
DISPLAY<br />
L<br />
R<br />
SPK.<br />
AUTO<br />
MUTING<br />
VOLUME<br />
With the unit, you can receive the following types of RDS signals:<br />
PS (Program Service)<br />
PTY (Program Type)<br />
RT (Radio Text)<br />
Enhanced Other Network :See page 21.<br />
:Shows commonly known station names.<br />
:Shows types of broadcast programs.<br />
:Shows text messages the station sends.<br />
Notes:<br />
• RDS is not available for AM broadcasts.<br />
• RDS may not operate correctly if the station tuned is not<br />
transmitting RDS signal properly or if the signal strength is weak.<br />
Operation Buttons<br />
You can use the following buttons for RDS operations:<br />
ANGLE<br />
ZOOM<br />
DIMMER<br />
MUTING<br />
+<br />
–<br />
TV VOL<br />
PROGRESSIVE<br />
+<br />
–<br />
VOLUME<br />
TA/NEWS/INFO<br />
DIGEST TOP MENU MENU<br />
MHz<br />
PS (Program Service):<br />
While searching, “PS” appears and then the station names will be<br />
displayed. “NO PS” appears if no signal is sent.<br />
PTY (Program Type):<br />
While searching, “PTY” appears and then the type of the broadcast<br />
program will be displayed. “NO PTY” appears if no signal is sent.<br />
RT (Radio Text):<br />
While searching, “RT” appears and then text messages the station<br />
sends will be displayed. “NO RT” appears if no signal is sent.<br />
Frequency:<br />
Station frequency (non-RDS service).<br />
About characters shown on the display<br />
When PS, PTY, or RT signals appear on the display window, some<br />
special characters and marks may not be displayed correctly.<br />
Note:<br />
• If searching finishes at once, “PS,” “PTY,” and “RT” will not appear<br />
on the display.<br />
( PTY PTY SEARCH PTY9<br />
CHOICE<br />
ENTER<br />
ON SCREEN<br />
RETURN<br />
DISPLAY<br />
HOME CINEMA<br />
DVD/CD CONTROL CENTER<br />
19
tions<br />
Searching for a Program<br />
by PTY Codes<br />
PTY codes<br />
None<br />
One of the advantages of the RDS service is that you can locate a<br />
particular kind of program from the preset channels (see page 17) by<br />
specifying the PTY codes.<br />
To search for a program using the PTY codes<br />
Before you start, remember...<br />
• The PTY Search is only applicable to preset stations.<br />
• To stop searching any time during the process, press<br />
PTY SEARCH while searching.<br />
• There is a time limit in doing the following steps. If the setting is<br />
canceled before you finish, start from step 1 again.<br />
Alarm !<br />
TEST<br />
Document<br />
Folk M (Music)<br />
Oldies<br />
Nation M (Music)<br />
Country<br />
News<br />
Affairs<br />
Info (Information)<br />
Sport<br />
Educate (Education)<br />
Drama<br />
Culture<br />
1 Press PTY SEARCH while<br />
listening to an FM station.<br />
“PTY SELECT” flashes on the display.<br />
( PTY PTY SEARCH PTY9<br />
ENTER<br />
Jazz<br />
Leisure<br />
Travel<br />
Science<br />
Varied<br />
Pop M (Music)<br />
PTY SEARCH<br />
2 Press PTY 9 or PTY ( until<br />
ENTER<br />
the PTY code you want appears<br />
on the display, while “PTY<br />
SELECT” is flashing.<br />
• For details, see “Description of the PTY codes” on page 22.<br />
( PTY PTY9<br />
Phone In<br />
Religion<br />
Social<br />
Children<br />
Rock M (Music)<br />
Easy M (Music)<br />
Light M (Music)<br />
Classics<br />
3 Press PTY SEARCH again,<br />
( PTY PTY SEARCH PTY9<br />
ENTER<br />
while the PTY code selected in<br />
the previous step is still on the<br />
display.<br />
While searching, “SEARCH” and the selected PTY code<br />
alternate on the display.<br />
The unit searches 30 preset FM stations, stops when it finds the<br />
one you have selected, and tunes in that station.<br />
Finance<br />
Weather<br />
Other M (Music)<br />
To continue searching after the first stop<br />
Press PTY SEARCH again while the indications on the display are<br />
flashing.<br />
If no program is found, “NOT FOUND” appears on the display.<br />
20
Tuner Operations<br />
Switching to Broadcast Program of<br />
Your Choice Temporarily<br />
Another convenient RDS service is called “Enhanced Other<br />
Network.”<br />
This allows the unit to switch temporarily to a broadcast program of<br />
your choice (TA, NEWS, and/or INFO) from a different station<br />
except in the following cases:<br />
• When you are listening to non-RDS stations (all AM stations,<br />
some FM stations and other sources).<br />
• When the unit is in standby mode or in TV Direct.<br />
Before you start, remember...<br />
• The Enhanced Other Network function is only applicable to preset<br />
stations.<br />
Press TA/NEWS/INFO repeatedly until the<br />
program type you want appears on the<br />
display.<br />
• Each time you press the button, the display changes to<br />
show the following:<br />
TA<br />
TA<br />
NEWS : News.<br />
INFO<br />
None<br />
NEWS<br />
INFO<br />
TA/NEWS/INFO<br />
TA/NEWS<br />
: Traffic Announcement in your area.<br />
TA/NEWS/INFO<br />
TA/INFO<br />
NEWS/INFO<br />
: Program the purpose of which is to impart advice in<br />
the widest sense.<br />
How the Enhanced Other Network function actually works:<br />
CASE 1<br />
If there is no station broadcasting the program you have<br />
selected<br />
The unit continues tuning in the current station.<br />
«<br />
When a station starts broadcasting the program you have<br />
selected, the unit automatically switches to the station. The<br />
indicator of received PTY code starts flashing.<br />
«<br />
When the program is over, the unit goes back to the previously<br />
tuned station, but the Enhanced Other Network function still<br />
remains activated.<br />
CASE 2<br />
If the FM station you are listening to is broadcasting the<br />
program you have selected<br />
The unit continues to receive the station but the indicator of<br />
received PTY code starts flashing.<br />
«<br />
When the program is over, the indicator of received PTY code<br />
stops flashing and remains lit, but the Enhanced Other Network<br />
function still remains activated.<br />
To stop listening to the program selected by Enhanced Other<br />
Network<br />
Press TA/NEWS/INFO repeatedly again so that the program type<br />
(TA/NEWS/INFO) indicator goes off from the display. The unit<br />
exits from Enhanced Other Network standby mode and goes back to<br />
the previously selected station.<br />
When an emergency broadcast (Alarm ! signal) is sent from an<br />
FM station<br />
The unit automatically tunes in to the station except in the following<br />
cases:<br />
• When you are listening to non-RDS stations (all AM stations,<br />
some FM stations and other sources).<br />
• When the unit is in standby mode or TV Direct.<br />
While receiving an emergency broadcast, “Alarm !” appears on the<br />
display.<br />
The TEST signal is used for equipment test—whether it can<br />
receive the Alarm ! signal correctly<br />
The TEST signal makes the unit work in the same way as the<br />
Alarm ! signal does. If the TEST signal is received, the unit<br />
automatically switches to the station broadcasting the TEST signal.<br />
While receiving the TEST signal, “TEST” appears on the display.<br />
Notes:<br />
• Enhanced Other Network data sent from some stations may not be<br />
compatible with this unit.<br />
• Enhanced Other Network does not function for some FM stations<br />
with RDS service.<br />
• While listening to a program tuned in to by the Enhanced Other<br />
Network function, the station does not change even if another<br />
network station starts broadcasting a program of the same<br />
Enhanced Other Network data.<br />
• While listening to a program tuned in by the Enhanced Other<br />
Network function, you can only use the TA/NEWS/INFO and<br />
DISPLAY as the tuner operation buttons.<br />
• If the stations alternate intermittently between the station tuned by<br />
the Enhanced Other Network function and the currently tuned<br />
station, press TA/NEWS/INFO repeatedly to cancel the Enhanced<br />
Other Network function.<br />
If you do not press the button, the currently tuned station is<br />
received finally, and the indication of the Enhanced Other Network<br />
data type flashing on the display disappears.<br />
21
tions<br />
Description of the PTY codes:<br />
News:<br />
Affairs:<br />
Info:<br />
Sport:<br />
Educate:<br />
Drama:<br />
Culture:<br />
Science:<br />
Varied:<br />
Pop M:<br />
Rock M:<br />
Easy M:<br />
Light M:<br />
Classics:<br />
Other M:<br />
Weather:<br />
Finance:<br />
Children:<br />
News.<br />
Topical program expanding or enlarging upon the<br />
news—debate, or analysis.<br />
Programs the purpose of which is to impart advice in<br />
the widest sense.<br />
Programs concerned with any aspect of sports.<br />
Educational programs.<br />
All radio plays and serials.<br />
Programs concerning any aspect of national or<br />
regional culture, including language, theater, etc.<br />
Programs about natural sciences and technology.<br />
Used for mainly speech-based programs such as<br />
quizzes, panel games and personality interviews.<br />
Commercial music of current popular appeal.<br />
Rock music.<br />
Current contemporary music considered to be “easylistening.”<br />
Instrumental music, and vocal or choral works.<br />
Performances of major orchestral works,<br />
symphonies, chamber music, etc.<br />
Music not fitting into any of the other categories.<br />
Weather reports and forecasts.<br />
Stock Market reports, commerce, trading etc.<br />
Programs targeted at a young audience.<br />
Social:<br />
Religion:<br />
Phone In:<br />
Travel:<br />
Leisure:<br />
Jazz:<br />
Country:<br />
Nation M:<br />
Oldies:<br />
Folk M:<br />
Document:<br />
TEST:<br />
Alarm !:<br />
Programs about sociology, history, geography,<br />
psychology and society.<br />
Religious programs.<br />
Involving members of the public expressing their<br />
views either by phone or at a public forum.<br />
Travel information.<br />
Programs about recreational activities.<br />
Jazz music.<br />
Songs which originate from, or continue the musical<br />
tradition of the American Southern States.<br />
Current popular music of the nation or region in that<br />
country’s language.<br />
Music from the so-called “golden age” of popular<br />
music.<br />
Music which has its roots in the musical culture of a<br />
particular nation.<br />
Programs concerning factual matters, presented in an<br />
investigative style.<br />
Broadcasts for testing emergency broadcast<br />
equipment or unit.<br />
Emergency announcement.<br />
Classification of the PTY codes for some FM stations<br />
may be different from the above list.<br />
22
Basic Settings<br />
Some of the following settings are required after connecting and positioning your speakers, while others will make operations easier.<br />
You can set the items by using the SETTING button and CONTROL 5/∞/2/3 buttons on the front panel.<br />
Setting items:<br />
• Speaker information for front, <strong>center</strong>, rear speakers, and subwoofer*<br />
• Speaker distance for front, <strong>center</strong>, and rear speakers*<br />
• Crossover frequency* • Low frequency effect attenuator* • Dynamic range compression*<br />
• Digital input (DIGITAL IN) terminals • Auto surround • Auto mode<br />
Note:<br />
* You can also set these items using the Choice menu (see pages 51 to 56).<br />
Operation Buttons<br />
To do the basic settings for this unit, use the buttons on the front<br />
panel.<br />
SETTING<br />
CONTROL<br />
Operating Procedure<br />
Ex. : When setting the digital input (DIGITAL IN) terminals.<br />
Before you start, remember...<br />
There is a time limit in doing the following steps. If the setting is<br />
canceled before you finish, start from step 1 again.<br />
Button<br />
On the front panel ONLY<br />
To do<br />
1 Press SETTING.<br />
The CONTROL buttons now work for basic settings.<br />
The setting item selected previously appears on the<br />
display.<br />
SETTING<br />
SETTING<br />
CONTROL 5/∞<br />
Display the setting indications on the<br />
display*.<br />
Select an item on the display.<br />
Each time you press the button, the<br />
indication changes as illustrated below.<br />
2 Press CONTROL ∞ (or 5)<br />
repeatedly until “DGT (Digital)”<br />
(with the current setting)* appears<br />
on the display.<br />
CONTROL<br />
CONTROL 3/2<br />
Adjust the selected item.<br />
• When no operation is done for about 5 seconds, the indications on<br />
the display will disappear.<br />
* Pressing SETTING repeatedly also changes the indication.<br />
DIGITAL AUTO<br />
L R<br />
SPK.<br />
VOLUME<br />
Configuration of the indications on the display<br />
* “1STB 2TV” is the initial setting. If you have already changed<br />
the setting, another combination will be shown.<br />
SUBWFR<br />
(Subwoofer)<br />
FRNT SP<br />
(Front speaker)<br />
MODE<br />
(Auto mode)<br />
AUTO SR<br />
(Auto surround)<br />
3 Press CONTROL 3 (or 2) to select<br />
the appropriate digital terminal<br />
setting.<br />
• Each time you press the button, the indication<br />
changes as follows:<br />
CONTROL<br />
CNTR SP<br />
(Center speaker)<br />
DGT<br />
(Digital)<br />
DIGITAL AUTO<br />
L R<br />
SPK.<br />
VOLUME<br />
REAR SP<br />
(Rear speaker)<br />
D.COMP<br />
(Dynamic range compression)<br />
DGT1STB 2TV<br />
DGT1STB2CDR<br />
FRNT D<br />
(Front distance)<br />
LFE<br />
(Low frequency effect)<br />
DGT1TV 2STB<br />
DGT1CDR2STB<br />
DGT1TV 2CDR<br />
DGT1CDR 2TV<br />
CNTR D<br />
(Center distance)<br />
CROSS<br />
(Crossover)<br />
(back to the beginning)<br />
REAR D<br />
(Rear distance)<br />
23
asic Settings<br />
7 Speaker information—“SUBWFR (subwoofer),”<br />
“FRNT SP (front speaker),” “CNTR SP (<strong>center</strong><br />
speaker),” and “REAR SP (rear speaker)”<br />
To obtain the best possible effect from the Surround modes (see<br />
pages 29 to 32), register the following information after all<br />
connections are completed.<br />
7 Speaker distance—“FRNT D (front distance),”<br />
“CNTR D (<strong>center</strong> distance),” and “REAR D<br />
(rear distance)”<br />
DIGITAL AUTO<br />
L R SPK.<br />
VOLUME<br />
For subwoofer:<br />
DIGITAL AUTO<br />
DIGITAL AUTO<br />
L R SPK.<br />
VOLUME<br />
L R SPK.<br />
VOLUME<br />
Select one of the following settings:<br />
DIGITAL AUTO<br />
L R SPK.<br />
VOLUME<br />
YES<br />
NO<br />
: Select this when a subwoofer is connected.<br />
: Select this when no subwoofer is used.<br />
Notes:<br />
• “NO” is the initial setting.<br />
• If you have selected “NO” for the subwoofer, you can only select<br />
“LARGE” for the front speakers.<br />
For front speakers, <strong>center</strong> speaker, and rear speakers:<br />
DIGITAL AUTO<br />
The distance from your listening point to the speakers is another<br />
important element to obtain the best possible surround sound of<br />
the Surround modes.<br />
You need to set the distance from your listening point to the<br />
speakers. By referring to the speaker distance setting, this unit<br />
automatically sets the delay time of the sound through each<br />
speaker so that sounds through all the speakers can reach you at<br />
the same time.<br />
Set the distance from the listening point within the range of<br />
0.3 m to 9.0 m, in 0.3 m interval.<br />
L R SPK.<br />
VOLUME<br />
DIGITAL AUTO<br />
L R SPK.<br />
VOLUME<br />
Left front<br />
speaker<br />
Center speaker<br />
Right front<br />
speaker<br />
Subwoofer<br />
DIGITAL AUTO<br />
L R SPK.<br />
VOLUME<br />
3.3 m<br />
3.0 m<br />
Select one of the following settings for each speaker:<br />
LRG (large) : Select this when the speaker size is relatively<br />
large.<br />
SML (small) : Select this when the speaker size is relatively<br />
small.<br />
NO : Select this when you have not connected a<br />
speaker. (Not selectable for the front speakers)<br />
Left rear<br />
speaker<br />
2.4 m<br />
2.7 m<br />
Right rear<br />
speaker<br />
Notes:<br />
• “LRG (large)” is the initial setting for the front speakers, “SML<br />
(small)” for the <strong>center</strong> and rear speakers.<br />
• Keep the following comment in mind as reference when<br />
adjusting the settings.<br />
– If the size of the cone speaker unit built in your speaker is<br />
greater than 12 cm, select “LRG (large),” and if it is smaller<br />
than 12 cm, select “SML (small).”<br />
• If you have selected “SML (small)” for the front speakers, you<br />
cannot select “LRG (large)” for the <strong>center</strong> and rear speakers.<br />
Ex. : In this case,<br />
set “FRNT D” to “3.3m,”<br />
set “CNTR D” to “3.0m” and<br />
set “REAR D” to “2.7m.”<br />
Notes:<br />
• “3.0m” is the initial setting. If you have already changed the<br />
setting, another setting will be shown.<br />
• If you have selected “NO” for the <strong>center</strong> and rear speakers<br />
setting, you cannot set the speaker distance for the <strong>center</strong> and<br />
rear speakers.<br />
24
Basic Settings<br />
7 Crossover frequency—“CROSS (crossover)”<br />
7 Dynamic range compression—“D.COMP”<br />
DIGITAL AUTO<br />
DIGITAL AUTO<br />
L<br />
R<br />
SPK.<br />
VOLUME<br />
DIGITAL L C R<br />
SUBWFR LFE<br />
SPK.<br />
VOLUME<br />
LS<br />
RS<br />
Small speakers cannot reproduce the bass sounds efficiently. If<br />
you use a small speaker in any position, this unit automatically<br />
reallocates the bass sound elements assigned to the small<br />
speaker to the large speakers.<br />
To use this function properly, set the crossover frequency level<br />
according to the size of the small speaker connected.<br />
• If you have selected “LRG (large)” for all speakers, this<br />
function will not take effect.<br />
Select one of the following settings:<br />
80Hz : Select this frequency when the cone speaker unit<br />
built in the speaker is about 12 cm.<br />
100Hz : Select this frequency when the cone speaker unit<br />
built in the speaker is about 10 cm.<br />
120Hz : Select this frequency when the cone speaker unit<br />
built in the speaker is about 8 cm.<br />
150Hz : Select this frequency when the cone speaker unit<br />
built in the speaker is about 6 cm.<br />
200Hz : Select this frequency when the cone speaker unit<br />
built in the speaker is less than 5 cm.<br />
Notes:<br />
• “100Hz” is the initial setting. If you have already changed the<br />
setting, another frequency will be shown.<br />
• Crossover frequency is not valid for the HEADPHONE mode.<br />
7 Low frequency effect attenuator—“LFE”<br />
DIGITAL AUTO<br />
DIGITAL L C R<br />
SUBWFR<br />
LS RS<br />
If the bass sound is distorted while playing back software<br />
encoded with Dolby Digital or DTS Digital Surround, set the<br />
LFE level to eliminate distortion.<br />
• This function takes effect only when the LFE (subwoofer)<br />
signals come in.<br />
Select one of the following settings:<br />
0dB : Normally select this.<br />
–10dB<br />
SPK.<br />
VOLUME<br />
: Select this when the bass sound is distorted.<br />
Note:<br />
• “0dB” is the initial setting. If you have already changed the<br />
setting, “–10dB” will be shown.<br />
You can compress the dynamic range (difference between<br />
maximum sound and minimum sound) of the reproduced sound.<br />
This is useful when enjoying surround sound at night.<br />
• This function takes effect only when playing back a source<br />
encoded with Dolby Digital.<br />
Select one of the following settings:<br />
OFF : Select this when you want to enjoy surround with its<br />
full dynamic range. (No effect applied.)<br />
MID : Select this when you want to reduce the dynamic range<br />
a little.<br />
MAX : Select this when you want to apply the compression<br />
effect fully. (Useful at night.)<br />
Note:<br />
• “MID” is the initial setting. If you have already changed the<br />
setting, another setting will be shown.<br />
7 Digital input (DIGITAL IN) terminals—“DGT”<br />
DIGITAL AUTO<br />
L R<br />
SPK.<br />
VOLUME<br />
When you use the digital input terminals, register what<br />
components are connected to which terminals (DIGITAL IN 1/<br />
DIGITAL IN 2). So, the correct source name will appear when<br />
you select the digital source.<br />
Set the appropriate digital terminal setting.<br />
• Each time you press CONTROL 3 or 2, the display changes<br />
as follows:<br />
1 STB 2 TV “ 1 STB 2 CDR “ 1 TV 2 STB “<br />
1 TV 2 CDR “ 1 CDR 2 STB “ 1 CDR 2 TV “<br />
(back to the beginning)<br />
Notes:<br />
• “1STB 2TV” is the initial setting. If you have already changed<br />
the setting, another combination will be shown.<br />
• If you want to connect a CD recorder to the digital input<br />
terminal, change the source name to “CDR” from “TAPE.”<br />
For details, see “Changing the Source Name” on page 14.<br />
25
asic Settings<br />
7 Auto surround—“AUTO SR”<br />
7 Auto mode—“MODE”<br />
DIGITAL AUTO<br />
AUTO SURROUND<br />
L R<br />
SPK.<br />
VOLUME<br />
DIGITAL AUTO<br />
L R<br />
SPK.<br />
VOLUME<br />
Surround mode is automatically activated when the digital<br />
multichannel source such as Dolby Digital or DTS Digital<br />
Surround software or 2-channel matrix source such as Dolby<br />
Surround is played back.<br />
You can enjoy Surround mode simply by selecting the source<br />
(with digital input selected for that source)—Auto Surround.<br />
Select one of the following settings:<br />
ON : The AUTO SURROUND indicator always lights up<br />
on the display.<br />
• If multichannel signals come in, an appropriate<br />
Surround mode will be turned on.<br />
•If Dolby Digital 2-channel or DTS 2-channel<br />
including surround signals come in, “PL II<br />
MOVIE” will be selected.<br />
• If Dolby Digital 2-channel or DTS 2-channel<br />
signals without surround signals come in,<br />
“STEREO” will be selected.<br />
•If the other signals come in, nothing will change.<br />
OFF<br />
: Select this to deactivate Auto Surround.<br />
Notes:<br />
• “ON” is the initial setting. If you have already changed the<br />
setting, “OFF” will be shown.<br />
• This function does not take effect in the following cases:<br />
– While playing an analog source.<br />
– While selecting “DGTL D.D.” or “DGTL DTS” as the fixed<br />
digital input mode (see page 13).<br />
• If you press SURROUND ON/OFF (SURR ON/OFF on the<br />
remote <strong>control</strong>) with Auto Surround activated, Auto Surround<br />
will be canceled temporarily for the currently selected source.<br />
Auto Surround setting will be restored in the following cases:<br />
– When you turn off and on the unit,<br />
– When you change the source,<br />
– When you change the analog/digital input, and<br />
– When you reset “AUTO SR” to “ON” again.<br />
You can turn on this unit and select the source automatically by<br />
turning on the video components connected to this unit<br />
—Auto mode.<br />
• This function takes effect only when the video components<br />
and TV are connected to this unit with SCART cables.<br />
• This function takes effect for the following sources—DVD,<br />
STB, and VCR.<br />
Select one of the following settings:<br />
AUTO1<br />
: When a video component is turned on while the<br />
unit is on, the unit selects the video component as<br />
the source automatically.<br />
AUTO2 : • When a video component is turned on<br />
– while the unit is off, the unit changes the mode<br />
into TV Direct and selects the video component<br />
as the source automatically.<br />
– while the unit is on or TV Direct is activated,<br />
the unit selects the video component as the<br />
source automatically.<br />
• When a video component is turned off<br />
– while TV Direct is activated or the unit is on<br />
with one of the video components selected as<br />
the source, the unit selects the previously<br />
selected video component as the source<br />
automatically.<br />
MANUAL : Select the source manually.<br />
Notes:<br />
• “MANUAL” is the initial setting. If you have already changed the<br />
setting, other settings will be shown.<br />
• When selecting VCR as the source, “AUTO1” or “AUTO2” may not<br />
work if you only turn on the VCR. If it happens, you may need to<br />
start playback to activate Auto mode.<br />
26
Sound Adjustments<br />
The following settings are required after connecting and positioning your speakers.<br />
You can adjust the items by using the ADJUST button and CONTROL 5/∞/2/3 buttons on the front panel.<br />
Adjustment items:<br />
• Front speaker output balance* • Tone* • Speaker output levels*<br />
• DAP effect level<br />
Notes:<br />
• The setting contents of adjustment items are memorized for each source.<br />
* You can also set these items using the Choice menu (see pages 51 to 56).<br />
Operation Buttons<br />
To do the basic settings for this unit, use the buttons on the front<br />
panel.<br />
ADJUST<br />
CONTROL<br />
Operating Procedure<br />
Ex. : When setting the front speaker output balance.<br />
Before you start, remember...<br />
There is a time limit in doing the following steps. If the setting is<br />
canceled before you finish, start from step 1 again.<br />
On the front panel ONLY*<br />
1 Press ADJUST.<br />
The CONTROL buttons now work for sound<br />
adjustments. The setting item selected previously<br />
appears on the display.<br />
ADJUST<br />
Button<br />
ADJUST<br />
CONTROL 5/∞<br />
CONTROL 3/2<br />
To do<br />
Display the adjustment indications on<br />
the display**.<br />
Select an item on the display.<br />
Each time you press the button, the<br />
indication changes as illustrated below.<br />
Adjust the selected item.<br />
2 Press CONTROL ∞ (or 5)<br />
repeatedly until “BAL (Balance)”<br />
(with the current setting)* appears<br />
on the display.<br />
DIGITAL AUTO<br />
L R<br />
SPK.<br />
CONTROL<br />
VOLUME<br />
• When no operation is done for about 5 seconds, the indications<br />
on the display will disappear.<br />
* You can also make sound adjustment except for front speakers<br />
output balance from the remote <strong>control</strong>.<br />
** Pressing ADJUST repeatedly also changes the indication.<br />
Configuration of the indications on the display<br />
* “CENTER” is the initial setting. If you have already changed<br />
the setting, another setting will be shown.<br />
3 Press CONTROL 3 (or 2) to adjust<br />
the front speaker balance.<br />
• Each time you press the button, the indication<br />
changes as follows:<br />
CONTROL<br />
BAL<br />
(Balance)<br />
EFFECT #<br />
#<br />
DIGITAL AUTO<br />
L R<br />
SPK.<br />
VOLUME<br />
BASS<br />
TREBLE<br />
SUBWFR<br />
(Subwoofer)<br />
#<br />
REAR R<br />
(Rear right)<br />
REAR L<br />
(Rear left)<br />
CENTER<br />
#<br />
#<br />
#<br />
R –21 CENTER L –21<br />
# These indications appear only when the corresponding speakers<br />
information for each speaker is set to other than “NO.”<br />
## “EFFECT” appears only when one of DAP modes (see pages 29<br />
to 32) is activated.<br />
27
ound Adjustments<br />
7 Front speaker output balance<br />
—“BAL (balance)”<br />
DIGITAL AUTO<br />
7 Speaker output levels—“SUBWFR<br />
(subwoofer),” “CENTER,” “REAR L (left),”<br />
and “REAR R (right)”<br />
L<br />
R<br />
SPK.<br />
VOLUME<br />
DIGITAL AUTO<br />
L R<br />
SUBWFR<br />
SPK.<br />
VOLUME<br />
If the sounds you hear from the front right and left speakers are<br />
unequal, you can adjust the speaker output balance.<br />
Adjust the output balance appropriately from the listening<br />
point within the range of R (Right) –21 to CENTER (0) or<br />
CENTER (0) to L (Left) –21.<br />
DIGITAL AUTO<br />
DIGITAL L C R<br />
SUBWFR LFE<br />
LS RS<br />
DIGITAL AUTO<br />
DIGITAL L C R<br />
SUBWFR LFE<br />
SPK.<br />
SPK.<br />
VOLUME<br />
VOLUME<br />
Note:<br />
LS<br />
RS<br />
• “CENTER” is the initial setting. If you have already changed<br />
the setting, another setting will be shown.<br />
DIGITAL AUTO<br />
DIGITAL L C R<br />
SUBWFR LFE<br />
SPK.<br />
VOLUME<br />
LS<br />
RS<br />
7 Tone—“BASS” and “TREBLE”<br />
DIGITAL AUTO<br />
L R<br />
SPK.<br />
VOLUME<br />
You can adjust the speaker output levels if you have set the<br />
speaker information appropriately.<br />
• You can adjust the output level for <strong>center</strong> and/or rear speakers<br />
only when one of proper Surround modes is activated (see<br />
page 31).<br />
DIGITAL AUTO<br />
L R<br />
SPK.<br />
VOLUME<br />
Adjust the speaker output level within the range of –10 to<br />
+10 in 1 step interval.<br />
You can adjust the bass and treble sounds as you like.<br />
Adjust the tone within the range of –10 to +10 in 2 steps<br />
intervals.<br />
Note:<br />
• “0” is the initial setting. If you have already changed the setting,<br />
another setting will be shown.<br />
Note:<br />
• “0” is the initial setting. If you have already changed the setting,<br />
another setting will be shown.<br />
7 DAP effect level—“EFFECT”<br />
ANALOG<br />
DSP<br />
L R<br />
SPK.<br />
SUBWFR<br />
LS RS<br />
VOLUME<br />
Adjusting sound from the remote <strong>control</strong><br />
1 Press SOUND.<br />
Number buttons now work for sound adjustments.<br />
2 Adjust the level as follows:<br />
To adjust subwoofer, press SUBWOOFER + or –.<br />
To adjust <strong>center</strong> speaker, press CENTER + or –.<br />
To adjust left rear speaker, press REAR•L + or –.<br />
To adjust right rear speaker, press REAR•R + or –.<br />
To adjust the effect level (for DAP mode), press EFFECT.<br />
While one of DAP modes is activated (the DSP indicator lights<br />
up on the display), you can adjust the effect level.<br />
For details about DAP modes, see pages 29 to 32.<br />
Adjust the effect level within the range of 1 to 5.<br />
Note:<br />
• “3” is the initial setting. If you have already changed the setting,<br />
another setting will be shown.<br />
About auto memory<br />
This unit memorizes the settings for each source:<br />
• when you turn off the power (see page 11)<br />
• when you change the source (see page 11)<br />
• when you change the analog/digital input mode (see page 13)<br />
• when you change the source name (see page 14)<br />
When you change the source, the memorized settings for the<br />
newly selected source are automatically recalled.<br />
The following can be stored for each source:<br />
• Analog/digital input mode (see page 13)<br />
• Input attenuator mode (see page 14)<br />
• Front speaker output balance (see above or page 54)<br />
• Speaker output level (see above or page 55)<br />
• Tone adjustment (see above or page 54)<br />
• DAP effect level (see above)<br />
• Surround mode selection (see page 31)<br />
Note:<br />
• If the source is FM or AM, you can assign a different setting for<br />
each band.<br />
28
STANDBY<br />
STANDBY/ON<br />
DIGITAL<br />
SURROUND<br />
INPUT<br />
SURROUND<br />
ON/OFF MODE<br />
ANALOG/DIGITAL<br />
INPUT ATT.<br />
REC MODE<br />
DVD<br />
RX-DV3 HOME CINEMA DVD/CD CONTROL CENTER<br />
DBS<br />
VCR<br />
TV<br />
TAPE/CDR<br />
SOURCE NAME<br />
FM/AM<br />
TV DIRECT<br />
MASTER VOLUME<br />
SETTING ADJUST MEMORY<br />
COMPACT<br />
CONTROL<br />
SUPER VIDEO<br />
DVD/SUPER VCD/VCD/CD<br />
Creating Realistic Sound Fields<br />
You can use the following Surround modes to reproduce a realistic<br />
sound field:<br />
■ Dolby Surround<br />
• Dolby Pro Logic II<br />
• Dolby Digital<br />
■ DTS Digital Surround<br />
■ DAP (Digital Acoustic Processor) modes<br />
■ All Channel Stereo<br />
■ Dolby Surround<br />
Dolby Pro Logic II*<br />
Dolby Pro Logic II has newly developed multichannel playback<br />
format to decode into 5.1-channel from all 2-channel sources—<br />
stereo source and Dolby Digital encoded source.<br />
Matrix-based encoding/decoding method for Dolby Pro Logic II<br />
makes no limitation for the cutoff frequency of the rear treble and<br />
enables stereo rear sound compared to conventional Dolby Pro<br />
Logic.<br />
Dolby Pro Logic II enables to reproduce spacious sound from<br />
original sound without adding any new sounds and tonal colorations.<br />
Dolby Pro Logic II has two modes—Movie mode and Music mode:<br />
Pro Logic II Movie (PL II MOVIE)—suitable for reproduction of<br />
Dolby Surround encoded sources bearing the mark DOLBY SURROUND<br />
and stereo television sources. You can enjoy sound field very close<br />
to the one created with discrete 5.1-channel sounds.<br />
Pro Logic II Music (PL II MUSIC)—suitable for reproduction of<br />
any 2-channel stereo music sources. You can enjoy wide and deep<br />
sound by using this mode.<br />
• When Dolby Pro Logic II is activated, the PRO LOGIC II<br />
indicator lights up on the display.<br />
Dolby Digital*<br />
Used to reproduce multichannel sound tracks of the software<br />
encoded with Dolby Digital ( D I G I T A L<br />
).<br />
• To enjoy the software encoded with Dolby Digital, connect the<br />
source component using the digital terminal on the rear of this<br />
unit. (See page 8.)<br />
Dolby Digital 5.1-channel encoding method (so-called discrete<br />
multichannel digital audio format) records and digitally compresses<br />
the left front channel, right front channel, <strong>center</strong> channel, left rear<br />
channel, right rear channel, and LFE channel signals.<br />
Since each channel is completely independent from the other<br />
channel signals to avoid interference, you can obtain much better<br />
sound quality with much stereo and surround effects.<br />
■ DTS Digital Surround**<br />
Used to reproduce multichannel sound tracks of the software<br />
encoded with DTS Digital Surround ( ).<br />
• To enjoy the software encoded with DTS Digital Surround,<br />
connect the source component using the digital terminal on the<br />
rear of this unit. (See page 8.)<br />
DTS Digital Surround is another discrete multichannel digital<br />
audio format available on CD, LD, and DVD software.<br />
Compared to Dolby Digital, audio compression ratio is relatively<br />
low. This fact allows DTS Digital Surround format to add breadth<br />
and depth to the reproduced sounds. As a result, DTS Digital<br />
Surround features natural, solid and clear sound.<br />
Typical Multichannel (5.1-channel) reproduction<br />
Left front<br />
speaker<br />
Left rear<br />
speaker<br />
Center<br />
speaker<br />
Subwoofer<br />
Right rear<br />
speaker<br />
■ DAP (Digital Acoustic Processor) modes<br />
Right front<br />
speaker<br />
DAP modes have been designed to create important acoustic<br />
surround elements.<br />
The sound heard in a live club, dance club, hall or pavilion consists<br />
of direct sound and indirect sound—early reflections and reflections<br />
from behind. Direct sounds reach the listener directly without any<br />
reflection. On the other hand, indirect sounds are delayed by the<br />
distances of the ceiling and walls (see the diagram on the next page).<br />
These indirect sounds are important elements of the acoustic<br />
surround effects. The DAP mode can reproduce a realistic sound<br />
field by adding these indirect sounds.<br />
DAP modes can be used when the front and rear speakers are<br />
connected to this unit (without respect to the <strong>center</strong> speaker<br />
connection: no sound comes out of the <strong>center</strong> speaker even if it is<br />
connected).<br />
Note:<br />
• Dolby Digital or DTS software can be roughly grouped into two<br />
categories<br />
—multichannel (up to 5.1-channel) and 2-channel software. To<br />
enjoy surround sounds while playing Dolby Digital 2-channel or<br />
DTS software, you can use Dolby Pro Logic II.<br />
* Manufactured under license from Dolby Laboratories. “Dolby,” “Pro<br />
Logic,” and the double-D symbol are trademarks of Dolby<br />
Laboratories.<br />
29<br />
**Manufactured underlicense from Digital Theater Systems, Inc. US<br />
PAT. No. 5,451,942 and other world-wide patents issued and<br />
pending. “DTS” and “DTS Digital Surround” are trademarks of<br />
Digital Theater Systems, Inc. Copyright 1996 Digital Theater<br />
Systems, Inc. All rights reserved.
Realistic Sound Fields<br />
The following DAP modes are provided for this unit:<br />
LIVE CLUB : Gives the feeling of a live music club with a low<br />
ceiling.<br />
DANCE CLUB : Gives a throbbing bass beat.<br />
HALL<br />
PAVILION<br />
: Gives clear vocal and the feeling of a concert<br />
hall.<br />
: Gives the spacious feeling of a pavilion with a<br />
high ceiling.<br />
These DAP modes can be used to add the acoustic surround effects<br />
while reproducing 2-channel stereo software, either analog or Linear<br />
PCM digital signal, and can give you a real “being there” feeling.<br />
• When one of the DAP modes is selected, the DSP indicator lights<br />
up on the display.<br />
■ All Channel Stereo<br />
This mode can reproduce a larger stereo sound field using all the<br />
connected (and activated) speakers.<br />
All Channel Stereo can be used when the front and rear<br />
speakers are connected to this receiver without respect to the<br />
<strong>center</strong> speaker connection.<br />
If the <strong>center</strong> speaker is connected and activated, the same phases of<br />
the front left and right signals are mixed and output through the<br />
<strong>center</strong> speaker.<br />
All Channel Stereo can be used while reproducing 2-channel stereo<br />
software, either analog or Linear PCM digital signal.<br />
• When All Channel Stereo is selected, the DSP indicator lights up<br />
on the display.<br />
All Channel Stereo reproduction<br />
Creating sound field<br />
Early reflections<br />
Reflections from behind<br />
Sound reproduced from normal stereo<br />
Direct sounds<br />
Sound reproduced from All Channel Stereo<br />
Available Surround modes for each input signal<br />
: Possible : Impossible<br />
Modes<br />
DOLBY DTS PL II PL II LIVE DANCE<br />
ALL CH<br />
STEREO<br />
HALL PAVILION<br />
Signals DIGITAL SURROUND MOVIE MUSIC CLUB CLUB ST.<br />
Dolby Digital<br />
<br />
(Multichannel)<br />
Dolby Digital<br />
(2-channel)<br />
Dolby Surround<br />
(matrix 2-ch)<br />
<br />
<br />
DTS Digital<br />
Surround <br />
(Multichannel)<br />
DTS Digital<br />
Surround <br />
(2-channel)<br />
Linear PCM <br />
Analog <br />
30
Creating Realistic Sound Fields<br />
Activating Surround Mode<br />
When Auto Surround is set to “OFF” or 2-channel source other than<br />
Dolby Surround software is played back, activate Surround mode<br />
manually.<br />
Make sure that you have set the speakers information correctly<br />
(see page 24 or 55).<br />
• If only front speakers are connected, you cannot activate any<br />
Surround mode.<br />
On the front panel:<br />
Press SURROUND ON/OFF.<br />
The SURROUND indicator lights up on the display<br />
(when Auto Surround is set to “OFF”).<br />
• Each time you press the button, Surround mode is<br />
activated or deactivated alternately.<br />
From the remote <strong>control</strong>:<br />
1 Press SOUND.<br />
Number buttons now work for sound adjustments.<br />
2 Press SURR ON/OFF.<br />
The SURROUND indicator lights up on the<br />
display (when Auto Surround is set to “OFF”).<br />
• Each time you press the button, Surround mode<br />
is activated or deactivated alternately.<br />
About SURROUND indicators<br />
• When Auto Surround is set to<br />
“ON,” the AUTO SURROUND<br />
indicator always lights up on the<br />
display.<br />
• When you activate Surround<br />
mode manually with Auto<br />
Surround set to “OFF,” the<br />
SURROUND indicator lights up<br />
on the display.<br />
SURROUND<br />
ON/OFF MODE<br />
REC MODE<br />
SOUND<br />
SURR ON/OFF<br />
7<br />
DIGITAL AUTO PRO LOGIC<br />
AUTO SURROUND<br />
L R<br />
SUBWFR<br />
DIGITAL AUTO PRO LOGIC<br />
SURROUND<br />
L R<br />
SUBWFR<br />
Selecting Surround Modes<br />
When 2-channel source is played back with Surround mode<br />
activated, you can select another Surround mode.<br />
Available Surround modes will vary depending on the number of the<br />
connected speakers and the playback sound.<br />
Make sure that you have set the speaker information correctly<br />
(see page 24 or 55).<br />
• If rear speakers are not connected, you cannot use DAP modes<br />
and the All Channel Stereo.<br />
On the front panel:<br />
Press SURROUND MODE.<br />
• Each time you press the button, Surround mode<br />
is changed as illustrated below:<br />
From the remote <strong>control</strong>:<br />
1 Press SOUND.<br />
Number buttons now work for sound adjustments.<br />
2 Press SURR MODE.<br />
• Each time you press the button, Surround mode is<br />
changed as illustrated below:<br />
When 5 or 4 (except <strong>center</strong> speaker) speakers are connected:<br />
DIGITAL AUTO PRO LOGIC<br />
SURROUND<br />
L R<br />
SUBWFR<br />
PL II MOVIE<br />
LIVE CLUB<br />
HALL<br />
ALL CH ST.<br />
PL II MUSIC<br />
DANCE CLUB<br />
PAVILION<br />
(back to the beginning)<br />
SURROUND<br />
ON/OFF MODE<br />
REC MODE<br />
SOUND<br />
SURR MODE<br />
10/0<br />
VOLUME<br />
When 3 (except rear speakers) speakers are connected or<br />
Dolby Digital including matrix source is played back:<br />
DIGITAL AUTO PRO LOGIC<br />
SURROUND<br />
L R<br />
SUBWFR<br />
VOLUME<br />
PL II MOVIE<br />
PL II MUSIC<br />
Signal and speaker indicators on the display<br />
The following signal indicators light up —:<br />
L, R : • When digital input is selected: Light up when<br />
the signals corresponding to each channel come<br />
in.<br />
• When analog input is selected: Always light<br />
up.<br />
C, LS, RS : Light up when the signals corresponding to each<br />
channel come in.<br />
S :Lights up when the monaural rear channel signal<br />
or Dolby Surround encoded signal comes in.<br />
LFE : Lights up when the LFE channel signal comes<br />
in.<br />
Signal indicators<br />
Speaker indicators<br />
The speaker indicators light up as follows:<br />
• The subwoofer speaker indicator ( ) lights up when<br />
“SUBWFR” is set to “YES” (see page 24) or “USE” (see<br />
page 55).<br />
• The other speaker indicators light up only when the<br />
corresponding speaker is activated, and also when required<br />
for the current playback.<br />
31
eating Realistic Sound Fields<br />
Adjusting Surround Mode<br />
Using Remote Control<br />
When playing back the source with Surround mode, you can adjust<br />
the speaker output levels for Surround modes.<br />
Once you have adjusted the Surround modes, the adjustment is<br />
memorized for each source.<br />
• You can also adjust Surround modes using the Choice menu (see<br />
pages 51 to 56) or buttons on the front panel (see page 24).<br />
• When using test tone, you can adjust the speaker output levels<br />
without playback sounds.<br />
1 Select and play back software you like.<br />
2 Activate and select Surround mode.<br />
• When 2-channel source is played back, you can select<br />
Surround modes.<br />
3 Adjust the sound.<br />
TV/STB CH<br />
SOUND EFFECT CENTER<br />
1 2 3<br />
ANALOG<br />
/DIGITAL TEST<br />
REAR·L<br />
INPUT 4 5 6<br />
AUDIO SURR ON/OFF REAR·R<br />
7 8 9<br />
SUBTITLE SURR MODE – SUBWOOFER +<br />
10/0 +10 VFP<br />
100+ TV RETURN<br />
DIMMER<br />
PROGRESSIVE<br />
1) Press SOUND.<br />
Number buttons now work for the sound adjustment.<br />
2) Adjust the speaker output levels as follows:<br />
To adjust <strong>center</strong> speaker, press CENTER +/–.*<br />
To adjust left rear speaker, press REAR•L +/–.<br />
To adjust right rear speaker, press REAR•R +/–.<br />
To adjust subwoofer, press SUBWOOFER +/–.<br />
To adjust the effect level, press EFFECT.**<br />
The name for the item currently adjusted appears on the<br />
display. For details, see the illustrations of “Speaker output<br />
levels” on page 28.<br />
Notes:<br />
• You can adjust the speaker output levels for the<br />
activated speakers ONLY (the speaker indicators are<br />
lit on the display).<br />
* You cannot adjust the output levels of <strong>center</strong> speaker<br />
when one of DAP modes is activated.<br />
**You can adjust the effect level only when one of DAP<br />
modes is activated.<br />
• Before operating the DVD player using remote<br />
<strong>control</strong>, press DVD to change the remote <strong>control</strong><br />
operation mode to DVD.<br />
(Left front speaker)<br />
(Left rear speaker)<br />
For using test tone<br />
1) Press SOUND.<br />
2) Press TEST.<br />
The playback sound stops during playback.<br />
“TEST L” starts flashing on the display and a test tone comes<br />
out of the speakers in the following order:<br />
(Center speaker)<br />
(Right front speaker)<br />
(Right rear speaker)<br />
3) Adjust the speaker output level as follows:<br />
To adjust <strong>center</strong> speaker, press CENTER +/–.<br />
To adjust left rear speaker, press REAR•L +/–.<br />
To adjust right rear speaker, press REAR•R +/–.<br />
Notes:<br />
• You cannot adjust the speaker output levels if you have set the<br />
speaker information to “NO.”<br />
• No test tone comes out of the speaker when its speaker<br />
information is set to “NO.”<br />
• When you press EFFECT or SUBWOOFER +/–, the test tone<br />
stops.<br />
4) Press TEST to stop the test tone.<br />
The test tone stops.<br />
• When no operation is done, the test tone stops automatically<br />
in about 1 minute.<br />
Relation between Surround modes and adjustable items<br />
: Possible : Impossible<br />
Mode Item TEST CENTER REAR•L REAR•R SUBWOOFER EFFECT<br />
Dolby Digital <br />
DTS Digital Surround <br />
Dolby Pro Logic II <br />
DAP <br />
All Channel Stereo <br />
Note:<br />
• You cannot adjust the speakers which are not used by the selected Surround mode.<br />
32
DVD Player Operations<br />
Disc Information<br />
7 Playable Disc Types<br />
This unit has been designed to play back the following discs:<br />
DVD VIDEO, Video CD (VCD), Super Video CD (SVCD), audio CD, CD-R, and CD-RW.<br />
• This unit can also play back MP3 and JPEG files recorded on CD-R and CD-RW. For details about MP3, see “MP3 Disc Playback” on<br />
pages 47 and 48 and about JPEG, see “JPEG Disc Playback” on pages 49 and 50.<br />
• This instruction refers to Video CD as VCD, Super Video CD as SVCD, and audio CD as CD.<br />
Discs you can play:<br />
Disc Type<br />
DVD VIDEO VCD SVCD CD CD-R CD-RW<br />
Mark (Logo)<br />
COMPACT<br />
DIGITAL AUDIO<br />
• The following discs cannot be played back:<br />
DVD AUDIO, DVD-ROM, DVD-RAM, DVD-RW, CD-ROM, CD-I (CD-I Ready), Photo CD, etc.<br />
Playing back these discs will generate noise and damage the speakers.<br />
• On some DVD VIDEO, VCD, or SVCD, their actual operations may be different from what is explained in this manual. This is due to the<br />
disc programming and disc structure, but not a malfunction of this unit.<br />
Note on Region Code<br />
DVD players and DVD VIDEO have their own Region Code<br />
numbers. This unit can play back only DVD VIDEO recorded<br />
with the color system of PAL whose Region Code numbers<br />
include “2.”<br />
Ex. :<br />
If a DVD VIDEO with the wrong Region Code numbers is<br />
loaded, “REGION CODE ERROR!” appears on the TV and<br />
playback cannot start.<br />
IMPORTANT : Before playing a disc, make sure of the<br />
following...<br />
• Check the connection with the TV.<br />
• Turn on the TV and select the correct input mode on the TV to<br />
view the pictures or on-screen indications on the TV screen.<br />
• For disc playback, you can change the initial setting to your<br />
preference. (See pages 51 to 59.)<br />
If “ ” appears on the TV screen when you press a button,<br />
the disc cannot accept an operation you have tried to do, or<br />
data required for that operation is not recorded on the disc.<br />
Notes on CD-R and CD-RW<br />
• User-edited CD-R (Recordable) and CD-RW (ReWritable) can<br />
be played back only if they are already “finalized.”<br />
• The unit can play back CD-R or CD-RW recorded on a<br />
personal computer if they have been recorded in the audio CD<br />
format.<br />
The unit can also play back CD-R or CD-RW if MP3 files or<br />
JPEG files are recorded on them.<br />
However, they may not be played back because of their disc<br />
characteristics, recording conditions, or damage or stain on<br />
them. Especially, the configuration and characteristics of an<br />
MP3 disc or a JPEG disc is determined by the writing<br />
(encoding) software and hardware used for recording.<br />
Therefore, due to the software and hardware used, the<br />
following symptoms may occur:<br />
– Some discs may not be played back.<br />
– Some tracks on an MP3 disc are skipped and may not be<br />
played back normally.<br />
– Some files on a JPEG disc may be played back distortedly.<br />
• Before playing back CD-R or CD-RW, read their <strong>instructions</strong><br />
or cautions carefully.<br />
• CD-RW may require a longer readout time. It is caused by the<br />
fact that the reflectance of CD-RW is lower than for regular<br />
audio CD.<br />
NOTICE : In some cases, without showing “<br />
will not be accepted.<br />
”, operations<br />
33
Player Operations<br />
7 Disc structure<br />
DVD VIDEO consists of “titles,” and each title may be divided into<br />
some “chapters” (see Example 1).<br />
For example, if DVD VIDEO contains some movies, each movie<br />
may have its own title number and it may be further divided into<br />
some chapters. In DVD VIDEO Karaoke, each song may have its<br />
own title number, but it may not be further divided into chapters.<br />
Example 1: DVD VIDEO<br />
VCD, SVCD, and CD consist of “tracks” (see Example 2).<br />
In general, each track has its own track number. (On some discs,<br />
each track may also be divided by Indexes. This unit is not<br />
compatible with Index function.)<br />
Example 2 : VCD/SVCD/CD<br />
7 Playback Control function (PBC)<br />
The Playback Control function allows you to enjoy menu-driven<br />
operation.<br />
Menu-driven playback<br />
A selection menu is displayed when you start playing VCD and<br />
SVCD with the Playback Control feature. The selection menu shows<br />
a list of numbers for selection. Some discs may show moving<br />
pictures or a divided screen.<br />
You can interact with the screen using a menu display to select and<br />
play an entry.<br />
See the example illustration on the right about basic feature of<br />
menu-driven playback (for details about the operation through the<br />
menu, see also page 37).<br />
Note:<br />
• While operating VCD or SVCD using the menu, some of the<br />
functions such as repeat play may not work.<br />
34
DVD Player Operations<br />
This section explains advanced operations of the built-in DVD player using the remote <strong>control</strong>. For MP3 playback, see pages 47 and 48, and<br />
for JPEG playback, see pages 49 and 50.<br />
Before using the remote <strong>control</strong>, press DVD to change the remote <strong>control</strong> operation mode.<br />
• See also “Basic DVD Player Operations” on pages 15 and 16.<br />
DVD VIDEO SUPER AUDIO<br />
• VIDEO CD VCD CD show which types of disc are available for the operation.<br />
• Turn on your TV and select the correct input mode on the TV.<br />
If “ ” appears on the TV when you press a button, the disc cannot accept an operation you have tried to do, or data required for<br />
that operation is not recorded on the disc.<br />
Using the On-screen Bar<br />
DVD-VIDEO 8.5Mbps TITLE 14 CHAP 23 TOTAL 1:25:58<br />
You can check the information of a disc while the disc is loaded and<br />
use some functions through the on-screen bar.<br />
TA/NEWS/INFO<br />
DIGEST TOP MENU MENU<br />
( PTY PTY SEARCH PTY9<br />
CHOICE<br />
ENTER<br />
Ex. : When a DVD VIDEO is played<br />
ON SCREEN<br />
RETURN<br />
DISPLAY<br />
& Whenever a disc is loaded<br />
DVD-VIDEO 8.5Mbps TITLE 14 CHAP 23 TOTAL 1:25:58<br />
Press ON SCREEN.<br />
• Each time you press the button, the on-screen bar changes as<br />
shown to the right:<br />
DVD-VIDEO<br />
TIME<br />
8.5Mbps TITLE 14 CHAP 23 TOTAL 1:25:58<br />
OFF CHAP. 1/3 1/3 1/3<br />
(with the pull-down menu)<br />
The on-screen bar disappears.<br />
(back to the beginning)<br />
35<br />
1<br />
2 3<br />
DVD-VIDEO 8.5Mbps TITLE 14 CHAP 23 TOTAL 1:25:58<br />
TIME OFF CHAP. 1/3 1/3 1/3<br />
4 Ex.: When a DVD VIDEO is played<br />
1 Disc type<br />
2 Playback information<br />
Indications Meanings Available discs<br />
Mbps shows the current<br />
transfer rate (Megabits<br />
per second).<br />
TITLE 14 shows the current title.<br />
CHAP 23<br />
shows the current<br />
chapter.<br />
TRACK 14<br />
shows the current<br />
track.<br />
TOTAL 1:25:58<br />
shows the elapsed<br />
playing time.<br />
All discs<br />
3 Playback conditions for all types of disc<br />
Indications<br />
Playback<br />
Meanings<br />
/ Fast forward/Fast reverse<br />
/ Forward/reverse slow-motion<br />
Pause<br />
Stop<br />
Contents of the on-screen bar with the pull-down menu<br />
4 Operation icons (on the pull-down menu)<br />
Indications Meanings Available discs<br />
TIME<br />
OFF<br />
CHAP.<br />
1/3<br />
1/3<br />
1/3<br />
PROG.<br />
RND.<br />
Select this to change the<br />
time indication.<br />
See page 36.<br />
Select this to repeat<br />
playback. See page 46.<br />
Select this for time search.<br />
See page 41.<br />
Select this for chapter<br />
search. See page 41.<br />
Select this to change the<br />
audio language or channel.<br />
See pages 39 and 40.<br />
Select this to change<br />
subtitle language.<br />
See page 39.<br />
Select this to change the<br />
view angle. See page 38.<br />
Select this for the program<br />
play. See page 45.<br />
Select this for the random<br />
play. See page 45.<br />
All discs
VD Player Operations<br />
Basic Operation through the On-screen<br />
Bar<br />
Ex. : When selecting the repeat mode for DVD VIDEO<br />
TA/NEWS/INFO<br />
DIGEST TOP MENU MENU<br />
( PTY PTY SEARCH PTY9<br />
CHOICE<br />
ENTER<br />
ON SCREEN<br />
& During playback or while<br />
stopped<br />
1 Press ON SCREEN twice.<br />
The on-screen bar with pull-down menu appears on the TV.<br />
2 Press cursor 3 (or 2) repeatedly to move to<br />
OFF<br />
RETURN<br />
DISPLAY<br />
DVD-VIDEO 8.5Mbps TITLE 14 CHAP 23 TOTAL 1:25:58<br />
TIME<br />
OFF CHAP. 1/3 1/3 1/3<br />
on the pull-down menu.<br />
DVD-VIDEO 8.5Mbps TITLE 14 CHAP 23 TOTAL 1:25:58<br />
TIME OFF CHAP. 1/3 1/3 1/3<br />
3 Press ENTER.<br />
The pop-up window appears under the pull-down menu.<br />
DVD-VIDEO 8.5Mbps TITLE 14 CHAP 23 TOTAL1:25:58<br />
TIME<br />
OFF<br />
CHAP.<br />
1/3 1/3 1/3<br />
4 Press cursor ∞ (or 5) to select the desired option<br />
in the pop-up window.<br />
• Each time you press the button, the options change.<br />
DVD-VIDEO 8.5Mbps TITLE 14 CHAP 23 TOTAL 1:25:58<br />
TIME<br />
TITLE<br />
CHAP.<br />
1/3 1/3 1/3<br />
5 Press ENTER.<br />
The setting changes and the pop-up window goes off.<br />
DVD-VIDEO 8.5Mbps TITLE 14 CHAP 23 TOTAL 1:25:58<br />
TIME<br />
TITLE CHAP. 1/3 1/3 1/3<br />
Changing the Time Indication<br />
You can change the time information in the on-screen bar and the<br />
display window on the <strong>center</strong> unit.<br />
TA/NEWS/INFO<br />
DIGEST TOP MENU MENU<br />
( PTY PTY SEARCH PTY9<br />
CHOICE<br />
ENTER<br />
ON SCREEN<br />
RETURN<br />
DISPLAY<br />
1 Press ON SCREEN twice.<br />
The on-screen bar appears on the TV.<br />
& During playback or while<br />
stopped<br />
2 Press cursor 3 (or 2) to move to TIME .<br />
3 Press ENTER.<br />
• Each time you press the button, the time indication changes as<br />
follows:<br />
TOTAL ] T. (total) REM ] TIME ] REM ]<br />
(back to the beginning)<br />
TOTAL : Elapsed time of the disc<br />
T. REM : Remaining time of the disc<br />
TIME : Elapsed playing time of the current chapter/track<br />
REM : Remaining time of the current chapter/track<br />
To turn off the on-screen bar<br />
Press ON SCREEN.<br />
Notes:<br />
• The time indication in the on-screen bar changes as follows:<br />
EX. :<br />
TOTAL 1:25:58 ] T.REM 0:45:41 ] TIME 0:25:58 ]<br />
REM 0:18:14 ] (back to the beginning)<br />
The indication on the display also changes.<br />
• While playing VCD, SVCD, or CD, the indication of the hour digit<br />
does not appear.<br />
To turn off the on-screen bar<br />
Press ON SCREEN.<br />
Note:<br />
• See the pages for the detail of each function.<br />
36
DVD Player Operations<br />
Locating a Desired Scene from<br />
the Disc Menu<br />
Using the disc menu, you can start playing a title, chapter, or track<br />
you specify.<br />
If the on-screen bar is shown on the TV, press ON SCREEN<br />
repeatedly to turn off the on-screen bar.<br />
7 From the VCD/SVCD menu with PBC<br />
VCD or SVCD recorded with PBC has its own menus such as a list<br />
of the tracks. (After loading such a disc, “PBC” appears on the<br />
display.) You can locate the specific track by using the menu (see<br />
also page 34).<br />
• Before using the remote <strong>control</strong>, press DVD to change the<br />
remote <strong>control</strong> operation mode.<br />
7 From the DVD menu<br />
DVD VIDEO generally have their own menus which show the disc<br />
contents. These menus contain various items such as titles of<br />
movies, names of songs, or artist information, and display them on<br />
the TV screen. You can locate a desired scene by using these menus.<br />
TA/NEWS/INFO<br />
DIGEST TOP MENU MENU<br />
( PTY PTY SEARCH PTY9<br />
CHOICE<br />
ENTER<br />
ON SCREEN<br />
RETURN<br />
DISPLAY<br />
& When DVD VIDEO is<br />
loaded<br />
TV/VIDEO REW/( TUNING 9/FF<br />
REPEAT SLEEP FM MODE STROBE<br />
TV/STB CH<br />
SOUND EFFECT CENTER<br />
1 2 3<br />
ANALOG<br />
/DIGITAL TEST<br />
REAR·L<br />
INPUT 4 5 6<br />
AUDIO SURR ON/OFF REAR·R<br />
7 8 9<br />
SUBTITLE SURR MODE – SUBWOOFER +<br />
10/0 +10 VFP<br />
100+ TV RETURN<br />
PROGRESSIVE<br />
TA/NEWS/INFO<br />
DIGEST TOP MENU MENU<br />
( PTY PTY SEARCH PTY9<br />
CHOICE<br />
ENTER<br />
& When the menu appears on<br />
the TV during playback<br />
with PBC<br />
1 Press TOP MENU or MENU.<br />
The DVD menu appears on the TV. (The menu usually appears<br />
on the TV automatically after loading DVD VIDEO.)<br />
Ex. :<br />
1 2 3<br />
ON SCREEN<br />
RETURN<br />
DISPLAY<br />
Press number buttons (1–10, +10) to select the<br />
number of the desired item.<br />
The unit starts playback from the selected item.<br />
Ex. : To select 3, press 3.<br />
To select 11, press +10, then 1.<br />
DVD VIDEO normally has a “title” menu when it contains more<br />
than one title. In this case, press TOP MENU to show the title<br />
menu.<br />
Some DVD VIDEO may also have a different menu which is<br />
shown by pressing the MENU button.<br />
See the <strong>instructions</strong> of each DVD VIDEO for its particular<br />
menu.<br />
2 Use cursor 5/∞/3/2 to select a desired item,<br />
then press ENTER.<br />
The unit starts playback of the selected item.<br />
• With some discs, you can also select items by entering the<br />
corresponding number using number buttons.<br />
Ex. :<br />
To return to the menu<br />
Press RETURN.<br />
1 2 3<br />
When “NEXT” or “PREVIOUS” is shown on the TV screen:<br />
To go to the next page, press ¢.<br />
To return to the previous page, press 4.<br />
To play back PBC-compatible VCD/SVCD without PBC<br />
Start playback by pressing the number buttons while playback is<br />
stopped.<br />
The elapsed playing time appears on the display instead of “PBC.”<br />
To restore PBC<br />
Press TOP MENU or MENU.<br />
“PBC” appears again on the display.<br />
About indication on the display while playing back a VCD/SVCD<br />
While you are playing back a VCD/SVCD recorded with PBC, playback information appears on the display as follows:<br />
Ex. : When VCD is played back using PBC<br />
Ex. : When VCD is played back without using PBC<br />
DIGITAL AUTO<br />
DSP<br />
DIGITAL AUTO<br />
DSP<br />
L R<br />
SUBWFR<br />
SPK.<br />
VOLUME<br />
L R<br />
SUBWFR<br />
SPK.<br />
VOLUME<br />
Track number<br />
Track number<br />
Elapsed playing time<br />
37
1/3<br />
1<br />
3/3<br />
3<br />
2/3<br />
2<br />
VD Player Operations<br />
Selecting a View Angle—ANGLE<br />
While playing back DVD VIDEO containing multi-view angles, you<br />
can enjoy the same scene in different angles.<br />
The icon appears at the beginning of playback when the current<br />
scene has multi-view angles.<br />
7 Selecting a view angle<br />
3 Press cursor ∞ (or 5) repeatedly to select the<br />
desired view angle.<br />
• Each time you press the button, the angle of the scene<br />
changes.<br />
4 Press ENTER.<br />
The pop-up window goes off.<br />
SUBTITLE SURR MODE – SUBWOOFER +<br />
10/0 +10 VFP<br />
100+ TV RETURN<br />
DIMMER<br />
ANGLE<br />
MUTING<br />
ZOOM<br />
+ +<br />
TV VOL<br />
–<br />
TA/NEWS/INFO<br />
PROGRESSIVE<br />
VOLUME<br />
–<br />
& During playback<br />
To turn off the on-screen bar<br />
Press ON SCREEN.<br />
1 Press ANGLE.<br />
The following pop-up window appears on the TV.<br />
Ex. : The first view angle is selected out of 3 view angles<br />
recorded.<br />
1/3<br />
1<br />
1/3<br />
2 Press ANGLE repeatedly to select the desired<br />
view angle.<br />
• Each time you press the button, the angle of the scene<br />
changes.<br />
Ex.: 1/3 ] 2/3 ] 3/3 ] (back to the beginning)<br />
1<br />
7 Showing all view angles on the TV<br />
ANGLE<br />
ZOOM<br />
100+ TV RETURN<br />
PROGRESSIVE<br />
+<br />
–<br />
+<br />
–<br />
TA/NEWS/INFO<br />
DIGEST TOP MENU MENU<br />
( PTY PTY SEARCH PTY9<br />
CHOICE<br />
ENTER<br />
ON SCREEN<br />
DIMMER<br />
MUTING<br />
TV VOL<br />
VOLUME<br />
RETURN<br />
DISPLAY<br />
& During playback<br />
1 Press and hold ANGLE for a few seconds.<br />
Up to 9 pictures of the different camera angles recorded on a<br />
disc appear on the TV screen.<br />
Ex. : When 3 view angles are recorded.<br />
Angle list<br />
The pop-up window goes off if no operation is done for about<br />
5 seconds.<br />
Using the on-screen bar:<br />
1 Press ON SCREEN repeatedly until the on-screen<br />
bar with pull-down menu appears on the TV.<br />
2 Press cursor 3 (or 2) repeatedly to move to<br />
in the pull-down menu, then press<br />
ENTER.<br />
The following pop-up window appears under the pull-down<br />
menu.<br />
Ex. : The first view angle is selected out of 3 view angles<br />
recorded.<br />
DVD-VIDEO 8.5Mbps TITLE 14 CHAP 23 TOTAL 1:25:58<br />
TIME<br />
OFF CHAP. 1/3 1/3 1/3<br />
1<br />
Selected picture<br />
2 Press cursor 5/∞/3/2 repeatedly to move to<br />
the desired view.<br />
3 Press ENTER.<br />
The angle list goes off, and playback starts at the selected view<br />
angle.<br />
Notes:<br />
• While the angle list is shown on the TV, you cannot listen to the<br />
sound.<br />
• If “ ” appears on the TV, the current scene does not contain<br />
multi-view angles.<br />
38
DVD Player Operations<br />
Changing the Languages—SUBTITLE and<br />
AUDIO<br />
While playing back DVD VIDEO or SVCD containing subtitles in<br />
different languages, you can select the subtitle language to be<br />
displayed on the TV.<br />
The icon appears at the beginning of playback when the current<br />
scene has plural subtitles.<br />
When DVD VIDEO contains audio languages (soundtrack), you can<br />
select the language (soundtrack) to listen to.<br />
The icon appears at the beginning of playback when the current<br />
scene has plural audio languages.<br />
• You can also select the audio channel(s) of VCD or SVCD.<br />
7 Selecting the subtitle language<br />
INPUT<br />
5 6<br />
+ +<br />
& During playback<br />
1 Press SUBTITLE.<br />
The following pop-up window appears on the TV.<br />
Ex. : “ENGLISH” is selected among 3 subtitle languages<br />
recorded.<br />
2 Press SUBTITLE repeatedly to select the desired<br />
subtitle language.<br />
• Each time you press the button, the subtitle language changes.<br />
The pop-up window goes off if no operation is done for about<br />
5 seconds.<br />
Using the on-screen bar:<br />
4<br />
AUDIO SURR ON/OFF<br />
7<br />
8 9<br />
SUBTITLE SURR MODE – SUBWOOFER +<br />
10/0 +10 VFP<br />
ANGLE<br />
DIMMER<br />
1/3<br />
ENGLISH<br />
REAR·R<br />
100+ TV RETURN<br />
PROGRESSIVE<br />
1/3<br />
ENGLISH<br />
1 Press ON SCREEN repeatedly until the on-screen<br />
bar with pull-down menu appears on the TV.<br />
2 Press cursor 3 (or 2) repeatedly to move to<br />
in the pull-down menu, then press<br />
ENTER.<br />
The following pop-up window appears under the pull-down<br />
menu.<br />
Ex. : “ENGLISH” is selected among 3 subtitle languages<br />
recorded.<br />
DVD-VIDEO 8.5Mbps TITLE 14 CHAP 23 TOTAL 1:25:58<br />
TIME<br />
OFF CHAP. 1/3 1/3 1/3<br />
ENGLISH<br />
3 Press cursor ∞ (or 5) repeatedly to select the<br />
desired subtitle language.<br />
• Each time you press the button, the subtitle language changes.<br />
4 Press ENTER.<br />
The pop-up window goes off.<br />
To turn off the on-screen bar<br />
Press ON SCREEN.<br />
Notes:<br />
• For DVD VIDEO: Some subtitle languages are abbreviated in the<br />
pop-up window. See “Language code list” on page 54.<br />
• For SVCD: SVCD can contain up to four subtitles. Pressing<br />
SUBTITLE changes the subtitles regardless of whether the<br />
subtitles are recorded or not. (Subtitles will not change if no subtitle<br />
is recorded.)<br />
• If “ ” appears on the TV, the current scene does not contain<br />
plural subtitles.<br />
7 Selecting the audio language<br />
/DIGITAL<br />
INPUT<br />
TEST<br />
5 6<br />
SUBTITLE SURR MODE – SUBWOOFER +<br />
10/0 +10 VFP<br />
100+ TV RETURN<br />
& During playback<br />
1 Press AUDIO.<br />
The following pop-up window appears on the TV.<br />
Ex. : “ENGLISH” is selected among 3 audio languages<br />
recorded.<br />
2 Press AUDIO repeatedly to select the desired<br />
audio language.<br />
• Each time you press the button, the audio language changes.<br />
The pop-up window goes off if no operation is done for about<br />
5 seconds.<br />
Using the on-screen bar:<br />
4<br />
AUDIO SURR ON/OFF<br />
7<br />
DIMMER<br />
REAR·L<br />
REAR·R<br />
8 9<br />
PROGRESSIVE<br />
1 Press ON SCREEN repeatedly until the on-screen<br />
bar with pull-down menu appears on the TV.<br />
2 Press cursor 3 (or 2) repeatedly to move to<br />
in the pull-down menu, then press<br />
ENTER.<br />
The following pop-up window appears under the pull-down<br />
menu.<br />
Ex. : “ENGLISH” is selected among 3 audio languages<br />
recorded.<br />
DVD-VIDEO 8.5Mbps TITLE 14 CHAP 23 TOTAL 1:25:58<br />
TIME<br />
1/3<br />
ENGLISH<br />
1/3<br />
ENGLISH<br />
OFF CHAP. 1/3 1/3 1/3<br />
ENGLISH<br />
39
VD Player Operations<br />
3 Press cursor ∞ (or 5) repeatedly to select the<br />
desired audio language.<br />
• Each time you press the button, the audio language changes.<br />
4 Press ENTER.<br />
The pop-up window goes off.<br />
To turn off the on-screen bar<br />
Press ON SCREEN.<br />
Notes:<br />
• Some audio languages are abbreviated in the pop-up window. See<br />
“Language code list” on page 54.<br />
• If “ ” appears on the TV, the current scene does not contain<br />
plural audio languages.<br />
7 Selecting the audio channel<br />
When playing back some Karaoke VCDs or SVCDs, you can enjoy<br />
Karaoke by selecting the audio channel to play.<br />
SOUND EFFECT CENTER<br />
1 2 3<br />
ANALOG<br />
/DIGITAL TEST<br />
REAR·L<br />
INPUT 4 5 6<br />
AUDIO SURR ON/OFF REAR·R<br />
7 8 9<br />
SUBTITLE SURR MODE – SUBWOOFER +<br />
10/0 +10<br />
100+<br />
VFP<br />
TV RETURN<br />
ANGLE<br />
ZOOM<br />
+<br />
–<br />
& During playback<br />
1 Press AUDIO.<br />
The following pop-up window appears on the TV.<br />
Ex. : “ST” (stereo) is selected.<br />
+<br />
–<br />
TA/NEWS/INFO<br />
DIGEST TOP MENU MENU<br />
( PTY PTY SEARCH PTY9<br />
CHOICE<br />
ENTER<br />
ON SCREEN<br />
DIMMER<br />
MUTING<br />
ST<br />
ST<br />
TV VOL<br />
PROGRESSIVE<br />
VOLUME<br />
RETURN<br />
DISPLAY<br />
ST<br />
ST<br />
2 Press AUDIO repeatedly to select the desired<br />
audio channel.<br />
• Each time you press the button, the audio channel changes.<br />
For VCD :<br />
Ex. :<br />
ST ] L ] R ] (back to the beginning)<br />
ST : To listen to normal stereo playback.<br />
L : To listen to the L (left) audio channel.<br />
R : To listen to the R (right) audio channel.<br />
For SVCD :<br />
Ex. :<br />
ST 1 ] ST 2 ] L 1 ] R 1 ] L 2 ] R 2 ]<br />
(back to the beginning)<br />
ST 1/ST 2 : To listen to normal stereo playback of ST 1 or<br />
ST 2 channel.<br />
L 1/L 2 : To listen to the L (left) 1 or 2 audio channel.<br />
R 1/R 2 : To listen to the R (right) 1 or 2 audio channel.<br />
The pop-up window goes off if no operation is done for about<br />
5 seconds.<br />
Using the on-screen bar:<br />
1 Press ON SCREEN repeatedly until the on-screen<br />
bar with pull-down menu appears on the TV.<br />
2 Press cursor 3 (or 2) repeatedly to move to<br />
in the pull-down menu, then press<br />
ENTER.<br />
The following pop-up window appears under the pull-down<br />
menu.<br />
Ex. : “ST” (stereo) is selected.<br />
VCD TRACK 4 TIME 25:58<br />
TIME<br />
OFF<br />
3 Press cursor ∞ (or 5) repeatedly to select the<br />
desired audio channel(s).<br />
• Each time you press the button, the audio channels change.<br />
4 Press ENTER.<br />
The pop-up window goes off.<br />
ST PROG.<br />
ST<br />
To turn off the on-screen bar<br />
Press ON SCREEN.<br />
40
DVD Player Operations<br />
Playing from a Specified Position on a Disc<br />
You can start playing a title, chapter, or track you specify.<br />
You can also play a disc from the specified time.<br />
7 Locating a desired chapter—Chapter Search<br />
When playing back DVD VIDEO, you can search for the chapter<br />
number to be played.<br />
• Before using the remote <strong>control</strong>, press DVD to change the<br />
remote <strong>control</strong> operation mode.<br />
TV/STB CH<br />
SOUND EFFECT CENTER<br />
1 2 3<br />
ANALOG<br />
/DIGITAL TEST<br />
REAR·L<br />
INPUT 4 5 6<br />
AUDIO SURR ON/OFF REAR·R<br />
7 8 9<br />
SUBTITLE SURR MODE – SUBWOOFER +<br />
10/0 +10 VFP<br />
ANGLE<br />
ZOOM<br />
100+ TV RETURN<br />
PROGRESSIVE<br />
+<br />
–<br />
& During playback<br />
1 Press ON SCREEN repeatedly until the on-screen<br />
bar with pull-down menu appears on the TV.<br />
2 Press cursor 3 (or 2) repeatedly to move to<br />
CHAP. in the pull-down menu, then press<br />
ENTER.<br />
The following pop-up window appears under the pull-down<br />
menu.<br />
3 Press the number buttons (0–9) to enter the<br />
desired chapter number.<br />
Ex. : To select chapter number 8, press 8.<br />
To select chapter number 10, press 1 then 0.<br />
To select chapter number 37, press 3 then 7.<br />
• To correct a misentry<br />
Repeat step 3 until the desired number appears in the pop-up<br />
window.<br />
4 Press ENTER.<br />
The unit starts playback from the selected chapter.<br />
To turn off the on-screen bar<br />
Press ON SCREEN.<br />
Notes:<br />
• The 10/0 button works only as “0” in this function.<br />
• The +10 button is not used in this function.<br />
• You can select up to the 99th chapter.<br />
+<br />
–<br />
TA/NEWS/INFO<br />
DIGEST TOP MENU MENU<br />
( PTY PTY SEARCH PTY9<br />
CHOICE<br />
ENTER<br />
ON SCREEN<br />
DIMMER<br />
MUTING<br />
TV VOL<br />
VOLUME<br />
RETURN<br />
DISPLAY<br />
DVD-VIDEO 8.5Mbps TITLE 14 CHAP 23 TOTAL 1:25:58<br />
TIME OFF CHAP. 1/3 1/3 1/3<br />
CHAPTER _<br />
7 Locating a desired position—Time Search<br />
You can start playing at your desired position by specifying the<br />
elapsed playing time from the beginning of the current title up to<br />
“9:59:59” (for DVD VIDEO), or from the beginning of the disc up<br />
to “99:59” (for VCD/SVCD/CD).<br />
• Before using the remote <strong>control</strong>, press DVD to change the<br />
remote <strong>control</strong> operation mode.<br />
TV/STB CH<br />
SOUND EFFECT CENTER<br />
1 2 3<br />
ANALOG<br />
/DIGITAL TEST<br />
REAR·L<br />
INPUT 4 5 6<br />
AUDIO SURR ON/OFF REAR·R<br />
7 8 9<br />
SUBTITLE SURR MODE – SUBWOOFER +<br />
10/0 +10 VFP<br />
ANGLE<br />
ZOOM<br />
& For DVD VIDEO:<br />
During playback<br />
For VCD/SVCD:<br />
While stopped or during<br />
playback without PBC<br />
For CD:<br />
While stopped or during<br />
playback<br />
1 Press ON SCREEN repeatedly until the on-screen<br />
bar with pull-down menu appears on the TV.<br />
2 Press cursor 3 (or 2) repeatedly to move to<br />
in the pull-down menu, then press ENTER.<br />
The following pop-up window appears under the pull-down<br />
menu.<br />
DVD-VIDEO 8.5Mbps TITLE 14 CHAP 23 TOTAL 1:25:58<br />
TIME<br />
+<br />
–<br />
OFF CHAP. 1/3 1/3 1/3<br />
TIME _ : _ _ : _ _<br />
3 Use the number buttons (0–9) to enter the time.<br />
Ex. : To play back from a point of 1 (hours): 02 (minutes): 49<br />
(seconds) from the beginning<br />
Press 1<br />
Press 0<br />
Press 2<br />
Press 4<br />
Press 9<br />
100+ TV RETURN<br />
PROGRESSIVE<br />
• To correct a misentry<br />
Press cursor 2 repeatedly until the wrong number is erased,<br />
then press the number buttons to enter the correct number.<br />
4 Press ENTER.<br />
The unit starts playback from the specified time.<br />
+<br />
–<br />
TA/NEWS/INFO<br />
DIGEST TOP MENU MENU<br />
( PTY PTY SEARCH PTY9<br />
CHOICE<br />
ENTER<br />
ON SCREEN<br />
DIMMER<br />
MUTING<br />
TV VOL<br />
VOLUME<br />
RETURN<br />
DISPLAY<br />
41
VD Player Operations<br />
To turn off the on-screen bar<br />
Press ON SCREEN.<br />
Notes:<br />
• The 10/0 button works only as “0” in this function.<br />
• The +10 button is not used in this function.<br />
• You can specify the time in hours/minutes/seconds for DVD VIDEO,<br />
and in minutes/seconds for VCD/SVCD/CD.<br />
2 Press cursor 5/∞/3/2 to move to the desired<br />
scene.<br />
• If there are more than 9 scenes, the digest screen will have<br />
more than one page.<br />
To show other pages of the digest screen<br />
To display the previous page, select the left top scene,<br />
then press cursor 2.<br />
7 Locating a desired scene—DIGEST<br />
The unit can display the opening scenes of each title or chapter on a<br />
DVD VIDEO or each track of a VCD/SVCD.<br />
You can select a desired title, chapter, or track from the opening<br />
scenes shown on the TV screen.<br />
ZOOM<br />
– –<br />
( PTY PTY SEARCH PTY9<br />
CHOICE<br />
ENTER<br />
ON SCREEN<br />
MUTING<br />
TV VOL<br />
VOLUME<br />
TA/NEWS/INFO<br />
DIGEST TOP MENU MENU<br />
RETURN<br />
DISPLAY<br />
1 Press DIGEST.<br />
Up to 9 opening scenes are displayed.<br />
Selected scene<br />
& For DVD VIDEO:<br />
While stopped or during<br />
playback<br />
For VCD/SVCD:<br />
While stopped or during<br />
playback without PBC<br />
To display the next page, select the right bottom scene,<br />
then press cursor 3.<br />
OR<br />
Press ¢ to display the next page.<br />
Press 4 to display the previous page.<br />
3 Press ENTER.<br />
The unit starts playback from the selected scene.<br />
Note:<br />
• For some discs, it may take some time before all the scenes appear<br />
on the TV screen.<br />
• While DVD VIDEO is stopped :<br />
The opening scenes of each title appear on the TV screen.<br />
• During DVD VIDEO playback :<br />
The opening scenes of each chapter in the current title appear<br />
on the TV screen.<br />
• When VCD or SVCD is loaded :<br />
The opening scenes of each track appear on the TV screen.<br />
42
DVD Player Operations<br />
Special Picture Playback<br />
This unit provides special picture playback functions including<br />
frame-by-frame, strobe, slow-motion, and zoom.<br />
7 Frame-by-frame playback<br />
• Before using the remote <strong>control</strong>, press DVD to change the<br />
remote <strong>control</strong> operation mode.<br />
TV/STB CH<br />
& During playback<br />
Press 8 (STROBE) repeatedly.<br />
• Each time you press the button, the still picture advances to the<br />
next frame.<br />
To return to normal playback<br />
Press 3.<br />
Note:<br />
• You can also perform the above operation using 8 on the front panel.<br />
7 Showing continuous still pictures—STROBE<br />
• Before using the remote <strong>control</strong>, press DVD to change the<br />
remote <strong>control</strong> operation mode.<br />
43<br />
TV/VIDEO REW/( TUNING 9/FF<br />
REPEAT SLEEP FM MODE STROBE<br />
TV/VIDEO REW/( TUNING 9/FF<br />
REPEAT SLEEP FM MODE STROBE<br />
1<br />
TV/STB CH<br />
SOUND EFFECT CENTER<br />
2 3<br />
& During playback<br />
1 Press STROBE (8) at the point you want to view<br />
as continuous pictures.<br />
Playback pauses.<br />
2 Press and hold STROBE (8) for a few seconds.<br />
The same 9 frames (still pictures) appear on the TV screen.<br />
You can advance the frames one by one in the following step.<br />
3 Press STROBE (8) once.<br />
The picture in the middle on the top row shows an advanced<br />
frame from the one on the left.<br />
Advanced frame<br />
• Pressing the button repeatedly advances the frames one by one.<br />
• Pressing 3 instead of STROBE (8) advances each frame at<br />
normal playback speed with a time delay over the all 9 frames.<br />
(The sound is muted.)<br />
To return to the normal screen<br />
Press and hold STROBE (8) for a few seconds.<br />
Notes:<br />
• If you press and hold STROBE (8) for a few seconds during<br />
playback, 9 still pictures also appear but they advance in normal<br />
playback speed with a time delay. (The sound is muted.)<br />
• You can also perform the above operation using 8 (STROBE) on the<br />
front panel.<br />
7 Playing back in slow-motion<br />
• Before using the remote <strong>control</strong>, press DVD to change the<br />
remote <strong>control</strong> operation mode.<br />
TV DIRECT<br />
TV/VIDEO<br />
STB<br />
& During playback<br />
1 Press 8 (STROBE) at the point where you want<br />
to start playback in slow-motion.<br />
Playback pauses.<br />
2 Press and hold ¢ or 4.<br />
To play back in forward slow-motion, press and hold ¢.<br />
To play back in reverse slow-motion (for DVD VIDEO only),<br />
press and hold 4.<br />
• Each time you press and hold the button, the playback speed<br />
changes as follows:<br />
Forward:<br />
1/32 ] 1/16 ] 1/8 ] 1/4<br />
] 1/2<br />
Reverse (for DVD VIDEO only):<br />
1/32 ] 1/16 ] 1/8 ] 1/4<br />
] 1/2<br />
VCR<br />
DVD<br />
REW/( TUNING 9/FF<br />
REPEAT SLEEP FM MODE STROBE<br />
TV/STB CH<br />
To pause slow-motion playback<br />
Press 8 (STROBE).<br />
To return to normal playback<br />
Press 3.<br />
Note:<br />
• You cannot listen to the sound during slow-motion playback.<br />
7 Zooming in—ZOOM<br />
ANGLE<br />
ZOOM<br />
DIMMER<br />
MUTING<br />
+<br />
–<br />
TV VOL<br />
PROGRESSIVE<br />
+<br />
–<br />
VOLUME<br />
TA/NEWS/INFO<br />
DIGEST TOP MENU MENU<br />
( PTY PTY SEARCH PTY9<br />
& During playback or while<br />
paused<br />
Press ZOOM.<br />
• Each time you press the button, the magnification changes as<br />
follows:<br />
x 2 ] x 4 ] x 8 ] x 16 ] x 32 ] x 64 ] x 128 ]<br />
x 256 ] x 512 ] x 1024<br />
Ex. : When x4 zoom is selected<br />
ZOOM x4
VD Player Operations<br />
To move the zoomed-in position<br />
Press cursor 5/∞/3/2.<br />
ZOOM x4<br />
To adjust the appearance of the picture<br />
When selecting “USER1” or “USER2,” you can adjust the<br />
appearance of picture.<br />
1 Press VFP, then press cursor 3 (or 2) repeatedly<br />
to select “USER1” or “USER2.”<br />
To return to normal playback<br />
Press ENTER.<br />
Note:<br />
• While being zoomed in, the picture may look coarse.<br />
7 Changing the VFP setting—VFP<br />
The VFP (Video Fine Processor) function enables you to<br />
adjust the picture based on the picture tone, or personal preference.<br />
• There is a time limit in doing the following steps. If the setting is<br />
canceled before you finish, start from step 1 again.<br />
• Before using the remote <strong>control</strong>, press DVD to change the<br />
remote <strong>control</strong> operation mode.<br />
SUBTITLE SURR MODE – SUBWOOFER +<br />
10/0 +10 VFP<br />
100+ TV RETURN<br />
ANGLE<br />
ZOOM<br />
+<br />
–<br />
& During playback<br />
1 Press VFP.<br />
The current VFP setting screen appears on the TV.<br />
+<br />
–<br />
TA/NEWS/INFO<br />
DIGEST TOP MENU MENU<br />
( PTY PTY SEARCH PTY9<br />
CHOICE<br />
ENTER<br />
ON SCREEN<br />
DIMMER<br />
MUTING<br />
TV VOL<br />
PROGRESSIVE<br />
VOLUME<br />
RETURN<br />
DISPLAY<br />
USER1<br />
GAMMA +0<br />
BRIGHTNESS +0<br />
CONTRAST +0<br />
SATURATION +0<br />
TINT +0<br />
SHARPNESS +3<br />
Y DELAY +0<br />
2 Press cursor ∞ (or 5) repeatedly to select a<br />
parameter you want to adjust.<br />
Adjust gradually to show preferable appearance by confirming<br />
the picture.<br />
GAMMA : Controls the brightness of neutral tints<br />
while maintaining the brightness of dark<br />
and bright portions (–4 to +4).<br />
BRIGHTNESS : Controls the brightness of the screen<br />
(–16 to +16).<br />
CONTRAST : Controls the contrast of the screen<br />
(–16 to +16).<br />
SATURATION : Controls the color depth of the screen<br />
(–16 to +16).<br />
TINT : Controls the tint of the screen<br />
(–16 to +16).<br />
SHARPNESS : Controls the sharpness of the screen<br />
(+0 to +3).<br />
Y DELAY : Controls the color gap of the screen<br />
(–2 to +2).<br />
3 Press ENTER.<br />
The VFP setting screen disappears and the following pop-up<br />
window appears on the TV.<br />
NORMAL<br />
GAMMA +0<br />
BRIGHTNESS +0<br />
CONTRAST +0<br />
SATURATION +0<br />
TINT +0<br />
SHARPNESS +3<br />
Y DELAY +0<br />
Ex.: When “NORMAL” is selected<br />
2 Press cursor 3 (or 2) repeatedly to select the<br />
VFP mode.<br />
• Each time you press the button, the VFP mode changes as<br />
follows.<br />
NORMAL “ CINEMA “ USER1 “ USER2 “<br />
(back to the beginning)<br />
NORMAL : Normally select this.<br />
CINEMA : Suitable for a movie source.<br />
USER1 and USER2 : You can adjust parameters that affect<br />
the appearance of picture and store the<br />
settings (see the right).<br />
To turn off the VFP setting screen<br />
Press VFP.<br />
GAMMA<br />
Ex. : When “GAMMA” is selected<br />
4 Press cursor ∞ (or 5) repeatedly to change the<br />
setting, then press ENTER.<br />
The current VFP setting screen appears again.<br />
5 Repeat steps 2 to 4 to adjust other parameters.<br />
To turn off the VFP setting screen<br />
Press VFP.<br />
+0<br />
GAMMA<br />
+0<br />
To activate your setting<br />
Press VFP, then press cursor 3 (or 2) repeatedly to select<br />
“USER1” or “USER2.”<br />
Note:<br />
• The VFP setting screen disappears if no operations are done for<br />
more than about 10 seconds.<br />
44
DVD Player Operations<br />
Program Playback and Random Playback<br />
You can play tracks on VCD, SVCD or CD in the desired order or in<br />
the random order.<br />
• You cannot use Resume play for the program or random playback.<br />
7 Playing back in the desired order<br />
You can play up to 99 tracks in the desired order.<br />
• You may program the same tracks more than once.<br />
• Before using the remote <strong>control</strong>, press DVD to change the<br />
remote <strong>control</strong> operation mode.<br />
TV/VIDEO REW/( TUNING 9/FF<br />
REPEAT SLEEP FM MODE STROBE<br />
SOUND<br />
ANALOG<br />
/DIGITAL<br />
INPUT<br />
EFFECT<br />
1<br />
TEST<br />
4<br />
AUDIO SURR ON/OFF<br />
7<br />
2 3<br />
5 6<br />
8 9<br />
SUBTITLE SURR MODE SUBWOOFER<br />
10/0 +10 VFP<br />
100+ TV RETURN<br />
PROGRESSIVE<br />
& While stopped<br />
1 Press ON SCREEN repeatedly until the on-screen<br />
bar with pull-down menu appears on the TV.<br />
2 Press cursor 3 (or 2) repeatedly to move to<br />
PROG. in the on-screen bar, then press ENTER.<br />
The program screen appears on the TV and the PROGRAM<br />
indicator lights up on the display.<br />
• 10 steps appear at a time on the program screen.<br />
PROGRAM<br />
No.<br />
1<br />
2<br />
3<br />
4<br />
5<br />
6<br />
7<br />
8<br />
9<br />
10<br />
Total Program Time 00:00:00<br />
3 Press the number buttons (1–10, +10) to enter a<br />
track number you want to program.<br />
Ex. : To select the track number 3, press 3.<br />
To select the track number 14, press +10 then 4.<br />
To select the track number 40, press +10, +10, +10 then 10.<br />
• When you enter a track number that does not exist on the<br />
loaded disc, your entry is ignored.<br />
• The total program time is shown at the top of the program<br />
screen on the display.<br />
PROGRAM<br />
TV/STB CH<br />
CENTER<br />
REAR·L<br />
REAR·R<br />
No.<br />
1<br />
2<br />
3<br />
4<br />
5<br />
6<br />
7<br />
8<br />
9<br />
10<br />
Total Program Time 00:04:14<br />
4 Repeat step 3 to program the next steps.<br />
• Each time you enter a track number in the step at the bottom<br />
of the program screen, the next steps appear.<br />
3<br />
TA/NEWS/INFO<br />
DIGEST TOP MENU MENU<br />
( PTY PTY SEARCH PTY9<br />
CHOICE<br />
ENTER<br />
ON SCREEN<br />
RETURN<br />
DISPLAY<br />
5 Press 3.<br />
Playback starts in the programmed order.<br />
To stop the program playback<br />
Press 7.<br />
• When VCD or SVCD is played back, the program screen appears<br />
again.<br />
• To edit your program, repeat steps 3 and 4.<br />
To cancel the program playback mode<br />
Clear the program you made as follows:<br />
1 Press 7 to stop playback.<br />
2 Press ON SCREEN to turn on the on-screen bar.<br />
3 Press 7.<br />
• You can also clear the program by ejecting the disc or turning off<br />
the unit.<br />
To turn off the on-screen bar<br />
Press ON SCREEN repeatedly.<br />
Note:<br />
• When all the programmed tracks have been played, the program<br />
playback stops.<br />
7 Playing back tracks in random order<br />
TA/NEWS/INFO<br />
DIGEST TOP MENU MENU<br />
( PTY PTY SEARCH PTY9<br />
CHOICE<br />
ENTER<br />
ON SCREEN<br />
RETURN<br />
DISPLAY<br />
& While stopped<br />
1 Press ON SCREEN repeatedly until the on-screen<br />
bar with pull-down menu appears on the TV.<br />
2 Press cursor 3 (or 2) repeatedly to move to<br />
RND. in the on-screen bar, then press ENTER.<br />
The RANDOM indicator lights up on the display and playback<br />
starts in random order.<br />
To stop the random playback<br />
Press 7.<br />
The random playback is canceled.<br />
• When all tracks have been played once, the random playback is<br />
also canceled.<br />
Notes:<br />
• The same track will not be played more than once during the<br />
random playback.<br />
• During the random playback, you can skip back to the beginning of<br />
the current track by pressing 4, but cannot skip back to the tracks<br />
that have been played.<br />
• During the random playback, pressing ENTER with RND. selected<br />
in the on-screen bar cancels the random playback and continues<br />
playback in the normal order.<br />
To erase a step<br />
Press cursor 5 (or ∞) to move to the desired step, then press 7.<br />
• To program the next steps again, press cursor ∞ repeatedly to<br />
move to the blank step, then repeat step 3.<br />
45
VD Player Operations<br />
Repeat Playback<br />
You can repeat playback of the current title or chapter (for DVD<br />
VIDEO) or track (for VCD/SVCD/CD).<br />
You can also repeat playback of a desired portion.<br />
7 Repeating a current title, chapter, or all<br />
tracks<br />
TV/VIDEO REW/( TUNING 9/FF<br />
REPEAT SLEEP FM MODE STROBE<br />
SOUND EFFECT CENTER<br />
ANALOG<br />
1<br />
TV/STB CH<br />
2 3<br />
TA/NEWS/INFO<br />
DIGEST TOP MENU MENU<br />
( PTY PTY SEARCH PTY9<br />
CHOICE<br />
ENTER<br />
ON SCREEN<br />
RETURN<br />
DISPLAY<br />
& For DVD VIDEO:<br />
During playback<br />
For VCD/SVCD:<br />
During playback or while<br />
stopped without PBC<br />
For CD:<br />
During playback or while<br />
stopped<br />
1 Press ON SCREEN repeatedly until the on-screen<br />
bar with pull-down menu appears on the TV.<br />
2 Press cursor 3 (or 2) repeatedly to move to<br />
in the on-screen bar, then press ENTER.<br />
The following pop-up window appears under the on-screen bar.<br />
DVD-VIDEO 8.5Mbps TITLE 14 CHAP 23 TOTAL1:25:58<br />
TIME<br />
OFF<br />
CHAP.<br />
1/3 1/3 1/3<br />
3 Press cursor ∞ (or 5) repeatedly to select the<br />
repeat mode, then press ENTER.<br />
• Each time you press cursor ∞ (or 5), the repeat mode changes<br />
as follows:<br />
For DVD VIDEO:<br />
CHAPTER “ TITLE “ A-B “ OFF “<br />
(back to the beginning)<br />
For VCD/SVCD/CD:<br />
TRACK “ ALL “ A-B “ OFF “<br />
(back to the beginning)<br />
CHAPTER : Repeats the current chapter (the REPEAT 1<br />
indicator lights up on the display)<br />
TRACK : Repeats the current track (the REPEAT 1<br />
indicator lights up on the display)<br />
TITLE : Repeats the current title (the REPEAT<br />
indicator lights up on the display)<br />
ALL : Repeats all the tracks on the disc or of the<br />
program (the REPEAT indicator lights up on<br />
the display)<br />
A-B : Repeats a desired portion (see the right<br />
column)<br />
OFF : Select this to cancel the repeat mode<br />
• You can directly change the repeat mode (except REPEAT<br />
A-B) for the current chapter, title, track, or disc by<br />
pressing REPEAT on the remote <strong>control</strong>.<br />
Notes:<br />
• If you select “ALL” during random playback, the all tracks of the disc<br />
are played repeatedly in random order.<br />
• “A-B” cannot be selected during the program and random playback<br />
or while a disc is not played back.<br />
To turn off the on-screen bar<br />
Press ON SCREEN.<br />
To cancel the repeat playback<br />
Select “OFF” in step 3, then press ENTER.<br />
7 Repeating a desired part<br />
You can repeat playback of a desired portion by specifying the<br />
beginning (point A) and the ending (point B).<br />
TA/NEWS/INFO<br />
DIGEST TOP MENU MENU<br />
( PTY PTY SEARCH PTY9<br />
CHOICE<br />
ENTER<br />
ON SCREEN<br />
& During playback<br />
1 Press ON SCREEN repeatedly until the on-screen<br />
bar with pull-down menu appears on the TV.<br />
2 Press cursor 3 (or 2) repeatedly to move to<br />
in the on-screen bar, then press ENTER.<br />
The following pop-up window appears under the on-screen bar.<br />
DVD-VIDEO 8.5Mbps TITLE 14 CHAP 23 TOTAL1:25:58<br />
TIME<br />
CHAP. 1/3 1/3 1/3<br />
OFF<br />
3 Press cursor ∞ (or 5) repeatedly to select “A-B.”<br />
4 Press ENTER at the beginning of the portion you<br />
want to repeat (point A).<br />
The following display appears in the on-screen bar.<br />
The REPEAT A indicator also lights up on the display.<br />
DVD-VIDEO<br />
TIME<br />
5 Press ENTER at the end of the portion you want<br />
to repeat (point B).<br />
A-B repeat playback starts. The selected part of the disc<br />
(between point A and B) is played repeatedly.<br />
During repeat A-B playback, the REPEAT A-B indicator lights<br />
up on the display.<br />
Point A<br />
RETURN<br />
DISPLAY<br />
To turn off the on-screen bar<br />
Press ON SCREEN.<br />
8.5Mbps TITLE 14 CHAP 23 TOTAL 1:25:58<br />
A - CHAP. 1/3 1/3 1/3<br />
To cancel the A-B repeat playback<br />
Select “OFF” in step 3, then press ENTER.<br />
Point B<br />
Note:<br />
• While playing back DVD VIDEO, A-B repeat playback is possible<br />
only within the same title.<br />
46
MP3 Disc Playback<br />
This unit can play back MP3 files on a CD-R or CD-RW. We call such a disc “MP3 disc” in this instruction.<br />
• Before using the remote <strong>control</strong>, press DVD to change the remote <strong>control</strong> operation mode for the MP3 disc operations.<br />
• Turn on your TV and select the correct input mode on the TV.<br />
If “<br />
” appears on the TV when you press a button, the disc cannot accept an operation you have tried to do.<br />
What is MP3?<br />
MP3 is an abbreviation of Motion Picture Experts Group 1 (or<br />
MPEG-1) Audio Layer 3. MP3 is simply a file format with a data<br />
compression. By using MP3 format, one CD-R or CD-RW can<br />
contain about 10 times as many songs as a regular CD can.<br />
Disc structure<br />
On an MP3 disc, each song (material) is recorded as a file. Files<br />
are usually grouped into a folder. Folders can also include other<br />
folders, creating hierarchical folder layers.<br />
This unit simplifies the hierarchical construction of a disc and<br />
manages files and folders by “tracks” and “groups.”<br />
Up to 99 groups<br />
Basic Operations<br />
You can also use the buttons on the front panel if they have the<br />
similar names as those on the remote <strong>control</strong>.<br />
• Before using the remote <strong>control</strong>, press DVD to change the<br />
remote <strong>control</strong> operation mode.<br />
TV DIRECT<br />
TV/VIDEO<br />
STB<br />
1<br />
VCR<br />
DVD<br />
REW/( TUNING 9/FF<br />
REPEAT SLEEP FM MODE STROBE<br />
TV/STB CH<br />
SOUND EFFECT CENTER<br />
2 3<br />
TA/NEWS/INFO<br />
DIGEST TOP MENU MENU<br />
Group 1<br />
Group 2<br />
( PTY PTY SEARCH PTY9<br />
CHOICE<br />
ENTER<br />
Track 1 Track 2<br />
Group 3 Group 4 Group 5<br />
ON SCREEN<br />
RETURN<br />
DISPLAY<br />
This unit can recognize up to 150 tracks per group and up to 99<br />
groups per disc (up to 14,850 tracks in total). Since the unit<br />
ignores the tracks whose numbers are exceeding 150 and the<br />
groups whose numbers are exceeding 99, they cannot be played<br />
back.<br />
• If there are any type of files other than MP3 files in a folder,<br />
those files are also counted in the total file number.<br />
Notes:<br />
• MP3 discs (either CD-R or CD-RW) require a longer readout time<br />
than normal discs. (It depends on the complexity of the folder/file<br />
configuration.)<br />
• When making an MP3 disc, select ISO 9660 Level 1 or Level 2<br />
as the disc format.<br />
• This unit supports “multi-session” discs (up to 5 sessions).<br />
• This unit cannot play “packet write” discs.<br />
• This unit can play MP3 files only with the following file<br />
extensions: “.MP3,” “.Mp3,” “.mP3,” and “.mp3.”<br />
• ID3* tags cannot be shown on the display.<br />
* An MP3 file can contain file information called “ID3 Tag” where<br />
its album name, performer, track title, etc. are recorded. There<br />
are two versions—ID3v1 (ID3 Tag version 1) and ID3v2 (ID3<br />
Tag version 2).<br />
• It is recommended that you make each MP3 file at sampling rate<br />
of 44.1 kHz and at bit rate of 128 kbps. The unit cannot play back<br />
the files made at bit rate of under 64 kbps.<br />
• If both MP3 files and JPEG files are recorded on a disc, set the<br />
MP3/JPEG setting in the PICTURE menu to “MP3.”<br />
(See page 54.)<br />
• Some MP3 discs may not be played back because of their disc<br />
characteristics or recording conditions.<br />
47<br />
Up to 150 tracks<br />
Notes:<br />
• The following functions are not available to MP3 disc playback:<br />
Program playback, random playback, fast-forward/reverse playback,<br />
on-screen bar, and choice menus<br />
• Some tracks on an MP3 disc are skipped and may not be played<br />
back normally.<br />
7 Starting playback<br />
Load an MP3 disc, then press 3.<br />
The unit starts playback. The MP3 CONTROL screen appears on<br />
the TV (see page 48).<br />
DIGITAL AUTO<br />
AUTO SURROUND<br />
L R<br />
SUBWFR<br />
When all tracks in a group have been played, the unit plays tracks in<br />
the next group.<br />
7 Stopping playback temporarily<br />
Press 8.<br />
To start playback again<br />
Press 3.<br />
7 Selecting groups or tracks<br />
To skip groups forward<br />
Press cursor 3.<br />
To skip groups backward<br />
Press cursor 2.<br />
Current track number<br />
SPK.<br />
Current group number<br />
To skip tracks forward<br />
Press ¢ or cursor ∞ as many times as required.<br />
To skip to the beginning of the current track<br />
Press 4 once.<br />
To skip tracks backward<br />
Press 4 or cursor 5 as many times as required.<br />
7 Stopping playback completely<br />
Press 7.<br />
VOLUME<br />
Elapsed playing time<br />
(minutes:seconds) of the current<br />
track during playback
layback<br />
Operations through the MP3 CONTROL<br />
Screen<br />
You can search for and play the desired groups and tracks through<br />
the MP3 CONTROL screen shown on TV.<br />
7 MP3 CONTROL screen<br />
Notes:<br />
Current group number/Total group number<br />
Current<br />
group<br />
MP3 CONTROL<br />
Group : 02 / 03<br />
Blue<br />
Red<br />
Green<br />
Elapsed playing time<br />
of the current track<br />
Time : 00:00:14<br />
Track : 05 / 14 (Total 41)<br />
Cloudy<br />
Fair<br />
Fog<br />
Hail<br />
Indian summer<br />
Rain<br />
Shower<br />
Snow<br />
Thunder<br />
Typhoon<br />
Wind<br />
Winter sky<br />
Current track<br />
Current track number/<br />
Total track number in the current group<br />
(Total track number on the loaded disc)<br />
• Some group and track names may not be displayed correctly<br />
because of their recording conditions.<br />
• The order of groups and tracks on an MP3 disc may be displayed<br />
differently from the order displayed on your personal computer.<br />
• Up to 12 groups and tracks are displayed on the TV at a time.<br />
Pressing cursor 5/∞/3/2 repeatedly shows the hidden groups and<br />
tracks one by one.<br />
7 Operations<br />
• Before using the remote <strong>control</strong>, press DVD to change the<br />
remote <strong>control</strong> operation mode.<br />
To start playback by specifying a track number<br />
Press the number buttons (1 – 10, +10) to enter the track number.<br />
Ex. : To select the track number 3, press 3.<br />
To select the track number 14, press +10 then 4.<br />
To select the track number 24, press +10, +10, then 4.<br />
To select the track number 110, press +10 ten times, then 10.<br />
The entered number appears in the track number indication, then<br />
playback starts from the specified track.<br />
Repeat Playback<br />
You can repeat playback of the current track, group, or all the tracks<br />
on the loaded disc.<br />
TV DIRECT<br />
TV/VIDEO<br />
STB<br />
VCR<br />
DVD<br />
REW/( TUNING 9/FF<br />
REPEAT SLEEP FM MODE STROBE<br />
TV/STB CH<br />
& During playback or while<br />
stopped<br />
From the remote <strong>control</strong> ONLY:<br />
Press REPEAT.<br />
The repeat indication appears on the MP3 CONTROL screen and<br />
the REPEAT indicator lights up on the display.<br />
• Each time you press the button, the repeat mode changes as<br />
follows:<br />
REPEAT TRACK “ REPEAT GROUP “ REPEAT ALL<br />
“ the indication goes off “ (back to the beginning)<br />
REPEAT TRACK : Repeats the current track<br />
REPEAT GROUP : Repeats the current group<br />
REPEAT ALL : Repeats all the tracks on the disc<br />
To cancel repeat mode<br />
Press REPEAT repeatedly until the repeat indication goes off from<br />
the MP3 CONTROL screen (the REPEAT indicator also goes off<br />
from the display).<br />
SOUND EFFECT CENTER<br />
ANALOG<br />
/DIGITAL<br />
INPUT<br />
1<br />
TEST<br />
4<br />
AUDIO SURR ON/OFF<br />
7<br />
TV/STB CH<br />
2 3<br />
REAR·L<br />
5 6<br />
REAR·R<br />
8 9<br />
SUBTITLE SURR MODE – SUBWOOFER +<br />
10/0 +10 VFP<br />
100+ TV RETURN<br />
TA/NEWS/INFO<br />
DIGEST TOP MENU MENU<br />
( PTY PTY SEARCH PTY9<br />
CHOICE<br />
ENTER<br />
ON SCREEN<br />
RETURN<br />
DISPLAY<br />
To select or skip groups during playback<br />
To select the next groups (or skip groups forward)<br />
Press cursor 3 repeatedly.<br />
To select the previous groups (or skip groups backward)<br />
Press cursor 2 repeatedly.<br />
To select or skip tracks during playback<br />
To select the next tracks (or skip tracks forward)<br />
Press cursor ∞ repeatedly.<br />
To select the previous tracks (or skip tracks backward)<br />
Press cursor 5 repeatedly.<br />
48
JPEG Disc Playback<br />
This unit can play back JPEG files on a CD-R or CD-RW. We call such a disc “JPEG disc” in this instruction.<br />
• Before using the remote <strong>control</strong>, press DVD to change the remote <strong>control</strong> operation mode for the JPEG disc operations.<br />
• Turn on your TV and select the correct input mode on the TV.<br />
If “<br />
” appears on the TV when you press a button, the disc cannot accept an operation you have tried to do.<br />
What is JPEG?<br />
A still-picture data compression system proposed by the Joint<br />
Photographic Expert Group, which features little distortion in<br />
image quality in spite of its high compression ratio.<br />
Disc structure<br />
On a JPEG disc, each still picture (material) is recorded as a file.<br />
Files are usually grouped into a folder. Folders can also include<br />
other folders, creating hierarchical folder layers.<br />
This unit simplifies the hierarchical construction of a disc and<br />
manages folders by “groups.”<br />
Group 1<br />
File 1 File 2<br />
Up to 150 files<br />
Up to 99 groups<br />
Group 2<br />
Group 3 Group 4 Group 5<br />
This unit can recognize up to 150 files per group and up to 99<br />
groups per disc (up to 14,850 files in total). Since the unit ignores<br />
the files whose numbers are exceeding 150 and the groups whose<br />
numbers are exceeding 99, they cannot be played back.<br />
• If there are any type files other than JPEG files in a folder, those<br />
files are also counted in the total file number.<br />
Notes:<br />
• JPEG discs (either CD-R or CD-RW) require a longer readout<br />
time than normal discs. (It depends on the complexity of the<br />
folder/file configuration.)<br />
• When making a JPEG disc, select ISO 9660 Level 1 or Level 2<br />
as the disc format.<br />
• This unit supports “multi-session” discs (up to 5 sessions).<br />
• This unit cannot play “packet write” discs.<br />
• The unit can play JPEG files only with the following file<br />
extensions: “.jpg,” “.jpeg,” “.JPG,” “.JPEG” and any uppercase and<br />
lowercase combinations (such as “.Jpg”).<br />
• It is recommended you to record a file at 640 x 480 resolution. (If<br />
a file has been recorded at a resolution of more than 640 x 480,<br />
it will take a longer time to be shown.)<br />
• If both JPEG files and MP3 files are recorded on a disc, set the<br />
MP3/JPEG setting in the PICTURE menu to “JPEG.”<br />
(See page 54.)<br />
• This system can play only baseline JPEG files*. Progressive<br />
JPEG files* or lossless JPEG files* cannot be played.<br />
* – Baseline JPEG format: Used for digital cameras, web, etc.<br />
– Progressive JPEG format: Used for web.<br />
– Lossless JPEG format: An old type and rarely used now.<br />
• Some JPEG discs may not be played back because of their disc<br />
characteristics or recording conditions.<br />
Slide-show Playback<br />
You can play back the still pictures one after another automatically<br />
—slide-show playback.<br />
You can also use the buttons on the front panel if they have the<br />
similar names as those on the remote <strong>control</strong>.<br />
• Before using the remote <strong>control</strong>, press DVD to change the<br />
remote <strong>control</strong> operation mode.<br />
TV/VIDEO REW/( TUNING 9/FF<br />
REPEAT SLEEP FM MODE STROBE<br />
SOUND EFFECT CENTER<br />
ANALOG<br />
/DIGITAL<br />
INPUT<br />
1<br />
TEST<br />
4<br />
AUDIO SURR ON/OFF<br />
7<br />
TV/STB CH<br />
2 3<br />
REAR·L<br />
5 6<br />
REAR·R<br />
8 9<br />
SUBTITLE SURR MODE – SUBWOOFER +<br />
10/0 +10 VFP<br />
100+ TV RETURN<br />
7 Starting slide-show playback<br />
Load a JPEG disc, then press 3.<br />
The slide-show playback starts. Each file (still picture) is shown on<br />
the TV for about 3 seconds, then changed to the next file one after<br />
another.<br />
When all files in a group have been played back, the unit plays back<br />
files in the next group.<br />
7 Stopping slide-show playback temporarily<br />
Press 8.<br />
You can zoom in on the still picture (see page 50).<br />
To start slide-show playback again<br />
Press 3.<br />
7 To start the slide-show playback by<br />
specifying a file number<br />
Press the number buttons (1 – 10, +10) to enter the file number.<br />
Ex. : To select the file number 3, press 3.<br />
To select the file number 14, press +10 then 4.<br />
To select the file number 24, press +10, +10, then 4.<br />
To select the file number 110, press +10 ten times, then 10.<br />
The selected file number appears in the file number indication, then<br />
the slide-show playback starts from the file you have specified.<br />
7 Selecting files or groups<br />
To skip pictures (files) forward<br />
Press ¢ or cursor ∞ as many times as required.<br />
To skip pictures (files) backward<br />
Press 4 or cursor 5 as many times as required.<br />
TA/NEWS/INFO<br />
DIGEST TOP MENU MENU<br />
( PTY PTY SEARCH PTY9<br />
CHOICE<br />
ENTER<br />
ON SCREEN<br />
RETURN<br />
DISPLAY<br />
7 Stopping slide-show playback completely<br />
Press 7.<br />
The JPEG CONTROL screen appears on the TV.<br />
• For how to operate through the JPEG CONTROL screen, see<br />
“Operations through the JPEG CONTROL Screen” on page 50.<br />
49
c Playback<br />
Notes:<br />
• The following functions are not available to JPEG disc playback:<br />
program playback, random playback, repeat playback (during the<br />
slide-show playback ONLY), fast-forward/reverse playback, onscreen<br />
bar, and choice menus.<br />
• If a black screen continuously appears in the slide-show playback:<br />
the file currently played may be non-baseline JPEG file. In this<br />
case, select a playable file (a baseline JPEG file) again (e.g.,<br />
pressing 7 or MENU to open the JPEG CONTROL screen, etc.).<br />
Note that it may take a long time to select another file.<br />
• Some files on a JPEG disc may be distored during playback.<br />
Operations through the JPEG CONTROL<br />
Screen<br />
You can search for and show the desired groups and files through the<br />
JPEG CONTROL screen.<br />
7 JPEG CONTROL screen<br />
Current group number/Total group number<br />
Current<br />
group<br />
JPEG CONTROL<br />
Group : 02 / 03 FILE : 05 / 14 (Total 41)<br />
Mountain<br />
Sea<br />
Sky<br />
Anemone fish<br />
Bonito<br />
Butterfly fish<br />
Dolphin<br />
Garden eel<br />
Manta ray<br />
Seal<br />
Swordfish<br />
Tuna<br />
Turtle<br />
Whale<br />
Whale shark<br />
Current file<br />
Current file number/<br />
Total file number in the current group<br />
(Total file number on the loaded disc)<br />
Notes:<br />
• You can check the group number and the file number on the display<br />
window.<br />
• Some group and file names may not be displayed correctly<br />
because of the recording condition.<br />
• The order of groups and files on a JPEG disc may be displayed<br />
differently from the order displayed on your personal computer.<br />
• Up to 12 groups and files are displayed on the TV at a time.<br />
Pressing cursor 5/∞/3/2 repeatedly shows the hidden groups and<br />
files one by one.<br />
• Before using the remote <strong>control</strong>, press DVD to change the<br />
remote <strong>control</strong> operation mode.<br />
TV/VIDEO REW/( TUNING 9/FF<br />
REPEAT SLEEP FM MODE STROBE<br />
ZOOM<br />
MUTING<br />
TV VOL<br />
VOLUME<br />
– –<br />
TA/NEWS/INFO<br />
DIGEST TOP MENU MENU<br />
7 To select a group<br />
Press cursor 3 (or 2) repeatedly.<br />
7 To select a file<br />
Press cursor ∞ (or 5) repeatedly.<br />
7 To show the selected file<br />
Press ENTER.<br />
• When the still picture has been shown on the TV thoroughly, you<br />
can zoom in or out the still picture (see pages 43 and 44).<br />
• If you press 3, the slide-show playback starts from the selected<br />
file.<br />
7 Zooming in on the still picture<br />
Press ZOOM.<br />
To move the zoomed-in position<br />
Press cursor 5/∞/3/2.<br />
To return to normal playback<br />
Press ENTER.<br />
See also pages 43 and 44.<br />
7 To return to the JPEG CONTROL screen<br />
Press MENU or 7.<br />
Repeat Playback<br />
You can repeat playback of the current group or all the files on the<br />
loaded disc.<br />
TV/VIDEO REW/( TUNING 9/FF<br />
REPEAT SLEEP FM MODE STROBE<br />
CONTROL EFFECT CENTER<br />
ANALOG<br />
1<br />
– TV/DBS CH +<br />
2 3<br />
& During playback or while<br />
stopped<br />
From the remote <strong>control</strong> ONLY:<br />
Press REPEAT.<br />
The repeat indication appears on the JPEG CONTROL screen and<br />
the REPEAT indicator lights up on the display.<br />
• Each time you press the button, the repeat mode changes as<br />
follows:<br />
REPEAT GROUP “ REPEAT ALL “<br />
the indication goes off “ (back to the beginning)<br />
REPEAT GROUP : Repeats the current group<br />
REPEAT ALL : Repeats all the files on the disc<br />
To cancel repeat mode<br />
Press REPEAT repeatedly until the repeat indication goes off from<br />
the JPEG CONTROL screen (the REPEAT indicator also goes off<br />
from the display).<br />
SOUND EFFECT CENTER<br />
ANALOG<br />
1<br />
TV/STB CH<br />
2 3<br />
( PTY PTY SEARCH PTY9<br />
CHOICE<br />
ENTER<br />
ON SCREEN<br />
RETURN<br />
DISPLAY<br />
50
Choice Menu Operations<br />
You can adjust the initial settings through the choice menu on the TV.<br />
Before operating the choice menu, select the source you want to adjust by pressing source selecting button.<br />
• When selecting FM or AM as the source, you cannot use the choice menu.<br />
• When selecting the source other than DVD, FM, and AM, you can use the AUDIO and SPK. SETTING menus. The audio adjustments are<br />
memorized for each source.<br />
• When activating TV Direct, you can use the LANGUAGE, PICTURE, and OTHERS menus for the build-in DVD player.<br />
Notes:<br />
• You need to turn on your TV and select the correct input mode on the TV.<br />
• You can only use the remote <strong>control</strong> for the choice menu operations.<br />
• You can change the language used in the choice menu. See page 53.<br />
• You cannot show the choice menu when an MP3 disc or a JPEG disc is loaded.<br />
Operation Buttons<br />
To do the operations in this choice menu, use the buttons on the<br />
remote <strong>control</strong>.<br />
CHOICE<br />
ENTER<br />
From the remote <strong>control</strong> ONLY<br />
Configuration of Choice Menu<br />
The choice menu has the following menus:<br />
LANGUAGE menu<br />
(see page 53)<br />
You can select the initial<br />
language for the disc menu,<br />
audio, and subtitle. You can also<br />
select the language used on the<br />
TV screen while operating this<br />
unit.<br />
LANGUAGE<br />
MENU LANGUAGE<br />
SELECT<br />
ENTER<br />
AUDIO LANGUAGE<br />
SUBTITLE<br />
ON SCREEN LANGUAGE<br />
ENGLISH<br />
ENGLISH<br />
OFF<br />
ENGLISH<br />
USE TO SELECT, USE ENTER TO CONFIRM.<br />
TO EXIT, PRESS CHOICE.<br />
Button<br />
CHOICE<br />
To do<br />
Display the choice menu on the TV.<br />
Each time you press the button, the<br />
choice menu is turned on and off<br />
alternately.<br />
PICTURE menu (see page 53)<br />
You can select the desired<br />
options concerning a picture or<br />
monitor screen.<br />
PICTURE<br />
MONITOR TYPE<br />
STILL MODE<br />
SCREEN SAVER<br />
MP3 / JPEG<br />
4:3 LB<br />
AUTO<br />
ON<br />
MP3<br />
5/∞<br />
Select an item.<br />
SELECT<br />
ENTER<br />
USE TO SELECT, USE ENTER TO CONFIRM.<br />
TO EXIT, PRESS CHOICE.<br />
3/2<br />
ENTER<br />
Adjust the selected item on the choice<br />
menu.<br />
Move to the submenu of the selected<br />
item or decide the setting.<br />
AUDIO menu (see page 54)<br />
You can adjust the sound<br />
settings of this unit through this<br />
menu.<br />
AUDIO<br />
L/R BALANCE<br />
BASS<br />
TREBLE<br />
LFE ATT.<br />
CENTER<br />
0<br />
0<br />
0 dB<br />
D. RANGE COMPRESSION MID<br />
SELECT<br />
ENTER<br />
USE TO SELECT, USE ENTER TO CONFIRM.<br />
TO EXIT, PRESS CHOICE.<br />
SPK. SETTING menu<br />
(see page 55)<br />
You can adjust the speaker<br />
settings. You can also adjust the<br />
output level of the speakers.<br />
SPK. SETTING<br />
SIZE<br />
LEVEL<br />
DISTANCE<br />
CROSS OVER 100Hz<br />
RETURN TO INITIAL<br />
SELECT<br />
ENTER<br />
USE TO SELECT, USE ENTER TO CONFIRM.<br />
TO EXIT, PRESS CHOICE.<br />
OTHERS menu (see page 56)<br />
You can change the settings for<br />
some of the functions.<br />
To set Parental Lock, use this<br />
menu.<br />
OTHERS<br />
RESUME<br />
ON SCREEN GUIDE<br />
AUTO STANDBY<br />
PARENTAL LOCK<br />
ON<br />
ON<br />
OFF<br />
SELECT<br />
ENTER<br />
USE TO SELECT, USE ENTER TO CONFIRM.<br />
TO EXIT, PRESS CHOICE.<br />
51
ice Menu Operations<br />
Operating Procedure<br />
Ex. : When setting on-screen language.<br />
Before operating the choice menu, press DVD to change the<br />
source to DVD.<br />
CHOICE<br />
1 Press CHOICE.<br />
The LANGUAGE menu appears on the TV.<br />
4 Press cursor ∞ (or 5) repeatedly<br />
to select the desired option.<br />
LANGUAGE<br />
MENU LANGUAGE<br />
AUDIO LANGUAGE<br />
SUBTITLE<br />
ENGLISH<br />
ENGLISH<br />
ENGLISH<br />
ON SCREEN LANGUAGE ENGLISH<br />
ENGLISH<br />
FRENCH<br />
GERMAN<br />
ENTER<br />
LANGUAGE<br />
MENU LANGUAGE ENGLISH<br />
AUDIO LANGUAGE ENGLISH<br />
SUBTITLE<br />
ENGLISH<br />
ON SCREEN LANGUAGE ENGLISH<br />
SELECT<br />
USE TO SELECT. USE ENTER TO CONFIRM.<br />
ENTER<br />
TO EXIT, PRESS CHOICE.<br />
Ex.: When “FRENCH” is selected.<br />
SELECT<br />
ENTER<br />
USE TO SELECT. USE ENTER TO CONFIRM.<br />
TO EXIT, PRESS CHOICE.<br />
5 Press ENTER to finish the setting.<br />
ENTER<br />
• Each time you press cursor 3 (or 2), the menu changes.<br />
2 Press cursor ∞ (or 5) repeatedly<br />
to move to “ON SCREEN<br />
LANGUAGE.”<br />
ENTER<br />
LANGUE<br />
LANGUE MENU<br />
LANGUE AUDIO<br />
SOUS-TITRE<br />
LANGUE D' ECRAN<br />
ANGLAIS<br />
ANGLAIS<br />
ANGLAIS<br />
FRANCAIS<br />
LANGUAGE<br />
MENU LANGUAGE ENGLISH<br />
AUDIO LANGUAGE ENGLISH<br />
SUBTITLE<br />
ENGLISH<br />
ON SCREEN LANGUAGE ENGLISH<br />
SELECTION<br />
ENTRER<br />
POUR CHOISIR ET ENTER POUR VALIDER.<br />
POUR QUITTER, APPUYER SUR CHOICE.<br />
To set other items on the same choice menu<br />
Repeat steps 2 to 5.<br />
SELECT<br />
ENTER<br />
USE TO SELECT. USE ENTER TO CONFIRM.<br />
TO EXIT, PRESS CHOICE.<br />
To move to another choice menu<br />
Press cursor 3 (or 2) repeatedly to select a choice menu you want<br />
to set up.<br />
3 Press ENTER.<br />
The pop-up window appears, listing the<br />
selectable options.<br />
LANGUAGE<br />
MENU LANGUAGE<br />
AUDIO LANGUAGE<br />
SUBTITLE<br />
ENGLISH<br />
ENGLISH<br />
ENGLISH<br />
ON SCREEN LANGUAGE ENGLISH<br />
ENGLISH<br />
FRENCH<br />
GERMAN<br />
ENTER<br />
To return to the normal screen<br />
Press CHOICE.<br />
Note:<br />
• Some items in the choice menu consist of submenus for setting up<br />
various options. Pressing ENTER makes the submenus for the<br />
selected item appears on the TV.<br />
You can set the items using cursor 5/∞ and ENTER (as explained<br />
in steps 4 and 5 above).<br />
SELECT<br />
ENTER<br />
USE TO SELECT. USE ENTER TO CONFIRM.<br />
TO EXIT, PRESS CHOICE.<br />
52
Choice Menu Operations<br />
7 LANGUAGE menu<br />
LANGUAGE<br />
MENU LANGUAGE<br />
AUDIO LANGUAGE<br />
SUBTITLE<br />
ON SCREEN LANGUAGE<br />
You can select “MENU LANGUAGE,” “AUDIO LANGUAGE,”<br />
and “SUBTITLE” only before playback.<br />
MENU LANGUAGE<br />
Some discs have multiple languages.<br />
Select one of the languages or language codes from AA to ZU<br />
(see “Language code list” on page 54) as the menu language.<br />
AUDIO LANGUAGE<br />
ENGLISH<br />
ENGLISH<br />
ENGLISH<br />
ENGLISH<br />
Some discs have multiple audio languages.<br />
Select one of the languages or language codes from AA to ZU<br />
(see “Language code list” on page 54).<br />
Select one of the following settings:<br />
16:9 NORMAL (Wide television conversion) :<br />
Select this when the aspect ratio of your TV is fixed<br />
to 16:9 (wide TV). The unit automatically adjusts the<br />
screen width of the output signal correctly when<br />
playing back a picture whose aspect ratio is 4:3.<br />
16:9 AUTO (Wide television conversion) :<br />
Select this when the aspect ratio of your TV is 16:9<br />
(wide TV).<br />
4:3 LB (Letter Box conversion) :<br />
Select this when the aspect ratio of your TV is 4:3<br />
(conventional TV). While viewing a wide screen<br />
picture, the black bars appear on the top and the<br />
bottom of the screen.<br />
4:3 PS (Pan Scan conversion) :<br />
Select this when the aspect ratio of your TV is 4:3<br />
(conventional TV). While viewing a wide screen<br />
picture, the black bars do not appear; however, the<br />
left and right edges of the pictures will not be shown<br />
on the screen.<br />
SUBTITLE<br />
Some discs have multiple subtitle languages.<br />
Ex. : 16:9<br />
Ex. : 4:3 LB<br />
Ex. : 4:3 PS<br />
Select one of the languages or language codes from AA to ZU<br />
(see “Language code list” on page 54) or “OFF (no subtitle).”<br />
Note:<br />
• When the language you have selected for MENU LANGUAGE,<br />
AUDIO LANGUAGE, or SUBTITLE is not recorded on a disc,<br />
the original language is used as the initial language<br />
automatically.<br />
ON SCREEN LANGUAGE<br />
Select one of the languages shown on the TV.<br />
7 PICTURE menu<br />
PICTURE<br />
MONITOR TYPE<br />
STILL MODE<br />
SCREEN SAVER<br />
MP3 / JPEG<br />
4:3 LB<br />
AUTO<br />
ON<br />
MP3<br />
• Even if “4:3 PS” is selected, the screen size may become<br />
“4:3 LB” with some DVD VIDEO. This depends on how they<br />
are recorded.<br />
• When you select “16:9 NORMAL” for a picture whose aspect<br />
ratio is 4:3, the picture slightly changes due to the process for<br />
converting the picture width.<br />
STILL MODE<br />
You can change “STILL MODE” to get better pictures when the<br />
playback picture is unclear or noisy, or the loose oblique lines<br />
appear on the TV screen.<br />
Select one of the following settings:<br />
AUTO : Normally select this. The unit detects the source type<br />
of picture (video source or film source) on the<br />
current disc, and selects the appropriate mode<br />
automatically.<br />
FIELD : Select this when playing back a video source disc.<br />
FRAME : Select this when playing back a film source disc.<br />
MONITOR TYPE<br />
You can select the monitor type to match your TV when you<br />
play DVD VIDEO recorded in the picture’s width/height ratio of<br />
16:9.<br />
SCREEN SAVER<br />
You can activate or deactivate the screen saver function.<br />
Select one of the following settings:<br />
ON : The picture on the TV becomes dark when no<br />
operation is done for 5 minutes.<br />
OFF : The screen saver function does not work.<br />
53
hoice Menu Operations<br />
MP3/JPEG<br />
If both MP3 files and JPEG files are recorded on a disc, you can<br />
select which files to play.<br />
Select one of the following settings:<br />
MP3 : Select this for playing MP3 files.<br />
JPEG<br />
7 AUDIO menu<br />
: Select this for playing JPEG files.<br />
You can also adjust the following items using the front panel or<br />
remote <strong>control</strong> (see pages 23 to 28).<br />
L/R BALANCE<br />
Adjust the output balance between the left front speaker and<br />
right front speaker within the range of “R–21” to “CENTER”<br />
or “CENTER” to “L–21.”<br />
BASS<br />
AUDIO<br />
L/R BALANCE<br />
CENTER<br />
BASS<br />
0<br />
TREBLE<br />
0<br />
LFE ATT.<br />
0 dB<br />
D. RANGE COMPRESSION MID<br />
Adjust the bass tone level from the front speakers within the<br />
range of –10 to +10 in 2 step intervals.<br />
TREBLE<br />
Adjust the treble tone level from the front speakers within<br />
the range of –10 to +10 in 2 step intervals.<br />
LFE ATT.<br />
The Low Frequency Effect attenuater diminishes the distortion<br />
of the bass sound from the subwoofer while playing back a disc<br />
with Dolby Digital or DTS Digital Surround.<br />
Select one of the following settings:<br />
–10 dB : Select this to diminish the distortion of the bass<br />
sound from the subwoofer.<br />
0 dB : Select this to cancel this function.<br />
D. RANGE COMPRESSION<br />
You can enjoy a powerful sound at night even at a low volume<br />
level when listening to the sound with Dolby Digital.<br />
Select one of the following settings:<br />
MAX : Select this when you want to apply the compression<br />
effect fully (useful at midnight).<br />
MID : Select this when you want to reduce the dynamic<br />
range a little.<br />
OFF : Select this when you want to enjoy surround with its<br />
full dynamic range (no effect applied).<br />
Language code list<br />
AA<br />
AB<br />
AF<br />
AM<br />
AR<br />
AS<br />
AY<br />
AZ<br />
BA<br />
BE<br />
BG<br />
BH<br />
BI<br />
BN<br />
BO<br />
BR<br />
CA<br />
CO<br />
CS<br />
CY<br />
DA<br />
DZ<br />
EL<br />
EO<br />
ET<br />
EU<br />
Afar<br />
Abkhazian<br />
Afrikaans<br />
Ameharic<br />
Arabic<br />
Assamese<br />
Aymara<br />
Azerbaijani<br />
Bashkir<br />
Byelorussian<br />
Bulgarian<br />
Bihari<br />
Bislama<br />
Bengali, Bangla<br />
Tibetan<br />
Breton<br />
Catalan<br />
Corsican<br />
Czech<br />
Welsh<br />
Danish<br />
Bhutani<br />
Greek<br />
Esperanto<br />
Estonian<br />
Basque<br />
FA<br />
FI<br />
FJ<br />
FO<br />
FY<br />
GA<br />
GD<br />
GL<br />
GN<br />
GU<br />
HA<br />
HI<br />
HR<br />
HU<br />
HY<br />
IA<br />
IE<br />
IK<br />
IN<br />
IS<br />
IW<br />
JI<br />
JW<br />
KA<br />
KK<br />
KL<br />
Persian<br />
Finnish<br />
Fiji<br />
Faroese<br />
Frisian<br />
Irish<br />
Scots Gaelic<br />
Galician<br />
Guarani<br />
Gujarati<br />
Hausa<br />
Hindi<br />
Croatian<br />
Hungarian<br />
Armenian<br />
Interlingua<br />
Interlingue<br />
Inupiak<br />
Indonesian<br />
Icelandic<br />
Hebrew<br />
Yiddish<br />
Javanese<br />
Georgian<br />
Kazakh<br />
Greenlandic<br />
KM<br />
KN<br />
KO<br />
KS<br />
KU<br />
KY<br />
LA<br />
LN<br />
LO<br />
LT<br />
LV<br />
MG<br />
MI<br />
MK<br />
ML<br />
MN<br />
MO<br />
MR<br />
MS<br />
MT<br />
MY<br />
NA<br />
NE<br />
NL<br />
NO<br />
OC<br />
Cambodian<br />
Kannada<br />
Korean (KOR)<br />
Kashmiri<br />
Kurdish<br />
Kirghiz<br />
Latin<br />
Lingala<br />
Laothian<br />
Lithuanian<br />
Latvian, Lettish<br />
Malagasy<br />
Maori<br />
Macedonian<br />
Malayalam<br />
Mongolian<br />
Moldavian<br />
Marathi<br />
Malay (MAY)<br />
Maltese<br />
Burmese<br />
Nauru<br />
Nepali<br />
Dutch<br />
Norwegian<br />
Occitan<br />
OM<br />
OR<br />
PA<br />
PL<br />
PS<br />
PT<br />
QU<br />
RM<br />
RN<br />
RO<br />
RU<br />
RW<br />
SA<br />
SD<br />
SG<br />
SH<br />
SI<br />
SK<br />
SL<br />
SM<br />
SN<br />
SO<br />
SQ<br />
SR<br />
SS<br />
ST<br />
(Afan) Oromo<br />
Oriya<br />
Panjabi<br />
Polish<br />
Pashto, Pushto<br />
Portuguese<br />
Quechua<br />
Rhaeto-Romance<br />
Kirundi<br />
Rumanian<br />
Russian<br />
Kinyarwanda<br />
Sanskrit<br />
Sindhi<br />
Sangho<br />
Serbo-Croatian<br />
Singhalese<br />
Slovak<br />
Slovenian<br />
Samoan<br />
Shona<br />
Somali<br />
Albanian<br />
Serbian<br />
Siswati<br />
Sesotho<br />
SU<br />
SV<br />
SW<br />
TA<br />
TE<br />
TG<br />
TH<br />
TI<br />
TK<br />
TL<br />
TN<br />
TO<br />
TR<br />
TS<br />
TT<br />
TW<br />
UK<br />
UR<br />
UZ<br />
VI<br />
VO<br />
WO<br />
XH<br />
YO<br />
ZU<br />
Sundanese<br />
Swedish<br />
Swahili<br />
Tamil<br />
Telugu<br />
Tajik<br />
Thai<br />
Tigrinya<br />
Turkmen<br />
Tagalog<br />
Setswana<br />
Tonga<br />
Turkish<br />
Tsonga<br />
Tatar<br />
Twi<br />
Ukrainian<br />
Urdu<br />
Uzbek<br />
Vietnamese<br />
Volapuk<br />
Wolof<br />
Xhosa<br />
Yoruba<br />
Zulu<br />
54
Choice Menu Operations<br />
7 SPK. SETTING menu<br />
SPK. SETTING<br />
SIZE<br />
LEVEL<br />
DISTANCE<br />
CROSS OVER 100Hz<br />
RETURN TO INITIAL<br />
LEVEL<br />
Select this to enter the LEVEL submenu.<br />
LEVEL<br />
CENTER SPEAKER 0 dB<br />
LEFT REAR SPEAKER 0 dB<br />
RIGHT REAR SPEAKER 0 dB<br />
SUB WOOFER –<br />
TEST TONE<br />
SIZE<br />
Select this to enter the SIZE submenu.<br />
SIZE<br />
FRONT SPEAKER LARGE<br />
CENTER SPEAKER SMALL<br />
REAR SPEAKER SMALL<br />
SUB WOOFER NONE<br />
RETURN<br />
FRONT SPEAKER, CENTER SPEAKER, and<br />
REAR SPEAKER<br />
Select one of the following settings for each speaker:<br />
LARGE (LRG) : Select this when the speaker size is relatively<br />
large.<br />
SMALL (SML) : Select this when the speaker size is relatively<br />
small.<br />
NONE (NO) : Select this when you have not connected a<br />
speaker. (Not selectable for the front<br />
speakers)<br />
SUBWOOFER<br />
Select one of the following settings:<br />
USE (YES) : Select this when a subwoofer is connected.<br />
NONE (NO) : Select this when no subwoofer is used.<br />
CENTER SPEAKER, LEFT REAR SPEAKER, RIGHT<br />
REAR SPEAKER, and SUB WOOFER<br />
Adjust the speaker output level within the range of –10 dB to<br />
+10 dB for each speaker in 1 step interval.<br />
TEST TONE<br />
Select this to start or stop test tone.<br />
RETURN<br />
Select this to return to SPK. SETTING menu.<br />
Notes:<br />
• When “NONE” is selected for the <strong>center</strong> speaker, rear speakers<br />
and/or subwoofer on the SIZE menu, “–” appears instead of the<br />
current setting. In this case, you cannot adjust the output level<br />
of those speakers.<br />
• You can adjust the output level for <strong>center</strong> speaker and/or rear<br />
speakers only when one of proper Surround modes are<br />
activated (see page 31).<br />
• When “NONE” is selected for the <strong>center</strong> and/or rear speakers,<br />
the test tone does not come out of those speakers.<br />
DISTANCE<br />
RETURN<br />
Select this to enter the DISTANCE submenu.<br />
RETURN<br />
Select this to return to SPK. SETTING menu.<br />
DISTANCE<br />
FRONT SPEAKER<br />
CENTER SPEAKER<br />
REAR SPEAKER<br />
TEST TONE<br />
RETURN<br />
3.0m<br />
3.0m<br />
3.0m<br />
Notes:<br />
• Keep the following comment in mind as reference when<br />
adjusting speaker settings.<br />
– If the size of the cone speaker unit built in your speaker is<br />
greater than 12 cm, select “LARGE,” and if it is smaller than<br />
12 cm, select “SMALL.”<br />
• If you have selected “SMALL” for the front speakers, you cannot<br />
select “LARGE” for the <strong>center</strong> and rear speakers.<br />
• If you have selected “NONE” for subwoofer, you cannot select<br />
“SMALL” for the front speakers.<br />
• You can take advantage of the speaker diagrams on the left<br />
part of the SPK. SETTING menu to set the speaker.<br />
– The speaker diagram for the selected speaker is highlighted.<br />
– The size of the speaker diagram is changed according to<br />
your setting.<br />
Speaker diagrams<br />
Subwoofer<br />
Front speakers<br />
Center speaker<br />
FRONT SPEAKER, CENTER SPEAKER, and<br />
REAR SPEAKER<br />
For each speaker, set the distance from the listening point<br />
within the range of 0.3 m to 9.0 m, in 0.3 m interval.<br />
TEST TONE<br />
Select this to start or stop test tone.<br />
RETURN<br />
Select this to return to SPK. SETTING menu.<br />
Notes:<br />
• When “NONE” is selected for the <strong>center</strong> speaker and rear<br />
speakers on the SIZE menu, “–” appears instead of the current<br />
setting.<br />
In this case, you cannot adjust the speaker distance of those<br />
speakers.<br />
• When “NONE” is selected for the <strong>center</strong> speaker and/or rear<br />
speakers on the SIZE menu, the test tone does not come out of<br />
those speakers.<br />
Rear speakers<br />
55
hoice Menu Setting Operations DVD preferences<br />
CROSS OVER<br />
When you use a small speaker in any position, this unit<br />
automatically reallocates the bass sound elements assigned to<br />
the small speaker to the large speakers.<br />
To use this function properly, set this crossover frequency level<br />
according to the size of the smallest speaker connected.<br />
• If you have selected “LRG (large)” or “LARGE” for all<br />
speakers, this function will not take effect.<br />
Select one of the following settings:<br />
200Hz : Select this frequency when the cone speaker unit<br />
built in the speaker is less than 5 cm.<br />
150Hz : Select this frequency when the cone speaker unit<br />
built in the speaker is about 6 cm.<br />
120Hz : Select this frequency when the cone speaker unit<br />
built in the speaker is about 8 cm.<br />
100Hz : Select this frequency when the cone speaker unit<br />
built in the speaker is about 10 cm.<br />
80Hz : Select this frequency when the cone speaker unit<br />
built in the speaker is about 12 cm.<br />
RETURN TO INITIAL<br />
Select this to reset all speaker settings to the initial settings.<br />
7 OTHERS menu<br />
OTHERS<br />
RESUME<br />
ON SCREEN GUIDE<br />
AUTO STANDBY<br />
PARENTAL LOCK<br />
ON<br />
ON<br />
OFF<br />
Select one of the following settings:<br />
ON<br />
OFF<br />
: Select this to activate this function.<br />
: Select this to deactivate it.<br />
• Subtitles (see page 39) and the information for zooming in<br />
(see pages 43 and 44) appear on the display even though this<br />
setting is “OFF.”<br />
AUTO STANDBY<br />
When the playback of the disc on the built-in DVD player ends<br />
and no operation is done for more than the selected time, the<br />
unit is turned off automatically.<br />
• This function takes effect only when DVD is selected as the<br />
source.<br />
Select one of the following settings:<br />
60 : Turns off the unit if no operation is done within 60<br />
minutes.<br />
30 : Turns off the unit if no operation is done within 30<br />
minutes.<br />
OFF : Select this to deactivate it.<br />
• If Sleep Timer (see page 12) and Auto Standby are used at a<br />
time, one with the early shut-off time will turn off the unit.<br />
PARENTAL LOCK<br />
You can restrict playback of DVD VIDEO containing violent<br />
scenes and those not suitable for your family members.<br />
• You can select “PARENTAL LOCK” only before playback.<br />
Select this to enter the PARENTAL LOCK submenu.<br />
(See pages 57 and 58.)<br />
RESUME<br />
You can activate or deactivate the resume play function of the<br />
built-in DVD player.<br />
Select one of the following settings:<br />
ON<br />
OFF<br />
: Select this to activate this function.<br />
: Select this to deactivate it.<br />
ON SCREEN GUIDE<br />
You can activate or deactivate the following on-screen guide<br />
icons:<br />
For multi-view angles :<br />
For plural subtitles :<br />
For plural audio languages :<br />
For playback status : , , 1/8 , x 5 ,<br />
etc.<br />
The on-screen guide icons appear on the TV at the beginning of<br />
the playback with this function turned on.<br />
When recording the picture with VCR, set “OFF” to avoid<br />
recording the indications above on your video tape.<br />
• The choice menu and on-screen bar can be recorded even<br />
though this function is set to “OFF.”<br />
56
Choice Menu Operations<br />
Restricting Playback by Parental Lock<br />
You can restrict playback of DVD VIDEO containing violent scenes<br />
and those not suitable for your family members. Nobody can play<br />
such a disc unless this function is canceled.<br />
• This setting takes effect only for the DVD VIDEO containing the<br />
Parental Lock level information—Level 1 (most restrictive) to<br />
Level 8 (least restrictive).<br />
• You can set the Parental Lock only while playback is stopped.<br />
5 Press ENTER.<br />
The pop-up window for setting level appears.<br />
PARENTAL LOCK<br />
COUNTRY CODE<br />
SET LEVEL<br />
PASSWORD<br />
EXIT<br />
SELECT<br />
ENTER<br />
GB NONE<br />
8<br />
NONE<br />
7<br />
_ _ _ _ 6<br />
5<br />
4<br />
3<br />
USE TO SELECT. USE ENTER TO CONFIRM.<br />
TO EXIT, PRESS CHOICE.<br />
7 Setting Parental Lock<br />
1 Press CHOICE, then press cursor 3 (or 2) to<br />
display the OTHERS menu.<br />
2 Press cursor ∞ (or 5) repeatedly to move to<br />
“PARENTAL LOCK,” then press ENTER.<br />
The PARENTAL LOCK submenu appears on the TV.<br />
6 Press cursor ∞ (or 5) repeatedly to select the<br />
level of restriction, then press ENTER.<br />
moves to “PASSWORD.”<br />
• The smaller the value of level is, the more restrictive the<br />
Parental Lock level is.<br />
• Select “NONE” to cancel this function.<br />
PARENTAL LOCK<br />
COUNTRY CODE<br />
SET LEVEL<br />
PASSWORD<br />
EXIT<br />
GB<br />
4<br />
_ _ _ _<br />
PARENTAL LOCK<br />
COUNTRY CODE<br />
SET LEVEL<br />
PASSWORD<br />
EXIT<br />
SELECT<br />
ENTER<br />
GB<br />
NONE<br />
_ _ _ _<br />
USE TO SELECT. USE ENTER TO CONFIRM.<br />
TO EXIT, PRESS CHOICE.<br />
3 Press cursor ∞ (or 5) repeatedly to move to<br />
“COUNTRY CODE,” then press ENTER.<br />
The submenu for setting the country code appears.<br />
PARENTAL LOCK<br />
COUNTRY CODE<br />
SET LEVEL<br />
PASSWORD<br />
EXIT<br />
SELECT<br />
ENTER<br />
GB FR<br />
FX<br />
NONE<br />
GA<br />
_ _ _ _ GB<br />
GD<br />
GE<br />
GF<br />
USE TO SELECT. USE ENTER TO CONFIRM.<br />
TO EXIT, PRESS CHOICE.<br />
SELECT<br />
ENTER<br />
NEW PASSWORD? PRESS 0 9KEY.<br />
TO EXIT, PRESS CHOICE.<br />
7 Press the number buttons (0–9) to enter a four<br />
digit number as your password, then press<br />
ENTER.<br />
moves to “EXIT.”<br />
8 Press ENTER.<br />
OTHERS menu resumes.<br />
To return to the normal screen<br />
Press CHOICE.<br />
Note:<br />
• Remember your password or make a note of it.<br />
You need to enter your password to change the setting or release<br />
the lock. To change the setting, see page 58.<br />
4 Press cursor ∞ (or 5) repeatedly to select the<br />
country code, then press ENTER.<br />
See “Country/Area codes list for Parental Lock” on page 59.<br />
moves to “SET LEVEL.”<br />
57
e Menu Operations<br />
7 Changing the setting of Parental Lock<br />
1 Press CHOICE, then press cursor 3 (or 2) to<br />
display the OTHERS menu.<br />
7 Releasing Parental Lock temporarily<br />
When you set a strict parental level, some discs may not be played<br />
back at all. When you load such a disc and try to play it, the<br />
following display appears on the TV. You can release Parental Lock<br />
temporarily.<br />
2 Press cursor ∞ (or 5) repeatedly to move to<br />
“PARENTAL LOCK,” then press ENTER.<br />
The PARENTAL LOCK submenu appears on the TV.<br />
• You can only move to “PASSWORD” or to “EXIT” before<br />
you enter your password.<br />
PARENTAL LOCK<br />
COUNTRY CODE<br />
LEVEL<br />
PASSWORD<br />
EXIT<br />
SELECT<br />
ENTER<br />
GB<br />
4<br />
_ _ _ _<br />
PASSWORD? PRESS 0 9KEY.<br />
TO EXIT, PRESS CHOICE.<br />
3 Press the number buttons (0–9) to enter your<br />
password, then press ENTER.<br />
• If you enter a wrong password, “WRONG! RETRY ••• PRESS<br />
0~9KEY” appears on the PARENTAL LOCK submenu.<br />
You cannot go to next steps before you enter the correct<br />
password.<br />
4 Press cursor ∞ (or 5) repeatedly to move to<br />
the item you want to change, then press ENTER.<br />
5 Press cursor ∞ (or 5) repeatedly to change the<br />
setting, then press ENTER.<br />
PARENTAL LOCK<br />
SELECT<br />
ENTER<br />
TEMPORARY RELEASE<br />
NOT RELEASE<br />
PASSWORD<br />
_ _ _ _<br />
PASSWORD? ••• PRESS 0 ~ 9 KEY<br />
1 Press cursor ∞ (or 5) repeatedly to move to<br />
“TEMPORARY RELEASE”, then press ENTER.<br />
moves to “PASSWORD.”<br />
• If you do not want to release Parental Lock temporarily, select<br />
“NOT RELEASE” by pressing cursor ∞ (or 5), then press<br />
ENTER. To eject the disc, press 0.<br />
2 Press number buttons (0–9) to enter your<br />
password, then press ENTER.<br />
Playback starts.<br />
• If you enter a wrong password, “WRONG! RETRY ••• PRESS<br />
0~9KEY” appears on the PARENTAL LOCK submenu.<br />
You cannot play the disc before you enter the correct<br />
password.<br />
Note:<br />
• When you enter wrong passwords more than three times,<br />
moves to “NOT RELEASE” automatically and cursor ∞ (or 5) does<br />
not work. Press 0 to remove the disc.<br />
6 Press the number buttons (0–9) to enter your<br />
password, then press ENTER.<br />
The new setting is stored.<br />
Notes:<br />
• You cannot set the Parental Lock before you set your password.<br />
• If you exit from the PARENTAL LOCK submenu before setting your<br />
password in step 6, the new country code and parental level will not<br />
become effective, and the old country code and parental level<br />
remain effective.<br />
• When you enter wrong passwords more than three times,<br />
moves to “EXIT” automatically and cursor ∞ (or 5) does not work.<br />
Press ENTER to exit from the PARENTAL LOCK submenu, then<br />
start from step 1 again.<br />
• If you forget your password, enter “8888.”<br />
58
Choice Setting Menu DVD Operations<br />
preferences<br />
Country/Area codes list for Parental Lock<br />
AD<br />
AE<br />
AF<br />
AG<br />
AI<br />
AL<br />
AM<br />
AN<br />
AO<br />
AQ<br />
AR<br />
AS<br />
AT<br />
AU<br />
AW<br />
AZ<br />
BA<br />
BB<br />
BD<br />
BE<br />
BF<br />
BG<br />
BH<br />
BI<br />
BJ<br />
BM<br />
BN<br />
BO<br />
BR<br />
BS<br />
BT<br />
BV<br />
BW<br />
BY<br />
BZ<br />
CA<br />
CC<br />
CF<br />
CG<br />
CH<br />
CI<br />
CK<br />
CL<br />
CM<br />
CN<br />
CO<br />
CR<br />
CU<br />
CV<br />
CX<br />
CY<br />
CZ<br />
DE<br />
DJ<br />
DK<br />
DM<br />
DO<br />
DZ<br />
EC<br />
EE<br />
EG<br />
EH<br />
Andorra<br />
United Arab Emirates<br />
Afghanistan<br />
Antigua and Barbuda<br />
Anguilla<br />
Albania<br />
Armenia<br />
Netherlands Antilles<br />
Angola<br />
Antarctica<br />
Argentina<br />
American Samoa<br />
Austria<br />
Australia<br />
Aruba<br />
Azerbaijan<br />
Bosnia and Herzegovina<br />
Barbados<br />
Bangladesh<br />
Belgium<br />
Burkina Faso<br />
Bulgaria<br />
Bahrain<br />
Burundi<br />
Benin<br />
Bermuda<br />
Brunei Darussalam<br />
Bolivia<br />
Brazil<br />
Bahamas<br />
Bhutan<br />
Bouvet Island<br />
Botswana<br />
Belarus<br />
Belize<br />
Canada<br />
Cocos (Keeling) Islands<br />
Central African Republic<br />
Congo<br />
Switzerland<br />
Côte d’Ivoire<br />
Cook Islands<br />
Chile<br />
Cameroon<br />
China<br />
Colombia<br />
Costa Rica<br />
Cuba<br />
Cape Verde<br />
Christmas Island<br />
Cyprus<br />
Czech Republic<br />
Germany<br />
Djibouti<br />
Denmark<br />
Dominica<br />
Dominican Republic<br />
Algeria<br />
Ecuador<br />
Estonia<br />
Egypt<br />
Western Sahara<br />
ER<br />
ES<br />
ET<br />
FI<br />
FJ<br />
FK<br />
FM<br />
FO<br />
FR<br />
FX<br />
GA<br />
GB<br />
GD<br />
GE<br />
GF<br />
GH<br />
GI<br />
GL<br />
GM<br />
GN<br />
GP<br />
GQ<br />
GR<br />
GS<br />
GT<br />
GU<br />
GW<br />
GY<br />
HK<br />
HM<br />
HN<br />
HR<br />
HT<br />
HU<br />
ID<br />
IE<br />
IL<br />
IN<br />
IO<br />
IQ<br />
IR<br />
IS<br />
IT<br />
JM<br />
JO<br />
JP<br />
KE<br />
KG<br />
KH<br />
KI<br />
KM<br />
KN<br />
KP<br />
KR<br />
KW<br />
KY<br />
KZ<br />
Eritrea<br />
Spain<br />
Ethiopia<br />
Finland<br />
Fiji<br />
Falkland Islands (Malvinas)<br />
Micronesia<br />
(Fedelated States of)<br />
Faroe Islands<br />
France<br />
France, Metropolitan<br />
Gabon<br />
United Kingdom<br />
Grenada<br />
Georgia<br />
French Guiana<br />
Ghana<br />
Gibraltar<br />
Greenland<br />
Gambia<br />
Guinea<br />
Guadeloupe<br />
Equatorial Guinea<br />
Greece<br />
South Georgia and the<br />
South Sandwich Islands<br />
Guatemala<br />
Guam<br />
Guinea-Bissau<br />
Guyana<br />
Hong Kong<br />
Heard Island and<br />
McDonald Islands<br />
Honduras<br />
Croatia<br />
Haiti<br />
Hungary<br />
Indonesia<br />
Ireland<br />
Israel<br />
India<br />
British Indian Ocean<br />
Territory<br />
Iraq<br />
Iran (Islamic Republic of)<br />
Iceland<br />
Italy<br />
Jamaica<br />
Jordan<br />
Japan<br />
Kenya<br />
Kyrgyzstan<br />
Cambodia<br />
Kiribati<br />
Comoros<br />
Saint Kitts and Nevis<br />
Korea, Democratic<br />
People’s Republic of<br />
Korea, Republic of<br />
Kuwait<br />
Cayman Islands<br />
Kazakhstan<br />
LA<br />
LB<br />
LC<br />
LI<br />
LK<br />
LR<br />
LS<br />
LT<br />
LU<br />
LV<br />
LY<br />
MA<br />
MC<br />
MD<br />
MG<br />
MH<br />
ML<br />
MM<br />
MN<br />
MO<br />
MP<br />
MQ<br />
MR<br />
MS<br />
MT<br />
MU<br />
MV<br />
MW<br />
MX<br />
MY<br />
MZ<br />
NA<br />
NC<br />
NE<br />
NF<br />
NG<br />
NI<br />
NL<br />
NO<br />
NP<br />
NR<br />
NU<br />
NZ<br />
OM<br />
PA<br />
PE<br />
PF<br />
PG<br />
PH<br />
PK<br />
PL<br />
PM<br />
PN<br />
PR<br />
PT<br />
PW<br />
PY<br />
QA<br />
RE<br />
RO<br />
RU<br />
Lao People’s<br />
Democratic Republic<br />
Lebanon<br />
Saint Lucia<br />
Liechtenstein<br />
Sri Lanka<br />
Liberia<br />
Lesotho<br />
Lithuania<br />
Luxembourg<br />
Latvia<br />
Libyan Arab Jamahiriya<br />
Morocco<br />
Monaco<br />
Moldova, Republic of<br />
Madagascar<br />
Marshall Islands<br />
Mali<br />
Myanmar<br />
Mongolia<br />
Macau<br />
Northern Mariana Islands<br />
Martinique<br />
Mauritania<br />
Montserrat<br />
Malta<br />
Mauritius<br />
Maldives<br />
Malawi<br />
Mexico<br />
Malaysia<br />
Mozambique<br />
Namibia<br />
New Caledonia<br />
Niger<br />
Norfolk Island<br />
Nigeria<br />
Nicaragua<br />
Netherlands<br />
Norway<br />
Nepal<br />
Nauru<br />
Niue<br />
New Zealand<br />
Oman<br />
Panama<br />
Peru<br />
French Polynesia<br />
Papua New Guinea<br />
Philippines<br />
Pakistan<br />
Poland<br />
Saint Pierre and Miquelon<br />
Pitcairn<br />
Puerto Rico<br />
Portugal<br />
Palau<br />
Paraguay<br />
Qatar<br />
Réunion<br />
Romania<br />
Russian Federation<br />
RW<br />
SA<br />
SB<br />
SC<br />
SD<br />
SE<br />
SG<br />
SH<br />
SI<br />
SJ<br />
SK<br />
SL<br />
SM<br />
SN<br />
SO<br />
SR<br />
ST<br />
SV<br />
SY<br />
SZ<br />
TC<br />
TD<br />
TF<br />
TG<br />
TH<br />
TJ<br />
TK<br />
TM<br />
TN<br />
TO<br />
TP<br />
TR<br />
TT<br />
TV<br />
TW<br />
TZ<br />
UA<br />
UG<br />
UM<br />
US<br />
UY<br />
UZ<br />
VA<br />
VC<br />
VE<br />
VG<br />
VI<br />
VN<br />
VU<br />
WF<br />
WS<br />
YE<br />
YT<br />
YU<br />
ZA<br />
ZM<br />
ZR<br />
ZW<br />
Rwanda<br />
Saudi Arabia<br />
Solomon Islands<br />
Seychelles<br />
Sudan<br />
Sweden<br />
Singapore<br />
Saint Helena<br />
Slovenia<br />
Svalbard and Jan Mayen<br />
Slovakia<br />
Sierra Leone<br />
San Marino<br />
Senegal<br />
Somalia<br />
Suriname<br />
Sao Tome and Principe<br />
El Salvador<br />
Syrian Arab Republic<br />
Swaziland<br />
Turks and Caicos Islands<br />
Chad<br />
French Southern Territories<br />
Togo<br />
Thailand Code Language<br />
Tajikistan<br />
Tokelau<br />
Turkmenistan<br />
Tunisia<br />
Tonga<br />
East Timor<br />
Turkey<br />
Trinidad and Tobago<br />
Tuvalu<br />
Taiwan<br />
Tanzania, United<br />
Republic of<br />
Ukraine<br />
Uganda<br />
United States Minor<br />
Outlying Islands<br />
United States<br />
Uruguay<br />
Uzbekistan<br />
Vatican City State<br />
(Holy See)<br />
Saint Vincent and the<br />
Grenadines<br />
Venezuela<br />
Virgin Islands (British)<br />
Virgin Islands (U.S.)<br />
Viet Nam<br />
Vanuatu<br />
Wallis and Futuna Islands<br />
Samoa<br />
Yemen<br />
Mayotte<br />
Yugoslavia<br />
South Africa<br />
Zambia<br />
Zaire<br />
Zimbabwe<br />
59
Glossary for DVD Player<br />
Aspect ratio<br />
The ratio of vertical and horizontal sizes of a displayed image. The<br />
horizontal vs. vertical ratio of conventional TVs is 4:3 and that of<br />
wide-screen TVs is 16:9.<br />
Chapter<br />
The smallest division on DVD VIDEO. It is a division of a title and<br />
similar to a track for CD or VCD.<br />
Composite video signal<br />
A video signal comprised of three kinds of signals combined: an<br />
image signal made up of luminance and chrominance signals using<br />
the frequency multiplication technique, burst signal providing the<br />
basis for color reproduction, and synchronization signal.<br />
Component video signal<br />
A video signal system where parts of information necessary for<br />
reproducing image signal comprised of the three primary colors of<br />
light are transmitted via separate signal lines. Types of signal, such<br />
as R/G/B, Y/PB/PR, etc., are available.<br />
Disc menu<br />
A screen display prepared for allowing selection of images, sounds,<br />
subtitles, multi-angle, etc. recorded on DVD VIDEO.<br />
JPEG<br />
A still-picture data compression system proposed by the Joint<br />
Photographic Expert Group, which features little distortion in image<br />
quality in spite of its high compression ratio.<br />
Linear PCM (PCM: Pulse Code Modulation)<br />
A system for converting analog sound signal to digital signal for<br />
later processing with no data compression used in conversion.<br />
Letter box<br />
A method of displaying wide images like movies in on a 4:3 TV<br />
screen with no part of the image deleted by placing black bands on<br />
the top and bottom of the screen. This name has derived from the<br />
screen form looking literally like a letter box.<br />
MP3<br />
A file format with a sound data compression system. “MP3” is the<br />
abbreviation of Motion Picture Experts Group 1 (or MPEG-1) Audio<br />
Layer 3. By using MP3 format, one CD-R or CD-RW can contain<br />
about 10 times as much data volume as a regular CD can.<br />
Multichannel<br />
DVD VIDEO has been designed to have each soundtrack constitute<br />
one sound field. Multichannel refers to a structure of sound tracks<br />
having three or more channels.<br />
Multilanguage<br />
When a title is created to cope with multiple languages, it is<br />
generally called a multilanguage title.<br />
Parental Lock<br />
A feature of this system to automatically determine whether or not<br />
to reproduce particular DVD VIDEO software by comparing its<br />
parental level (a measure of undesirability of scenes, etc. from<br />
educational viewpoint) set for the software beforehand with that set<br />
on this system by the user; if the software’s level is less restrictive<br />
than the user-set level, it will be reproduced.<br />
Playback <strong>control</strong> (PBC)<br />
Refers to the signal recorded on VCD/SVCD for <strong>control</strong>ling<br />
reproduction. By using menu screens recorded on VCD/SVCD that<br />
supports PBC, you can enjoy interactive-type software as well as<br />
software having a search function.<br />
Region code<br />
A system for allowing discs to be played back only in the regions<br />
designated beforehand. All the countries in the world are divided<br />
into six regions and each region is identified by a specified region<br />
code (or region number). If the region code of a disc matches that of<br />
a player, the player can play back the disc.<br />
Surround<br />
A system for creating three-dimensional sound fields full of realism<br />
by arranging multiple speakers around the listener.<br />
Sampling frequency<br />
Frequency of sampling data when analog data is converted to digital<br />
data. Sampling frequency numerically represents how many times<br />
the original analog signal is sampled per second.<br />
Transfer rate<br />
The rate of transferring digital data. Usually the measure is in bit per<br />
second (bps). The DVD system applies a variable transfer rate<br />
system for high efficiency.<br />
Multi-angle<br />
By recording multiple scenes progressing at the same time in a<br />
single title, the user can select view angles. This feature is called the<br />
multi-angle function.<br />
60
Operating <strong>JVC</strong>’s Audio/Video Components<br />
You can operate <strong>JVC</strong>’s audio and video components with this unit’s remote <strong>control</strong>, since <strong>control</strong> signals for <strong>JVC</strong>’s components are preset in the<br />
remote <strong>control</strong>.<br />
Operating Audio Components<br />
To operate <strong>JVC</strong>’s audio components using this remote <strong>control</strong><br />
• Aim the remote <strong>control</strong> directly at the remote sensor on the unit.<br />
• To operate a source with the remote <strong>control</strong>, the source must be<br />
selected using the source selecting buttons on the remote <strong>control</strong>.<br />
• Refer also to the manuals supplied with your components.<br />
7 Sound <strong>control</strong> section (Amplifier)<br />
After pressing SOUND, you can perform the following operations:<br />
TV/STB CH<br />
SOUND EFFECT CENTER<br />
1 2 3<br />
ANALOG<br />
/DIGITAL TEST<br />
REAR·L<br />
INPUT 4 5 6<br />
AUDIO SURR ON/OFF REAR·R<br />
7 8 9<br />
SUBTITLE SURR MODE SUBWOOFER<br />
10/0 +10<br />
100+<br />
VFP<br />
TV RETURN<br />
SURR ON/OFF<br />
SURR MODE<br />
TEST<br />
CENTER + or –<br />
REAR•L + or –<br />
REAR•R + or –<br />
: Turns on or off the Surround modes—<br />
Dolby Digital, DTS Digital Surround, and<br />
Dolby Pro Logic II.<br />
: Selects the Surround modes.<br />
: Turns on or off the test tone output.<br />
: Adjusts the <strong>center</strong> speaker channel output<br />
level.<br />
: Adjusts the left rear speaker channel<br />
output level.<br />
: Adjusts the right rear speaker channel<br />
output level.<br />
SUBWOOFER + or – : Adjusts subwoofer channel output level.<br />
EFFECT<br />
: Selects the effect level.<br />
Note:<br />
• After adjusting sounds, press the source selecting button to operate<br />
your target source by using number buttons; otherwise, number<br />
buttons cannot be used for operating your target source.<br />
7 Tuner<br />
You can always perform the following operations:<br />
TV TAPE CDR FM/AM<br />
TV DIRECT<br />
TV/VIDEO<br />
REPEAT<br />
STB<br />
VCR<br />
DVD<br />
REW/( TUNING 9/FF<br />
SLEEP<br />
FM MODE<br />
STROBE<br />
TV/STB CH<br />
SOUND EFFECT CENTER<br />
1 2 3<br />
ANALOG<br />
/DIGITAL TEST<br />
REAR·L<br />
INPUT 4 5 6<br />
AUDIO SURR ON/OFF REAR·R<br />
7 8 9<br />
SUBTITLE SURR MODE SUBWOOFER<br />
10/0 +10 VFP<br />
100+ TV RETURN<br />
PROGRESSIVE<br />
FM/AM : Tunes into the last selected FM or AM station.<br />
• Each time you press the button, the band changes between FM and<br />
AM alternately.<br />
After pressing FM/AM, you can perform the following operations on<br />
a tuner:<br />
1 – 10, +10 : Selects a preset channel number directly.<br />
For channel number 5, press 5.<br />
For channel number 15, press +10, then 5.<br />
For channel number 20, press +10, then 10.<br />
TUNING 9 or ( : Tunes into stations.<br />
FM MODE : Changes the FM reception mode.<br />
When FM is selected as the band, you can perform the following<br />
operations for RDS:<br />
ZOOM<br />
– –<br />
TA/NEWS/INFO<br />
DIGEST TOP MENU MENU<br />
( PTY PTY SEARCH PTY9<br />
CHOICE<br />
ENTER<br />
ON SCREEN<br />
MUTING<br />
TV VOL<br />
VOLUME<br />
RETURN<br />
DISPLAY<br />
DISPLAY<br />
: Displays the RDS information.<br />
PTY SEARCH/PTY 9 or ( : Searches for PTY codes<br />
TA/NEWS/INFO<br />
: Selects programs for the Enhanced<br />
Other Network function.<br />
7 CD recorder<br />
After pressing CDR, you can perform the following operations on a CD<br />
player and a CD recorder:<br />
TV TAPE CDR FM/AM<br />
TV DIRECT<br />
TV/VIDEO<br />
REPEAT<br />
STB<br />
VCR<br />
DVD<br />
REW/( TUNING 9/FF<br />
SLEEP<br />
FM MODE<br />
STROBE<br />
TV/STB CH<br />
SOUND EFFECT CENTER<br />
1 2 3<br />
ANALOG<br />
/DIGITAL TEST<br />
REAR·L<br />
INPUT 4 5 6<br />
AUDIO SURR ON/OFF REAR·R<br />
7 8 9<br />
SUBTITLE SURR MODE SUBWOOFER<br />
10/0 +10 VFP<br />
100+ TV RETURN<br />
3 : Starts playing.<br />
4 : Returns to the beginning of the current (or previous)<br />
track.<br />
¢ : Skips to the beginning of the next track.<br />
7 : Stops playing.<br />
8 : Pauses playing. To release it, press 3.<br />
1 – 10, +10 : Selects a track number directly.<br />
For track number 5, press 5.<br />
For track number 15, press +10, then 5.<br />
For track number 20, press +10, then 10.<br />
For track number 30, press +10, +10, then 10.<br />
Note:<br />
• When you start recording on the CD recorder, use the buttons on<br />
the CD recorder itself or on the remote <strong>control</strong> supplied with it.<br />
61
perating <strong>JVC</strong>’s Audio/Video Components<br />
Operating Video Components<br />
To operate <strong>JVC</strong>’s video components using this remote <strong>control</strong><br />
• Some <strong>JVC</strong>’s VCRs can accept two types of the <strong>control</strong> signals—<br />
remote codes “A” and “B.” Before using this remote <strong>control</strong>, make<br />
sure that the remote <strong>control</strong> code of the connected VCR is set to<br />
code “A.”<br />
• To operate the video component(s) using the remote <strong>control</strong>, aim<br />
the remote <strong>control</strong> directly at the remote sensor on each<br />
component, not on this unit.<br />
7 TV<br />
You can always perform the following operations:<br />
STB VCR TV AUDIO<br />
TV TAPE CDR FM/AM<br />
TV DIRECT<br />
TV/VIDEO<br />
REPEAT<br />
TV/STB CH<br />
SOUND EFFECT CENTER<br />
1 2 3<br />
ANALOG<br />
/DIGITAL TEST<br />
REAR·L<br />
INPUT 4 5 6<br />
AUDIO SURR ON/OFF REAR·R<br />
7 8 9<br />
SUBTITLE SURR MODE SUBWOOFER<br />
10/0 +10 VFP<br />
ANGLE<br />
ZOOM<br />
STB<br />
VCR<br />
100+ TV RETURN<br />
PROGRESSIVE<br />
+<br />
–<br />
DVD<br />
REW/( TUNING 9/FF<br />
SLEEP<br />
DIMMER<br />
MUTING<br />
STANDBY/ON<br />
FM MODE<br />
TV VOL<br />
TA/NEWS/INFO<br />
STROBE<br />
+<br />
–<br />
VOLUME<br />
7 VCR<br />
You can always perform the following operations:<br />
STB VCR TV AUDIO<br />
TV TAPE CDR FM/AM<br />
TV DIRECT<br />
TV/VIDEO<br />
REPEAT<br />
STB<br />
VCR<br />
DVD<br />
REW/( TUNING 9/FF<br />
SLEEP<br />
STANDBY/ON<br />
FM MODE<br />
STROBE<br />
TV/STB CH<br />
SOUND EFFECT CENTER<br />
1 2 3<br />
ANALOG<br />
/DIGITAL TEST<br />
REAR·L<br />
INPUT 4 5 6<br />
AUDIO SURR ON/OFF REAR·R<br />
7 8 9<br />
SUBTITLE SURR MODE SUBWOOFER<br />
10/0 +10 VFP<br />
STANDBY/ON VCR<br />
100+ TV RETURN<br />
: Turns on or off the VCR.<br />
After pressing VCR, you can perform the following operations on a<br />
VCR:<br />
1 – 9, 0 : Selects the TV channels on a VCR.<br />
For channel number 5, press 5.<br />
For channel number 10, press 1, then 0.<br />
For channel number 23, press 2, then 3.<br />
3 : Starts playing.<br />
REW : Rewinds a tape.<br />
FF : Fast-winds a tape.<br />
7 : Stops operations.<br />
8 : Pauses playing. To release it, press 3.<br />
STANDBY/ON TV<br />
TV VOL + or –<br />
TV/VIDEO<br />
: Turns on or off the TV.<br />
: Adjusts the volume.<br />
: Sets the input mode (either TV or<br />
VIDEO).<br />
After pressing TV, you can perform the following operations on a TV:<br />
TV/STB CH + or – : Changes the channels.<br />
1 – 9, 0, 100+ : Selects the channels.<br />
For channel number 5, press 5.<br />
For channel number 10, press 1, then 0.<br />
For channel number 23, press 2, then 3.<br />
For channel number 135, press 100+, 3,<br />
then 5.<br />
TV RETURN : Alternates between the previously<br />
selected channel and the current<br />
channel.<br />
62
Operating Other Manufacturers’ Equipment<br />
This remote <strong>control</strong> supplied with the unit can transmit <strong>control</strong> signals for other manufacturers’ TVs, STBs, and VCRs.<br />
By changing the transmittable signals from preset ones to other manufacturers’, you can operate other manufacturers’ components using this<br />
remote <strong>control</strong>.<br />
Changing the Preset Signal Codes<br />
To operate other manufacturers’ equipment using this remote<br />
<strong>control</strong><br />
• Aim the remote <strong>control</strong> directly at the remote sensor on each<br />
equipment.<br />
• To operate a source with the remote <strong>control</strong>, the source must be<br />
selected using source selecting buttons on the remote <strong>control</strong>.<br />
• Refer also to the manuals supplied with your equipment.<br />
7 To change the transmittable signals for<br />
operating other manufacturers’ TV<br />
1. Press and hold<br />
STANDBY/ON TV.<br />
2. Press TV.<br />
3. Enter the manufacturer’s code<br />
using the number buttons (1–9,<br />
0).<br />
See the right to find the code.<br />
4. Release STANDBY/ON TV.<br />
STANDBY/ON<br />
STB VCR TV AUDIO<br />
TV TAPE CDR FM/AM<br />
TV DIRECT<br />
You can perform the following operations on the TV:<br />
STANDBY/ON TV : Turns on or off the TV.<br />
TV VOL + or – : Adjusts the volume.<br />
TV/VIDEO<br />
: Sets the input mode (either TV or<br />
VIDEO).<br />
After pressing TV, you can perform the following operations on<br />
a TV:<br />
TV/STB CH + or – : Changes the channels.<br />
1 – 9, 0, 100+ : Selects the channels.<br />
For channel number 5, press 5.<br />
For channel number 10, press 1, then 0.<br />
For channel number 23, press 2, then 3.<br />
For channel number 135, press 100+, 3,<br />
then 5.<br />
TV RETURN will function as the<br />
ENTER button if your equipment<br />
requires pressing ENTER after selecting<br />
a channel number.<br />
STB<br />
VCR<br />
DVD<br />
EFFECT CENTER<br />
1 2 3<br />
TEST<br />
REAR·L<br />
4 5 6<br />
SURR ON/OFF REAR·R<br />
7 8 9<br />
SURR MODE – SUBWOOFER +<br />
10/0 +10<br />
100+<br />
Notes:<br />
• Refer also to the manual supplied with your TV.<br />
• All the functions listed on the left may not be assigned to the<br />
buttons for some TVs.<br />
• If you cannot change the channels of some TVs by pressing<br />
the number buttons, press TV/STB CH + or – for changing the<br />
channels.<br />
5. Try to operate your TV by pressing<br />
STANDBY/ON TV.<br />
When your TV turns on or off, you have entered the correct<br />
code.<br />
If there are more than one code listed for your brand of TV,<br />
try each one until the correct one is entered.<br />
Manufactures’ codes for TV<br />
Manufacturer<br />
Codes<br />
<strong>JVC</strong> 00*, 02, 13, 14, 47, 74<br />
Akai 01, 02<br />
Blaupunkt 03, 04<br />
Fisher 01, 05<br />
Grundig 03, 06, 07<br />
Hitachi 08 – 10, 49<br />
Iraddio 02<br />
Itt/Nokia 11, 12<br />
Loewe 06, 15, 16<br />
Magnavox 08, 17, 49<br />
Mets 50 – 53<br />
Mitsubishi 08, 18 – 20<br />
Miver 21<br />
Nordmende 22, 23<br />
Okano 15<br />
Panasonic 24 – 27, 76<br />
Philips 15, 17, 28, 75<br />
Quelle 52 – 67<br />
RCA/PROSC 08, 24, 29 – 31, 48<br />
SABA 32, 33, 68 – 70<br />
Samsung 06, 08, 16, 34, 35, 49<br />
Sanyo 01, 05<br />
Schneider 02, 15, 36<br />
Sharp 37, 38, 77<br />
Sony 39<br />
Telefunken 40 – 42, 69<br />
Thomson 71, 72<br />
Toshiba 37, 43, 44<br />
Zenith 45, 46<br />
*“00” is the initial <strong>JVC</strong> code.<br />
Note:<br />
• Manufacturers’ codes are subject to change without notice. If<br />
they are changed, this remote <strong>control</strong> cannot operate the<br />
equipment.<br />
63
perating Other Manufacturers’ Equipment<br />
7 To change the transmittable signals for<br />
operating other manufacturers’ STB<br />
1. Press and hold<br />
STANDBY/ON STB.<br />
2. Press STB.<br />
3. Enter manufacturer’s code using<br />
the number buttons (1–9, 0).<br />
See the right to find the code.<br />
4. Release STANDBY/ON STB.<br />
You can turn on and off the STB:<br />
STANDBY/ON<br />
STB VCR TV AUDIO<br />
TV TAPE CDR FM/AM<br />
TV DIRECT<br />
STANDBY/ON STB : Turns on or off the STB.<br />
EFFECT CENTER<br />
1 2 3<br />
TEST REAR·L<br />
4 5 6<br />
SURR ON/OFF REAR·R<br />
7 8 9<br />
SURR MODE – SUBWOOFER +<br />
10/0 +10<br />
After pressing STB, you can perform the following operations<br />
on an STB:<br />
TV/STB CH + or – : Changes the channels.<br />
1 – 9, 0, 100+ : Selects the channels.<br />
For channel number 5, press 5.<br />
For channel number 10, press 1, then 0.<br />
For channel number 23, press 2, then 3.<br />
For channel number 135, press 100+, 3,<br />
then 5.<br />
TV RETURN will function as the<br />
ENTER button if your equipment<br />
requires pressing ENTER after selecting<br />
a channel number.<br />
Note:<br />
• Refer also to the manual supplied with your STB.<br />
STB<br />
VCR<br />
100+<br />
DVD<br />
Manufactures’ codes for STB<br />
Manufacturer<br />
Codes<br />
<strong>JVC</strong> 56*, 57, 67<br />
Amstrad 43 – 49<br />
Blaupunkt 30<br />
Echostar 50, 51, 67<br />
General Insrument 29<br />
Goldstar 31<br />
Grundig 32, 33<br />
Hemlin/Re 01 – 05<br />
Hirschmann 48, 52 – 55<br />
Instrument 68<br />
Itt/Nokia 34<br />
Jerrold/G 06 – 14<br />
Kathrein 52, 58 – 63<br />
NEC 35, 36<br />
Oak 15 – 17<br />
Orbitech 48<br />
Panasonic 18 – 20<br />
Philips 37, 38<br />
Pioneer 21, 22<br />
RCA 65<br />
Samsung 39, 40<br />
Scientiff 23 – 25<br />
Schwaiger 61, 64<br />
Siemens 41, 42<br />
Sony 66<br />
Technisat 48<br />
Tocom 26<br />
Zenith 27, 28<br />
*“56” is the initial <strong>JVC</strong> code.<br />
Note:<br />
• Manufacturers’ codes are subject to change without notice. If<br />
they are changed, this remote <strong>control</strong> cannot operate the<br />
equipment.<br />
5. Try to operate your STB by pressing<br />
STANDBY/ON STB.<br />
When your STB turns on or off, you have entered the correct<br />
code.<br />
If there are more than one code listed for your brand of STB,<br />
try each one until the correct one is entered.<br />
64
Operating Other Manufacturers’ Equipment<br />
7 To change the transmittable signals for<br />
operating other manufacturers’ VCR<br />
1. Press and hold<br />
STANDBY/ON VCR.<br />
2. Press VCR.<br />
3. Enter the manufacturer’s code<br />
using the number buttons (1–9, 0).<br />
See the right to find the code.<br />
4. Release STANDBY/ON VCR.<br />
You can turn on and off the VCR:<br />
STANDBY/ON VCR<br />
STANDBY/ON<br />
STB VCR TV AUDIO<br />
TV TAPE CDR FM/AM<br />
TV DIRECT<br />
: Turns on or off the VCR.<br />
2 3<br />
After pressing VCR, you can perform the following operations<br />
on a VCR:<br />
1 – 9, 0 : Selects the TV channels on a VCR.<br />
For channel number 5, press 5.<br />
For channel number 10, press 1, then 0.<br />
For channel number 23, press 2, then 3.<br />
TV RETURN will function as the ENTER button if<br />
your equipment requires pressing ENTER after<br />
selecting a channel number.<br />
3 : Starts playing.<br />
REW : Rewinds a tape.<br />
FF : Fast-winds a tape.<br />
7 : Stops operations.<br />
8 : Pauses playing. To release it, press 3.<br />
STB<br />
EFFECT<br />
1<br />
TEST<br />
4<br />
SURR ON/OFF<br />
7<br />
VCR<br />
5 6<br />
8 9<br />
SURR MODE – SUBWOOFER +<br />
10/0 +10<br />
100+<br />
CENTER<br />
REAR·L<br />
REAR·R<br />
DVD<br />
Manufactures’ codes for VCR<br />
Manufacturer<br />
Codes<br />
<strong>JVC</strong> 00*, 26 –29, 58<br />
Aiwa 01, 02<br />
Bell&Howell 03<br />
Blaupunkt 04, 05<br />
CGM 06, 07<br />
Emerson 08, 10 – 12, 64, 65<br />
Fisher 03, 14 – 17<br />
Funai 01<br />
GE 18 – 20<br />
Goldstar 07<br />
Goodmans 13, 21<br />
Grundig 06, 22<br />
Hitachi 18, 23 – 25, 66<br />
Loewe 07, 21<br />
Magnavox 04, 19, 24<br />
Mitsubishi 30 – 35<br />
NEC 26, 27<br />
Nokia 03, 36<br />
Nordmende 38<br />
Orion 09<br />
Panasonic 19, 24, 39, 40<br />
Philips 04, 19, 21, 24, 41, 42<br />
Phonola 21<br />
RCA/PROSC 04, 18, 19, 23, 24, 43 – 45<br />
SABA 38, 46<br />
Samsung 45, 47, 59, 61 – 63<br />
Sanyo 03, 48, 49<br />
Sharp 37, 50<br />
Siemens 03, 51<br />
Sony 52 – 54<br />
Telefunken 55, 60<br />
Toshiba 43, 44<br />
Zenith 56, 57<br />
*“00” is the initial <strong>JVC</strong> code.<br />
Note:<br />
• Manufacturers’ codes are subject to change without notice. If<br />
they are changed, this remote <strong>control</strong> cannot operate the<br />
equipment.<br />
Note:<br />
• Refer also to the manual supplied with your VCR.<br />
5. Try to operate your VCR by pressing<br />
STANDBY/ON VCR.<br />
When your VCR turns on or off, you have entered the correct<br />
code.<br />
If there are more than one code listed for your brand of<br />
VCR, try each one until the correct one is entered.<br />
65
Maintenance<br />
To get the best performance of the system, keep your discs and mechanism clean.<br />
General Notes<br />
In general, you will have the best performance by keeping your discs<br />
and mechanism clean.<br />
• Store discs in their cases, and keep them in cabinets or on shelves.<br />
Cleaning Discs<br />
Wipe the disc with a soft cloth in a straight line from <strong>center</strong> to edge.<br />
Handling Discs<br />
• Remove the disc from its case by holding it at the edge while<br />
pressing the <strong>center</strong> hole lightly.<br />
• Do not touch the shiny surface of the disc, or bend the disc.<br />
• Put the disc back in its case after use to prevent warping.<br />
DO NOT use any solvent—such as conventional record<br />
cleaner, spray, thinner, or benzine—to clean the disc.<br />
• Be careful not to scratch the surface of the disc when placing it<br />
back in its case.<br />
• Avoid exposure to direct sunlight, temperature extremes, and<br />
moisture.<br />
Cleaning the Unit<br />
• Stains on the unit<br />
Should be wiped off with a soft cloth. If the unit is heavily stained,<br />
wipe it with a cloth soaked in water-diluted neutral detergent and<br />
wrung well, then wipe clean with a dry cloth.<br />
• Since the unit may deteriorate in quality, become damaged or get<br />
its paint peeled off, be careful about the following.<br />
— DO NOT wipe it with a hard cloth.<br />
— DO NOT wipe it strong.<br />
— DO NOT wipe it with thinner or benzine.<br />
— DO NOT apply any volatile substances such as insecticides to it.<br />
— DO NOT allow any rubber or plastic to remain in contact with<br />
it for a long time.<br />
66
Troubleshooting<br />
Use this chart to help you solve daily operational problems. If there is any problem you cannot solve, contact your dealer.<br />
7 Genaral<br />
PROBLEM<br />
The power does not come on.<br />
No sound from speakers.<br />
Sound from one speaker only.<br />
“OVERLOAD” starts flashing on the<br />
display.<br />
The STANDBY lamp lights up after<br />
turning on the power, but soon the unit<br />
turns off (into standby mode).<br />
Remote <strong>control</strong> does not operate as you<br />
intend.<br />
Remote <strong>control</strong> does not work.<br />
POSSIBLE CAUSE<br />
The power cord is not plugged in.<br />
Speaker signal cables are not<br />
connected.<br />
The audio cable is not connected<br />
properly.<br />
An incorrect source is selected.<br />
Muting is activated.<br />
An incorrect input mode (analog or<br />
digital) is selected.<br />
Connections are incorrect.<br />
The balance is set to one extreme.<br />
Speakers are overloaded because of<br />
high volume.<br />
Speakers are overloaded because of<br />
short circuit of speaker terminals.<br />
The unit is overloaded because of a<br />
high voltage.<br />
The remote <strong>control</strong> is not ready for<br />
your intended operation.<br />
It is too far from the unit, or is not<br />
facing the unit.<br />
There is an obstruction hiding the<br />
remote sensor on the unit.<br />
The remote <strong>control</strong> is not aimed at the<br />
remote sensor on the unit or<br />
components.<br />
The batteries have been inserted into<br />
the wrong way round (+/–).<br />
Batteries are weak.<br />
The remote <strong>control</strong> signals are not set<br />
correctly.<br />
SOLUTION<br />
Plug the power cord into an AC outlet.<br />
Check speaker wiring and reconnect if<br />
necessary.<br />
Connect the cord properly (see pages 7 to<br />
10).<br />
Select the correct source.<br />
Press MUTING to cancel the muting.<br />
Select the correct input mode (analog or<br />
digital).<br />
Check connections.<br />
Adjust the balance properly (see pages 28 or<br />
54).<br />
1. Press STANDBY/ON on the front<br />
panel to turn off the unit.<br />
2. Stop the playback source.<br />
3. Turn on the unit again, and adjust the<br />
volume.<br />
Press STANDBY/ON on the front panel<br />
to turn off the unit, then check the speaker<br />
wiring.<br />
If “OVERLOAD” does not disappear,<br />
unplug the AC power cord, then plug it back<br />
again.<br />
If speaker wiring is not short-circuited,<br />
contact your dealer.<br />
Press STANDBY/ON on the front panel<br />
to turn off the unit. After unplugging the<br />
power cord, consult your dealer.<br />
Press SOUND (see page 28) or a source<br />
selecting button first, then press the buttons<br />
you want to use.<br />
Come closer to the unit. Operate the remote<br />
<strong>control</strong> within 7 m from the unit.<br />
Remove the obstruction.<br />
Aim the remote <strong>control</strong> at the remote sensor<br />
on each component you want to operate.<br />
Insert the batteries correctly.<br />
Replace batteries.<br />
Enter the correct manufacturers’ code (see<br />
pages 63 to 65).<br />
67
leshooting<br />
7 For DVD Player<br />
PROBLEM<br />
No picture is displayed on the TV.<br />
A disc cannot be played.<br />
A disc cannot be played and “0:00” is<br />
displayed on the display window.<br />
Video and audio are distorted.<br />
The picture does not fit the TV screen<br />
properly.<br />
No subtitle appears on the TV screen<br />
though you have selected as your initial<br />
subtitle language.<br />
Audio language is different from the<br />
one you have selected as your initial<br />
audio language.<br />
POSSIBLE CAUSE<br />
The SCART cable is not connected<br />
correctly.<br />
TV input selection is incorrect.<br />
The disc is not playable.<br />
The unit’s and disc’s Region Code<br />
numbers are incompatible.<br />
Parental Lock is in use.<br />
The disc is loaded with its label and<br />
data sides inverted.<br />
The unplayable disc is loaded.<br />
The disc is scratched or dirty.<br />
A VCR is connected between the unit<br />
and the TV.<br />
“STILL MODE” may not be set<br />
appropriately for the current disc.<br />
“MONITOR TYPE” is not set correctly.<br />
The TV is not set correctly.<br />
SOLUTION<br />
Connect the cord correctly (see pages 9 and<br />
10).<br />
Select the correct input on the TV.<br />
Replace the disc (see page 33).<br />
Replace the disc (see page 33).<br />
Enter your password to change the parental<br />
level (see pages 57 and 58).<br />
Insert the disc correctly (see page 15).<br />
Replace the disc (see page 33).<br />
Replace or clean the disc (see page 66).<br />
Connect the unit and TV directly.<br />
Select other setting of “STILL MODE” (see<br />
page 53).<br />
Set the monitor type correctly (see page 53).<br />
Set the TV correctly.<br />
Some discs are programed to always display<br />
no subtitle initially. If this happens, press<br />
SUBTITLE on the remote <strong>control</strong> after<br />
starting play (see page 39).<br />
Some discs are programed to always use the<br />
original language initially. If this happens,<br />
press AUDIO on the remote <strong>control</strong> after<br />
starting play (see pages 39 and 40).<br />
68
Troubleshooting<br />
7 For Tuner<br />
PROBLEM<br />
Hard to listen to broadcast because of<br />
noise.<br />
Continuous hiss or buzzing during FM<br />
reception.<br />
Occasional cracking noise during FM<br />
reception.<br />
POSSIBLE CAUSE<br />
The AM loop antenna is too close to the<br />
unit.<br />
The supplied FM antenna is not<br />
properly extended and positioned.<br />
Incoming signal is too weak.<br />
The station is too far away.<br />
An incorrect antenna is used.<br />
Antennas are not connected properly.<br />
Ignition noise from automobiles.<br />
SOLUTION<br />
Change the position and direction of the AM<br />
loop antenna.<br />
Extend the FM antenna at the best position.<br />
Connect an outdoor FM antenna or contact<br />
your dealer.<br />
Select a new station.<br />
Check with your dealer to be sure you have a<br />
correct antenna.<br />
Check connections.<br />
Move the antenna farther from automobile<br />
traffic.<br />
7 For MP3<br />
PROBLEM<br />
A disc cannot be played.<br />
No MP3 files except JPEG files are<br />
played.<br />
POSSIBLE CAUSE<br />
No MP3 files are recorded on the disc.<br />
The disc is unplayable (such as CD-<br />
ROM).<br />
MP3 files do not have the correct file<br />
extension—.mp3, .Mp3, .mP3, or .MP3<br />
in their file names.<br />
MP3 files are made at bit rate under<br />
64 kbps.<br />
MP3 files are not recorded in the format<br />
compliant with ISO 9660 Level 1 or 2.<br />
The MP3/JPEG setting is set to<br />
“JPEG.”<br />
SOLUTION<br />
Replace the disc.<br />
Add the file extension—.mp3, .Mp3, .mP3,<br />
or .MP3—to their file names (see page 47).<br />
This unit cannot play back such files.<br />
Replace the disc.<br />
Replace the disc. (Record MP3 files using a<br />
compliant application.)<br />
When both MP3 files and JPEG files are<br />
recorded on a disc, to play MP3 files, set the<br />
MP3/JPEG setting to “MP3” (see page 54).<br />
7 For JPEG<br />
PROBLEM<br />
A disc cannot be played.<br />
No JPEG files except MP3 files are<br />
played.<br />
POSSIBLE CAUSE<br />
No JPEG files are recorded on the disc.<br />
The disc is unplayable (such as CD-<br />
ROM).<br />
JPEG files do not have the correct file<br />
extension in their file names.<br />
JPEG files are not made with baseline<br />
JPEG format.<br />
JPEG files are not recorded in the<br />
format compliant with ISO 9660 Level<br />
1 or 2.<br />
The MP3/JPEG setting is set to “MP3.”<br />
SOLUTION<br />
Replace the disc.<br />
Add the file extension—.jpg, .jpeg, .JPG,<br />
.JPEG or any uppercase and lowercase<br />
combination (such as “.Jpg”)—to their file<br />
names (see page 49).<br />
This unit cannot play back such files.<br />
Replace the disc.<br />
Replace the disc. (Record JPEG files using a<br />
compliant application.)<br />
When both MP3 files and JPEG files are<br />
recorded on a disc, to play JPEG files, set<br />
the MP3/JPEG setting to “JPEG” (see page<br />
54).<br />
69
Specifications<br />
Designs & specifications are subject to change without notice.<br />
Amplifier<br />
Output Power<br />
At Stereo operation:<br />
Front channels: 80 W per channel, min. RMS, driven into 8 Ω at 1<br />
kHz, with no more than 0.9% total harmonic<br />
distortion. (IEC268-3/DIN)<br />
At Surround operation:<br />
Front channels: 80 W per channel, min. RMS, driven into 8 Ω<br />
at 1 kHz, with no more than 0.8% total harmonic<br />
distortion.<br />
Center channel: 80 W, min. RMS, driven into 8 Ω<br />
at 1 kHz, with no more than 0.8% total harmonic<br />
distortion.<br />
Rear channels: 80 W per channel, min. RMS, driven into 8 Ω<br />
at 1 kHz, with no more than 0.8% total harmonic<br />
distortion.<br />
Audio<br />
Audio Input Sensitivity/Impedance (1 kHz): TV, TAPE/CDR, STB, VCR: 240 mV/47 kΩ<br />
Audio Input (DIGITAL IN)* : Coaxial: DIGITAL 1 (STB): 0.5 V(p-p)/75 Ω<br />
Optical: DIGITAL 2 (TV): –21 dBm to –15 dBm (660 nm ±30 nm)<br />
* Corresponding to Linear PCM, Dolby Digital, and DTS Digital Surround<br />
(with sampling frequency—32 kHz, 44.1 kHz, 48 kHz).<br />
Signal-to-Noise Ratio (’66 IHF/DIN): TV, TAPE/CDR, STB, VCR: 87 dB/67 dB<br />
Frequency Response (8 Ω): TV, TAPE/CDR, STB, VCR: 20 Hz to 20 kHz (±1 dB)<br />
Tone Control: Bass (100 Hz): ±10 dB ±2 dB<br />
Treble (10 kHz): ±10 dB ±2 dB<br />
Video<br />
Video Input Sensitivity/Impedance (1 kHz):<br />
Composite video: STB IN, VCR IN: 1 V(p-p)/75 Ω<br />
S-VIDEO: STB IN, VCR IN: (Y:luminance): 1 V(p-p)/75 Ω<br />
(C:chrominance): 0.286 V(p-p)/75 Ω<br />
RGB: STB IN, VCR IN: 0.7 V(p-p)/75 Ω<br />
Video Output Level/Impedance (1 kHz):<br />
Composite video: VCR OUT, TV OUT: 1 V(p-p)/75 Ω<br />
S-VIDEO: TV OUT: (Y:luminance): 1 V(p-p)/75 Ω<br />
(C:chrominance): 0.286 V(p-p)/75 Ω<br />
RGB: TV OUT: 0.7 V(p-p)/75 Ω<br />
Color System: PAL<br />
Horizontal Resolution: 500 lines<br />
Signal-to-Noise Ratio (S/N): 63 dB<br />
Synchronize: Negative<br />
FM tuner (IHF)<br />
Tuning Range:<br />
87.50 MHz to 108.00 MHz<br />
AM tuner<br />
General<br />
Tuning Range: MW: 522 kHz to 1 629 kHz<br />
Power Requirements: AC 230V , 50 Hz<br />
Power Consumption: 180 W (in operation)<br />
2 W (in standby mode)<br />
Dimensions (W x H x D): 435 mm x 100 mm x 403.5 mm<br />
Mass: 7.9 kg<br />
70
VICTOR COMPANY OF JAPAN, LIMITED<br />
EN<br />
<strong>JVC</strong><br />
0602NHMMDWJEM
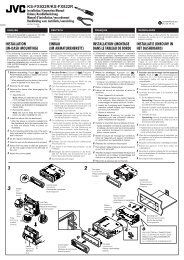


![TH-V70R[B] revision - JVC](https://img.yumpu.com/23738839/1/184x260/th-v70rb-revision-jvc.jpg?quality=85)