

naiman-1984-introduction-to-the-lisa
naiman-1984-introduction-to-the-lisa
naiman-1984-introduction-to-the-lisa
- No tags were found...

Create successful ePaper yourself
Turn your PDF publications into a flip-book with our unique Google optimized e-Paper software.
Introduction <strong>to</strong> <strong>the</strong> Lisa
Also by Arthur Naiman<br />
Every Goy's Guide <strong>to</strong> Common Jewish Expressions<br />
Introduction <strong>to</strong> WordStar<br />
Word Processing Buyer's Guide<br />
Computer Dictionary for Beginners<br />
The First Book <strong>to</strong> Read about <strong>the</strong> IBM Personal<br />
Computer
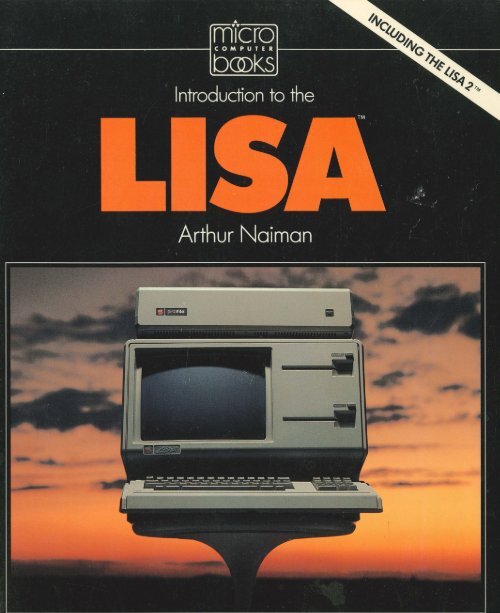
Introduction <strong>to</strong> <strong>the</strong> Lisa<br />
Arthur Naiman<br />
...<br />
......<br />
Addison-Wesley Publishing Company<br />
Reading, Massachusetts Menlo Park, California<br />
London Amsterdam Don Mills, Ontario Sydney
Lisa is a trademark of Apple Computer, Inc. Macin<strong>to</strong>sh is a<br />
trademark licensed <strong>to</strong> Apple Computer, Inc.<br />
"Master and Boatswain," copyright 1944 by W. H. Auden. Reprinted<br />
from W H. Auden: Collected Poems, edited by Edward Mendelson,<br />
by permission of Random House, Inc.<br />
"The Eye," copyright 1941, 1944, and renewed 1969, 1972 by Donnan<br />
Jeffers and Garth Jeffers. Reprinted from Selected Poems, by<br />
Robinson Jeffers, by permission of Random House, Inc.<br />
Copyright© <strong>1984</strong> by Arthur Naiman<br />
All rights reserved. No part of this publication may be reproduced,<br />
s<strong>to</strong>red in a retrieval system, or transmitted, in any form or by any<br />
means, electronic, mechanical, pho<strong>to</strong>copying, recording, or<br />
o<strong>the</strong>rwise, without <strong>the</strong> prior written permission of <strong>the</strong> Publisher.<br />
Printed in <strong>the</strong> United States of America. Published simultaneously<br />
in Canada.<br />
Library of Congress Cataloging in Publication Data<br />
Naiman, Arthur.<br />
Introduction <strong>to</strong> <strong>the</strong> <strong>lisa</strong>.<br />
Includes index.<br />
1. Lisa computer. I. Title.<br />
QA76.8.L55N35 <strong>1984</strong> 001.64<br />
ISBN 0-201-15895-7<br />
84-327<br />
Jacket design by Marshall Henrichs. Text design by Lori Snell.<br />
Set in 11-point Aster by Kingsport Press.<br />
ISBN 0-201-15895-7<br />
ABCDEFGHIJ-HA-8987654
for Kai<br />
and<br />
for Ellie
Contents<br />
Acknowledgments<br />
IX<br />
Introduction 1<br />
1 The Lisa's Hardware<br />
and How It's Different from O<strong>the</strong>r Computers' 5<br />
2 The Lisa's Software<br />
and How It's Different from O<strong>the</strong>r Computers' 23<br />
3 Using a Lisa for <strong>the</strong> First Time 85<br />
4 Word Processing with LisaWrite 93<br />
5 Managing a Data Base with LisaList 117<br />
6 Predicting <strong>the</strong> Future with LisaCalc 123<br />
7 Making Business Charts with LisaGraph 135<br />
8 Scheduling and Job Tracking with LisaProject 153<br />
9 Drawing Diagrams and Pictures with<br />
LisaDraw 169<br />
10 Communicating with LisaTerminal 193<br />
11 Doing More with a Lisa 197<br />
Index 201
Acknowledgments<br />
When <strong>the</strong> edi<strong>to</strong>r of a book is mentioned in <strong>the</strong> acknowledgments,<br />
it's often interesting <strong>to</strong> look for what's not<br />
said. Since <strong>the</strong>re are almost always difficulties between<br />
author and edi<strong>to</strong>r, and since <strong>the</strong>re's no point in writing<br />
an acknowledgment if it's going <strong>to</strong> be negative, authors<br />
tend <strong>to</strong> "accentuate <strong>the</strong> positive." But you won't have<br />
<strong>to</strong> read between <strong>the</strong> lines here-working with Ted Buswick<br />
has been a complete delight in every way.<br />
Ron Lichty continues his unbroken string of acknowledgments<br />
in my books (six for six). He read a<br />
draft of <strong>the</strong> first three chapters and made many helpful<br />
suggestions-as did that computer wizard and inexhaustible<br />
source of ban mots, Fred Davis. For <strong>the</strong>ir reading<br />
of <strong>the</strong> same draft, Mike Bradley and Meg Holmberg<br />
tried <strong>to</strong> pretend <strong>the</strong>y knew less about computers than<br />
<strong>the</strong>y do; <strong>the</strong>ir comments helped me see where my writing<br />
was obscure, confusing and-worst of all-not<br />
funny.<br />
I also want <strong>to</strong> express my appreciation <strong>to</strong> five small<br />
islands of competence and sanity in a sea of bureaucratic<br />
ineptitude so vast and deep it would flabbergast<br />
even an employee of <strong>the</strong> New York City Board of Education<br />
(connoisseurs of world-class passive aggression will<br />
appreciate <strong>the</strong> enormity of this statement). How <strong>the</strong> Apple<br />
Computer Company managed, in a few short years,<br />
<strong>to</strong> grow in<strong>to</strong> something beyond Kafka's wildest nightix
x<br />
Introduction <strong>to</strong> <strong>the</strong> Lisa<br />
mares will no doubt fascinate scholars for centuries <strong>to</strong><br />
come; I'm just grateful that a handful of its employees<br />
Linda Goff en, Ron Perrotta, Burt Cummings, Bill Libbey<br />
and Karen Steele-somehow managed <strong>to</strong> buck <strong>the</strong> tide.<br />
A few o<strong>the</strong>rs at Apple also tried <strong>to</strong> help, but found<br />
<strong>the</strong>mselves as powerless as that ancient king who sat<br />
on his throne and ordered <strong>the</strong> advancing sea <strong>to</strong> halt,<br />
futilely continuing even as <strong>the</strong> water washed about his<br />
ankles, <strong>the</strong>n his knees . . .<br />
Pete Lundstrom (or Lungstrom-<strong>the</strong> records are<br />
unclear) suggested I write this book and encouraged·<br />
me in <strong>the</strong> early stages. Mike Nadelman of Apex Information<br />
Systems tried <strong>to</strong> do what Apple couldn't-give me<br />
an opportunity <strong>to</strong> look at LisaTerminal-but <strong>the</strong> fates<br />
conspired against us.<br />
Janice Byer did her usual fine job of copy-editing.<br />
Marshall Henrichs made <strong>the</strong> cover of <strong>the</strong> book look<br />
beautiful, and Lori Snell did <strong>the</strong> same for <strong>the</strong> inside.<br />
I also want <strong>to</strong> thank Charlie Rubin, Ira Rosenberg,<br />
Tom Crosley, Bill Finzer, Steve Rosenthal, Tony Pietsch,<br />
Kathleen MacEnroe, Gloria Zarifa, Yvette Manson,<br />
Nancy Shine, Mat<strong>the</strong>w Lasar, Dave Brast, Vic<strong>to</strong>r<br />
Fischer, Cheryl Nichols, Albert and Nettie Naiman,<br />
Rita Gibian, Jane Margold, Eric Angress and Eva Walen<br />
for aid and comfort of various kinds.
Introduction <strong>to</strong> <strong>the</strong> Lisa
Introduction<br />
If you're looking for a personal computer and wonder<br />
if Apple's Lisa might be right for you, this book will<br />
give you a very good feeling for its strengths and weaknesses.<br />
If you already own a Lisa (or have definitely<br />
decided <strong>to</strong> buy one), this book will get you started using<br />
it much more quickly and easily than Apple's own user<br />
manual and training program-because, unlike <strong>the</strong>m,<br />
it presents information in <strong>the</strong> order you need <strong>to</strong> know<br />
it, and explains things clearly and simply.<br />
Chapter 1 describes <strong>the</strong> Lisa's hardware and how<br />
it's different from more traditional computer equipment.<br />
Since this book was written before <strong>the</strong> Lisa 2<br />
was introduced, some of <strong>the</strong> comments in it refer specifically<br />
<strong>to</strong> <strong>the</strong> original Lisa system, <strong>the</strong> "Lisa 1." However,<br />
by means of an elaborate series of deceptions and<br />
bribes-not <strong>to</strong> mention a daring commando raid that<br />
was <strong>the</strong> talk of Rangoon for months afterwards-I was<br />
able <strong>to</strong> learn <strong>the</strong> basic facts about <strong>the</strong> Lisa 2, and <strong>the</strong>y<br />
are included as well (you'd think Apple was planning<br />
a military coup, ra<strong>the</strong>r than a product <strong>introduction</strong>,<br />
from <strong>the</strong> maniacal ferocity with which <strong>the</strong>y guarded<br />
what was essentially mundane information).<br />
Chapter 2 describes <strong>the</strong> Lisa's unconventional approach<br />
<strong>to</strong> software in great detail. The screens produced<br />
by <strong>the</strong> new, faster Lisa 2 software may differ slightly<br />
from those shown in this book. But most of <strong>the</strong> differ-<br />
1
2 Introduction <strong>to</strong> <strong>the</strong> Lisa<br />
ence is simply speed-<strong>the</strong> basic approach remains unchanged,<br />
and Chapter 2 gives you an excellent sense<br />
of it.<br />
Chapter 3 provides some tips on how <strong>to</strong> avoid anguish<br />
when getting started on a Lisa. Chapters 4 through<br />
10 describe <strong>the</strong> seven standard software "<strong>to</strong>ols" that<br />
come with <strong>the</strong> Lisa:<br />
• Lisa Write, a word processing program<br />
• LisaList, a data base manager<br />
• LisaCalc, an electronic spreadsheet<br />
• LisaGraph, a program for producing several different<br />
kinds of business charts<br />
• LisaProject, a job tracking and scheduling program<br />
• LisaDraw, a very sophisticated graphics program<br />
• LisaTerminal, a telecommunications program<br />
The order in which I present <strong>the</strong>se programs is not<br />
random; what you learn about each program helps you<br />
understand <strong>the</strong> next-from Lisa Write, which introduces<br />
skills basic <strong>to</strong> all <strong>the</strong> o<strong>the</strong>r <strong>to</strong>ols, <strong>to</strong> LisaDraw, which<br />
incorporates and enhances techniques from most of <strong>the</strong><br />
o<strong>the</strong>rs. (Lisa Terminal is simply stuck on <strong>the</strong> end because<br />
Apple itself stuck it on at <strong>the</strong> end-introducing it a year<br />
after <strong>the</strong> o<strong>the</strong>r standard <strong>to</strong>ols.) You don't have <strong>to</strong> read<br />
<strong>the</strong> chapters in order, of course, but if you do skip<br />
around, be prepared <strong>to</strong> refer back <strong>to</strong> earlier chapters<br />
occasionally.<br />
The Apple manuals for <strong>the</strong>se seven programs are<br />
quite good and I don't try <strong>to</strong> duplicate what <strong>the</strong>y do.<br />
It takes a while <strong>to</strong> get <strong>the</strong> hang of <strong>the</strong> Lisa's approach<br />
<strong>to</strong> software, but once you're comfortable with it, specific<br />
applications are a snap. The organization of this book<br />
reflects that: Chapter 2 (on <strong>the</strong> basics) is quite long,<br />
Chapters 4 through 10 (on <strong>the</strong> applications) are much<br />
shorter.<br />
Ra<strong>the</strong>r than bore you (and myself) with <strong>the</strong> fake<br />
business letters and such that are typically used as examples<br />
in training manuals and introduc<strong>to</strong>ry books, I've<br />
given you poems, jokes and deranged rants. These are
3 Introduction<br />
a lot more fun, and you won't have any trouble making<br />
<strong>the</strong> transition <strong>to</strong> actual business or personal uses.<br />
Chapter 11 talks about how you can go beyond <strong>the</strong><br />
standard Lisa-both by adding hardware and software.<br />
It also discusses <strong>the</strong> differences between <strong>the</strong> original<br />
Lisa system, announced in January, 1983, and <strong>the</strong> Lisa<br />
2, announced in January, <strong>1984</strong> (guess what month of<br />
<strong>the</strong> year Apple holds its annual shareholders' meeting).<br />
Finally, <strong>the</strong>re's a very complete index, so you can<br />
use this book as a reference, not merely as a thrilling<br />
one-time read.<br />
Introduction <strong>to</strong> <strong>the</strong> Lisa is written in simple, everyday<br />
English. I assume you have a basic understanding<br />
of how computers work and of elementary computer<br />
technology, but I avoid jargon as much as possible.<br />
When I do find it necessary <strong>to</strong> use a technical term, I<br />
typically boldface it and define it. If you need more<br />
help than that, <strong>the</strong>re are several good beginning computer<br />
dictionaries on <strong>the</strong> market (since I wrote <strong>the</strong> best<br />
of <strong>the</strong>m, modesty prevents me from recommending<br />
one).
1 The Lisa's Hardware<br />
and How It's Different<br />
from O<strong>the</strong>r Computers'<br />
Whe<strong>the</strong>r or not you decide you like <strong>the</strong> Lisa, and<br />
whe<strong>the</strong>r or not you think it's worth what it costs, <strong>the</strong>re's<br />
no question about one thing-it's not just ano<strong>the</strong>r hohum,<br />
me-<strong>to</strong>o machine.<br />
The Lisa's innovations can be found both in hardware<br />
and software, but since hardware is what you see<br />
first, that's what I'll cover first (and naturally I'll cover<br />
<strong>the</strong> Lisa's noninnovative features as well as its innovative<br />
ones).<br />
A standard Lisa system consists of a console, a keyboard,<br />
a mouse (which I'll describe in a little while)<br />
and one or more s<strong>to</strong>rage devices.<br />
The console is <strong>the</strong> computer itself, <strong>the</strong> screen, and<br />
<strong>the</strong> cabinet that contains <strong>the</strong>m. On <strong>the</strong> original Lisa,<br />
<strong>the</strong> "Lisa 1," it also enclosed two 5-inch minifloppy<br />
disk drives that each held 860K; on <strong>the</strong> Lisa 2, it encloses<br />
a 3Yi-inch microfloppy disk drive that holds 400K (with<br />
SOOK on <strong>the</strong> way) and an optional hard disk drive that<br />
holds ei<strong>the</strong>r 5 MB or 10 MB (<strong>the</strong> Lisa 2/5 and 2/10,<br />
respectively).<br />
A major advantage of <strong>the</strong> 3Yi-inch drive is that it's<br />
<strong>the</strong> same one used in <strong>the</strong> Macin<strong>to</strong>sh, a machine for<br />
which a lot of software will be written. For <strong>the</strong> o<strong>the</strong>r<br />
advantages, see Chapter 11.<br />
Since no hard disk was built in<strong>to</strong> <strong>the</strong> Lisa 1, it was<br />
always hooked up <strong>to</strong> one or more of Apple's external<br />
5
6 Introduction <strong>to</strong> <strong>the</strong> Lisa<br />
Figure 1-1<br />
Figure 1-2<br />
ones, called ProFiles. A Profile holds somewhat less<br />
than five megabytes.<br />
The standard system for <strong>the</strong> Lisa 1 is shown in<br />
Figure 1-1, with <strong>the</strong> Profile and <strong>the</strong> mouse <strong>to</strong> <strong>the</strong> right;<br />
Figure 1-2 shows <strong>the</strong> Lisa 2 (as you can see, <strong>the</strong>re's<br />
only one slot for floppy disks and <strong>the</strong> front panel is<br />
also somewhat different).
7<br />
The Lisa's Hardware<br />
One additional piece of hardware is needed <strong>to</strong> make<br />
a Lisa system really complete-a printer. Both dot-matrix<br />
and formed-character (daisy wheel or thimble)<br />
printers are available, but <strong>the</strong> dot-matrix printer is standard.<br />
There are a lot of things you can do with it that<br />
you can't do with a formed-character printer, although<br />
it's not as good at producing professional-looking business<br />
letters and manuscripts.<br />
The system I used when I wrote this book was a<br />
Lisa 1 with Apple's old dot-matrix printer, so that's what<br />
I'll be describing-with appropriate asides about <strong>the</strong><br />
Lisa 2 whenever necessary. Here's one now: when <strong>the</strong><br />
Mac and Lisa 2 were introduced, Apple also brought<br />
out a new, improved dot-matrix printer called <strong>the</strong><br />
Imagewriter.<br />
These components are discussed at various points<br />
below, but <strong>the</strong> chapter isn't organized around <strong>the</strong>m; instead,<br />
it focuses on various qualities of <strong>the</strong> Lisa, its virtues<br />
and its failings.<br />
Ease of use<br />
This is <strong>the</strong> quality that Apple brags about <strong>the</strong> most when<br />
promoting <strong>the</strong> Lisa. Ease of use is mostly a function<br />
of software, but <strong>the</strong> Lisa's hardware also incorporates<br />
many advanced ergonomic features. (Ergonomicsalso<br />
called human engineering-is <strong>the</strong> science of designing<br />
a product as if human beings were going <strong>to</strong><br />
use it.)<br />
Let's start with <strong>the</strong> screen. I'm convinced that most<br />
of <strong>the</strong> eyestrain that people who work at VDT's complain<br />
about is due <strong>to</strong> things like flicker, glare, flashing cursors<br />
and so on. Flicker is caused by <strong>the</strong> fact that <strong>the</strong> image<br />
on <strong>the</strong> screen is not constant but is continually renewed<br />
by <strong>the</strong> cathode-ray gun at <strong>the</strong> back of <strong>the</strong> tube. (This<br />
is called rewriting or updating <strong>the</strong> screen, and <strong>the</strong> number<br />
of times per second it's done is called <strong>the</strong> refresh<br />
rate.)<br />
The picture on <strong>the</strong> screen appears <strong>to</strong> be more or<br />
less constant because both our eyes and <strong>the</strong> phosphor<br />
(which coats <strong>the</strong> inside of <strong>the</strong> screen and glows when
8 Introduction <strong>to</strong> <strong>the</strong> Lisa<br />
<strong>the</strong> cathode-ray gun hits it with an electron) hold on<br />
<strong>to</strong> images for a little while. In <strong>the</strong> case of our eyes,<br />
this is called <strong>the</strong> persistence of vision; it's <strong>the</strong> reason<br />
why movies seem continuous ra<strong>the</strong>r than jerky (since,<br />
after all, <strong>the</strong>y're made up of a series of distinct, separate<br />
images).<br />
The Lisa's screen image is very steady and easy<br />
<strong>to</strong> look at, for a number of reasons:<br />
• The screen is updated 60 times a second (instead of<br />
<strong>the</strong> more common 30 times a second).<br />
• It has dark characters on a light background, ra<strong>the</strong>r<br />
than <strong>the</strong> usual light characters on a dark background.<br />
• You can adjust <strong>the</strong> contrast between <strong>the</strong> characters<br />
and <strong>the</strong> background <strong>to</strong> your own taste (but you should<br />
know that a grey background is much easier on your<br />
eyes than a white one). Sixteen levels of contrast are<br />
under software control, and going from one <strong>to</strong> <strong>the</strong><br />
o<strong>the</strong>r is simple.<br />
• The screen is relatively nonreflective, and it comes<br />
with an optional glare guard for difficult situations.<br />
• The pointer-<strong>the</strong> symbol that tells you where you are<br />
on <strong>the</strong> screen (called <strong>the</strong> cursor on most o<strong>the</strong>r systems<br />
)-doesn't flash. There is a blinking vertical bar<br />
that shows up when you're inserting text, but it's quite<br />
thin and blinks fairly slowly.<br />
• Ghost images are a problem on some screens. They're<br />
caused when <strong>the</strong> same display remains a long time<br />
on a brightly lit screen and gets burned in<strong>to</strong>-or exhausts<br />
certain parts of-<strong>the</strong> phosphor. To prevent this,<br />
<strong>the</strong> Lisa's screen au<strong>to</strong>matically dims itself when <strong>the</strong><br />
image on it remains unchanged for a while. (It comes<br />
back up <strong>to</strong> normal brightness <strong>the</strong> moment you <strong>to</strong>uch<br />
<strong>the</strong> keyboard or <strong>the</strong> mouse.) You can even adjust how<br />
long <strong>the</strong> Lisa waits before dimming <strong>the</strong> screen.<br />
The Lisa's keyboard is also well designed for comfort<br />
and ease of use. It's laid out like a standard typewriter<br />
keyboard (with <strong>the</strong> addition of a few keys), which<br />
makes it easy <strong>to</strong> learn. But some of <strong>the</strong> keys could be<br />
better placed. For example, <strong>the</strong> backspace key (used con-
9 The Lisa's Hardware<br />
stantly by incompetent typists like myself) is stuck off<br />
in a corner where it's hard <strong>to</strong> reach, far<strong>the</strong>r away than<br />
o<strong>the</strong>r keys that are much less important (like those for<br />
square and curly brackets).<br />
The keyboard incorporates a numeric keypad (like<br />
<strong>the</strong> one on a calcula<strong>to</strong>r )-a useful feature when you're<br />
working with a lot of figures. The numeric keypad has<br />
a raised dot on <strong>the</strong> 5 key, <strong>to</strong> help you position your<br />
fingers quickly.<br />
The keyboard is attached <strong>to</strong> <strong>the</strong> console with a fourfoot<br />
coiled cord. This allows you <strong>to</strong> place <strong>the</strong> keyboard<br />
in <strong>the</strong> most comfortable position for working (which<br />
is usually lower and closer <strong>to</strong> you than <strong>the</strong> console).<br />
The key<strong>to</strong>ps are concave <strong>to</strong> fit your finger tips, and <strong>the</strong>y<br />
have a textured, nonslip surface.<br />
Underneath <strong>the</strong> keyboard are four pull-out reference<br />
cards. The first tells you which keys can be used<br />
<strong>to</strong> generate special symbols; o<strong>the</strong>rs provide handy summaries<br />
of <strong>the</strong> Lisa's basic operations. These cards are<br />
a helpful <strong>to</strong>uch.<br />
Although <strong>the</strong> keyboard and <strong>the</strong> screen are impressive,<br />
<strong>the</strong> Lisa's claims for easy-<strong>to</strong>-use hardware rest<br />
largely on <strong>the</strong> mouse-a little box with a ball bearing<br />
on <strong>the</strong> bot<strong>to</strong>m and a but<strong>to</strong>n on <strong>the</strong> <strong>to</strong>p, connected <strong>to</strong><br />
<strong>the</strong> computer with a wire. It's called a mouse because<br />
it's small (though not as small as an actual mouse), grey<br />
(though not as grey as an actual mouse), and has a wire<br />
sticking out of it that looks a little like a tail (if you<br />
have a vivid imagination).<br />
When you roll <strong>the</strong> mouse on a flat surface, <strong>the</strong><br />
pointer moves in <strong>the</strong> same direction on <strong>the</strong> screen (although<br />
not <strong>the</strong> same distance-<strong>the</strong> pointer moves about<br />
2Yz inches for every inch <strong>the</strong> mouse moves).<br />
The benefit claimed for <strong>the</strong> mouse is that it allows<br />
people <strong>to</strong> take advantage of <strong>the</strong>ir natural hand-eye coordination,<br />
and also that moving <strong>the</strong> pointer with a mouse<br />
is more intuitive-more like what we do in everyday<br />
life-than hitting various keys <strong>to</strong> direct it.<br />
When you really get used <strong>to</strong> <strong>the</strong> mouse, you forget<br />
that it's <strong>the</strong>re; it feels like you're simply moving <strong>the</strong><br />
pointer with your hand. As a result, <strong>the</strong> mouse lets you
10 Introduction <strong>to</strong> <strong>the</strong> Lisa<br />
move <strong>the</strong> pointer faster and more accurately than you<br />
can using <strong>the</strong> keyboard.<br />
But <strong>the</strong> mouse has one big disadvantage: it forces<br />
you <strong>to</strong> take your hand off <strong>the</strong> keyboard. This is not so<br />
much of a problem if you plan <strong>to</strong> use <strong>the</strong> Lisa primarily<br />
for graphic applications, but if you want <strong>to</strong> do much<br />
writing on it, having <strong>to</strong> constantly move your hand from<br />
<strong>the</strong> keyboard <strong>to</strong> <strong>the</strong> mouse will drive you nuts.<br />
The Lisa was designed primarily for use in corporate<br />
offices, and part of <strong>the</strong> reason <strong>the</strong> mouse was developed<br />
has <strong>to</strong> do with a basic fact about that market: most<br />
corporate executives would sooner <strong>to</strong>uch a leper than<br />
a keyboard. They feel it diminishes <strong>the</strong>ir stature <strong>to</strong> be<br />
doing what someone walking by <strong>the</strong>ir office might perceive<br />
as clerical work. Secretaries use keyboards; executives<br />
call secretaries in<strong>to</strong> <strong>the</strong>ir offices and dictate <strong>to</strong><br />
<strong>the</strong>m. To be seen with your own little pink hands at<br />
<strong>the</strong> keyboard is demeaning; beggars will leer at you in<br />
<strong>the</strong> street and snigger <strong>to</strong> <strong>the</strong>ir friends, "He sits at a keyboard."<br />
Ah, but <strong>the</strong> mouse is different! Most secretaries<br />
don't even know what it is. So if <strong>the</strong>re were a computer<br />
that used a mouse instead of a keyboard for most of<br />
its major functions, executives could buy it without embarrassment<br />
and remorse (and presumably, <strong>the</strong>refore,<br />
by <strong>the</strong> carload).<br />
As you can tell from <strong>the</strong>se evenhanded remarks,<br />
I <strong>to</strong>tally sympathize with executives in this crazed fear<br />
of <strong>the</strong>irs. But <strong>the</strong>re are better reasons for using a mouse<br />
than keyboardphobia-it is a great way <strong>to</strong> move <strong>the</strong><br />
pointer around. So what's <strong>the</strong> solution<br />
I'm glad you asked. The solution is a mouse-like<br />
device on <strong>the</strong> keyboard-a <strong>to</strong>uchpad, joystick, trackball<br />
or <strong>the</strong> like-that takes advantage of all <strong>the</strong> hand-eye<br />
intuitive stuff, but keeps your hands on <strong>the</strong> keyboard<br />
where <strong>the</strong>y belong.<br />
Actually, <strong>the</strong> ultimate solution is two devices that<br />
fit over your hands like gloves. You wiggle your fingers<br />
in one <strong>to</strong> produce characters and in <strong>the</strong> o<strong>the</strong>r <strong>to</strong> move<br />
<strong>the</strong> pointer around. (If you s<strong>to</strong>p <strong>to</strong> think about it, this
11 The Lisa's Hardware<br />
can be easily done. Each finger can move up and down,<br />
and <strong>the</strong> thumb can move back and forth in at least three<br />
different positions. That makes a <strong>to</strong>tal of fourteen distinct<br />
movements on each hand, and <strong>the</strong>refore 142 (196)<br />
possible combinations-more than enough, on <strong>the</strong> one<br />
hand, <strong>to</strong> produce every conceivable character, and on<br />
<strong>the</strong> o<strong>the</strong>r, <strong>to</strong> move <strong>the</strong> pointer anY""·here in <strong>the</strong> known<br />
universe.)<br />
You lie in a hammock with <strong>the</strong>se glove things on<br />
and look at a screen which fills <strong>the</strong> wall. (Naturally<br />
<strong>the</strong>re are no wires; this is 1990, after all.) Your hands<br />
twitch idly and <strong>the</strong> image on <strong>the</strong> screen dances at your<br />
command. What a wonderful-almost magical-device!<br />
And <strong>to</strong> think that Naiman dreamt it up so many years<br />
ago.<br />
But even this isn't <strong>the</strong> ultimate solution. They're<br />
working on a device that shines infrared beams in<strong>to</strong><br />
your eyes, so you can position <strong>the</strong> pointer merely by<br />
looking where you want it <strong>to</strong> go! (I don't use exclamation<br />
marks often, but that deserves one.) Of course you do<br />
have <strong>to</strong> push a but<strong>to</strong>n <strong>to</strong> tell <strong>the</strong> pointer <strong>to</strong> obey this<br />
device; if <strong>the</strong> pointer were always following your eyes,<br />
it could end up in some embarrassing places.<br />
Ah, well-back <strong>to</strong> <strong>the</strong> dreary, primitive 1980s. Ano<strong>the</strong>r<br />
advantage of <strong>the</strong> mouse-built-in<strong>to</strong>-<strong>the</strong>-keyboard<br />
approach is that you don't have <strong>to</strong> leave a clear space<br />
on your desk for <strong>the</strong> mouse <strong>to</strong> move around in. (If you're<br />
like me, <strong>the</strong> concepts "desk" and "clear space" are mutually<br />
exclusive. Apple recommends a square space six<br />
inches on a side for <strong>the</strong> mouse; on my desk, <strong>the</strong>y might<br />
as well be asking for six miles.)<br />
Aside from <strong>the</strong> space for <strong>the</strong> mouse, <strong>the</strong> Lisa doesn't<br />
require much room. The console is about fourteen<br />
inches high, nineteen inches wide and fifteen inches<br />
from front <strong>to</strong> back (sixteen inches with <strong>the</strong> keyboard<br />
s<strong>to</strong>wed under <strong>the</strong> front). And at forty-eight pounds for<br />
<strong>the</strong> console and four pounds for <strong>the</strong> keyboard, it's not<br />
terribly hard <strong>to</strong> move around.<br />
The ProFile hard disk drive is just four inches high,<br />
seventeen inches wide and nine inches from front <strong>to</strong>
12<br />
Introduction <strong>to</strong> <strong>the</strong> Lisa<br />
back. It weighs eleven pounds and sits comfortably on<br />
<strong>to</strong>p of <strong>the</strong> console (which is <strong>the</strong> usual place for it, Figure<br />
1-1 notwithstanding). The Lisa 2/5 and 2/10 consoles<br />
will weigh more than <strong>the</strong> Lisa 1 console, but of course<br />
you won't need a ProFile with <strong>the</strong>m.<br />
Ano<strong>the</strong>r thing that makes <strong>the</strong> Lisa easy <strong>to</strong> use is<br />
how quiet it is. By taking advantage of convective cooling,<br />
<strong>the</strong> Lisa's designers were able <strong>to</strong> eliminate <strong>the</strong> need<br />
for a fan. Unfortunately, <strong>the</strong> ProFile makes as much<br />
noise as a fan does, even though it's quiet for a hard<br />
disk drive.<br />
The directions for setting up a Lisa are explicit,<br />
clear and well illustrated, and most of <strong>the</strong> installation<br />
procedures are quite simple. For example, all you have<br />
<strong>to</strong> do <strong>to</strong> connect ei<strong>the</strong>r a ProFile or a dot-matrix printer<br />
is <strong>to</strong> run a cable from it <strong>to</strong> <strong>the</strong> Lisa and a power cord<br />
from it <strong>to</strong> <strong>the</strong> wall.<br />
That pretty much covers ease of use from a hardware<br />
standpoint; as I said, much of <strong>the</strong> Lisa's ease of<br />
use has <strong>to</strong> do with software and is discussed in <strong>the</strong> next<br />
chapter.<br />
Safety<br />
For my money, <strong>the</strong> most important question you can<br />
ask about a computer or a program is: "Is it safe" By<br />
"safe" I mean that it doesn't crash if you sneeze and<br />
isn't full of snares and pitfalls that destroy hours of<br />
work for no good reason (as if <strong>the</strong>re could be a good<br />
reason for destroying your work). This is an area in<br />
which <strong>the</strong> Lisa really shines-it's by far <strong>the</strong> safest computer<br />
system I've ever worked with.<br />
Software deserves most of <strong>the</strong> credit for this; <strong>the</strong>re<br />
are a huge number of error messages (text on <strong>the</strong> screen<br />
that tells you something is wrong) and each is a masterpiece<br />
of clarity and relevance. But <strong>the</strong>re are several significant<br />
hardware safety features as well.<br />
For example, <strong>the</strong> Lisa's idiot-proofing is quite<br />
extensive:<br />
• When you remove <strong>the</strong> front or rear panel, <strong>the</strong> power<br />
au<strong>to</strong>matically turns off and any residual voltage is
13 The Lisa's Hardware<br />
drained away. (Only service personnel can get in<strong>to</strong><br />
<strong>the</strong> high-voltage CRT and video board circuitry.)<br />
• Offset connec<strong>to</strong>rs prevent you from putting expansion<br />
cards in<strong>to</strong> <strong>the</strong>ir slots backwards.<br />
• Because both <strong>the</strong> loading and ej ection of floppies is<br />
controlled by software, you can't hurt a floppy disk<br />
by turning <strong>the</strong> machine off while a disk is in <strong>the</strong> drive,<br />
or by pushing <strong>the</strong> ej ect but<strong>to</strong>n while information is<br />
being written <strong>to</strong> <strong>the</strong> disk.<br />
Ano<strong>the</strong>r aspect of idiot-proofing is self-testing, and<br />
<strong>the</strong> Lisa does a lot of it. When you turn a Lisa on, it<br />
au<strong>to</strong>matically checks out <strong>the</strong> CPU, memory and all<br />
I/O ports before letting you go <strong>to</strong> work. While you're<br />
working, diagnostics programs scan for problems and<br />
warn you about <strong>the</strong>m before any harm is done.<br />
When you turn on <strong>the</strong> Profile, it au<strong>to</strong>matically<br />
checks out all of <strong>the</strong> disk surface. If <strong>the</strong>re's any problem,<br />
it tries <strong>to</strong> remedy <strong>the</strong> situation before letting you know<br />
something is wrong.<br />
But <strong>the</strong> Lisa's most impressive safety feature is<br />
what happens when you turn it off. It displays <strong>the</strong> message<br />
you see in Figure 1-3 and au<strong>to</strong>matically saves all<br />
<strong>the</strong> work you've done-additions, deletions, substitutions,<br />
whatever-thus making it impossible for you <strong>to</strong><br />
accidentally lose it. This is really terrific and I've never<br />
heard of ano<strong>the</strong>r computer that does it.<br />
Figure 1-3<br />
The Lisa is putting everything away before turning off.<br />
''·<br />
·*"<br />
WARNING: If you intend <strong>to</strong> turn <strong>the</strong> Profile off, wait<br />
until <strong>the</strong> light in <strong>the</strong> Lisa's on-off but<strong>to</strong>n goes off.<br />
To terminate <strong>the</strong> operation, hold down <strong>the</strong> Apple key<br />
while you type a period.
14<br />
Introduction <strong>to</strong> <strong>the</strong> Lisa<br />
Reliability and<br />
ease of service<br />
The Lisa is built not <strong>to</strong> break and <strong>to</strong> be easy <strong>to</strong> fix on<br />
those rare occasions when it does break. Let's talk about<br />
reliability first.<br />
Each Lisa component is thoroughly tested and<br />
burned in. To burn in something, you turn it on and<br />
leave it on for a solid week (or for 200 hours). This is<br />
important because components fail much more frequently<br />
during <strong>the</strong> first 200 hours of use-sort of <strong>the</strong><br />
computer equivalent of infant mortality. If a manufacturer<br />
doesn't burn in a system for you, you inevitably<br />
end up doing it yourself.<br />
The inside of <strong>the</strong> Lisa console cabinet is made of<br />
metal. This is called shielding and it reduces <strong>the</strong> chance<br />
that extraneous electromagnetic "noise" in <strong>the</strong> environment<br />
will interfere with <strong>the</strong> electronics inside.<br />
The floppy disk drives only spin when you're using<br />
<strong>the</strong>m; naturally, this makes <strong>the</strong>m last a lot longer. The<br />
Profile is designed <strong>to</strong> offer an MTBF-"mean [i.e., average]<br />
time between failures"-of better than 10,000<br />
hours.<br />
If, in spite of all this, you have a hardware problem<br />
with a Lisa, you can deal with it quite readily. All <strong>the</strong><br />
internal components-including <strong>the</strong> disk drives and<br />
power supply-are modular, so even an ordinary user<br />
with no technical expertise can remove <strong>the</strong>m for servicing.<br />
The instructions for how <strong>to</strong> do that are specific,<br />
detailed and simple.<br />
The Lisa uses Apple's standard dot-matrix printer,<br />
which makes finding ribbons for it less of a chore (especially<br />
when you know that <strong>the</strong> same printer is also sold<br />
as <strong>the</strong> NEC 8023 and <strong>the</strong> C. I<strong>to</strong>h 8510). But getting <strong>the</strong><br />
ribbon in<strong>to</strong> <strong>the</strong> little slot is slightly harder than cramming<br />
a camel through <strong>the</strong> eye of a needle. Apple has<br />
<strong>the</strong> incredible gall <strong>to</strong> call replacing <strong>the</strong> ribbon "easy";<br />
"impossible" is more like it.<br />
The print head is replaceable by <strong>the</strong> user (which<br />
isn't <strong>the</strong> case on most dot-matrix printers). I haven't<br />
tried <strong>to</strong> do it, but it's got <strong>to</strong> be simpler than changing<br />
<strong>the</strong> ribbon.
15<br />
The Lisa's Hardware<br />
Last but not least, Apple maintains a <strong>to</strong>ll-free number<br />
Lisa users can call with <strong>the</strong>ir questions, problems,<br />
etc.-(800) 553-4000. Like most such numbers, sometimes<br />
it's "temporarily busy." (Are <strong>the</strong>re numbers that<br />
are "permanently busy" Probably <strong>the</strong>re are; I've certainly<br />
come across some that seemed <strong>to</strong> be. But this<br />
Apple number seems <strong>to</strong> be adequately staffed.)<br />
Power<br />
For all its ease of use, <strong>the</strong> Lisa is a very powerful personal<br />
computer. Much of <strong>the</strong> reason for this is <strong>the</strong> CPU<br />
chip it's built around-<strong>the</strong> Mo<strong>to</strong>rola 68000 microprocessor,<br />
one of <strong>the</strong> most highly praised chips of recent years.<br />
Unlike <strong>the</strong> eight-hit chips used in many personal<br />
computers (which process data in eight-bit chunks), and<br />
unlike <strong>the</strong> 8088, <strong>the</strong> 8/16-hit chip used in <strong>the</strong> IBM PC<br />
and its imita<strong>to</strong>rs (which processes data in sixteen-bit<br />
chunks internally but takes it in and sends it out eight<br />
bits at a time), <strong>the</strong> 68000 is a 16/32-hit chip.<br />
As you may have guessed from its name, a 16/32-<br />
bit chip processes data 32 bits at a time, but takes it<br />
in and sends it out 16 bits at a time. The biggest computers<br />
in <strong>the</strong> world only process data 64 bits at a time,<br />
and many computers that cost millions of dollars are<br />
32-bit machines. So <strong>the</strong> Lisa is no slouch in terms of<br />
raw computational power.<br />
Unfortunately, <strong>the</strong> Lisa asks far <strong>to</strong>o much of <strong>the</strong><br />
68000. Almost 40% of its time is spent simply dealing<br />
with <strong>the</strong> screen, and this is compounded by <strong>the</strong> slowness<br />
of <strong>the</strong> Profile, which is constantly being accessed.<br />
This overloading of <strong>the</strong> 68000 (and overuse of <strong>the</strong><br />
Profile) makes <strong>the</strong> Lisa quite slow in many vital operations-in<br />
spite of <strong>the</strong> fact that <strong>the</strong>re are three o<strong>the</strong>r chips<br />
<strong>to</strong> handle input/ output functions. Long delays in updating<br />
<strong>the</strong> screen and sending data <strong>to</strong> <strong>the</strong> printer are <strong>the</strong><br />
result; this is <strong>the</strong> Lisa's single greatest failing. The Lisa<br />
2 software is two <strong>to</strong> four times as fast, but even that<br />
may not be enough; this is an area where <strong>the</strong> Lisa really<br />
needs a lot of improvement.
16 Introduction <strong>to</strong> <strong>the</strong> Lisa<br />
The Lisa has a lot of memory for a personal computer.<br />
A megabyte (over one million characters-about<br />
170,000 words) is standard, and expansion up <strong>to</strong> two<br />
megabytes is planned as an option (God only knows<br />
what you need two megabytes of memory for). Most<br />
o<strong>the</strong>r personal computers give you much less memory;<br />
between 16K and 128K-1/64th <strong>to</strong> 1/8th as much-is<br />
common, and few machines let you expand up <strong>to</strong> a<br />
megabyte even as an option.<br />
The Lisa also provides a lot of permanent s<strong>to</strong>ragealthough<br />
somewhat less than Apple says it does, as we<br />
shall see. The two high-density minifloppy disk drives<br />
that came built in<strong>to</strong> <strong>the</strong> Lisa 1 each hold 860K; <strong>the</strong> Lisa<br />
2's 3Yi-inch microfloppy holds 400K. The ProFile hard<br />
disk drive is supposed <strong>to</strong> hold five megabytes, but it<br />
doesn't. In fact, Apple seems <strong>to</strong> be playing tricks with<br />
some basic computer terms. Let me review <strong>the</strong>m for<br />
you:<br />
A byte is eight bits-<strong>the</strong> amount of information<br />
necessary <strong>to</strong> define one character (a letter, number or<br />
symbol). A kilobyte, or K, is 1024 bytes; a megabyte,<br />
or meg, is 1024K, or 1,048,576 bytes.<br />
The reason for those funny numbers has <strong>to</strong> do with<br />
<strong>the</strong> fact that computers are based on <strong>the</strong> binary number<br />
system, in which all numbers are represented as multiples<br />
of 2. Thus, 2 x 2 = 4, 2 x 4 = 8, and so on up<br />
through 16, 32, 64, 128, 256, 512 and 1024 (aha!). Some<br />
people have suggested changing <strong>the</strong> meaning of <strong>the</strong>se<br />
terms <strong>to</strong> make a K equal <strong>to</strong> exactly a thousand bytes<br />
and a meg equal <strong>to</strong> exactly a million. But that is not<br />
what <strong>the</strong>se words mean <strong>to</strong>day. Just <strong>to</strong> make sure, I<br />
looked <strong>the</strong>m up in four-count 'em, four-recent computer<br />
dictionaries, and all of <strong>the</strong>m (without exception)<br />
agreed with <strong>the</strong> values I've given above.<br />
o, five megabytes is equal <strong>to</strong> 5120K (5 x 1024);<br />
<strong>the</strong> ProFile holds 4845K. This comes out <strong>to</strong> 4. 73 megabytes,<br />
a shortfall of more than 5%. I'm not splitting<br />
hairs here-<strong>the</strong> difference is 275K and that's a significant<br />
amount of s<strong>to</strong>rage. Even if you called a million
17 The Lisa's Hardware<br />
characters "a megabyte," <strong>the</strong> ProFile would still fall almost<br />
38K short of <strong>the</strong> mark.<br />
(Presumably <strong>the</strong> Lisa 2's built-in "five-megabyte"<br />
and "ten-megabyte" hard disks also hold less than those<br />
amounts; I have no way of knowing without actually<br />
using one. It's easy for you <strong>to</strong> find out, though-just<br />
go in<strong>to</strong> a dealer who has a Lisa 2, get <strong>the</strong> hard disk<br />
display up on <strong>the</strong> screen, and see how many blocks<br />
of data it holds. A block is 512 bytes-half a K.)<br />
Apple plays <strong>the</strong> same game with <strong>the</strong> Lisa l's 5Y4inch<br />
floppy disk drives. The claim is that <strong>the</strong> two of<br />
<strong>the</strong>m <strong>to</strong>ge<strong>the</strong>r hold 1. 72 megabytes; in fact <strong>the</strong> correct<br />
figure is 1.68 (860K times 2 divided by 1024). Now<br />
<strong>the</strong>re's nothing clumsy about saying "13-) megabytes" or,<br />
for that matter, "1.68 megabytes"; it's certainly no different<br />
from saying "1.72 megabytes" (except that it's accurate).<br />
Misusing <strong>the</strong> terms "K" and "megabyte" <strong>to</strong> your<br />
own advantage strikes me as <strong>the</strong> kind of sleazy marketing<br />
that gives us prices like $69.95 instead of $70.<br />
Now I'm <strong>to</strong>ld that this sort of-shall we call it "exaggeration"-is<br />
a common practice among hardware<br />
manufacturers; Apple simply made it easier for me <strong>to</strong><br />
discover <strong>the</strong> truth. One person I spoke <strong>to</strong> at Apple said<br />
that <strong>the</strong>y would call <strong>the</strong> Profile a "five-megabyte disk<br />
drive" even if it held somewhat more than five megs;<br />
<strong>the</strong>y're simply rounding off.<br />
Well, that may be true, and I'm sure this particular<br />
person would do that himself. But roundig off doesn't<br />
explain "1.72 megabytes." And remember that Apple is<br />
<strong>the</strong> company that claimed in its advertising that it "invented"<br />
<strong>the</strong> personal computer-even though Apple<br />
didn't even exist until years after <strong>the</strong> first personal computers<br />
came out. So when someone tells me that Apple<br />
would round off 5.1 or 5.2 megabytes <strong>to</strong> an even 5 megs,<br />
I'm tempted <strong>to</strong> quote <strong>the</strong> last line of The Sun Also Rises:<br />
" 'Yes.' . . . 'Isn't it pretty <strong>to</strong> think so' "<br />
The disk in <strong>the</strong> Profile rotates at 3600 RPM and<br />
data is transferred <strong>to</strong> and from it at five million bits a<br />
second-about ten times faster than on a conventional
18 Introduction <strong>to</strong> <strong>the</strong> Lisa<br />
floppy disk drive. Fast as this sounds, <strong>the</strong> ProFile is<br />
one of <strong>the</strong> main things that slows <strong>the</strong> Lisa down. What<br />
<strong>the</strong> Lisa really needs is not more external s<strong>to</strong>rage, with<br />
its slow access speeds, but a RAM disk-a large hunk<br />
of extra memory that acts like a disk but accesses much<br />
more quickly.<br />
It will become clear as you read on in this book<br />
that some of <strong>the</strong> Lisa's most impressive capabilities are<br />
in <strong>the</strong> area of graphics. Graphics requires a high-resolution<br />
screen (one with a very fine, detailed picture) and<br />
<strong>the</strong> Lisa definitely has that. Its twelve-inch CRT displays<br />
more than a quarter of a million pixels (<strong>the</strong> little dots<br />
of light that make up <strong>the</strong> picture)-364 lines of 720 dots<br />
each. On a more practical level, this amounts <strong>to</strong> 45 lines<br />
of 144 characters (most personal computers display 24<br />
lines of 80 characters-less than a third as many).<br />
One of <strong>the</strong> most significant benefits of this high<br />
resolution is <strong>the</strong> hundreds of different type face, size<br />
and style combinations it allows. (I'll give you more<br />
details on this when I cover LisaWrite and LisaDraw.)<br />
The Lisa's screen is hit-mapped. This means that<br />
for every dot on <strong>the</strong> screen <strong>the</strong>re's a corresponding on/<br />
off switch in memory that controls it (so <strong>the</strong> screen<br />
can be updated almost <strong>the</strong> very instant <strong>the</strong> computer<br />
figures out what it wants <strong>to</strong> display).<br />
As I mentioned above, <strong>the</strong> Lisa l's dot-matrix<br />
printer was <strong>the</strong> same one used with <strong>the</strong> Apple II and<br />
III. But with <strong>the</strong> Lisa's intelligence behind it, it could<br />
work wonders. Because <strong>the</strong>re's a corresponding dot on<br />
<strong>the</strong> printer for every pixel, <strong>the</strong> printer can make a precise<br />
copy of <strong>the</strong> screen (except that <strong>the</strong> image on <strong>the</strong><br />
screen is about 6 x 8Yz inches and <strong>the</strong> image on paper<br />
is about 7¥4 x 10 inches-almost half again as large).<br />
I've used <strong>the</strong> Lisa's ability <strong>to</strong> print <strong>the</strong> screen <strong>to</strong> produce<br />
most of <strong>the</strong> illustrations in this book.<br />
Normally, of course, you don't want <strong>to</strong> reproduce<br />
<strong>the</strong> screen; you want <strong>to</strong> take what's on <strong>the</strong> screen and<br />
reconfigure it for placement on a sheet of paper. The<br />
Lisa does this at three levels of quality. The highest is<br />
high-resolution mode. There's also normal mode-it's
19 The Lisa's Hardware<br />
a third as detailed, prints out faster, and is ideal for<br />
informal memos and notes. And finally <strong>the</strong>re's draft<br />
mode-it's much faster (and much uglier); you can only<br />
use it for text, not graphics.<br />
Having <strong>the</strong> choice of three different speeds and<br />
three different levels of quality is quite handy; I've<br />
shown you <strong>the</strong> difference between <strong>the</strong>m in Figure 1-4.<br />
(I didn't change any of <strong>the</strong> typefaces in <strong>the</strong> draft mode<br />
sample; that's just <strong>the</strong> way draft mode handles <strong>the</strong>m.<br />
It also eliminates underlining and screws up <strong>the</strong> spacing<br />
between words and sentences. But your text is <strong>the</strong>re<br />
<strong>to</strong> be checked.)<br />
In draft mode, both <strong>the</strong> Imagewriter and Apple's<br />
old dot-matrix printer reach a nominal speed of 120<br />
characters per second, which is equivalent <strong>to</strong> about 1200<br />
actual words per minute (or 1440 official, typing-class,<br />
four-letters-and-a-space words per minute). I say "nominal"<br />
because most dot-matrix printers don't actually<br />
achieve <strong>the</strong>ir advertised speeds (although my subjective<br />
impression is that <strong>the</strong>se came close).<br />
In high-resolution mode, <strong>the</strong> printer sometimes sits<br />
and waits for <strong>the</strong> computer <strong>to</strong> figure out what it wants<br />
<strong>to</strong> do; this is one of <strong>the</strong> clearest examples of <strong>the</strong> 68000<br />
chip being overloaded. Even in normal mode, prin<strong>to</strong>uts<br />
take a while.<br />
Some people feel that <strong>the</strong> dot-matrix printer in<br />
high-resolution mode produces a better-looking business<br />
letter than a formed-character (daisy wheel) printer<br />
can. Two clear advantages are that you can easily shift<br />
back and forth between type fonts, and you can integrate<br />
charts and o<strong>the</strong>r graphics in<strong>to</strong> <strong>the</strong> text.<br />
The Lisa lets you do background printing. This<br />
means you can work on Document B while <strong>the</strong> Lisa<br />
is printing out Document A "in <strong>the</strong> background." Unfortunately,<br />
although <strong>the</strong> Lisa's spirit is willing, its electronics<br />
are weak. When a prin<strong>to</strong>ut is in progress, most o<strong>the</strong>r<br />
activities slow <strong>to</strong> a crawl. Working while printing in<br />
<strong>the</strong> background demands more patience than it's worth.<br />
Communicating with o<strong>the</strong>r computers is yet ano<strong>the</strong>r<br />
thing <strong>the</strong> Lisa is equipped for. It has two RS-232
20 Introduction <strong>to</strong> <strong>the</strong> Lisa<br />
Figure 1-4<br />
High-resolution mode:<br />
'ffhen a. critic wrote (something like): "of course we<br />
ha.ve <strong>to</strong> expect thiB Bort of fooliBhneBB from Coleridge;<br />
a.fter a.11, a.11 poets a.re fools," Coleridge resporded with<br />
<strong>the</strong> following epigra.m:<br />
S1r, I adJll1t your ge.neral rule,<br />
·<br />
That every poet ts a fool,<br />
But you yourself 1114.J' serve <strong>to</strong> shov 1 t,<br />
That every fool ts not a poet.<br />
Norn1al rnocle:<br />
When a critic wrote (something lil{e): "of course<br />
1Re have <strong>to</strong> expect this sort of foolishness from<br />
Coleridge; after all, all poets are fools, " Coleridge<br />
responded with <strong>the</strong> following epigram:<br />
Sir, I ad»it your general rule,<br />
lhat every poet is a fool,<br />
But you yourself 116J' serve <strong>to</strong> show it,<br />
lhat every fool is not a poet.<br />
Dra-f1: mode:<br />
l,Jhen a critic wrote (something like): "of course<br />
we have <strong>to</strong> expect this sort of foolishness from<br />
Coleridge; after all, all poets are fools," Coleridge<br />
responded with <strong>the</strong> following epigram:<br />
·sir, I admit your general rule,<br />
That every poet is a fool,<br />
But you yourse If may serve <strong>to</strong> show it,<br />
That every fool is not a poet.
21<br />
The Lisa's Hardware<br />
(serial) ports on <strong>the</strong> rear panel, one of which comes<br />
all ready <strong>to</strong> have an au<strong>to</strong>-dial, au<strong>to</strong>-answer modem connected<br />
<strong>to</strong> it. Data can be transmitted as fast as 19,200<br />
bits per second, and <strong>the</strong> rate is controlled by software.<br />
(For more on <strong>the</strong> Lisa's communications abilities, see<br />
Chapter 10.)<br />
All 73 keys on <strong>the</strong> Lisa's keyboard can be programmed<br />
by <strong>the</strong> software <strong>to</strong> act as function keys. The<br />
Clear key, <strong>the</strong> Enter key, <strong>the</strong> arrow keys in <strong>the</strong> upper<br />
right corner of <strong>the</strong> keyboard, and <strong>the</strong> Apple key (which<br />
has a picture of an apple on it) all do different things<br />
depending on <strong>the</strong> software you're running. The Caps<br />
Lock key works like <strong>the</strong> Shift Lock key on a typewriter,<br />
except that it only affects <strong>the</strong> letter keys, not <strong>the</strong> keys<br />
with numbers, punctuation or o<strong>the</strong>r symbols on <strong>the</strong>m.<br />
The two Option keys allow you <strong>to</strong> produce a whole<br />
slew of special characters and symbols. So if you hold<br />
<strong>the</strong> Option key down and hit W, you get (<strong>the</strong> Greek<br />
letter sigma) instead; if you hit 5, you get oo (<strong>the</strong> infinity<br />
sign) instead. In this way, <strong>the</strong> Lisa provides you with<br />
all <strong>the</strong> accent marks and special letters used in French,<br />
Spanish, German, Swedish, Danish and Norwegian, as<br />
well as symbols used in ma<strong>the</strong>matical and scientific formulas<br />
and o<strong>the</strong>r useful ones like ®, , ©, ¢ and £.<br />
Expandability<br />
As if <strong>the</strong> Lisa weren't powerful enough in its standard<br />
configuration, <strong>the</strong> system can be expanded extensively<br />
and easily. Three expansion slots for special-purpose<br />
cards are built in<strong>to</strong> <strong>the</strong> console. In addition <strong>to</strong> <strong>the</strong> two<br />
serial ports mentioned above, <strong>the</strong>re's a jack for connecting<br />
external high-resolution video moni<strong>to</strong>rs or camera<br />
imaging systems.<br />
In addition <strong>to</strong> <strong>the</strong> built-in parallel port, up <strong>to</strong> three<br />
parallel interface hoards can be installed in <strong>the</strong> Lisa's<br />
expansion slots. If parallel boards are in all three slots,<br />
it's possible <strong>to</strong> connect six Profiles and a dot-matrix<br />
printer-although, as I said earlier, a RAM disk would<br />
be a lot more useful than more external s<strong>to</strong>rage.
22 Introduction <strong>to</strong> <strong>the</strong> Lisa<br />
The parallel board incorporates self-test diagnostics<br />
that trouble-shoot many problems. Like all expansion<br />
boards for <strong>the</strong> Lisa, it's easy <strong>to</strong> install-thanks <strong>to</strong> zero<br />
insertion force connec<strong>to</strong>rs. (On most computers, you<br />
have <strong>to</strong> push down hard on a board <strong>to</strong> get it in<strong>to</strong> a<br />
slot; on a Lisa, you just pull and twist a rod and that<br />
opens <strong>the</strong> slot for you.)<br />
The Lisa has several o<strong>the</strong>r nice little features, like<br />
a real-time clock and a built-in speaker with a <strong>to</strong>ne genera<strong>to</strong>r<br />
that's controlled by software. But <strong>the</strong> main point<br />
is simple: with a few exceptions-like <strong>the</strong> overloading<br />
of <strong>the</strong> system's capabilities and <strong>the</strong> slow response time<br />
that's <strong>the</strong> result-<strong>the</strong> Lisa's hardware is quite well<br />
designed.<br />
But <strong>the</strong> Lisa's software, not its hardware, is what's<br />
truly innovative. So let's move on <strong>to</strong> <strong>the</strong> next chapter,<br />
where I cover that software in some detail.
2 The Lisa's Software<br />
and How It's Different<br />
from O<strong>the</strong>r Computers'<br />
The Lisa comes with one of two standard software packages-<strong>the</strong><br />
Development System, designed for expert<br />
computer programmers who want <strong>to</strong> write new software<br />
for <strong>the</strong> Lisa, and <strong>the</strong> Office System, designed for<br />
people like you and me who want <strong>to</strong> use already-written<br />
programs for specific tasks like word processing, graphics<br />
and financial analysis. Since virtually all Lisa users<br />
fall in<strong>to</strong> <strong>the</strong> second group, I'll only discuss <strong>the</strong> Office<br />
System in this chapter.<br />
The best way <strong>to</strong> give you a sense of what's innovative<br />
about <strong>the</strong> Lisa's software is simply <strong>to</strong> walk you<br />
through its basic concepts. I'll make it a reasonably detailed<br />
walk-through-although much less than you need<br />
<strong>to</strong> know <strong>to</strong> actually use <strong>the</strong> Lisa with any grace-so<br />
you can begin <strong>to</strong> get a sense of whe<strong>the</strong>r <strong>the</strong> Lisa's approach<br />
is what you're looking for, or at least so you<br />
can sit down and play with a Lisa in a s<strong>to</strong>re without<br />
having <strong>to</strong> go through a lengthy and confusing orientation.<br />
This chapter will also be useful <strong>to</strong> you if you already<br />
own a Lisa (or have definitely decided <strong>to</strong> get one), because<br />
it will get you started using <strong>the</strong> machine with<br />
less anguish than diving right in<strong>to</strong> <strong>the</strong> Lisa's introduc<strong>to</strong>ry<br />
training program, LisaGuide. Although LisaGuide<br />
is better than most training programs, and <strong>the</strong> Lisa Owner's<br />
Guide is better than most computer manuals, <strong>the</strong>y<br />
23
24<br />
Introduction <strong>to</strong> <strong>the</strong> Lisa<br />
both have one great weakness: <strong>the</strong>y lack an easy-<strong>to</strong>-understand<br />
overview of <strong>the</strong> Lisa's basic operations.<br />
Apple says you can learn <strong>to</strong> "do useful work" on<br />
<strong>the</strong> Lisa in half an hour. So far as I can see, this is<br />
only possible in <strong>the</strong> same way that it's possible <strong>to</strong> learn<br />
<strong>to</strong> use any <strong>to</strong>ol in half an hour-that is, in a very limited<br />
and clumsy way. Although certain aspects of <strong>the</strong> Lisa's<br />
operations are simpler and easier <strong>to</strong> learn than on conventional<br />
computers, o<strong>the</strong>r aspects are much more complex<br />
and confusing.<br />
For example, most computers have just two kinds<br />
of files on a disk: programs, which tell <strong>the</strong> computer<br />
how <strong>to</strong> do things, and data files, which you fill up with<br />
information of your own (text, numbers, or whatever).<br />
You use programs <strong>to</strong> work on data files and that's all<br />
you need <strong>to</strong> understand about <strong>the</strong> basic structure of<br />
things (unless you're doing programming of your own).<br />
The Lisa, on <strong>the</strong> o<strong>the</strong>r hand, presents you with a bewildering<br />
multiplicity of file types and related conceptsicons,<br />
windows, folders, <strong>to</strong>ols, stationery pads, documents,<br />
shadows, and so on.<br />
The first of <strong>the</strong>se concepts you encounter is <strong>the</strong><br />
Desk<strong>to</strong>p. The Lisa uses its screen <strong>to</strong> simulate an actual<br />
physical desk <strong>to</strong>p with file folders and o<strong>the</strong>r things lying<br />
around on it. This is a good example of what's new<br />
and unusual about <strong>the</strong> Lisa's approach-it always tries<br />
<strong>to</strong> present abstract computer activities as if <strong>the</strong>y were<br />
concrete, visual and ordinary.<br />
Icons<br />
As you can see from Figure 2-1, <strong>the</strong> Lisa makes <strong>the</strong><br />
Desk<strong>to</strong>p grey and <strong>the</strong> objects white, and it labels each<br />
object. For example, <strong>the</strong>re's a little picture of a clipboard<br />
that's labeled "Clipboard" and a little picture of a trash<br />
can that's labeled "Wastebasket." These pictures are<br />
called icons.<br />
The way a computer interacts with a user is called<br />
its user interface. The Lisa's is often informally referred<br />
<strong>to</strong> as "<strong>the</strong> mouse/icon user interface," because <strong>the</strong>
25 The Lisa's Software<br />
Figure 2-1<br />
Fi le/Print Edit Vi ew Disk<br />
mouse is its main feature in hardware and icons are<br />
its main feature in software.<br />
One of <strong>the</strong> essential parts of any computer's user<br />
interface is its operating system-<strong>the</strong> basic program,<br />
or context, within which all o<strong>the</strong>r programs operate.<br />
Because <strong>the</strong> Desk<strong>to</strong>p concept is fundamental <strong>to</strong> <strong>the</strong><br />
Lisa's user interface, its operating system is called <strong>the</strong><br />
Desk<strong>to</strong>p Manager. It's mostly <strong>the</strong> Desk<strong>to</strong>p Manager I'll<br />
be describing in this chapter, although I'll also refer<br />
<strong>to</strong> o<strong>the</strong>r <strong>to</strong>ols that work within it.<br />
The four icons you see in Figure 2-1 are always<br />
on <strong>the</strong> Desk<strong>to</strong>p (assuming that you have a Profile connected<br />
<strong>to</strong> your Lisa).
26 Introduction <strong>to</strong> <strong>the</strong> Lisa<br />
Wastebasket is <strong>the</strong> place where <strong>the</strong> Lisa puts objects<br />
you throw out. They stay in Wastebasket until <strong>the</strong><br />
room is needed for objects you discard later. This means<br />
you can go in<strong>to</strong> Wastebasket and retrieve objects for<br />
a while after you've thrown <strong>the</strong>m out. (Some objectslike<br />
<strong>the</strong> ProFile, for example-can't be thrown out. If<br />
you put <strong>the</strong>m in Wastebasket, <strong>the</strong>y bounce back out<br />
and return <strong>to</strong> <strong>the</strong>ir original position.)<br />
Clipboard holds text or graphics you've deleted<br />
from within some object, or that you're in <strong>the</strong> process<br />
of moving from one place <strong>to</strong> ano<strong>the</strong>r. You can look<br />
in<strong>to</strong> Clipboard but you can't affect its contents in any<br />
way.<br />
Since <strong>the</strong> Preferences icon is a picture of a little<br />
Lisa, you don't need <strong>to</strong> be psychic <strong>to</strong> figure out that it<br />
deals with your preferences about <strong>the</strong> Lisa (basically,<br />
it lets you cus<strong>to</strong>mize a Lisa <strong>to</strong> your own taste). I'll use<br />
Preferences <strong>to</strong> demonstrate how you open an iconthat<br />
is, how you gain access <strong>to</strong> <strong>the</strong> things inside it, so<br />
you can look at <strong>the</strong>m and alter <strong>the</strong>m if you want.<br />
In <strong>the</strong> middle of <strong>the</strong> screen in Figure 2-1 is a black<br />
arrow. This is <strong>the</strong> pointer. As I mentioned in <strong>the</strong> last<br />
chapter, you use <strong>the</strong> mouse <strong>to</strong> move <strong>the</strong> pointer around<br />
<strong>the</strong> screen. An arrow is only one of <strong>the</strong> shapes a pointer<br />
can take; I'll describe <strong>the</strong> o<strong>the</strong>rs as <strong>the</strong>y come up.<br />
(In Figure 2-1, <strong>the</strong> arrow is pointing <strong>to</strong>ward a small<br />
white streak that looks something like a comet or a<br />
meteor. This comes from a minor defect in <strong>the</strong> printer<br />
and has nothing at all <strong>to</strong> do with what actually appears<br />
on <strong>the</strong> screen. You'll also notice that <strong>the</strong> Desk<strong>to</strong>p is not<br />
a consistent <strong>to</strong>ne of grey; that's <strong>the</strong> printer's fault <strong>to</strong>o.<br />
Both of <strong>the</strong>se problems vary from one illustration <strong>to</strong><br />
<strong>the</strong> next. Just ignore <strong>the</strong>m; on <strong>the</strong> Lisa's screen, <strong>the</strong> Desk<strong>to</strong>p<br />
will be a smooth, streak-free grey.)<br />
The Lisa uses a two-step process for almost all of<br />
its operations. First you select <strong>the</strong> object you want <strong>to</strong><br />
do something <strong>to</strong>, <strong>the</strong>n you tell <strong>the</strong> Lisa what you want<br />
<strong>to</strong> do <strong>to</strong> it. You select an icon by moving <strong>the</strong> pointer<br />
<strong>to</strong> it and <strong>the</strong>n clicking <strong>the</strong> but<strong>to</strong>n on <strong>the</strong> mouse's back<br />
(which I'll call "<strong>the</strong> mouse but<strong>to</strong>n"-or simply "<strong>the</strong> but<strong>to</strong>n"-from<br />
now on).
27 The Lisa's Software<br />
Figure 2-2<br />
File/Print Edit View Disk<br />
Figure 2-2 shows <strong>the</strong> pointer in position on <strong>the</strong><br />
Preferences icon. (On <strong>the</strong> arrow pointer, it's <strong>the</strong> tip that<br />
counts. All of <strong>the</strong> arrow can be off <strong>the</strong> icon, just as long<br />
as <strong>the</strong> tip is in. Conversely, if all of <strong>the</strong> arrow except<br />
<strong>the</strong> tip is on <strong>the</strong> icon, nothing will happen when you<br />
push <strong>the</strong> mouse but<strong>to</strong>n. You can point <strong>to</strong> ei<strong>the</strong>r <strong>the</strong> picture<br />
or <strong>the</strong> label-<strong>the</strong>y're both part of <strong>the</strong> icon.)<br />
An icon indicates that it's been selected by changing<br />
from white <strong>to</strong> black (or-<strong>to</strong> be precise-from a black<br />
figure on a white ground <strong>to</strong> a white figure on a black<br />
ground). This is called highlighting. In all Lisa software,<br />
whenever you want <strong>to</strong> know what is currently selected,<br />
you just look for what is highlighted. Figure 2-3 shows<br />
how <strong>the</strong> screen looks after you push <strong>the</strong> mouse but<strong>to</strong>n.
28 Introduction <strong>to</strong> <strong>the</strong> Lisa<br />
Figure 2-3<br />
File/Print Edit View Disk<br />
Menus<br />
Now that you've selected Preferences, you have <strong>to</strong> tell<br />
<strong>the</strong> Lisa what you want <strong>to</strong> do with it. For that, you<br />
need a menu.<br />
"Menu" is computerese for a list of commands on<br />
<strong>the</strong> screen. The Lisa's menus are a lot snazzier than<br />
most-<strong>the</strong>y pop down on<strong>to</strong> <strong>the</strong> screen when you need<br />
<strong>the</strong>m, and disappear when you don't. To make a menu<br />
pop down, you select its menu title.<br />
Menu titles run across <strong>the</strong> <strong>to</strong>p of <strong>the</strong> screen, starting<br />
from <strong>the</strong> left side. (The line <strong>the</strong>y do that on is called<br />
<strong>the</strong> menu bar.) Four basic menu titles are on <strong>the</strong> screen<br />
now: File/Print, Edit, View and Disk.
29 The Lisa's Software<br />
Figure 2-4<br />
To open an icon, you need <strong>to</strong> get in<strong>to</strong> <strong>the</strong> File/Print<br />
menu, so you move <strong>the</strong> pointer <strong>to</strong> that title (as in Figure<br />
2- 4), <strong>the</strong>n press <strong>the</strong> mouse but<strong>to</strong>n and hold it down.<br />
This produces Figure 2-5. (If you press <strong>the</strong> mouse but<strong>to</strong>n<br />
and immediately release it, <strong>the</strong> menu will pop down<br />
and pop right up again. This is exciting <strong>the</strong> first few<br />
times you do it, but <strong>the</strong> thrill fades fast.)<br />
Menus are made up of menu items. Not all menu<br />
items are active at any one time-you can ·only select<br />
<strong>the</strong> ones that are in black, not <strong>the</strong> ones that are grey.<br />
Only <strong>the</strong> items that let you Open "Preferences" and Moni<strong>to</strong>r<br />
<strong>the</strong> Printer are active in Figure 2-5.
30 Introduction <strong>to</strong> <strong>the</strong> Lisa<br />
Figure 2-5<br />
Edit Vi ew Disk<br />
\nve fr Pui Hrv
31 The Lisa's Software<br />
Figure 2-6<br />
Edit Vi ew Disk<br />
When you have Open "Preferences" highlighted (as<br />
it is in Figure 2-6), you lift your finger from <strong>the</strong> mouse<br />
but<strong>to</strong>n and . . . shazam! . . . <strong>the</strong> Preferences icon becomes<br />
a window (Figure 2-7).
32 Introduction <strong>to</strong> <strong>the</strong> Lisa<br />
Figure 2-7<br />
File/Print<br />
...... ... ... ... ... ... ... <br />
111111 Preferences 111111<br />
D Startup D Device Connections<br />
Dset All Convenience Settings <strong>to</strong> Lisa Defaults<br />
Screen (ontrost<br />
Normal Level<br />
dark D D D D D D D I D D D D D D D D bri ght<br />
Minutes Unti l Screen Dims<br />
D 1-2 I 2-4 D s-10 D 10-20 D 15-30 D 30-60<br />
Dim Level<br />
dark D D D I D D D D D D D D D D D D bri ght<br />
Speaker Vo lume<br />
Silent (Flash menu bar) 0<br />
Soft I D D D D Loud<br />
Repeating Keys<br />
Delay<br />
Short D 0 D I 0 D Long<br />
Rote<br />
Fast<br />
I D 0 0 0 0 Slow<br />
House Double (lick Deloy<br />
Short D D 0 I Long
33<br />
The Lisa's Software<br />
Windows<br />
As you can see, a window is a big box that fills up a<br />
lot of <strong>the</strong> screen. Not all windows are this large, and<br />
you can expand or shrink <strong>the</strong>m (I'll describe how <strong>to</strong><br />
do that later).<br />
Because <strong>the</strong> Preferences window is selected (<strong>the</strong><br />
official term is active or activated, but it means <strong>the</strong><br />
same thing as selected), its title-<strong>the</strong> word "Preferences"<br />
at <strong>the</strong> <strong>to</strong>p-is highlighted. Later on we'll get in<strong>to</strong> situations<br />
where several windows are open on <strong>the</strong> Desk<strong>to</strong>p;<br />
only <strong>the</strong> title of <strong>the</strong> active window will be highlighted.<br />
Notice that <strong>the</strong> pointer is just where we left it, on<br />
<strong>the</strong> upper left edge of <strong>the</strong> screen, although <strong>the</strong> menu<br />
item it was pointing <strong>to</strong> has disappeared (along with <strong>the</strong><br />
rest of <strong>the</strong> File/Print menu).<br />
I won't spend a lot of time explaining what <strong>the</strong><br />
display in Figure 2-7 is all about. Obviously it allows<br />
you <strong>to</strong> change a number of <strong>the</strong> Lisa's convenience settings<br />
<strong>to</strong> your own taste. They come set <strong>to</strong> <strong>the</strong> Lisa's<br />
defaults (a default is what you get if you don't ask for<br />
something different). The black squares represent <strong>the</strong><br />
current settings and you can use <strong>the</strong> pointer <strong>to</strong> reset<br />
<strong>the</strong>m.<br />
The actual settings in Figure 2-7 are not, in every<br />
case, <strong>the</strong> Lisa's defaults; I'd already changed a couple<br />
of <strong>the</strong>m before I printed out this screen. For example,<br />
<strong>the</strong> screen contrast (normal level) comes set on <strong>the</strong> tenth<br />
box from <strong>the</strong> left, instead of <strong>the</strong> eighth; I moved it because<br />
I find black on grey easier <strong>to</strong> look at than black<br />
on white. Once you express a preference, <strong>the</strong> Lisa remembers<br />
it and gives it <strong>to</strong> you as your own personalized<br />
default until you change it again.<br />
To reset a setting, you move <strong>the</strong> pointer in<strong>to</strong> <strong>the</strong><br />
appropriate box and click <strong>the</strong> mouse but<strong>to</strong>n. When <strong>the</strong><br />
pointer enters a box, it changes from an arrow <strong>to</strong> a<br />
check mark (this check pointer lets you know you're<br />
on <strong>the</strong> box). In Figure 2-8, I've moved <strong>the</strong> check pointer<br />
in<strong>to</strong> <strong>the</strong> normal default box for screen contrast. If I<br />
clicked <strong>the</strong> mouse but<strong>to</strong>n now, that box would turn<br />
black, <strong>the</strong> eighth box from <strong>the</strong> left-which is now
34 Introduction <strong>to</strong> <strong>the</strong> Lisa<br />
File/Print<br />
Figure 2-8<br />
.. <br />
lml I Preferences 11111<br />
I Convenience Settings D Startup D Device Connections<br />
Oset All Conveni ence Settings <strong>to</strong> Lisa Defaults<br />
Screen Contrast<br />
Normal Level<br />
dark 0 D D 0 D D D I 0 S' D D D 0 D D bright<br />
Minutes Until Screen Dims<br />
D 1-2 12-4 D 5-10 010-20 D 15-30 0 30-60<br />
Dim Leve l<br />
dark D 0 D I D 0 0 0 D 0 0 0 0 0 D D bright<br />
Speaker Vo lume<br />
Silent (F l ash menu bar) 0 Soft I D D D D Loud ·<br />
Repeating Keys<br />
Delay<br />
Short 0 0 D I 0 0 Long<br />
Rate<br />
Fast I D D 0 0 0 Slow<br />
Mouse Double Click Deloy<br />
Short 0 0 I 0 Long
3 5 The Lisa's Software<br />
Figure 2-9<br />
0 Convenience Settings<br />
Connec<strong>to</strong>rs<br />
0 Expansion 2 lower<br />
D Expansion 2 upper<br />
D Parallel<br />
D Serial A<br />
D Serial B<br />
Devices Cuf"l"ently Connected<br />
Nothing Connected<br />
Dot Matrix Printer<br />
Profile<br />
Nothing Connected<br />
Nothing Connected<br />
black-would turn white, and <strong>the</strong> screen contrast would<br />
increase.<br />
If you've changed <strong>the</strong> settings and can't remember<br />
what <strong>the</strong> Lisa originally had <strong>the</strong>m set for, you can use<br />
<strong>the</strong> box on <strong>the</strong> second line of this window (Set All Convenience<br />
Settings <strong>to</strong> Lisa Defaults).<br />
The line above that switches you between <strong>the</strong> three<br />
different Preferences displays. So if you put <strong>the</strong> pointer<br />
in <strong>the</strong> Device Connections box and click <strong>the</strong> mouse but<strong>to</strong>n,<br />
you get Figure 2-9 (<strong>the</strong> little line sticking out of<br />
<strong>the</strong> <strong>to</strong>p of <strong>the</strong> Device Connections box is <strong>the</strong> <strong>to</strong>p of <strong>the</strong><br />
check pointer). This display simply records what you've<br />
got hooked up <strong>to</strong> <strong>the</strong> Lisa (you have <strong>to</strong> tell it when<br />
you connect each device-o<strong>the</strong>rwise it doesn't know).
36 Introduction <strong>to</strong> <strong>the</strong> Lisa<br />
Figure 2-10<br />
File/Print<br />
-=,---<br />
111111 Preferences 111111<br />
Dconvenienc:e Setti ngs !'startup DDevice Connections<br />
Start Up From:<br />
DDi skette in Drive 1 (Upper)<br />
DDiskette in Drive 2 (Lower)<br />
I Disk Attached <strong>to</strong> Para I lel Connec<strong>to</strong>r<br />
Memory Test<br />
I Brief<br />
DThorough<br />
To see <strong>the</strong> Startup display, you put <strong>the</strong> pointer in<br />
that box and click <strong>the</strong> mouse; that gives you Figure<br />
2-10. This lets you tell <strong>the</strong> Lisa where it should go for<br />
<strong>the</strong> information it needs when you turn it on (typically,<br />
<strong>to</strong> your ProFile-i.e., "Disk Attached <strong>to</strong> Parallel Connec<strong>to</strong>r"),<br />
and also whe<strong>the</strong>r you want it <strong>to</strong> test its memory<br />
briefly or thoroughly.<br />
That may have been a bit more than you wanted<br />
<strong>to</strong> know about Preferences. I went in<strong>to</strong> detail so you'd<br />
get a sense of how completely <strong>the</strong> Lisa explains <strong>the</strong> options<br />
it gives you, and how easy those explanations are<br />
<strong>to</strong> understand.
37 The Lisa's Software<br />
Figure 2-1 1<br />
===-.....,.....,.=•e 1 (Upper)<br />
DDiskette in Drive 2 (Lower)<br />
•Disk Attached <strong>to</strong> Para I lel Connec<strong>to</strong>r<br />
Memory Test<br />
I Brief<br />
D Thorough<br />
To close <strong>the</strong> Preferences window (that is, <strong>to</strong> shrink<br />
it back in<strong>to</strong> an icon and put it back on <strong>the</strong> Desk<strong>to</strong>p),<br />
you go <strong>to</strong> <strong>the</strong> File/Print menu (Figure 2-1 1). Notice<br />
how <strong>the</strong> menu pops down over <strong>the</strong> window. You may<br />
find displays like this a little confusing at first, what<br />
with menus on <strong>to</strong>p of windows on <strong>to</strong>p of <strong>the</strong> Desk<strong>to</strong>p,<br />
but you'll soon get used <strong>to</strong> it and won't have any problem,<br />
even when half a dozen windows are overlapping<br />
each o<strong>the</strong>r.<br />
Compare <strong>the</strong> menu items in Figure 2-1 1 with those<br />
in Figure 2-5 <strong>to</strong> see how <strong>the</strong>y've changed <strong>to</strong> reflect <strong>the</strong><br />
current situation. If you go <strong>to</strong> <strong>the</strong> File/Print menu when
38 Introduction <strong>to</strong> <strong>the</strong> Lisa<br />
Figure 2-12<br />
File/Print Edit Vi ew Disk
39 The Lisa's Software<br />
no icon is selected-from Figure 2-1, say-all <strong>the</strong> menu<br />
items (except Moni<strong>to</strong>r <strong>the</strong> Printer) will be grey, and it<br />
will be impossible <strong>to</strong> do anything. With <strong>the</strong> Lisa, you<br />
always have <strong>to</strong> select something before you can do anything<br />
<strong>to</strong> it.<br />
There are usually two ways <strong>to</strong> close a window, but<br />
with Preferences you have Robson's choice: Set Aside.<br />
(Later on in <strong>the</strong> chapter, I'll contrast Set Aside with<br />
<strong>the</strong> o<strong>the</strong>r method - -Save & Put Away.) Here again, <strong>the</strong><br />
Lisa is making an analogy with an everyday actionclosing<br />
a folder and putting it off <strong>to</strong> <strong>the</strong> side of your<br />
desk so you can open ano<strong>the</strong>r folder in <strong>the</strong> middle of<br />
your desk.<br />
When you Set Aside a window, <strong>the</strong> Lisa shrinks<br />
it in<strong>to</strong> an icon-in a very graphic and dramatic fashion-and<br />
puts <strong>the</strong> icon near <strong>the</strong> bot<strong>to</strong>m edge of <strong>the</strong> Desk<strong>to</strong>p.<br />
In Figure 2-1 1, Set Aside "Preferences" is selected<br />
on <strong>the</strong> File/Print menu; Figure 2-12 shows <strong>the</strong> result.<br />
Notice that <strong>the</strong> Preferences icon is still highlighted,<br />
even though it's been set aside. That's because it's still<br />
selected. If you went back up <strong>to</strong> <strong>the</strong> File/Print menu,<br />
it would look <strong>the</strong> way it did in Figure 2-5. If you want<br />
<strong>to</strong> open some o<strong>the</strong>r icon-or do a n' ything at all with<br />
any icon o<strong>the</strong>r than Preferences-you have <strong>to</strong> first select<br />
it. (I don't mean <strong>to</strong> harp on this, but it's <strong>the</strong> single most<br />
confusing thing that comes up when you're learning<br />
about <strong>the</strong> Lisa.)<br />
Most of <strong>the</strong> work you do with <strong>the</strong> Lisa is done inside<br />
<strong>the</strong> Profile icon. That's typically where you keep all<br />
your programs and data files. So let's select Profile.<br />
You do that, of course, by moving <strong>the</strong> pointer <strong>to</strong> <strong>the</strong><br />
Profile icon and clicking <strong>the</strong> mouse. Now <strong>to</strong> open Pro<br />
File, you go <strong>to</strong> <strong>the</strong> Print/File menu (Figure 2-13). Notice<br />
that <strong>the</strong> menu has adjusted itself <strong>to</strong> reflect <strong>the</strong> fact that<br />
ProFile and not Preferences is now selected.<br />
In addition <strong>to</strong> Open "Profile" and Moni<strong>to</strong>r <strong>the</strong><br />
Printer, <strong>the</strong> menu gives you <strong>the</strong> option of duplicating<br />
<strong>the</strong> Profile-that is, of making a backup copy of everything<br />
on <strong>the</strong> disk. (You weren't offered this choice with
40 Introduction <strong>to</strong> <strong>the</strong> Lisa<br />
Figure 2-13<br />
Ed it Vi ew Disk<br />
Preferences, because it doesn't make any sense <strong>to</strong> duplicate<br />
Preferences.)<br />
Notice that at <strong>the</strong> end of <strong>the</strong> Duplicate line <strong>the</strong>re's<br />
an Apple symbol and <strong>the</strong> letter D. This lets you know<br />
that instead of moving <strong>the</strong> pointer <strong>to</strong> <strong>the</strong> Print/File<br />
menu and down <strong>to</strong> <strong>the</strong> Duplicate line (pressing and releasing<br />
<strong>the</strong> mouse at <strong>the</strong> appropriate times), you can<br />
achieve <strong>the</strong> same result simply by holding <strong>the</strong> Apple<br />
key and <strong>the</strong> D key down simultaneously (whenever <strong>the</strong><br />
ProFile is selected).<br />
Many Lisa functions have substitute commands<br />
like this. They're useful when you're at <strong>the</strong> keyboard<br />
and don't want <strong>to</strong> move your hand over <strong>to</strong> <strong>the</strong> mouse.
41 The Lisa's Software<br />
Figure 2-14<br />
File/Print Edit Vi ew Disk<br />
untitled<br />
1st picture<br />
Typef.;;: e.<br />
lliJ<br />
There's also a simpler way of opening an icon than<br />
going <strong>to</strong> <strong>the</strong> File/Print window-it's called douhleclicking.<br />
Instead of clicking <strong>the</strong> mouse but<strong>to</strong>n once on<br />
an icon <strong>to</strong> select it, you click twice in rapid succession.<br />
This eliminates <strong>the</strong> File/Print menu step.<br />
Ei<strong>the</strong>r way you choose <strong>to</strong> open Profile, when you<br />
do you get a display like <strong>the</strong> one in Figure 2-1 4-quite<br />
different from <strong>the</strong> displays in <strong>the</strong> Preferences window<br />
(which contain, in effect, a bunch of multiple-choice<br />
questions). Instead of boxes <strong>to</strong> check, <strong>the</strong> Profile icon<br />
contains o<strong>the</strong>r icons.<br />
Naturally, <strong>the</strong> Profile window won't always look<br />
exactly like Figure 2-14. For one thing, <strong>the</strong> icons dis-
42<br />
Introduction <strong>to</strong> <strong>the</strong> Lisa<br />
played reflect what's on a particular disk and thus vary<br />
from Profile <strong>to</strong> Profile. For ano<strong>the</strong>r thing, <strong>the</strong> icons<br />
won't always be displayed quite this neatly. They're usually<br />
arranged a little sloppily when you first get your<br />
Profile from <strong>the</strong> dealer. Fortunately for <strong>to</strong>tal obsessives<br />
like me, it's possible <strong>to</strong> move <strong>the</strong>m around <strong>to</strong> straighten<br />
<strong>the</strong>m out. (I'll show you how <strong>to</strong> do that in a moment.)<br />
Tools<br />
Across <strong>the</strong> bot<strong>to</strong>m of this (compulsively arranged) Profile<br />
window are icons for six <strong>to</strong>ols. Tool is simply <strong>the</strong><br />
Lisa's name for a program; <strong>the</strong> two words mean <strong>the</strong><br />
same thing. (To be perfectly precise, "<strong>to</strong>ol" means "applications<br />
program," but this subtle distinction needn't<br />
concern you.)<br />
As I've mentioned before, <strong>the</strong> six <strong>to</strong>ols shown here<br />
come as standard equipment on every Office Systems<br />
Lisa-as does a seventh one, LisaTerminal. Chapters 4<br />
through 10 describe <strong>the</strong> seven <strong>to</strong>ols individually.<br />
LisaTerminal is missing from <strong>the</strong>se illustrations<br />
simply because it hadn't been released when I was writing<br />
<strong>the</strong> book (and printing out <strong>the</strong>se screens). So, although<br />
I sometimes refer <strong>to</strong> <strong>the</strong> six standard <strong>to</strong>ols in<br />
this chapter, remember that now <strong>the</strong>re are seven.<br />
In order <strong>to</strong> use a <strong>to</strong>ol, its icon must be in <strong>the</strong> active<br />
window. But you can't open <strong>the</strong>se icons, or do anything<br />
else with <strong>the</strong>m except duplicate <strong>the</strong>m.<br />
At <strong>the</strong> right end of <strong>the</strong> bot<strong>to</strong>m line of icons are<br />
two more <strong>to</strong>ols-Calcula<strong>to</strong>r and Clock. Calcula<strong>to</strong>r duplicates<br />
<strong>the</strong> functions of a (fairly versatile) pocket calcula<strong>to</strong>r<br />
and Clock duplicates those of a calendar watch.<br />
Opening Clock <strong>to</strong> find out <strong>the</strong> date and time has<br />
<strong>to</strong> be <strong>the</strong> slowest and most troublesome way of doing<br />
that imaginable; how many people can afford a Lisa<br />
but .can't afford a $10 digital watch Clock's real purpose<br />
make . s more sense-it tags each piece of your work with<br />
<strong>the</strong> date and time you created it and <strong>the</strong> date and time<br />
you last worked on it.<br />
Clock and Calcula<strong>to</strong>r appear on <strong>the</strong> Desk<strong>to</strong>p when<br />
you first fire up your Lisa, but a lot of people (including
43<br />
The Lisa's Software<br />
myself, obviously) move <strong>the</strong>m over <strong>to</strong> <strong>the</strong> ProFile. It<br />
doesn't make a lot of difference where <strong>the</strong>y're kept, since<br />
you rarely need <strong>to</strong> open ei<strong>the</strong>r one of <strong>the</strong>m (although<br />
people who are <strong>to</strong>uch-typists on a numeric keypad may<br />
find <strong>the</strong>mselves using Calcula<strong>to</strong>r fairly frequently).<br />
On <strong>the</strong> next line up <strong>the</strong>re's a row of individual folders,<br />
each of which corresponds <strong>to</strong> one of <strong>the</strong> six standard<br />
<strong>to</strong>ols. These hold <strong>the</strong> examples that teach you how <strong>to</strong><br />
use <strong>the</strong> <strong>to</strong>ols, and are referred <strong>to</strong> in <strong>the</strong>ir manuals.<br />
(There's also an Empty Folders icon on <strong>the</strong> bot<strong>to</strong>m line;<br />
I'll explain what that's all about <strong>to</strong>ward <strong>the</strong> end of <strong>the</strong><br />
chapter.)<br />
Near <strong>the</strong> <strong>to</strong>p of <strong>the</strong> screen is a line that says, "4802<br />
blocks free out of 9690. Backed up: never." A block is<br />
a measure of s<strong>to</strong>rage space equal <strong>to</strong> 512 charactershalf<br />
a K, about 85 words. (As I pointed out in Chapter 1,<br />
9690 X 512 bytes doesn't actually add up <strong>to</strong> <strong>the</strong> five<br />
megabytes <strong>the</strong> ProFile is supposed <strong>to</strong> hold.)<br />
You can see that I've used slightly more than half<br />
<strong>the</strong> space available on my ProFile. That's why I've never<br />
backed up <strong>the</strong> ProFile (made a duplicate of everything<br />
on it)-<strong>the</strong>re isn't room on this one, and I don't have<br />
ano<strong>the</strong>r one <strong>to</strong> do it on<strong>to</strong>. (Of course it's also possible<br />
<strong>to</strong> back up on<strong>to</strong> floppies, and you should do that with<br />
any important document.)<br />
On <strong>the</strong> line of icons running across <strong>the</strong> <strong>to</strong>p of <strong>the</strong><br />
window are stationery pads for <strong>the</strong> six standard <strong>to</strong>ols.<br />
When you want <strong>to</strong> use one of <strong>the</strong>se <strong>to</strong>ols, you begin<br />
by "tearing off a sheet" from an appropriate pad. Each<br />
pad has a distinctive design on it and sheets <strong>to</strong>rn off<br />
from it retain this design. As you can see, I've <strong>to</strong>rn off<br />
one sheet each of LisaCalc Paper, LisaGraph Paper and<br />
LisaDraw Paper and placed <strong>the</strong>m under <strong>the</strong>ir respective<br />
pads; under Lisa Write Paper are three such sheets (making<br />
it obvious where my interests lie).<br />
Documents<br />
Each of <strong>the</strong>se <strong>to</strong>rn-off sheets represents a document.<br />
Document is <strong>the</strong> Lisa's name for a data file-any single<br />
piece of work (writing, drawing, calculations or what-
44 Introduction <strong>to</strong> <strong>the</strong> Lisa<br />
File/Print Edit Vi ew<br />
Figure 2-15<br />
untitled<br />
I<br />
Lisa.Project Paper IMMld<br />
i<br />
1st document<br />
i<br />
Typefaces<br />
i<br />
2nd document<br />
<br />
Lisa.Graph Paper<br />
<br />
Untitled<br />
m<br />
LisaDraw Paper<br />
I<br />
1st picture<br />
LisaList Paper<br />
CJ CJ CJ CJ CJ<br />
Lisacalc Examples LisaProject Examples Lisa.Write Examples Lisa.Graph Examples LisaDraw Examples<br />
Empty Folders<br />
Figure 2-16<br />
Edit Vi ew<br />
Set Aside Everything<br />
Set Aside "Profile"<br />
Moni<strong>to</strong>r <strong>the</strong> Printer . . .
45 The Lisa's Software<br />
ever) you call by one name and handle as one unit.<br />
The distinctive design on <strong>the</strong> icon of any document tells<br />
you what <strong>to</strong>ol was used <strong>to</strong> create it.<br />
The Lisa's <strong>to</strong>ols are integrated <strong>to</strong> some extent-that<br />
is, you can move certain material from one kind of<br />
document <strong>to</strong> ano<strong>the</strong>r. For example, you can move a<br />
LisaGraph graph or a LisaProject chart in<strong>to</strong> a LisaDraw<br />
document, and you can move a LisaCalc spreadsheet,<br />
a LisaGraph table or a Calcula<strong>to</strong>r tape in<strong>to</strong> a Lisa Write<br />
document. But you can't move LisaDraw graphics or<br />
LisaList material in<strong>to</strong> any o<strong>the</strong>r kind of document. (Full<br />
details of what you can and can't do are given in <strong>the</strong><br />
manuals for each <strong>to</strong>ol).<br />
Let's create ano<strong>the</strong>r LisaWrite document, so you<br />
can see how it's done. (The procedure is <strong>the</strong> same no<br />
matter which <strong>to</strong>ol you use; I picked LisaWrite because<br />
it's <strong>the</strong> simplest and least confusing.)<br />
First you select <strong>the</strong> Lisa Write Paper stationery pad<br />
(Figure 2-15). Then you go <strong>to</strong> <strong>the</strong> File/Print menu (Figure<br />
2-16) and select <strong>the</strong> Tear Off Stationery menu item<br />
which has miraculously been activated (it happened<br />
when you selected a stationery pad, of course). Next<br />
<strong>the</strong> Lisa tells you <strong>to</strong> wait while it creates <strong>the</strong> new document<br />
(Figure 2-17).<br />
Figure 2-17<br />
The Lisa is creating a new document from "Li saWrite<br />
Paper" on "Profile",<br />
To termi nate <strong>the</strong> operation, hold down <strong>the</strong> Rpple key ·<br />
wh ile you t ype a period.
46 Introduction <strong>to</strong> <strong>the</strong> Lisa<br />
Figure 2-18<br />
File/Print Edit Vi ew Disk<br />
II <br />
untitled<br />
LisaProject Papeaper<br />
i<br />
i<br />
1st document<br />
Typefaces<br />
i<br />
2nd document<br />
Lisa.Gr Paper<br />
<br />
Untitled<br />
LisaDraw Paper<br />
I<br />
1st picture<br />
LisaL.ist Paper<br />
CJ CJ CJ CJ CJ CJ<br />
Lisacalc Examples LisaProject Examples<br />
LisaWrite Examples Lisa.Graph Examples Lisariraw Examples<br />
Empty Folders<br />
The pointer looks like an arrow in Figure 2-17,<br />
but on <strong>the</strong> screen it appears as an hourglass. Whenever<br />
<strong>the</strong> Lisa makes you wait more than a few seconds, it<br />
changes <strong>the</strong> pointer in<strong>to</strong> an hourglass <strong>to</strong> let you know<br />
that it can't respond <strong>to</strong> any instructions for <strong>the</strong> time<br />
being. This is just ano<strong>the</strong>r example of <strong>the</strong> Lisa's thoroughgoing<br />
concern for your needs and its attempt <strong>to</strong><br />
make sure you never feel bewildered or lost.<br />
. . In Figure 2-18 you see how <strong>the</strong> screen looks when<br />
<strong>the</strong> process is finished. (Notice that <strong>the</strong> new document<br />
icon, labeled "Untitled", is highlighted. That's because<br />
you selected it when you <strong>to</strong>ld <strong>the</strong> Lisa <strong>to</strong> create it.)
47 The Lisa's Software<br />
Figure 2-19<br />
File/Print Edit Vi ew Disk<br />
a<br />
m<br />
Lisa.ca.le Paper<br />
I<br />
.<br />
Untitled<br />
lH<br />
Lisa.Gr apn Paper Lisaoraw Paper LisaList Paper<br />
Untitled<br />
l®I<br />
1st picture<br />
2nC1 document<br />
CJ CJ .<br />
CJ<br />
.<br />
CJ<br />
. CJ<br />
Lisacaic Examples LisaProject Examples L 1sawnte Examples L1saGrap11 Examples L1saoraw Examples<br />
D<br />
U±j<br />
Lisa!lraw<br />
LisaList<br />
LJI<br />
Empty F o!Oers<br />
Calcula<strong>to</strong>r<br />
Now <strong>the</strong>re are (at least) two things you want <strong>to</strong><br />
do with this new document. One is <strong>to</strong> move it so it isn't<br />
blocking <strong>the</strong> Lisa Write Paper icon. Ano<strong>the</strong>r is <strong>to</strong> give<br />
it a somewhat snappier title than "Untitled." You can<br />
do <strong>the</strong>se in ei<strong>the</strong>r order, but let's move <strong>the</strong> icon first.<br />
The Lisa makes this easy. You just put <strong>the</strong> pointer<br />
on it, <strong>the</strong>n push <strong>the</strong> mouse but<strong>to</strong>n and hold it down<br />
as you move <strong>the</strong> icon <strong>to</strong> <strong>the</strong> new location (Figure<br />
2-19). This is officially called grasping, but I-like many<br />
o<strong>the</strong>r Lisa users-call it grabbing ("grasp" being one<br />
of those words that's on its way out of common speech).<br />
Sometimes it is also called dragging, which is ano<strong>the</strong>r<br />
good word for it. The Lisa leaves a shadow in <strong>the</strong> icon's<br />
original location until you release <strong>the</strong> but<strong>to</strong>n. Then <strong>the</strong>
.<br />
48 Introduction <strong>to</strong> <strong>the</strong> Lisa<br />
Figure 2-20<br />
File/Print Edit Vi ew Disk<br />
I<br />
untitlei:l<br />
Li:: .. .v.1rite F'-per<br />
;<br />
1s.t 1ji:ic:1.1rnerit<br />
;<br />
r;,1pef.:u: es<br />
B<br />
L2.J<br />
1st picture<br />
CJ LJ CJ CJ CJ<br />
usaDaJc: E:;: arnples LisaProject E':31nples L!sa.Wnte E:,ainples LlsaGrapr1 Examples L1saDraw Examples<br />
rz;;:i<br />
@'.J<br />
Empty Folder:<br />
icon appears in <strong>the</strong> new location and <strong>the</strong> shadow disappears<br />
(Figure 2-20).<br />
Now <strong>to</strong> change <strong>the</strong> title-that's also quite easy. Just<br />
as long as <strong>the</strong> icon is selected, all you have <strong>to</strong> do is<br />
start typing. The moment you hit a key, <strong>the</strong> present<br />
title disappears, and <strong>the</strong> letter you typed appears on<br />
<strong>the</strong> screen, followed by a thin flashing vertical bar. This<br />
is called <strong>the</strong> insertion point (despite <strong>the</strong> fact that it's<br />
not a point but a line). You can see it at <strong>the</strong> end of<br />
<strong>the</strong> new title in Figure 2-2 1 (although naturally you<br />
can't see it flash).<br />
Whenever you're entering text, in any Lisa program,<br />
<strong>the</strong> insertion point indicates where <strong>the</strong> next letter<br />
will appear.
49 The Lisa's Software<br />
Figure 2-21<br />
a<br />
u<br />
Lisacalc Per<br />
<br />
tmJl<br />
untitled<br />
<br />
LisaProject POjler<br />
Lisa.'1-lrite Paper<br />
- <br />
II Ht drnent<br />
Master & Bos'rl<br />
I !:\ I<br />
Typefai::es<br />
LisaG<br />
IJ<br />
"Master & Bos'n" refers <strong>to</strong> one of my favorite<br />
poems; it has <strong>the</strong> highest percentage of great linesover<br />
50% by my scorecard-of any poem I know (although<br />
its view of <strong>the</strong> world is pretty bleak).<br />
Once you've typed in <strong>the</strong> new title, you go <strong>to</strong> our<br />
old favorite, <strong>the</strong> File/Print menu (Figure 2-22), and select<br />
Open "Master & Bos'n."<br />
Figure 2-22<br />
Edit Vi ew<br />
Set Aside Everything<br />
Set Aside "Profile"<br />
Make Stati onery Pad<br />
Moni <strong>to</strong>r <strong>the</strong> Printer ...
50 Introduction <strong>to</strong> <strong>the</strong> Lisa<br />
Figure 2-23<br />
Fi le/Print Edit Search Type Style Format 1f Page Layout<br />
mommmommmmiimmammmmiimmammmcmmmommmmmammmammmamammmamm """"i<br />
!9<br />
-- ---<br />
I<br />
One of <strong>the</strong> nicest things about <strong>the</strong> Lisa is <strong>the</strong> way<br />
it makes you feel that it cares about you. Now obviously<br />
it's no great trick <strong>to</strong> have <strong>the</strong> items on <strong>the</strong> File/Print<br />
menu change when you select a new icon or window<br />
(or when you change <strong>the</strong> title of whatever's selected),<br />
but <strong>the</strong>re's something that feels almost magical about<br />
popping that menu down and seeing that it's already<br />
anticipated your needs. I guess you could call this good<br />
psychological engineering.<br />
Anyway, when you open this new document you<br />
get Figure 2-23. Notice that <strong>the</strong> Master & Bos'n window<br />
has been placed over <strong>the</strong> ProFile window; you can see<br />
a little of <strong>the</strong> ProFile window at <strong>the</strong> bot<strong>to</strong>m of <strong>the</strong> screen<br />
(and, at <strong>the</strong> very bot<strong>to</strong>m, a sliver of <strong>the</strong> Desk<strong>to</strong>p peeking
51 The Lisa's Software<br />
Figure 2-24<br />
Fi I e /Print Ed it Search Type Sty I e For mat 1r Page Layout<br />
---" ---"- <br />
111111 Master & Bos 'n 111111<br />
Song of <strong>the</strong> Master and Boatswain<br />
lV H Auden<br />
flt Dirty Dick 's a11d Skpp,r .}:e 's<br />
We drank our liquor straight ,<br />
Some went upsta.ir s v,rith Margery ,<br />
And some , ala s, vrith Kate ;<br />
And two by two lil:.e cat and mou e<br />
The homele ss played at keeping house.<br />
There Wealthy Meg, <strong>the</strong> Sailor 's Frien·j ,<br />
find M.:ir·ion , o:,,N-eyed ,<br />
Opened <strong>the</strong>ir a.rrns <strong>to</strong> me but I<br />
Refused t8· step inside ;<br />
I i,vas not lc·:.king for a. cage<br />
In which <strong>to</strong> mope in my old age .<br />
The nightingale s are sobbing <br />
ClDCI<<br />
Cli board<br />
out beneath it). As I said earlier, <strong>the</strong> Lisa lets you put<br />
one window on <strong>to</strong>p of ano<strong>the</strong>r, just as you would with<br />
papers on your desk, even <strong>to</strong> <strong>the</strong> point of <strong>to</strong>tally obscuring<br />
what's underneath.<br />
Master & Bos'n is on <strong>to</strong>p because it's <strong>the</strong> active<br />
(selected) window. (Ano<strong>the</strong>r way <strong>to</strong> tell it's active: its<br />
title is highlighted.) Later on in this chapter I'll tell you<br />
how you can retrieve windows that have been buried.<br />
There's nothing in <strong>the</strong> Master & Bos'n window so<br />
far, except for something that looks like a stylized cross<br />
section of an I-beam. This is <strong>the</strong> text pointer-whenever<br />
it appears, all you have <strong>to</strong> do <strong>to</strong> enter text is click <strong>the</strong><br />
mouse and start typing. That's what I did <strong>to</strong> produce<br />
Figure 2-24.
52<br />
Introduction <strong>to</strong> <strong>the</strong> Lisa<br />
The text pointer deposits <strong>the</strong> insertion point right<br />
below its vertical bar. Once you've got <strong>the</strong> insertion<br />
point on <strong>the</strong> screen, it doesn't matter where you put<br />
<strong>the</strong> pointer. Back in <strong>the</strong> '60s, <strong>the</strong>re was an expression<br />
that went: "out in left field with prunes in your teeth."<br />
That's where <strong>the</strong> pointer is in Figure 2-24, but it doesn't<br />
make any difference, because <strong>the</strong> pointer doesn't affect<br />
anything when you're entering text. If you click <strong>the</strong><br />
mouse but<strong>to</strong>n, however, <strong>the</strong> insertion point will move<br />
<strong>to</strong> wherever <strong>the</strong> pointer is.<br />
(By <strong>the</strong> way, a "master" is <strong>the</strong> captain of a merchant<br />
ship; <strong>the</strong> name is short for "master mariner." A "boatswain"<br />
is <strong>the</strong> guy in charge of <strong>the</strong> deck crew on a ship,<br />
as well as its rigging, anchors and cables; <strong>the</strong> name is<br />
pronounced-and often spelled-"bos'n.")<br />
Scrolling<br />
You're obviously going <strong>to</strong> want <strong>to</strong> create documents that<br />
are bigger than one window. When you reach <strong>the</strong> bot<strong>to</strong>m<br />
of <strong>the</strong> window, <strong>the</strong> Lisa au<strong>to</strong>matically moves your<br />
text up under <strong>the</strong> <strong>to</strong>p of <strong>the</strong> window <strong>to</strong> create space<br />
at <strong>the</strong> bot<strong>to</strong>m (as it's done in Figure 2-25). This is called<br />
scrolling.<br />
You can also scroll <strong>the</strong> contents of a window yourself;<br />
in fact, <strong>the</strong> Lisa gives you three separate ways <strong>to</strong><br />
do it. You may have noticed that whatever window is<br />
active has a grey bar on its right edge and ano<strong>the</strong>r one<br />
on its bot<strong>to</strong>m. These are called scroll bars and <strong>the</strong>y<br />
contain a number of mysterious symbols, which I'll now<br />
explain.<br />
In <strong>the</strong> right scroll bar in Figure 2-25, <strong>the</strong>re's a<br />
square white box Gust opposite <strong>the</strong> line that reads "And<br />
Marion, cow-eyed,"). This is an eleva<strong>to</strong>r; it indicates<br />
how what's presently shown in <strong>the</strong> window relates <strong>to</strong><br />
<strong>the</strong> whole document.<br />
· · In Figure 2-24, <strong>the</strong> eleva<strong>to</strong>r is all <strong>the</strong> way at <strong>the</strong><br />
<strong>to</strong>p of <strong>the</strong> grey bar. That's because in Figure 2-24, we're<br />
right at <strong>the</strong> beginning of <strong>the</strong> document. In Figure<br />
2-25, however, we're far<strong>the</strong>r down, and <strong>the</strong> eleva<strong>to</strong>r has<br />
moved <strong>to</strong> indicate that fact.
53 The Lisa's Software<br />
Figure 2-25<br />
File/Print Edit Search Type Style Format 1r Page Layout<br />
-------------------------------.<br />
111111 Master & Bos'n 111111<br />
find two by two hl.e c.l.t and mouse<br />
The homeless played at keeping IK>US
54 Introduction <strong>to</strong> <strong>the</strong> Lisa<br />
Figure 2-26<br />
File/Print Edit Search Type Style Format 1r Page Layout<br />
---.<br />
111111 Master & Bos'n 11111<br />
I was not looking for a cage<br />
In which <strong>to</strong> mope in my old age .<br />
The nightingales are sobbing in<br />
The orchards of our mo<strong>the</strong>rs,<br />
And hearts that we broke long ago<br />
Have long been breaking o<strong>the</strong>rs;<br />
Tears are round , <strong>the</strong> sea. is deep:<br />
Roll <strong>the</strong>m Oi.rerboard and sleep.<br />
You can move <strong>the</strong> eleva<strong>to</strong>r (and <strong>the</strong>refore scroll<br />
<strong>the</strong> document) yourself. You do that by grabbing <strong>the</strong><br />
eleva<strong>to</strong>r (putting <strong>the</strong> pointer on it and holding <strong>the</strong> but<strong>to</strong>n<br />
down) and moving it where you want it. When you release<br />
<strong>the</strong> but<strong>to</strong>n, <strong>the</strong> text scrolls down (Figure 2-26).<br />
You can also move <strong>the</strong> eleva<strong>to</strong>r, and <strong>the</strong>refore scroll,<br />
in <strong>the</strong> opposite direction-as I did <strong>to</strong> create Figure<br />
2-27.<br />
·Lisa Write has only a vertical eleva<strong>to</strong>r, but <strong>the</strong> o<strong>the</strong>r<br />
<strong>to</strong>ols (and <strong>the</strong> Desk<strong>to</strong>p Manager) have eleva<strong>to</strong>rs in <strong>the</strong><br />
horizontal scroll bar as well. These horizontal eleva<strong>to</strong>rs<br />
work <strong>the</strong> same way, scrolling a document that is wider<br />
than <strong>the</strong> window in<strong>to</strong> view.
55 The Lisa's Software<br />
Figure 2-27<br />
File/Print Edit Search Type Style Format 1f Page Layout<br />
--=---=-----.<br />
111111 Master & Bos' n 11111<br />
W H Auden<br />
At Dirty Dick 's and Sloppy Joe 's<br />
We drank our liquor straight,<br />
Some went upstairs with Margery ,<br />
.A.nd some , alas , with Kate ;<br />
And two by two like cat and mouse<br />
The homeless playeO. at keeping house.<br />
There Wealthy Meg , <strong>the</strong> Sailor 's Friend ,<br />
.A.nd Marion , cow-eyed ,<br />
Opened <strong>the</strong>ir arms <strong>to</strong> me but I<br />
Refused <strong>to</strong> step inside ;<br />
I was not looking for a cage<br />
In which <strong>to</strong> mope in my old age .<br />
The nightingales a.re sobbing in<br />
The orchards of our mo<strong>the</strong>rs,<br />
At each end of each scroll bar <strong>the</strong>re's a scroll arrow<br />
(four of <strong>the</strong>m in all). When you place <strong>the</strong> pointer on<br />
one of <strong>the</strong>m and hit <strong>the</strong> but<strong>to</strong>n, <strong>the</strong> document scrolls<br />
in <strong>the</strong> direction indicated. If you hold <strong>the</strong> but<strong>to</strong>n down,<br />
<strong>the</strong> document will scroll slowly and continuously. (The<br />
way scroll arrows work is so obvious and intuitive that<br />
I won't belabor you with illustrations of it.)<br />
Just below <strong>the</strong> up scroll arrow (at <strong>the</strong> <strong>to</strong>p of <strong>the</strong><br />
vertical scroll bar) is a little symbol that looks like a<br />
sheet of paper with <strong>the</strong> corner turned over; <strong>the</strong>re's a<br />
similar symbol just above <strong>the</strong> down scroll arrow. These<br />
are <strong>the</strong> view but<strong>to</strong>ns and <strong>the</strong>y scroll text a screenful<br />
at a time. To activate a view but<strong>to</strong>n, you just put <strong>the</strong>
56 Introduction <strong>to</strong> <strong>the</strong> Lisa<br />
Figure 2-28<br />
Fi le/Print Edit Search Type Style Format 1f Page Layout<br />
111111 Master & Bos ' n 111111<br />
--.<br />
Song of <strong>the</strong> Master and Boatswain<br />
W H Auden<br />
flt Dirty Dick 's and Sloppy Joe 's<br />
We drank our liquor straight,<br />
Some went upstairs with Margery ,<br />
A.nd some , alas , with Kate ;<br />
find two by two like cat and mou se<br />
The homeless played at keeping house.<br />
There Wealthy Meg , <strong>the</strong> Sailor 's Friend ,<br />
find Marion , cow-eyed ,<br />
Opened <strong>the</strong>ir arms <strong>to</strong> me but I<br />
Refused <strong>to</strong> step inside ;<br />
I was not looking for a cage<br />
In which <strong>to</strong> mope in my old age .<br />
The nightingale s are sobbing in<br />
pointer in it and click <strong>the</strong> but<strong>to</strong>n. In Figure 2-28, I've<br />
moved <strong>to</strong> <strong>the</strong> beginning of <strong>the</strong> document and put <strong>the</strong><br />
pointer in <strong>the</strong> down view but<strong>to</strong>n; clicking <strong>the</strong> but<strong>to</strong>n<br />
produces Figure 2-29 (notice how <strong>the</strong> eleva<strong>to</strong>r shifted<br />
<strong>to</strong> indicate <strong>the</strong> new place in <strong>the</strong> document).<br />
The last line in Figure 2-28 is, "The nightingales<br />
are sobbing in." In Figure 2-29, half of this line is at<br />
<strong>the</strong> <strong>to</strong>p of <strong>the</strong> new window, <strong>to</strong> give you a little continuity.<br />
Aside from that slight overlap, you get a whole new<br />
screenful.<br />
Lisa Write only has vertical view but<strong>to</strong>ns, but <strong>the</strong><br />
o<strong>the</strong>r <strong>to</strong>ols (and <strong>the</strong> Desk<strong>to</strong>p Manager) have horizontal<br />
ones as well. They work <strong>the</strong> same basic way, leaving
57<br />
The Lisa's Software<br />
File/Print<br />
Edit<br />
Figure 2-29<br />
Page Layout<br />
The orchards of our mo<strong>the</strong>rs,<br />
And hearts that we broke long ago<br />
Have kng been breaking o<strong>the</strong>rs;<br />
Tear s are rcu1Kl. , <strong>the</strong> sea is .jeep:<br />
Roll <strong>the</strong>m oYerboard and sleep.<br />
a little bit of <strong>the</strong> old screenful on <strong>the</strong> edge for reference,<br />
o<strong>the</strong>rwise giving you a whole new screenful <strong>to</strong> ei<strong>the</strong>r<br />
<strong>the</strong> left or <strong>the</strong> right.<br />
You can only scroll in <strong>the</strong> active window, and thus<br />
it's <strong>the</strong> only one that has scroll bars. (This is yet ano<strong>the</strong>r<br />
way <strong>to</strong> tell which window is active.)<br />
Rearranging<br />
windows on<br />
<strong>the</strong> Desk<strong>to</strong>p<br />
Your keen eyes have noticed that <strong>the</strong>re's one more symbol<br />
I haven't discussed. It sits at <strong>the</strong> juncture of <strong>the</strong><br />
two scroll bars and is called <strong>the</strong> size control box. It's<br />
used <strong>to</strong> change <strong>the</strong> size and/ or shape of a window<br />
(called sizing in ei<strong>the</strong>r case). The way <strong>the</strong> size control
58<br />
Introduction <strong>to</strong> <strong>the</strong> Lisa<br />
File/Print<br />
Figure 2-30<br />
Search Type Style Format 1r<br />
illlll Master & Bos'n 111111<br />
of <strong>the</strong> Master and Boats<br />
H'. H Auden<br />
Page Layout<br />
At Dirty Dick 's and Sloppy .J::e ' s<br />
We dra11k our liquor str.:Ught,<br />
Some went upstairs with Margery ,<br />
A.nd some , alas , with Kate ;<br />
And ti..vo by tv·IC· like c:.:1t and mov e<br />
The homele ss played at l
59 The Lisa's Software<br />
Figure 2-31<br />
File/Print Edit Search Type Style Format tr Page Layout<br />
---''--------'=
60 Introduction <strong>to</strong> <strong>the</strong> Lisa<br />
Figure 2-32<br />
File/Print Edit Search Type Style Format 1f Page Layout<br />
<br />
111111 Master & Bos' n 111111<br />
of <strong>the</strong> Master and Boatswain<br />
lV H Auden<br />
At Dirty Dick 's a.nd Sloppy Joe 's<br />
We drank our liquor str aight,<br />
Sorne went upst.air s with Margery ,<br />
And sorne , alas, with Kate ;<br />
And tv.ro by two like cat and rnou se<br />
The homeless played at keeping house .<br />
There Wealthy Meg , <strong>the</strong> Sailor 's Frien·j ,<br />
And M.il'ion , cow-eyed ,<br />
Opened <strong>the</strong>ir arms t::i roe but I<br />
Refused <strong>to</strong> step in side ;<br />
I l'ras not looking for a cage<br />
In which <strong>to</strong> mope in rny old age .<br />
The nightingale s a.re sobbing in<br />
The orchards cf our mo<strong>the</strong>rs,<br />
And hearts that we broke long ago<br />
Have long been breaking o<strong>the</strong>rs;<br />
Tea.rs a.re round , <strong>the</strong> sea is deep:
61 The Lisa's Software<br />
Figure 2-33<br />
File/Print Edit Search Type Style Format 1r<br />
1°b m<br />
Lis3Pr•, ject Paper<br />
Master & Bc•s'r1<br />
D . .<br />
Lis.;.'IJrite Paper<br />
Fl<br />
Li2J<br />
is t do•oument<br />
I ;}:<br />
Typefaces<br />
i<br />
2M d•)Cument<br />
I<br />
LisaGraj)h Paper Li:,.;JJr a1•,• P af•er Lis.;Li;.t Paper<br />
Untitle•j<br />
l@I<br />
1st picture<br />
CJ D D D D<br />
.<br />
.<br />
. .<br />
Lis.:iCalc E::< :>mples LisaProject Exaroples L!sawnte Examples L1saGrapr1 Examples L1sanra.w Examples LlsaL1st Example<br />
[28 I§ l£iJ Cl Im<br />
Empty Folders<br />
I<br />
Lis awrite LisaGrapr1 Lisa!lr a.i LisaList Clock<br />
.as tebasket<br />
Cli board<br />
You can make a window as big or small as you<br />
want. In Figure 2-32, it fills <strong>the</strong> screen and completely<br />
blocks out <strong>the</strong> Profile window (and Desk<strong>to</strong>p) beneath<br />
it; in Figure 2-33, it retreats in<strong>to</strong> a corner, revealing<br />
almost all of <strong>the</strong> Profile window.<br />
There are a couple of things <strong>to</strong> notice about Figure<br />
2-33:<br />
• The Lisa moves <strong>the</strong> title of <strong>the</strong> resized window over<br />
so that as much of it as possible is still visible. If <strong>the</strong><br />
title had been left in its original position, none of it<br />
would be visible in Figure 2-33. You can see some<br />
of this title-shifting in Figure 2-30 as well.
:<br />
62 Introduction <strong>to</strong> <strong>the</strong> Lisa<br />
Figure 2-34<br />
Edit Search Type Style Format 1f Page Layout<br />
untitle1j<br />
I<br />
Et picture<br />
T/ref..c:e.<br />
F"l<br />
Li]<br />
2n1J i:wcument<br />
LJ LJ<br />
.<br />
LJ<br />
.<br />
i.-. I<br />
. 1-. !<br />
LisiCaK E:•
.<br />
63 The Lisa's Software<br />
File/Print Edit Search<br />
Figure 2-35<br />
Lis.:i.Gr.:ipri P.:ipi::r<br />
;<br />
<br />
1::. t 1jc1i::1.1mi::nt<br />
;<br />
ltJ<br />
Ur:itle1J<br />
1:' <br />
Li: . . :irir21_i.i·.1 Peiper<br />
1:.t picture<br />
Coleridge<br />
IW<br />
.<br />
.§<br />
.. 0<br />
: ·:: . . .<br />
mJ Im<br />
Lis.;Calc Lis.;Pro.iect Lisa.write Li"r.;p1 Li:;.;i[lr.:iY·,' Li" .. :iList<br />
'<br />
L:J<br />
Ernpty Fol,jers<br />
11 I<br />
r:IQCIQ<br />
go<br />
CICIQQ<br />
c1e:u1a<strong>to</strong>r<br />
Clock
64 Introduction <strong>to</strong> <strong>the</strong> Lisa<br />
Figure 2-36<br />
File/Print Edit Search Type Style Format 1r Page Layout<br />
11111 Master £J Bos' n 11111<br />
of <strong>the</strong> Master and fuatswain<br />
ll H Auden<br />
<br />
At Dirty Dick 's and Sloppy Joe's<br />
We drank our liquor straight,<br />
Some went upstair s with Margery ,<br />
An·j some, alas , with Kate ;<br />
And two by two like cat and mouse<br />
The homeless played at keeping house .<br />
There Wealthy Meg , <strong>the</strong> Sailor ' s Friend ,<br />
And M0l.rion , cow-eyed ,<br />
Opened <strong>the</strong>ir arms <strong>to</strong> me but I<br />
Refused t:· step in side ;<br />
I was not lc-:·king for a cage<br />
In which <strong>to</strong> mope in my old age .<br />
If you want <strong>to</strong> look at a window that's buried underneath<br />
<strong>the</strong> active window, you can shrink <strong>the</strong> active window<br />
and move it around, as I've done with Master &<br />
Bos'n. But <strong>the</strong>re's a better method-you just activate<br />
<strong>the</strong> window you want <strong>to</strong> bring <strong>to</strong> <strong>the</strong> <strong>to</strong>p.<br />
The easiest way <strong>to</strong> activate a window is simply <strong>to</strong><br />
put <strong>the</strong> pointer anywhere in it and click <strong>the</strong> but<strong>to</strong>n.<br />
Figure 2-36 shows <strong>the</strong> pointer in <strong>the</strong> Profile window,<br />
whiCh is mostly buried underneath Master & Bos'n; Figure<br />
2-37 shows <strong>the</strong> result of clicking <strong>the</strong> but<strong>to</strong>n when<br />
<strong>the</strong> pointer is in that position. Notice that Master &<br />
Bos'n is still visible (across <strong>the</strong> <strong>to</strong>p and along <strong>the</strong> left<br />
edge of <strong>the</strong> screen).
65 The Lisa's Software<br />
Figure 2-37<br />
File/Print Edit Vi ew Disk<br />
5063 blocks free out of 9690.<br />
a<br />
m<br />
Lisacaic P aiier<br />
i .<br />
untitle•l<br />
<br />
<br />
I<br />
I :)iff I<br />
Li$aProject Paper<br />
Lisa.Write Paper<br />
Master & Bos 'n<br />
1S t dc•cument<br />
Typefaces<br />
I<br />
2M document<br />
LisaGrapn Paper<br />
Untitled<br />
lH<br />
Lisa!Jraw Paper<br />
I<br />
ls t pict1Jre<br />
Lisa.Gale E:
=a==<br />
66 Introduction <strong>to</strong> <strong>the</strong> Lisa<br />
Figure 2-38<br />
Save Er Put Away<br />
Save Er Continue<br />
Revert <strong>to</strong> Previous Version<br />
Format for Pri nter . . . I<br />
.'.'lri te p.,per<br />
·rent<br />
a<br />
B<br />
Lis'8npn P3per<br />
Untitled<br />
f.mll<br />
<br />
Lis.lDrav·,' Paper<br />
I<br />
1st picture<br />
8<br />
L2J<br />
F1<br />
L__J<br />
Li; .. 3.C.3Jc E>::ample;. Li;<br />
.. :o.FTO.Ject E:,,:.;;mples Liseo.1Nnte E:,.;.•mpies Lis.•Gnp1 E>eampie;. Lis«mple;.<br />
Lis
67 The Lisa's Software<br />
Figure 2-39<br />
Fi le /Print Edit Vi ew Disk<br />
Sometimes, however, <strong>the</strong> window you want <strong>to</strong> look<br />
at is completely buried (this is quite possible, since <strong>the</strong><br />
Lisa lets you have 20! windows on <strong>the</strong> Desk<strong>to</strong>p at one<br />
time). You can't click <strong>the</strong> mouse but<strong>to</strong>n in it, because<br />
<strong>the</strong>re's no visible part of it <strong>to</strong> put <strong>the</strong> pointer in. You<br />
could resize one window after ano<strong>the</strong>r till you uncover<br />
<strong>the</strong> one you want, but <strong>the</strong>re's a faster way <strong>to</strong> do it: you<br />
simply go <strong>to</strong> <strong>the</strong> File/Print menu and select Set Aside<br />
Everything (Figure 2-38). All <strong>the</strong> windows become<br />
icons again (Figure 2-39), which makes it easy <strong>to</strong> find<br />
<strong>the</strong> one you want, select it and open it.<br />
Notice that, in Figure 2-39, Master & Bos'n has<br />
its own icon on <strong>the</strong> Desk<strong>to</strong>p. This is convenient, because
68<br />
Introduction <strong>to</strong> <strong>the</strong> Lisa<br />
o<strong>the</strong>rwise you wouldn't be able <strong>to</strong> select it (if it were<br />
<strong>the</strong> buried window you were looking for). You'd have<br />
<strong>to</strong> select Profile and opeh it, <strong>the</strong>n select Master & Bos'n<br />
and open it.<br />
On <strong>the</strong> o<strong>the</strong>r hand, if you wanted <strong>to</strong> put away Master<br />
& Bos'n back inside of Profile, you could have done<br />
that simply by selecting Save & Put Away instead of<br />
Set Aside from <strong>the</strong> File/Print menu. A third option is<br />
Save & Continue. The chart below explains <strong>the</strong> differences<br />
between <strong>the</strong>m:<br />
Set Aside Save & Put Away Save & Continue<br />
Reduces window<br />
<strong>to</strong> icon<br />
yes yes no<br />
Places icon:<br />
on Desk<strong>to</strong>p<br />
back where it<br />
came from<br />
Records changes<br />
on disk<br />
no yes yes<br />
Saving takes significantly more time thari setting<br />
aside, because <strong>the</strong> Profile has <strong>to</strong> be accessed. The advantage,<br />
of course, is that you won't lose your changes if<br />
<strong>the</strong>re's a power failure, or if <strong>the</strong> plug accidentally gets<br />
pulled out of <strong>the</strong> wall.<br />
Figure 2-40<br />
Edit Search T<br />
Set Aside Everything<br />
Set Aside "Master & Bos'n"<br />
Save & Put Away<br />
Save & Continue<br />
Revert <strong>to</strong> Previous Version
69 The Lisa's Software<br />
Figure 2-41<br />
illtfiUI Edit Search Type Style Format 1r Page Layout<br />
Format for Printer,,,<br />
On which printer do yi ou intend <strong>to</strong> pr int tl·1 is document<br />
D Daisv V/ r1eej<br />
Print Method: • Dot Matrix<br />
Paper Length: 111" 0 14"<br />
Orientation: I Portra.it (tsl l) D Lsmlscspe (•1iicie)<br />
Resolution: D t\Jormal •High<br />
( Cancel )<br />
1/-.l hs.t do vou '·'·..'ant done 1f <strong>the</strong> printer vou've ;;pecifieci<br />
1s not listed in Preferences<br />
D Tell lv1 e • F' ick an Avs.ils.ble F'r i nter for t·1e D Disregard it<br />
( OK<br />
There V•.realthy !'leg, t1·1e ::ailor '; Friend,<br />
And M.:u-·ion , covr-eyed ,<br />
Ot:€ned <strong>the</strong>ir arms <strong>to</strong> me but I<br />
Refused <strong>to</strong> step in side;<br />
I was not lc-:.1.iJ1g for a c.:ige<br />
In which <strong>to</strong> mop; in my old age.<br />
Printing out<br />
When you're ready <strong>to</strong> print a document, you go <strong>to</strong> <strong>the</strong><br />
File/Print menu and select Format for Printer . . . (Figure<br />
2-40). This gives you <strong>the</strong> dialog box shown in Figure<br />
2- 41. A dialog box is simply a display, similar <strong>to</strong> <strong>the</strong><br />
ones in <strong>the</strong> Preferences window, that lets you change<br />
variables of one kind or ano<strong>the</strong>r. (By <strong>the</strong> way, I think<br />
<strong>the</strong> dialog box in Figure 2-41 is an excellent example<br />
of how clear and understandable <strong>the</strong> Lisa's messages<br />
are.)<br />
One of <strong>the</strong> things it asks you (if you're using a dotmatrix<br />
printer) is whe<strong>the</strong>r you want a high-resolution<br />
or a normal prin<strong>to</strong>ut; I discussed <strong>the</strong> difference between
70 Introduction <strong>to</strong> <strong>the</strong> Lisa<br />
<strong>the</strong>m and gave you samples of each in Chapter 1. Ano<strong>the</strong>r<br />
thing it asks you is if you want <strong>the</strong> prin<strong>to</strong>ut <strong>to</strong><br />
run down <strong>the</strong> page in a vertical format (called "portrait"<br />
or "tall" by Apple-why use <strong>the</strong> obvious term) or across<br />
<strong>the</strong> page in a horizontal format (which Apple calls<br />
"landscape" or "wide").<br />
Vertical, of course, is what's normal; that's <strong>the</strong> way<br />
paper normally passes through a typewriter. But horizontal<br />
format gives each line more room and makes<br />
<strong>the</strong> text easier <strong>to</strong> read. And, of course, many graphic<br />
presentations look better in horizontal format. (When<br />
you print <strong>the</strong> screen, it always comes out in horizontal<br />
format, and you don't see any of <strong>the</strong>se dialog boxes.)<br />
Anyway . . . if all <strong>the</strong>se defaults are fine with you,<br />
you click on OK. The printing format you define for a<br />
document remains with it until you change it. If you<br />
know that a document's format is fine with you (ei<strong>the</strong>r<br />
because you've previously set it up <strong>the</strong> way you want<br />
it or because you want <strong>the</strong> defaults), you can skip this<br />
Format for Printer step and go directly <strong>to</strong> <strong>the</strong> next oneselecting<br />
Print . . . from <strong>the</strong> File/Print menu (Figure<br />
2- 42).<br />
This produces ano<strong>the</strong>r dialog box, shown in Figure<br />
2-43. (By <strong>the</strong> way, three dots after a menu item always<br />
indicates that it produces a dialog box.) Here's where<br />
you get <strong>to</strong> choose between draft mode (also discussed<br />
and illustrated in Chapter 1) and "finished quality" (ei<strong>the</strong>r<br />
high-resolution or normal, depending on what you<br />
selected in <strong>the</strong> Format for Printer dialog box).<br />
You get this choice only if you select vertical format,<br />
because draft mode only works in vertical format.<br />
If you pick horizontal format in <strong>the</strong> Format for Printer<br />
dialog box, <strong>the</strong> draft mode/finished quality option is<br />
simply eliminated from this dialog box.<br />
The While You Work choice lets you do backgrond<br />
printing (working on one document while<br />
printing ano<strong>the</strong>r). The rest of <strong>the</strong> options are selfexplana<strong>to</strong>ry.<br />
When you click on OK, <strong>the</strong> Lisa gives you<br />
<strong>the</strong> display you see in Figure 2-44 and begins printing<br />
(unless you click on Terminate). If you want <strong>to</strong> do o<strong>the</strong>r
71 The Lisa's Software<br />
Figure 2-42<br />
Edit Search T<br />
Set Aside Everything<br />
Set Aside "Master & Bos'n"<br />
Save & P t1t Away<br />
Save & Continue<br />
Revert <strong>to</strong> Previous Ve rsion<br />
Format for Pri nter ...<br />
Figure 2-43<br />
iiitft4MI Edit Search Type Style Format ,r Page Layout<br />
Print... •Finished Quality D Quick Draft (Text Onl'y')<br />
D One Copy While You Wait •While You Work<br />
• All Pages D Only pages:<br />
Through:<br />
Number of Copies: B00[JITJ[DITJ0[D<br />
,' "'"""''"""""'""'"""'""""":<br />
"""""""""""'''"""""'"""""'<br />
( Cancel )<br />
( OK )<br />
Figure 2-44<br />
_llllM:mfill Edit Search Type Style Format ,r Page Layout<br />
Moni<strong>to</strong>r <strong>the</strong> Pri nter . .<br />
Docwnent being pri nted: r··l .:i .<br />
ster :3: Bos'n<br />
Copy being printed: 1 Of 1<br />
P11ge being printed: 1 In <strong>the</strong> range: To<br />
[Jerminate)<br />
If you w:3.nt t.1:1 cl o o<strong>the</strong>r 'A' Drk 'N hile <strong>the</strong> clocument is bein•I pnnteci .<br />
..<br />
click Pro ceed..<br />
O<strong>the</strong>n.··.' iS: e_, . .i u :;t ',· a.it.<br />
If you d o d ec:i d e t o Prnceec!,.. ·y- ou c.:i.n •J et. br:i.ck 1·1 ere f:i·y- choosin 1<br />
Honi<strong>to</strong>r U-1 e Printer from tr1e File/Print menu. You s1·1 oulc! c!o t.1·1a.t if<br />
vou 1·1 eer .:i. '1k1 idle or if 'y' OU Vi r:i.nt <strong>to</strong> terminate pr intin1.<br />
( Proceed )
72 Introduction <strong>to</strong> <strong>the</strong> Lisa<br />
Figure 2-45<br />
Disk<br />
Straighten up Icons<br />
LisacaJc Paper LisaProject Paper L1sawnte Paper<br />
i i i<br />
Untitled<br />
Master a. Bos · n 1st document<br />
i i<br />
Coleridge 2M document<br />
<br />
Lisa.Graph Paper<br />
<br />
Untitled<br />
lH<br />
LisaDr aw Paper<br />
l®I<br />
1st picture<br />
ml<br />
LisaLis t Paper<br />
LisacaJc Examples LisaProject Examples Lisawrite Examples Lisa.Graph Examples Lisaoraw Examples<br />
work while <strong>the</strong> prin<strong>to</strong>ut is going on (in o<strong>the</strong>r words,<br />
if you want <strong>to</strong> put <strong>the</strong> printing in <strong>the</strong> background), you<br />
click on Proceed. O<strong>the</strong>rwise, you just sit back and let<br />
<strong>the</strong> Lisa do its stuff.<br />
Odds and ends<br />
There are o<strong>the</strong>r pointer shapes and scrolling controls<br />
than those already mentioned. They're specific <strong>to</strong> particular<br />
<strong>to</strong>ols and I'll describe <strong>the</strong>m as <strong>the</strong>y come up in<br />
later chapters.<br />
So far <strong>the</strong> only menu we've used is <strong>the</strong> File/Print<br />
menu. But some of <strong>the</strong> o<strong>the</strong>r menus do interesting things<br />
<strong>to</strong>o. For example, <strong>the</strong> View menu (Figure 2-45) controls
73 The Lisa's Software<br />
Figure 2-46<br />
File/Print Edit Vi ew Disk<br />
5194 blocks free out of 9690. : never.<br />
...<br />
<br />
<br />
,..<br />
<br />
Title<br />
1st document<br />
0 1st picture<br />
2nd doCL1ment<br />
1§1 Calculat or<br />
0 Clock<br />
Coleridge<br />
t:5l Empty Folders<br />
mJ<br />
'<br />
LisaCalc<br />
L:l LisaCalc Examples<br />
!ill LisaCalc Paper<br />
llil LisaDraw<br />
L:l LisaDraw Examples<br />
0<br />
LisaDre.w Paper<br />
LisaGre.ph<br />
L:l<br />
Modified<br />
Created<br />
5 6:19 pm 10/26/63 4:26 am 10/06/63<br />
10 6:46 pm 10/29/63 5:23 am 10/06/63<br />
7 4:16 am 10/26/63 5:50 am 10/25/63<br />
76 6:06 am 10/22/67<br />
36 6:06 am 10/22/67<br />
4 5:43 am 11/05/63 5:01 am 11/05/63<br />
0 6:06 am 10/22/67<br />
66 2:45 pm 4/2 5/63<br />
75 6:30 am 10/22/67<br />
9 6:31 am 10/22/67<br />
201 2:45 pm 4/2 5/63<br />
199 6:15 am 10/22/67<br />
3 6:16 am 10/22/67<br />
126 2:45 pm 4/25/63<br />
6:20 am 10/22/67<br />
how objects are represented in a window. The default<br />
is <strong>to</strong> display <strong>the</strong>m pic<strong>to</strong>rially-as icons-which is <strong>the</strong><br />
way we've been seeing <strong>the</strong>m up till now. But you can<br />
have <strong>the</strong>m listed alphabetically as well (Figure 2-46).<br />
The alphabetical listing also gives you <strong>the</strong> size of<br />
each document (in 512-byte blocks), <strong>the</strong> date and time<br />
it was created, and <strong>the</strong> date and time it was last modified.<br />
The Modified and Created columns provide some interesting<br />
insights. One is that I tend <strong>to</strong> work all night long.<br />
Ano<strong>the</strong>r is that I have managed <strong>to</strong> create several documents<br />
on Oc<strong>to</strong>ber 22, 1987, a major accomplishment<br />
in time travel that you'll have <strong>to</strong> buy my forthcoming<br />
science-fiction novel <strong>to</strong> find out more about.
74 Introduction <strong>to</strong> <strong>the</strong> Lisa<br />
Figure 2-47<br />
File/Print Edit View Disk<br />
5194 b I ocks free out of 9690,<br />
Title<br />
Size<br />
Lise.Graph Paper 9<br />
ml Lise.List 277<br />
tJ Lise.List Examples 254<br />
5]] Lise.List Paper 11<br />
@ Lise.Project 178<br />
tJ Lise.Project Examples 33<br />
Lise.Project Paper 4<br />
<br />
Li sal.lri t e 213<br />
tJ Lise.Write Examples<br />
Lisa!rite Paper 4<br />
<br />
Master & Bos'n 5<br />
Tipefaces 10<br />
i<br />
Untitled 9<br />
Untitled 9<br />
57<br />
4:04 am 11/08/83<br />
11:42 am 11/03/83<br />
5:11 am 10/08/83<br />
5:19 am 10/08/83<br />
Created<br />
8:21 am 10/22/87 [)<br />
2:45 pm 4/25/83<br />
8:26 am 10/22/87<br />
8:28 am 10/22/87<br />
2:45 pm 4/25/83<br />
8:22 am 10/22/87<br />
8:23 am 10/22/87<br />
2:45 pm 4/25/83<br />
8:12 am 10/22/87<br />
8:13 am 10/22/87<br />
8:37 pm 10/28/83<br />
2:43 am 10/27 /83<br />
5:11 am 10/08/83<br />
5:19 am 10/08/83
75 The Lisa's Software<br />
Figure 2-48<br />
File/Print Edit Vi ew Disk<br />
5194 blocks free out of 9690.<br />
Title Size Created<br />
ffi LisaCal c Paper 9 8:H am 10/22/87<br />
t:J LisaCalc Examples<br />
8:30 am 10/22/87<br />
75<br />
[Dll Lisalist Paper 11 8:28 am 10/22/87<br />
t:J Lisalist Examples 254 8:26 am 10/22/87<br />
LisaProject Paper 4 8:23 am 10/22/87<br />
t:J LisaProject Examples 33 8:22 am 10/22/87<br />
LisaGraph Paper<br />
t:J LisaGraph Examples<br />
LisaDraw Paper<br />
t:J LisaDraw Examples<br />
LisaWrite Paper<br />
t:J Lisali
76 Introduction <strong>to</strong> <strong>the</strong> Lisa<br />
Figure 2-49<br />
File/Print Edit Vi ew Disk<br />
5194 blocks free out of 9690. : never·.<br />
Title<br />
Master & Bos ' n<br />
Coleridge<br />
"""<br />
<br />
Tipefaces<br />
•<br />
1st picture<br />
1st document<br />
2nd document<br />
Untitled<br />
i Untitled<br />
.<br />
[ill LisaCal c<br />
.<br />
.<br />
Li saDraw<br />
LisaGraph<br />
ttil Lisalist<br />
LisaProject<br />
LisalAlri te<br />
Size !Modified Created<br />
5 4:04 cam 11/08/83 8:37 pm 10/28/83<br />
4 5:43 cam 11/05/83 5:01 am 11/05/83<br />
10 11:42 cam 11/03/83 2:43 am 10/27/83<br />
10 8:46 pm 10/29/83 5:23 am 10/08/83<br />
5 8:19 pm 10/28/83 4:26 am 10/08/83<br />
7 4:16 cim 10/28/83 5:50 am 10/25/83<br />
9 5:19 am 10/08/83 5:19 am 10/08/83<br />
9 5:11 am 10/08/83 5:11 am 10/08/83<br />
86 2:45 pm 4/25/83<br />
201 2:45 pm 4/25/83<br />
126 2:45 pm 4/25/83<br />
277 2:45 pm 4/25/83<br />
178 2:45 pm 4/25/83<br />
213 2:45 pm 4/25/83<br />
and folders of examples on this list, when in fact all I<br />
created were <strong>the</strong> eight documents (Master & Bos'n,<br />
Coleridge, etc.). Well, this has <strong>to</strong> do with ProFile's philosophical<br />
orientation. Basically, ProFile is a solipsist and<br />
thus believes that nothing exists except what it's aware<br />
of. So as far as it's concerned, all those objects were<br />
created out of nothing <strong>the</strong> instant I transferred <strong>the</strong>m<br />
on<strong>to</strong> ProFile from <strong>the</strong> floppy disks Apple sent <strong>the</strong>m <strong>to</strong><br />
me on. (But how did I do it in 198 7!-that's <strong>the</strong><br />
question.)<br />
Here again, <strong>the</strong> documents won't all fit on one<br />
screen; in Figure 2- 49, I've scrolled down <strong>to</strong> <strong>the</strong> end<br />
(using <strong>the</strong> eleva<strong>to</strong>r this time, just for a little variety).
77 The Lisa's Software<br />
Figure 2-50<br />
Edit Vi ew Disk<br />
Set Aside Everything<br />
Set Aside "Profile"<br />
\iW•.'.' b P1.1t HwmJ<br />
Ope1i<br />
Oupl icate<br />
'ftl!ll"lll!ll!lf!llll<br />
Moni<strong>to</strong>r <strong>the</strong> Printer<br />
so<br />
Lisawri te Paper<br />
i<br />
Sos' n 1S t d•jCUment<br />
i<br />
Coleridge 2nd doc1jment<br />
i<br />
Typef.ces<br />
LisaGraph P;.per Lisanrah' Pa+ier Lisaist Pa+ier<br />
untitled<br />
I<br />
1st picture<br />
Lisacalc Examples LisaProject Examples Lisawrite Examples LisaJ3raph Examples LisaDraw Exa:riples<br />
Ii §
78 Introduction <strong>to</strong> <strong>the</strong> Lisa<br />
Figure 2-51<br />
File/Print Edit View Disk<br />
5194 blocks free out of 9690.<br />
Lisaca1c Paper<br />
i 1<br />
.<br />
LisaProject Paper<br />
Untitled Master , Bos'n ist document untitled<br />
i<br />
Coleridge<br />
i<br />
2nd d•)C•Jment<br />
i<br />
Typefaces<br />
I<br />
1st picture<br />
LisaGalc Examples LisaProject Examples Lisa.Write Examples LisaGrapn Examples LisaDra.w Examples Lisa.List Examples<br />
b<br />
mill [12] Ii Im LJ<br />
c<br />
Lisacaic Lisa.Project Lisa.Write<br />
. .<br />
LisaGrapn Lisallraw Lisa.List<br />
Cal cul a.<strong>to</strong>r<br />
Actually, <strong>the</strong>re's not much <strong>to</strong> explain. The Lisa's<br />
folders are used just as folders in <strong>the</strong> real world are<strong>to</strong><br />
hold several related objects. You can take a bunch<br />
of icons that are littering up <strong>the</strong> window and get <strong>the</strong>m<br />
out of <strong>the</strong> way by stuffing <strong>the</strong>m in<strong>to</strong> a folder you've<br />
created for that purpose. What you call <strong>the</strong> folder and<br />
what you put in it are both entirely up <strong>to</strong> you. Here's<br />
how it works:<br />
·First you select <strong>the</strong> Empty Folders icon, <strong>the</strong>n you<br />
go <strong>to</strong> <strong>the</strong> File/Print menu and Tear Off Stationery (Figure<br />
2-50). This gives you an untitled new folder (Figure<br />
2-5 1 )-just as following <strong>the</strong> same procedure with a stationery<br />
pad gives you an untitled new document.
79 The Lisa's Software<br />
Figure 2-52<br />
Fi le/Print Edit Vi ew Disk<br />
5194 blocks Free out of 9690.<br />
Lisaca1c Paper<br />
i<br />
.<br />
untitled<br />
Lisa.oroject Paper<br />
Lisawrite Paper LisaBraph Paper LisaDrai-1' Paper<br />
<br />
untitled<br />
I<br />
1st picture<br />
Coleridge<br />
2M document<br />
Fl<br />
LZJ<br />
Typefaces<br />
Ii<br />
Lisawrite ooc1 1ents<br />
Lisacalc Examples Lisa.oroject Examples Lisawrite Examples LisaGraph Examples Lisaoraw Examples<br />
(Notice that <strong>the</strong> Lisa has au<strong>to</strong>matically scrolled <strong>the</strong><br />
icons up <strong>to</strong> make room for <strong>the</strong> new folder. You can<br />
scroll <strong>the</strong>m back down whenever you want, as I did<br />
between Figures 2-5 1 and 2-52.)<br />
Next you grab <strong>the</strong> new folder, move it somewhere<br />
convenient, and retitle it. Then you grab each object<br />
you want <strong>to</strong> go in<strong>to</strong> <strong>the</strong> folder, move it over and place<br />
it on <strong>to</strong>p of <strong>the</strong> folder. In Figure 2-52, I've done that<br />
with Master & Bos'n. When you release <strong>the</strong> mouse but<strong>to</strong>n,<br />
<strong>the</strong> document disappears from its old lo·cation and<br />
moves in<strong>to</strong> <strong>the</strong> folder.
80 Introduction <strong>to</strong> <strong>the</strong> Lisa<br />
Figure 2-53<br />
File/Print Edit Vi ew Disk<br />
5194 blocks free out of 9690.<br />
ii<br />
'<br />
<br />
Lisacaic Paper LisaProject Paper LisaWrite Paper<br />
i<br />
'<br />
untitled<br />
1..&Mm<br />
<br />
LisaGr apn Paper<br />
[£.J<br />
untitled<br />
lH<br />
Lisi!Dra\'\1 Paper<br />
1@1<br />
1st picture<br />
illJ<br />
Lisal.ist Paper<br />
Lisacaic Ex;,mples LisaProject Ex;,rr1ples Lisawrite Exw1ples LisaGrapn Examples Lisi!Draw Examples<br />
iill<br />
'<br />
§ U2J<br />
'<br />
mJ a fill<br />
L:J<br />
Lisatist Examples
81 The Lisa's Software<br />
Figure 2-54<br />
File/Print Edit Vi ew Disk<br />
Typefaces Master & Bos'n Coleridge<br />
<br />
lli:J<br />
2nd doc1.Jment<br />
1st doc1Jment<br />
caicula<strong>to</strong>r<br />
Clock<br />
In Figure 2-53, I've moved all five LisaWrite documents<br />
in<strong>to</strong> <strong>the</strong> Lisa Write Documents folder and moved<br />
<strong>the</strong> folder underneath <strong>the</strong> Lisa Write Paper icon. See<br />
how much neater <strong>the</strong> window looks<br />
To get <strong>to</strong> any of those LisaWrite documents, all I<br />
have <strong>to</strong> do is open <strong>the</strong> folder (as I've done in Figure<br />
2-54). If I decide I want <strong>to</strong> move a document back out<br />
of <strong>the</strong> folder, I just grab it, move it over <strong>to</strong> <strong>the</strong> Profile<br />
window, and release <strong>the</strong> mouse but<strong>to</strong>n.<br />
Folders are great for keeping windows well organized<br />
and <strong>the</strong>y make it easier <strong>to</strong> find what you're looking<br />
for, especially when you're dealing with a lot of icons.
82<br />
Introduction <strong>to</strong> <strong>the</strong> Lisa<br />
The Edit menu also does some nice things, most<br />
of which I'll cover in <strong>the</strong> Lisa Write chapter. But <strong>the</strong>re's<br />
one very useful feature I really should discuss here. I'm<br />
talking, of course, about <strong>the</strong> original forgive-and-forget<br />
guy, that friend indeed in times of need, star of graphics,<br />
spreadsheets and word processing, and a close personal<br />
friend-<strong>the</strong> Undo command!<br />
The Undo command is really simple. When you<br />
screw up, you just go <strong>to</strong> <strong>the</strong> Edit menu and select Undo<br />
Last Change (Figure 2-55). The Lisa <strong>the</strong>n proceeds <strong>to</strong><br />
put everything back <strong>the</strong> way it was before you did <strong>the</strong><br />
last thing you did-unless for some reason it can't do<br />
that, in which case it displays Figure 2-56.<br />
Figure 2-55<br />
Cut<br />
li(X<br />
Copy j[<br />
Pu:;i e<br />
.t.v<br />
Select All Icons WA<br />
Figure 2-56<br />
The Lisa cannot undo <strong>the</strong> last operation.<br />
( Cance l )<br />
Untitled<br />
Master & Bos' n 1st document Untitled
83<br />
The Lisa's Software<br />
And so we bid<br />
fond adieu . . .<br />
It must be obvious <strong>to</strong> you by now that I could go on<br />
describing <strong>the</strong> Lisa's software for ano<strong>the</strong>r hundred<br />
pages (it's painfully obvious <strong>to</strong> me). But I'm going <strong>to</strong><br />
force myself <strong>to</strong> s<strong>to</strong>p. With what you have here for a<br />
beginning, <strong>the</strong> Lisa's manual and training program<br />
should be adequate <strong>to</strong> explain <strong>the</strong> rest.<br />
So I'll now proceed <strong>to</strong> tell you how you finish a<br />
work session with <strong>the</strong> Lisa. That won't take long, since<br />
all you have <strong>to</strong> do is . . . turn <strong>the</strong> machine off. It doesn't<br />
matter whe<strong>the</strong>r you're in a window or on <strong>the</strong> Desk<strong>to</strong>p<strong>the</strong><br />
Lisa saves on<strong>to</strong> <strong>the</strong> disk all <strong>the</strong> changes you've made<br />
<strong>to</strong> any document. As I said earlier, this is a safety feature<br />
that can't be praised <strong>to</strong>o highly.<br />
The Lisa also remembers what windows were open,<br />
<strong>the</strong>ir size, shape and location on <strong>the</strong> screen, etc., etc.<br />
When you turn <strong>the</strong> Lisa on again, it puts you back in<br />
exactly <strong>the</strong> same place, so you can begin working right<br />
where you left off.<br />
Now that you have some sense of how <strong>the</strong> Lisa's<br />
software works, you may wonder why it takes <strong>the</strong> unusual<br />
and complicated approach it does.<br />
I've already answered this question, but it bears<br />
restating: although this approach is more complex in<br />
some ways, Apple feels that it's much more intuitive<br />
and easier <strong>to</strong> learn, because instead of dealing with abstract<br />
concepts like "files" and "commands," you're manipulating<br />
(pictures of) actual physical objects just <strong>the</strong><br />
way you do in <strong>the</strong> real, noncomputer world.<br />
There is certainly some truth <strong>to</strong> this; <strong>the</strong> question<br />
is only whe<strong>the</strong>r <strong>the</strong> advantages of <strong>the</strong> Lisa's approach<br />
outweigh its disadvantages (expensive hardware, relatively<br />
slow operation, constantly having <strong>to</strong> move your<br />
hand from <strong>the</strong> keyboard <strong>to</strong> <strong>the</strong> mouse, and so on).<br />
Apple talks about how easy <strong>the</strong> mouse/icon approach<br />
is <strong>to</strong> learn, but I think that this chapter-which<br />
is quite a bit more lucid than any of Apple's own training<br />
materials-clearly demonstrates that this is not <strong>the</strong> case.<br />
(I hope you found it easier <strong>to</strong> learn than I did, or else<br />
what would be <strong>the</strong> point of writing this book)
84 Introduction <strong>to</strong> <strong>the</strong> Lisa<br />
But however confusing <strong>the</strong> first stages of learning<br />
<strong>the</strong> Lisa may be, things really begin <strong>to</strong> fall in<strong>to</strong> place<br />
as you proceed. The mouse/icon approach does make<br />
sense on a more basic level than <strong>the</strong> user interface on<br />
most computers, and for many applications, it's spectacularly<br />
easy <strong>to</strong> use. In o<strong>the</strong>r words, it isn't much faster<br />
from 0 <strong>to</strong> 30, but from 30 <strong>to</strong> 60 it really eats up <strong>the</strong><br />
road, and it can cruise all day at 75.<br />
There's ano<strong>the</strong>r advantage <strong>to</strong> Lisa's user interface:<br />
once you've learned it, you're set-it stays <strong>the</strong> same no<br />
matter what <strong>to</strong>ol you're using. The usefulness of this<br />
will become obvious in Chapters 4 through 10.<br />
But first I'll talk a little about how <strong>to</strong> get started<br />
using a Lisa and what you can expect your first session<br />
with it <strong>to</strong> be like.
3 Using a Lisa<br />
for <strong>the</strong> First Time<br />
The basic Lisa manual-called <strong>the</strong> Owner's Guide-is<br />
designed <strong>to</strong> shepherd you through your first few anxietyladen<br />
days (or weeks) with a Lisa, and it does a reasonably<br />
good job of that-although far from a perfect one.<br />
The Owner's Guide is copiously illustrated and almost<br />
always paced slowly enough for even <strong>the</strong> most<br />
terror-stricken novice <strong>to</strong> follow. (Ano<strong>the</strong>r nice thing<br />
about it: unlike many o<strong>the</strong>r computer manuals, it<br />
doesn't come in one of those vinyl binders that stink<br />
so much <strong>the</strong>y make your eyes cross.) But for all its virtues,<br />
<strong>the</strong> Owner's Guide could be more complete, more<br />
thorough and somewhat better organized.<br />
There's no sense in my going over all <strong>the</strong> things<br />
<strong>the</strong> Owner's Guide explains well, or repeating what I've<br />
already covered in Chapters 1 and 2. Instead, I'll just<br />
give you a few pointers that should make getting started<br />
on <strong>the</strong> Lisa a little less traumatic.<br />
Before you can use <strong>the</strong> Lisa, you need <strong>to</strong> set it up.<br />
The procedures for doing that are in a four-page pamphlet<br />
that comes in <strong>the</strong> accessory box, and are also<br />
included in <strong>the</strong> Owner's Guide as an appendix.<br />
Fortunately, <strong>the</strong>y're easy <strong>to</strong> follow and <strong>the</strong>y steer you<br />
clear of several dangerous pitfalls.<br />
The dealer who sells you a Lisa should 'initialize<br />
<strong>the</strong> ProFile for you, but if that hasn't been done, you'll<br />
have <strong>to</strong> do it yourself. (To initialize a disk means <strong>to</strong><br />
85
86 Introduction <strong>to</strong> <strong>the</strong> Lisa<br />
structure it <strong>to</strong> accept information.) Normally, in addition<br />
<strong>to</strong> initializing <strong>the</strong> ProFile, you want <strong>to</strong> make it <strong>the</strong><br />
startup device. This means that when you turn <strong>the</strong> Lisa<br />
on, it will look <strong>to</strong> <strong>the</strong> ProFile for instruction_s on what<br />
<strong>to</strong> do. To do that, it must contain <strong>the</strong> Lisa's basic program-<strong>the</strong><br />
Desk<strong>to</strong>p Manager.<br />
You load <strong>the</strong> Desk<strong>to</strong>p Manager on<strong>to</strong> <strong>the</strong> ProFile<br />
from two floppies; <strong>the</strong>y're labeled Office System I and<br />
II and you'll find <strong>the</strong>m in slots in <strong>the</strong> cover of <strong>the</strong> Owner's<br />
Guide. In Section D of <strong>the</strong> Owner's Guide are several<br />
pages that tell you how <strong>to</strong> proceed. They walk you<br />
through <strong>the</strong> steps in a ra<strong>the</strong>r straightforward manner,<br />
but <strong>the</strong>y omit one important fact-that it will take about<br />
fifteen minutes <strong>to</strong> accomplish <strong>the</strong> transfer.<br />
If you're new <strong>to</strong> computers, you could easily panic<br />
during that time and think that something has gone<br />
drastically wrong with this new, sophisticated and very<br />
expensive <strong>to</strong>y of yours.<br />
Naturally this sort of thing doesn't even begin <strong>to</strong><br />
phase an old computer hand like myself. I realize that<br />
all I have <strong>to</strong> do is:<br />
1. quickly make myself a big drink;<br />
2. throw half of it down my throat;<br />
3. slosh <strong>the</strong> rest of it all over <strong>the</strong> manual as I frantically<br />
flip through <strong>the</strong> pages, trying <strong>to</strong> figure out<br />
how I screwed up.<br />
At <strong>the</strong> same time you put <strong>the</strong> Desk<strong>to</strong>p Manager on<strong>to</strong><br />
<strong>the</strong> ProFile, you should also load all <strong>the</strong> o<strong>the</strong>r <strong>to</strong>ols (Lisa<br />
Draw, LisaWrite, etc.). The Lisa is slow enough as it<br />
is, without having <strong>to</strong> load programs from floppy disks<br />
at a tenth <strong>the</strong> speed of <strong>the</strong> ProFile. (Here again, <strong>the</strong><br />
dealer may have done this for you.)<br />
If you're also hooking up a dot-matrix printer, you<br />
should install <strong>the</strong> parallel board in expansion slot #2<br />
and hook up <strong>the</strong> printer <strong>to</strong> <strong>the</strong> <strong>to</strong>p connec<strong>to</strong>r in <strong>the</strong><br />
board. The printer will work if it's connected at any<br />
of <strong>the</strong> o<strong>the</strong>r six possible locations (<strong>to</strong>p or bot<strong>to</strong>m in<br />
slot #1, bot<strong>to</strong>m in slot #2, <strong>to</strong>p or bot<strong>to</strong>m in slot #3, or<br />
<strong>the</strong> standard parallel port on <strong>the</strong> back of <strong>the</strong> console
87 Using a Lisa for <strong>the</strong> First Time<br />
itself), but <strong>the</strong> <strong>to</strong>p connec<strong>to</strong>r in slot #2 is <strong>the</strong> only one<br />
that lets you au<strong>to</strong>matically print what's on <strong>the</strong> screen<br />
at any given time (you do it by simultaneously pressing<br />
<strong>the</strong> right-hand Option key, <strong>the</strong> right-hand Shift key and<br />
<strong>the</strong> number 4 on <strong>the</strong> numeric keypad). This can be a<br />
handy feature, so why not take advantage of it<br />
Although <strong>the</strong> setup instructions for <strong>the</strong> printer are<br />
fairly clear, <strong>the</strong>y are a bit confusing at certain points<br />
and would benefit from more pho<strong>to</strong>graphs (as in <strong>the</strong><br />
o<strong>the</strong>r manuals).<br />
Before <strong>the</strong> printer will work, you have <strong>to</strong> open Preferences<br />
and tell <strong>the</strong> Lisa it's <strong>the</strong>re. Then you're <strong>to</strong>ld <strong>to</strong><br />
turn <strong>the</strong> Lisa off, connect <strong>the</strong> printer and turn <strong>the</strong> Lisa<br />
on again. (You'll have <strong>to</strong> do this even if your printer<br />
is already physically hooked up.)<br />
Once you've got <strong>the</strong> whole Lisa system set up, you<br />
turn <strong>to</strong> Section A of <strong>the</strong> manual. Section A is only three<br />
pages long-which isn't surprising since it merely tells<br />
you how <strong>to</strong> turn <strong>the</strong> Lisa on and how <strong>to</strong> insert <strong>the</strong> disk<br />
that contains an on-screen training program called Lisa<br />
Guide.<br />
All <strong>the</strong> basic teaching about <strong>the</strong> Lisa is done by<br />
LisaGuide. It's an interactive program with a lot of<br />
branching. This means that it reacts <strong>to</strong> what you do;<br />
what it puts on <strong>the</strong> screen depends on what your last<br />
response was. If you get an answer right, it congratulates<br />
you. If you get it wrong, it says something euphemistic<br />
like "you don't seem <strong>to</strong> have <strong>the</strong> idea yet" and asks if<br />
you want <strong>to</strong> see a demonstration of <strong>the</strong> correct way<br />
<strong>to</strong> do it. LisaGuide gives you frequent opportunities <strong>to</strong><br />
practice what you've already learned, <strong>to</strong> review earlier<br />
screens, or <strong>to</strong> skip ahead <strong>to</strong> a new <strong>to</strong>pic.<br />
The program is arranged in<strong>to</strong> ten sections, or "<strong>to</strong>pics."<br />
The manual recommends you complete <strong>the</strong> first<br />
six <strong>to</strong>pics in one fell swoop and <strong>the</strong>n look at <strong>the</strong> last<br />
four at your leisure. All ten are listed below, along with<br />
<strong>the</strong> concepts that are covered under each one.<br />
1. Of Mice & Menus-<strong>the</strong> mouse, <strong>the</strong> desk<strong>to</strong>p, au<strong>to</strong>matic<br />
screen dimming, menus, <strong>the</strong> menu bar,<br />
menu items, highlighting
88 Introduction <strong>to</strong> <strong>the</strong> Lisa<br />
2. Starting a Document-disks, folders, documents,<br />
icons, windows, stationery pads, renaming<br />
documents<br />
3. Editing a Document-opening documents, activating<br />
windows, inserting text, replacing text,<br />
cutting text, <strong>the</strong> clipboard, undoing changes<br />
4. Filing a Document-creating a new folder, filing<br />
homes (where objects go when <strong>the</strong>y're<br />
Saved & Put Away), closing a window with Save<br />
& Put Away, closing a window with Set Aside,<br />
filing a document<br />
5. Viewing a Document-scroll bars, view arrows,<br />
eleva<strong>to</strong>rs, view but<strong>to</strong>ns, moving windows, <strong>the</strong><br />
size control box, listing alphabetically, listing<br />
chronologically, listing pic<strong>to</strong>rially, resizing<br />
windows<br />
6. S<strong>to</strong>pping LisaGuide-thi is just one screen that<br />
lets you decide whe<strong>the</strong>r you want <strong>to</strong> keep working<br />
with LisaGuide or take a break and come<br />
back later (actually, <strong>the</strong> manual has already<br />
<strong>to</strong>ld you how <strong>to</strong> do this at any point you want)<br />
7. More Editing-selecting a word, selecting a<br />
group of words, moving text (also known as<br />
"cut & paste"), copying text, shadows<br />
8. More Filing-copying documents, copying folders,<br />
creating stationery pads, discarding icons,<br />
<strong>the</strong> wastebasket, retrieving icons<br />
9. Shortcuts-double-clicking, grouping icons<br />
with shift-clicking, grouping icons in a box,<br />
moving grouped icons, selecting all icons<br />
10. Summaries_:this is simply a collection of all<br />
of <strong>the</strong> on-screen summaries that have ended<br />
each of <strong>the</strong> preceding <strong>to</strong>pics, useful as a quick<br />
reference<br />
Of Mice & Menus, <strong>the</strong> cleverly named first section,<br />
is a delight-clear and easy <strong>to</strong> follow. But as LisaGuide<br />
goes on, it picks up <strong>the</strong> pace quite a bit and it begins<br />
<strong>to</strong> lob information at you somewhat relentlessly. Before
89 Using a Lisa for <strong>the</strong> First Time<br />
I used LisaGuide, I'd been around computers for several<br />
years and had written a number of books about <strong>the</strong>m.<br />
I'd even played with some early pro<strong>to</strong>types of <strong>the</strong> Lisa.<br />
In o<strong>the</strong>r words, I was not a computer novice-and I<br />
am not now, nor have I ever been, a dope. So if I felt<br />
like I had <strong>to</strong> bob and duck my head as new terms and<br />
concepts crashed in<strong>to</strong> <strong>the</strong> wall behind me, chances are<br />
a lot of o<strong>the</strong>r people will have <strong>the</strong> same experience.<br />
This will be less of a problem for you, of course,<br />
since you've had <strong>the</strong> extreme good fortune <strong>to</strong> read my<br />
ravishingly cogent explanation of <strong>the</strong> Lisa's basic concepts<br />
in Chapter 2. But if you still feel lost-in spite<br />
of all I could do <strong>the</strong>re-turn <strong>to</strong> Section B of <strong>the</strong> Owner's<br />
Guide.<br />
Unlike LisaGuide, which is a tu<strong>to</strong>rial, Section B<br />
is arranged as a reference. This doesn't necessarily mean<br />
you should wait <strong>to</strong> read it until you've finished Lisa<br />
Guide. People learn in different ways and some like<br />
<strong>to</strong> have an organized overview of a subject before being<br />
taken by <strong>the</strong> hand and led through it. So you can do<br />
LisaGuide and <strong>the</strong>n read Section B, or you can read<br />
Section B before beginning LisaGuide-whichever feels<br />
more comfortable.<br />
Section C gives you a brief overview of <strong>the</strong> Lisa<br />
hardware; you might want <strong>to</strong> read it <strong>to</strong> supplement<br />
Chapter 1 of this book.<br />
Let's assume you've read what you want <strong>to</strong> read<br />
in <strong>the</strong> Owner's Guide and are now ready <strong>to</strong> begin Lisa<br />
Guide. You put <strong>the</strong> LisaGuide disk in<strong>to</strong> <strong>the</strong> <strong>to</strong>p slot of<br />
<strong>the</strong> console and turn <strong>the</strong> Lisa on. The first thing you<br />
see is a screen that tells you that <strong>the</strong> Lisa is checking<br />
its CPU, memory, 1/0 functions, and so on, before letting<br />
you use it-an excellent safety feature. (I would<br />
have showed you this screen, except I couldn't get <strong>the</strong><br />
Lisa <strong>to</strong> print it-which makes sense, since if it's still<br />
checking itself out, how can it proceed <strong>to</strong> some o<strong>the</strong>r<br />
activity, like printing <strong>the</strong> screen)<br />
Next you see Figure 3-1. The Lisa has au<strong>to</strong>matically<br />
loaded LisaGuide and put you at <strong>the</strong> beginning of Of
90 Introduction <strong>to</strong> <strong>the</strong> Lisa<br />
Figure 3-1<br />
Topics<br />
1111!1 LisaGu1de 111111<br />
We lcome <strong>to</strong> LisaGuide!<br />
LisaGuide introduces features used throughout Lisa, including a<br />
c1 evi ce called a "mouse . " The mouse takes some getting used <strong>to</strong>/<br />
but it lets you communicate with Lisa quickl·11 and easily .<br />
• Now you get <strong>to</strong> use <strong>the</strong> mouse. Don't press <strong>the</strong> mouse but<strong>to</strong>n<br />
until <strong>to</strong>ld <strong>to</strong> do so . Do each numbered task :<br />
1. Place t h e mouse <strong>to</strong> tl1e left or right of Lisa. Clear e.<br />
6-.i nch square area in which <strong>to</strong> roll <strong>the</strong> mouse .<br />
<br />
2. Hold <strong>the</strong> mouse as shown . Roll <strong>the</strong> mouse on 'y our<br />
desk and watch <strong>the</strong> poin ter move on Lisa' s screen .<br />
Trouble Pick up <strong>the</strong> mouse and reposition it.<br />
3. Roll <strong>the</strong> mouse on your desk until <strong>the</strong> pointer is over <strong>the</strong><br />
" " but <strong>to</strong>n named Continue at Lisa.Gui de' s 1 m·1 er ri g1·1t . Wl"1en<br />
positioned correctl ', t h e pointer becomes arrow-shaped.<br />
4. Wl"1en <strong>the</strong> arrow-shaped pointer ' s tip is in <strong>the</strong> Continue but<strong>to</strong>n,<br />
CLICK <strong>the</strong> mouse but <strong>to</strong>n: Press <strong>the</strong> but <strong>to</strong>n/ <strong>the</strong>n rel ease it.<br />
Mice & Menus. When you click on Continue, you see<br />
Figure 3-2. Doesn't that make you feel warm all over<br />
LisaGuide continues <strong>to</strong> give you encouraging slaps on<br />
<strong>the</strong> back all <strong>the</strong> way through <strong>to</strong> <strong>the</strong> end.<br />
By <strong>the</strong> time you've finished LisaGuide, Section B<br />
of <strong>the</strong> Owner's Guide and Chapter 2 of this book, you<br />
should feel quite comfortable with <strong>the</strong> Lisa and be ready<br />
<strong>to</strong>. rpove on <strong>to</strong> <strong>the</strong> <strong>to</strong>ols that actually allow you <strong>to</strong> "do<br />
useful work." But it has taken a bit more than half<br />
an hour, hasn't it
91 Using a Lisa for <strong>the</strong> First Time<br />
Topics<br />
Figure 3-2<br />
LisaGuide<br />
Ri 1 ht I
4<br />
Word Processing<br />
with LisaWrite<br />
LisaWrite, <strong>the</strong> word processing program that comes as<br />
a standard feature with <strong>the</strong> Lisa, is very powerful in<br />
its graphic and formatting capabilities but fairly clumsy<br />
for <strong>the</strong> entering and editing of text. In spite of that,<br />
I'll spend more time on Lisa Write than on any o<strong>the</strong>r<br />
<strong>to</strong>ol, because word processing is far and away <strong>the</strong> most<br />
common use of a computer in an office setting.<br />
Eighty percent of all office jobs involve writing, and<br />
according <strong>to</strong> a recent study conducted at <strong>the</strong> University<br />
of California, word processing is what people most often<br />
use <strong>the</strong>ir personal computers for-in spite of <strong>the</strong> fact<br />
that <strong>the</strong>y rank it fourth out of five major tasks when<br />
asked, before <strong>the</strong>y buy a computer, what <strong>the</strong>y intend<br />
<strong>to</strong> use it for.<br />
The first two menus in LisaWrite (aside from our<br />
old friend, File/Print) relate <strong>to</strong> editing, so I'll cover that<br />
area first.<br />
Editing<br />
The Edit menu (shown in Figure 4-1) works more or<br />
less <strong>the</strong> same way in all seven <strong>to</strong>ols as well as in <strong>the</strong><br />
Desk<strong>to</strong>p Manager, so I really should have covered it<br />
in Chapter 2. But that chapter got <strong>to</strong> be longer than a<br />
post office line, so I only discussed <strong>the</strong> Undo command<br />
<strong>the</strong>re. Since editing commands normally fall under <strong>the</strong><br />
aegis of word processing, I'll discuss <strong>the</strong> rest of <strong>the</strong>m<br />
here.<br />
93
94 Introduction <strong>to</strong> <strong>the</strong> Lisa<br />
Figure 4-1<br />
Type Style<br />
Cut<br />
Copy<br />
Paste<br />
Select RI I of Document SA<br />
When editing text, as always on <strong>the</strong> Lisa, you have<br />
<strong>to</strong> select something before you can do anything <strong>to</strong> it.<br />
The Lisa lets you select any amount of text from a single<br />
character <strong>to</strong> a whole document. Let's start small:<br />
To select text character by character, you place <strong>the</strong><br />
text pointer at <strong>the</strong> beginning of it and hold down <strong>the</strong><br />
mouse but<strong>to</strong>n. (Don't release <strong>the</strong> but<strong>to</strong>n, because that<br />
will just deposit <strong>the</strong> insertion point; if you release it<br />
by mistake, simply push it down again and hold it.)<br />
In Figure 4-2, I put <strong>the</strong> text pointer at <strong>the</strong> beginning<br />
of <strong>the</strong> word "experiment" (in <strong>the</strong> first line). Then I held<br />
<strong>the</strong> but<strong>to</strong>n down and moved <strong>the</strong> text pointer <strong>to</strong> <strong>the</strong> right.<br />
This produced Figure 4-3. As you see, <strong>the</strong> selected text<br />
is highlighted.<br />
Figure 4-2<br />
File/Print Edit Search Type Style Format 1f<br />
u<br />
This is an experiment t o see wha.t <strong>the</strong> response ti<br />
t,ipeface ( 12- · tch Modern) instead of one of Hie fa<br />
that 's for sur but it 's still not qu ite inst antan<br />
t hs.t little one- or tvw-character clelav (or ma be it'<br />
It's also possible <strong>to</strong> move backward from <strong>the</strong> initial<br />
position, as I did <strong>to</strong> produce Figure 4-4.<br />
Although a selected piece of text can be any size,<br />
you can only select one piece at a time. The selected<br />
text always begins from <strong>the</strong> place where <strong>the</strong> text pointer<br />
was when you first pushed <strong>the</strong> mouse but<strong>to</strong>n.
95 Word Processing with LisaWrite<br />
Figure 4-3<br />
File/Print Edit Search Type Style Format 1r<br />
LJ<br />
This is an<br />
nt <strong>to</strong> see whet <strong>the</strong> response ti<br />
typeface ( 12-pi tch Mo em) instead of one of t he fat<br />
that 's for sure, but it 's still not quite instantan<br />
that lit t 1 e one- or two-ci·1 aract er delay (or maybe it '<br />
Figure 4-4<br />
File/Print Edit Search Type Style Format 1r<br />
LJ<br />
Th · experiment <strong>to</strong> see what <strong>the</strong> response ti<br />
t w ef ac e ( 12-pitch Modern) instead of one of tl"1 e fat<br />
t hat ' s fo:ir sure, but it 's still not quite insta.nt a.n<br />
tl1a.t little one or t11w- character del av ( or rr1 av t1 e it '<br />
If you want <strong>to</strong> change <strong>the</strong> initial position, you put<br />
<strong>the</strong> text pointer at <strong>the</strong> new location and push <strong>the</strong> but<strong>to</strong>n<br />
again; <strong>the</strong> previously selected section of text de-highlights<br />
(goes back <strong>to</strong> normal). Relocating <strong>the</strong> insertion<br />
point works in <strong>the</strong> same way-when you deposit it in<br />
a new place (by moving <strong>the</strong> text pointer <strong>the</strong>re and clicking<br />
<strong>the</strong> but<strong>to</strong>n), it disappears from its previous location.<br />
Now you can see how selecting a lot of text by<br />
<strong>the</strong> method I just described would get pretty tedious.<br />
So <strong>the</strong> Lisa gives you a way <strong>to</strong> select words. You put<br />
<strong>the</strong> pointer anywhere on <strong>the</strong> word and click <strong>the</strong> mouse<br />
but<strong>to</strong>n twice in rapid succession (Preferences lets you<br />
choose just how rapid that succession has <strong>to</strong> be).<br />
If you click twice and hold <strong>the</strong> mouse but<strong>to</strong>n down,<br />
text will be selected word by word when you move <strong>the</strong><br />
pointer, ra<strong>the</strong>r than character by character.<br />
There's also a way <strong>to</strong> select whole paragraphs-you<br />
just put <strong>the</strong> pointer anywhere in <strong>the</strong> paragraph and click<br />
three times. (That's what I did <strong>to</strong> produce Figure 4-5).<br />
If you triple-click and hold <strong>the</strong> but<strong>to</strong>n down, you can<br />
move <strong>the</strong> pointer straight down through <strong>the</strong> text and<br />
select it paragraph by paragraph.<br />
But even that can get tedious if you're selecting a<br />
very large amount of text. So <strong>the</strong> Lisa gives you <strong>the</strong>
96 Introduction <strong>to</strong> <strong>the</strong> Lisa<br />
Edit<br />
Search<br />
Figure 4-5<br />
I knm v,1t·1at would l:i e fun 1 I' 11 1·1olcl cl o1•,1 n tt·1 e option ke\1 8.n cl see v11·1 8.t 8.11 tr"1o:se special<br />
cl1an.cters look like : · · i'Hoo§11-Q±•')Z.®:1t{ 0n1•
97 Word Processing with LisaWrite<br />
Figure 4-6<br />
Edit Search Type Style Format 1r Page Layout<br />
llm""==--- -------<br />
<strong>the</strong> block of text <strong>to</strong> go, deposit <strong>the</strong> insertion point <strong>the</strong>re,<br />
move <strong>the</strong> pointer up <strong>to</strong> <strong>the</strong> Edit menu and select Paste.<br />
The block of text jumps out of Clipboard and back in<strong>to</strong><br />
<strong>the</strong> document right at that point.<br />
Copy works similarly, except that when you Copy<br />
a block of text, it doesn't disappear from its original<br />
location in <strong>the</strong> document when it goes <strong>to</strong> Clipboard.<br />
So when you Paste it in<strong>to</strong> its new location, you have<br />
it in both places.<br />
And that's all <strong>the</strong>re is <strong>to</strong> using <strong>the</strong> Edit menu. It<br />
really couldn't be much simpler.
98 Introduction <strong>to</strong> <strong>the</strong> Lisa<br />
The next menu is <strong>the</strong> Search menu (Figure 4-7).<br />
You use it <strong>to</strong> look through an entire document for a<br />
word or phrase. You can simply find each place where<br />
it occurs, or you can change it <strong>to</strong> something else.<br />
Figure 4-7<br />
Type Style<br />
Form<br />
•<br />
Find Next Occurrence •F<br />
Change Th is Occurrence<br />
Change Er Find Next •N<br />
Find Er Change All<br />
Cases Must Agree<br />
v'Coses Need Not Agree<br />
Insert Wi ld Card ( ... )<br />
Hide Dialog Box<br />
Figure 4-8<br />
X o<br />
Fi le/Print Edit<br />
{:l<br />
Search Type Style Format 1r Page Layout<br />
Find<br />
Change <strong>to</strong> {}<br />
Q<br />
In ei<strong>the</strong>r case, you begin with <strong>the</strong> Find What menu<br />
item. Selecting it produces <strong>the</strong> dialog box you see in<br />
Figure 4-8. You move <strong>the</strong> pointer between <strong>the</strong> curly<br />
brackets after Find and type in <strong>the</strong> word or phrasein<br />
computer jargon, <strong>the</strong> string-you're looking for. Let's<br />
look for <strong>the</strong> phrase "this typeface". (I put <strong>the</strong> period<br />
outside <strong>the</strong> quotes in that last sentence <strong>to</strong> make it clear<br />
that a period is not part of <strong>the</strong> string we're going <strong>to</strong><br />
search for.)<br />
The Lisa will not only find "this typeface" but also<br />
"This typeface". If you only want it <strong>to</strong> find "this type-
99 Word Processing with LisaWrite<br />
face"-with <strong>the</strong> first letter not capitalized-you select<br />
<strong>the</strong> Cases Must Agree menu item. But since you usually<br />
want <strong>to</strong> find all occurrences of a string, regardless of<br />
whe<strong>the</strong>r or not it begins a sentence, Cases Need Not<br />
Agree is <strong>the</strong> default.<br />
Now-if you simply want <strong>to</strong> find all <strong>the</strong> occurrences<br />
of "this typeface", you just keep selecting Find Next<br />
Occurrence from <strong>the</strong> Search menu over and over again.<br />
Each occurrence of <strong>the</strong> string will be highlighted. But<br />
<strong>the</strong> first occurrence of "this typeface" is under <strong>the</strong> dialog<br />
box. So first you have <strong>to</strong> select Hide Dialog Box (<strong>the</strong><br />
last item on <strong>the</strong> Search menu). Then you can see <strong>the</strong><br />
first occurrence highlighted (Figure 4-9), as well as <strong>the</strong><br />
second (Figure 4-10).<br />
Figure 4-9<br />
[j<br />
File/Print Edit Search Type Style Format ....;;.<br />
X<br />
1f<br />
_<br />
P<br />
_<br />
a ..;<br />
g -.<br />
e<br />
_<br />
L<br />
_<br />
ay ;;;.<br />
o<br />
_<br />
u<br />
_<br />
t _______<br />
_<br />
What shall I type on this screen is interesting but, ju st for <strong>the</strong> fun of it , 0<br />
iet'schange it. Well, this is interestingHI I can see that ll<br />
I could have sotne fun with Lisa Write, except that ,,,,,.,,<br />
[j<br />
Figure 4-10<br />
File/Print Edit Search Type Style Format 1f Page Layout<br />
-------------------------<br />
lllll I lst document 111111<br />
Wha.t shall I tv .1:-e on this screen'c' This typeUt.ce is interestiJ1g but, ,just for <strong>the</strong> fun of it ,<br />
let' ; ·:IHnge it . wen, this is interesting''' I can see that<br />
I could ha ve some fun with Lisa Write, except tha t<br />
<strong>the</strong> response tkne is awfully slow.<br />
His is <strong>the</strong> tl/pef:5ce <strong>the</strong>v gi"le vou as 8. d e fault .<br />
rea.l l"/ a pain. l 1"1/i finite/>.' 11.ve t' " _t n'ii M t. t fl.95111(1.· IJ .91".<br />
The.t flashin1J \' ertical t• 8r is<br />
What will
100 Introduction <strong>to</strong> <strong>the</strong> Lisa<br />
Often, however, you'll not only want <strong>to</strong> find <strong>the</strong><br />
string but change it. In that case, you type in a replacement<br />
string after <strong>the</strong> words Change <strong>to</strong> in <strong>the</strong> dialog<br />
box. Let's change "this typeface" <strong>to</strong> "this <strong>to</strong>o <strong>to</strong>o solid<br />
flesh" (Figure 4-11).<br />
Figure 4-1 1<br />
F i l e/Print Edit Search Type Style Format 1f Page Layout<br />
Find {this typeface)<br />
Change <strong>to</strong> X{ this <strong>to</strong>o <strong>to</strong>o solid flesh)<br />
One way you can do this is by first finding <strong>the</strong> occurrence<br />
you want <strong>to</strong> change, and <strong>the</strong>n selecting Change<br />
This Occurrence from <strong>the</strong> menu. If you're planning <strong>to</strong><br />
make a number of changes, Change & Find Next is<br />
more convenient; as its name suggests, it changes <strong>the</strong><br />
occurrence that is presently highlighted and <strong>the</strong>n moves<br />
on <strong>to</strong> <strong>the</strong> next occurrence and highlights it. Figure<br />
4-12 shows <strong>the</strong> result of selecting Change & Find Next<br />
when <strong>the</strong> first occurrence of "this typeface" (in <strong>the</strong> first<br />
line) was highlighted.<br />
El<br />
Figure 4-12<br />
File/Print Edit Search Type Style Format 1f Page Layout<br />
---------------·<br />
What shall I type on this screen this <strong>to</strong>o <strong>to</strong>o solid flesh is interesting but, ,j ust for <strong>the</strong> fun<br />
of it , let's ch.mge it .1Well, this is interestingm I can see<br />
tha t I could have some fw with Lisa Write, except<br />
tha t <strong>the</strong> response time is awfully slow.<br />
This is tl1e t1peface tl"1 ev gi\J8 'y'ou as s. default. Tl"1 e.t flashin•J 1,1 ertic;jl l:iar is
101 Word Processing with LisaWrite<br />
' LJ<br />
Figure 4-13<br />
File/Print Edit Search Type Style Format 1f Page Layout<br />
1111 Ist document 11111<br />
----- ---------<br />
: \11.lfi.jt h:iU I type eon this :cr een ·i· thi tcio <strong>to</strong>o solicl flesh is interestir1g but, ,just for <strong>the</strong> fun<br />
; 0:1 it . iet 's change it. Well, this is interestingm I can see<br />
tha t I couldpa ve some fun with Lisa Write,. except<br />
tha t <strong>the</strong> response time is awfully slow.<br />
This is <strong>the</strong> t1,1pef8ce <strong>the</strong>·y· 1i'•/ 8 '•/OU as 8. cl ef8.ult . That fl8.hin11 \.1ertic::il :i etr is<br />
:<br />
-pr< 1 1 ..<br />
WltA 1.'l<br />
• · .- . .<br />
1·-· .l:c ct p.J.lll .<br />
l 1iil i L"'= finitel i 11.c.< tc' '"e t nc" c't' ff1. t fl.c; 1! I.'J•' M1 -. t Wl<br />
·<br />
.<br />
-<br />
10'"''" ]' i'"e - .. -. -. ,. , ... - -. ..<br />
J, i VI\ .1.1\ i , This 1._<br />
• . ; ....<br />
,,,. - f·-. . -- . -. • . -. - --,• ....<br />
- ·.-.<br />
''"ti -· .... . -, ,;,, .. , .. .. r .-i<br />
11_. i.:)·J-· .. -:i1_.-c .. tJ 1_. t'J., ·· J.·'.· ._. ,_(. .1. ·'.· ·.-.. e i.i_.-_. .LJ.::; lt ._.1_ .<br />
· r.:a d, ,;1;·d iti'.:1reks up bec usf ofits Si.ii.ill!. sizt·.<br />
I guess tfils js <strong>the</strong> 011e IJJ stjck with !01> nzy<br />
11or11zal Wiitjrl{f--a 1-Uce, mzostentatjous,<br />
wo11
102 Introduction <strong>to</strong> <strong>the</strong> Lisa<br />
dialog box, ra<strong>the</strong>r than <strong>the</strong> type fonts "this typeface"<br />
was in.<br />
There are a number of fancier tricks you can play<br />
with <strong>the</strong> Search menu, but that's enough for a general<br />
<strong>introduction</strong>.<br />
Lisa Write has a special feature that no o<strong>the</strong>r <strong>to</strong>ol<br />
has, and it's quite a powerful one. If you look at any<br />
illustration that shows <strong>the</strong> whole LisaWrite window<br />
(Figure 4-13, for example), you'll notice <strong>the</strong>re's a thick<br />
black bar above <strong>the</strong> up scroll arrow and ano<strong>the</strong>r one<br />
<strong>to</strong> <strong>the</strong> left of <strong>the</strong> left scroll arrow. These are <strong>the</strong> split<br />
controls and you can use <strong>the</strong>m <strong>to</strong> divide <strong>the</strong> window<br />
in<strong>to</strong> as many different horizontal and/ or vertical views<br />
of <strong>the</strong> document as you want.<br />
Each of <strong>the</strong>se views acts as an active window; you<br />
can scroll text through it <strong>to</strong> any point you want. Splitting<br />
<strong>the</strong> window in<strong>to</strong> many different views is particularly<br />
useful in a long document (where, for example, you<br />
may want <strong>to</strong> compare what you said about your psychopathic<br />
sales manager on page 20 with what you said<br />
on pages 6, 14 and 32).<br />
By this point you may be wondering what's wrong<br />
with Lisa Write for editing and entering text It certainly<br />
seems powerful enough, easy <strong>to</strong> use, elegantly designed.<br />
Well, it has <strong>the</strong> following problems:<br />
• You have <strong>to</strong> keep moving your hand from <strong>the</strong> keyboard<br />
<strong>to</strong> <strong>the</strong> mouse. (This is more of a problem for<br />
word processing than for any o<strong>the</strong>r application.) The<br />
"Apple characters" (which you get by holding down<br />
<strong>the</strong> Apple key plus a letter) help some, but you still<br />
need <strong>to</strong> use <strong>the</strong> mouse a lot. Apple characters merely<br />
cut down on excessive movement of <strong>the</strong> mouse; <strong>the</strong>y<br />
don't eliminate <strong>the</strong> need for it al<strong>to</strong>ge<strong>the</strong>r.<br />
• Most word processors have single commands <strong>to</strong> do<br />
things like delete a word or delete a line, but not <strong>the</strong><br />
Lisa. Having <strong>to</strong>:<br />
a. select <strong>the</strong> text you want,<br />
b. move up <strong>to</strong> <strong>the</strong> menu, and<br />
c. select a menu item
103<br />
Word Processing with LisaWrite<br />
is much more time-consuming and clumsy-even<br />
aside from <strong>the</strong> fact that you have <strong>to</strong> move your hand<br />
off <strong>the</strong> keyboard <strong>to</strong> do it. This is true even if you can<br />
substitute an Apple command for b and c.<br />
• Many operations, particularly those that involve<br />
scrolling and/ or rewriting <strong>the</strong> screen, take a painfully<br />
long time.<br />
No, editing is not LisaWrite's forte. What it's good<br />
at is formatting and similar graphic applications. So<br />
let's get on <strong>to</strong> that.<br />
Formatting<br />
Lisa Write not only gives you an enormous amount of<br />
graphic flexibility, it makes it easy for you <strong>to</strong> see what<br />
you're doing, since margins, line justification, line<br />
breaks, page breaks, page numbers, headers, footers,<br />
bold, italic and underlined text all display on <strong>the</strong> screen<br />
exactly as <strong>the</strong>y appear on paper.<br />
Figure 4-14<br />
Underline<br />
Bold<br />
Italic<br />
Superscript<br />
Subscr ipt<br />
Format<br />
.SP<br />
.SU<br />
.SB<br />
.SI<br />
15 Pitch Gothic<br />
./12 P i tch Modern<br />
12 Pitch Elite<br />
10 P i tch Modern<br />
10 Pitch Courier<br />
PS Modern<br />
PS Executive<br />
1/ 4 inch Modern<br />
1/4 inch Classic<br />
1/3 inch Modern<br />
1/3 inch Classic
104 Introduction <strong>to</strong> <strong>the</strong> Lisa<br />
Figure 4-15<br />
LisaWrite s 88 Type Fonts<br />
§ Beven type faces and sizes<br />
Five for normal text<br />
15-pitch Gothic<br />
12-pitch Modern<br />
12-pitch Elite<br />
10-pitch Modern<br />
10-pi tch Courier<br />
Two proportionaJJ.v-spaced<br />
PS Modern<br />
PS Executive<br />
Fo ur displa.v ff or headlines)<br />
1/ 4-inch Modem<br />
1/4-inch Classic<br />
1/3-inch Modern<br />
1/3-inch Classic<br />
§ Eight type styles in each face and size<br />
regular<br />
bold<br />
italic<br />
/JoJd ltaJlc<br />
underline<br />
bold l.llderline<br />
italic antle1'line<br />
/JoJd i taJlc UJt1er Jlne<br />
Sulscripting and superscripting<br />
a.re also available.
105 Word Processing with LisaWrite<br />
LisaWrite Type Style menu (Figure 4-14) offers<br />
eleven different type faces and sizes, each of which can<br />
be printed regular, bold or italic, with or without underlining.<br />
This makes a <strong>to</strong>tal of 88 possible type fonts (face,<br />
size and style combinations)-all of which are shown,<br />
as such, on <strong>the</strong> screen.<br />
(Most word processors are capable of producing<br />
three type fonts-regular, boldface and underline, all<br />
in <strong>the</strong> same face and size-none of which is shown as<br />
such on <strong>the</strong> screen. And yet LisaWrite's capabilities are<br />
nothing compared <strong>to</strong> LisaGraph's and LisaDraw's-<strong>the</strong>y<br />
can produce 264! different type fonts.)<br />
Figure 4-15 shows <strong>the</strong> eleven type faces and sizes<br />
and eight type styles that combine <strong>to</strong> produce Lisa<br />
Write's 88 fonts. All of <strong>the</strong>m can be subscripted-placed<br />
slightly below <strong>the</strong> line, as in H 2 0-or superscriptedplaced<br />
slightly above <strong>the</strong> line, as in E = mc2.<br />
Figure 4-16<br />
Center<br />
Right Flush<br />
Justify<br />
Page Layout<br />
Show Margin/Tab Ruler<br />
Hide Margin/Tab Ruler<br />
.SL<br />
../Single Space U<br />
1-1/2 Space U<br />
Double Space U<br />
Triple Space U<br />
../Single Space Lines<br />
1-1/2 Space Lines<br />
Doub I e Space Lines<br />
Triple Space Lines<br />
Some as on Clipboard .ts
106 Introduction <strong>to</strong> <strong>the</strong> Lisa<br />
Figure 4-17<br />
Fi le/Print Edit Search Type Style Format 1r Page Layout<br />
.. _. ...; .. ... ... ...<br />
<br />
-<br />
The Fjre<br />
Robinson<br />
Jeffers<br />
g<br />
The A.ti.antic is a s<strong>to</strong>rmy moat , and <strong>the</strong> Mediterranean ,<br />
The blue pool in <strong>the</strong> old garden ,<br />
More than five thousand years has drunk sacrifice<br />
Of ships and blood and shines in <strong>the</strong> sun ; but here <strong>the</strong> Pacific :<br />
The ships , planes, wars are perfectly irrelevant.<br />
Nei<strong>the</strong>r our present blood-feud with <strong>the</strong> brave dwarfs<br />
Nor any future world-quarrel of westering<br />
And eastering man , <strong>the</strong> bloody :migrations, greed of power , battle-falcons,<br />
A.re a mote of dust in <strong>the</strong> great scale-pan .<br />
Here from this mountain shore , headland beyond s<strong>to</strong>rmy headland plunging like dolphins<br />
through <strong>the</strong> gray sea-smoke<br />
In<strong>to</strong> pale sea, look west at <strong>the</strong> hill of water : it is half <strong>the</strong> planet: this dome , this<br />
half-globe, this bulging<br />
Eyeball of water , arched over <strong>to</strong> A.sia,<br />
A.ustralia and 1'.rhite Antarctica: those are <strong>the</strong> eyelids that never close ; this is <strong>the</strong> staring<br />
unsleeping<br />
Eye of <strong>the</strong> earth , and what it watches is not our wars.<br />
(For those of you familiar with typesetting, 15-pitch<br />
Gothic is a 7-point face and >3-inch Modern and Classic<br />
are 24-point faces. For those of you not familiar with<br />
typesetting, <strong>the</strong>re are 72 points <strong>to</strong> an inch, making<br />
7-point (15-pitch) Gothic a little less than Yio inch tall.)<br />
LisaWrite's Format menu, shown in Figure<br />
4-16, gives you a choice of four kinds of justification:<br />
• Flush left (straight left margin, "ragged" right margin),<br />
shown in Figure 4-17 (<strong>the</strong> title looked funny flush<br />
left, so I moved it over). This is <strong>the</strong> normal format<br />
for typewritten copy.
107 Word Processing with LisaWrite<br />
Figure 4-18<br />
File/Print Edit Search Type Style Format 1f Page Layout<br />
111111 The Eye 111111<br />
=-----=:..---<br />
Theljre<br />
Robinson Jeffers<br />
The Atlantic is a s<strong>to</strong>rmy moat, and <strong>the</strong> Mediterranean ,<br />
The blue p::ol in <strong>the</strong> old garden ,<br />
More t.han fiYe thousand years has drunk sacrifice<br />
Of ships and blood and shines in <strong>the</strong> sun ; but here <strong>the</strong> Pacific :<br />
The ships , planes, wars are perfectly irrelevant.<br />
Nei<strong>the</strong>r our present blood-feud with <strong>the</strong> braYe dwarfs<br />
Nor any future world-quarrel of we stering<br />
And eastering man , <strong>the</strong> bloody migrations , greed of power, battle-falcons,<br />
flre a mote of dust in <strong>the</strong> great scale-pan .<br />
Here from this mountain shore , headland be·ond s<strong>to</strong>rmy headland plunging like dolphin s<br />
through <strong>the</strong> gray sea-smoke<br />
In<strong>to</strong> pale sea, look west at <strong>the</strong> hill of water : it is half <strong>the</strong> planet: this dome , this<br />
half-globe , t.his bulging<br />
Eyeball of water , arched oYer <strong>to</strong> Asia,<br />
A.ustr.ill.a and white Antarctica: t.h ose are <strong>the</strong> eyelids that neYer close ; tl"Lis is <strong>the</strong> staring<br />
unsleeping<br />
Eye of tl·Le earth , and what it watches is not our wars.<br />
<br />
I {)<br />
• Flush right (straight right margin, ragged left margin).<br />
This is not used much in normal text, but actually<br />
looks quite nice in a poem, as Figure 4-18 illustrates<br />
(here again, I moved <strong>the</strong> title over).
108 Introduction <strong>to</strong> <strong>the</strong> Lisa<br />
Figure 4-19<br />
File/Print Edit Search Type Style Format 1f Page Layout<br />
----''--"'---,<br />
1Jze Fjre<br />
Robinson<br />
Jeffers<br />
I<br />
Thu s.1nc1 yea.r s 1-1.1s drun}:. sa.crifice<br />
Of ships a.n d bk·xl .rnd shines in <strong>the</strong> sun ; but here <strong>the</strong> F»:t.cific :<br />
The ; hips. pl.:t.nes. '.•l·'trs .:tre r-:erfectly irrelevant.<br />
Nei<strong>the</strong>r our pre:sent blu:d-feud '.·litJ-1 <strong>the</strong> brave dwa,r-fs<br />
Nor a.nr future 11,rorl:t.n .<br />
Here from thi mount.ab shore , he.:tdland beyond s<strong>to</strong>rmy headland plungin.g li}:e dolphir1 s<br />
through <strong>the</strong> gr.1y sea-srnole<br />
In<strong>to</strong> p:11e se.:1 , kok v, e st a.t <strong>the</strong> hill of vi.:i.ter : it is h.:11£ <strong>the</strong> planet:<br />
f\ustr.1li.1 .1.nd white Anta.rctic.1 :<br />
half-globe , this bulging<br />
Eyeball of w.:tter , ar ched over t
109 Word Processing with LisaWrite<br />
Figure 4-20<br />
File/Print Edit Search Type Style Format 1r Page Layout<br />
0..- ...<br />
<br />
<br />
lllll I 2nd document 111111<br />
Ruler<br />
-----------<br />
This is an experiment <strong>to</strong> see what <strong>the</strong> response time is like when I use <strong>the</strong> default<br />
typeface (12-pitch Modern) instead of one of' <strong>the</strong> fancy ones . Well, it 's a lot better,<br />
that 's for sur but it 's still not quite instantaneous enough for my taste. There 's<br />
that lit t 1 e one- or t·m- charact er delay (or maybe it ' s even short er than that ) like <strong>the</strong><br />
one you 1et when you 're using a timeshBring computer tha.t 's 13000 miles away 8.nd <strong>the</strong><br />
keystroke 1·1 as <strong>to</strong> travel <strong>the</strong>re and back before it's echoed on your screen . And when <strong>the</strong><br />
screen he.s <strong>to</strong> be reformat ted 1 --t he.t ' s v,1hen Li sal1Jri t e is reall v slow. But <strong>the</strong> worst<br />
thing of all is that flashing "insertion point "! ! ! ! ! It 's really unbearable. (Of<br />
course I have <strong>the</strong> lowest <strong>to</strong>l era.nce for fleshing cursors of' e.nyone I know.)<br />
I knm·1 wr 1<br />
at would ti e fun 1 I ' ll h o l d ctivm t r 1 e option key and see w /·1 e.t al l those speci 8.1<br />
cl1aracters look l i ke: ·· i"'£, ¢00§,l - Q±0z ··®r¥· ··0n 1 «8.13af©'l.,.&lQ ::i;1fi.. i "'£ ¢,.§,l ·Q± ··oz<br />
'®r{ 0nw ABaf©Al., .. JE QzCHN i.U.<br />
Ud.Wlw can't I get that last group of' s,im bols <strong>to</strong> move up <strong>to</strong> <strong>the</strong> line above where <strong>the</strong>y<br />
belong ii Ah, h0vl i wish J c©Cild dQ rht 1 1<br />
Omi 1 ocl, I cl id it 1 i i it1)1 extr8.or1]in8ry computer cunning 1" 1<br />
as triurnp/·1 ed, 8.s 8.lv18ys,<br />
over otist ;:i,cl es t 1·1e.t would he.v e 1 eft 1 esser riK•rt 8.1 s fl 8.l:i berg8.st eel 1 1 1 1<br />
, ii , 1 , 1 , 1 , 21 , 1 , 1 , 1 , 3I , 1 , 1 , 1 , 4I , 1 , 1 , 1 , sl , 1 , 1 , , 6I , 1 , 1 , 1 , 7I , 1 , 1<br />
/\<br />
&:.<br />
£<br />
• Justified <strong>to</strong> both margins (both margins straight) is<br />
<strong>the</strong> norm for typeset copy, and is being used more<br />
and more for business letters. Jeffers' poem has been<br />
great for demonstrating <strong>the</strong> previous three formats,<br />
because its lines vary so greatly in length. But no poem<br />
is any good at showing justified text, because each<br />
line ends in a "forced line break." Since no text runs<br />
on from one line <strong>to</strong> <strong>the</strong> next, <strong>the</strong>re's no difference<br />
between justified text and flush left text. So I've used<br />
something a lot less moving (Figure 4-20) as an example<br />
of justified text.<br />
As you can see, <strong>the</strong> Format 1T menu gives you a<br />
choice of various line spacings, and lets you vary <strong>the</strong>
110 Introduction <strong>to</strong> <strong>the</strong> Lisa<br />
spacing between paragraphs independently of <strong>the</strong> spacing<br />
between lines. The choices are quite limited, particularly<br />
for a graphically sophisticated system like <strong>the</strong> Lisa.<br />
Even <strong>the</strong> relatively inexpensive word processing program<br />
I'm using <strong>to</strong> write this book lets me vary line<br />
spacings from Ys of an inch <strong>to</strong> 32 inches in Ys-inch<br />
increments.<br />
Lisa's visual approach is carried over <strong>to</strong> <strong>the</strong> setting<br />
of margins and tab s<strong>to</strong>ps. First, you select Show Margin/<br />
Tab Ruler from <strong>the</strong> Format iT menu. Figure 4-20 shows<br />
<strong>the</strong> screen with <strong>the</strong> ruler displayed. The small black<br />
triangle indicates <strong>the</strong> present position of <strong>the</strong> insertion<br />
point (see it up <strong>the</strong>re on line 5, just before "3000").<br />
The triangles marked L and R show <strong>the</strong> left and right<br />
margins; <strong>the</strong> triangle marked F sets <strong>the</strong> left margin for<br />
<strong>the</strong> first line of each paragraph.<br />
By moving <strong>the</strong> F triangle <strong>to</strong> <strong>the</strong> right of <strong>the</strong> L triangle,<br />
you can indent each paragraph-which, of course,<br />
is what you normally want <strong>to</strong> do. Notice how <strong>the</strong> indentations<br />
at <strong>the</strong> start of each paragraph all line up with<br />
<strong>the</strong> F triangle.<br />
You can also place <strong>the</strong> F triangle <strong>to</strong> <strong>the</strong> right of<br />
<strong>the</strong> L triangle; this will give you an outdented line (also<br />
Figure 4-2 1<br />
Inch Scale<br />
Metric Scale<br />
Clear Tab S<strong>to</strong>p<br />
Set Normal Tab<br />
Set Centered Tab<br />
Set Right Flush Tab<br />
S·et. Decimal Tab<br />
No Tab Fill Pattern<br />
.. Tab Fill Pattern<br />
-- Tab Fi II Pattern<br />
Tab Fill Pattern
111 Word Processing with LisaWrite<br />
File/Print Edit Search<br />
Preview Pages<br />
../Don't Preview Pages<br />
Dover Beach<br />
Ma ttlzew A111oil.i<br />
The sea is calm <strong>to</strong>night<br />
Show Page Ruler<br />
Hide Page Ruler<br />
Insert Page Number<br />
Insert Page Mark<br />
............................................. ............. ..<br />
Keep On Same Page<br />
The tide is full. <strong>the</strong> n1oon lies fe:7Jr ../Allow <strong>to</strong> Cross Pages<br />
lfpcm <strong>the</strong> straits; --on <strong>the</strong> French c:o.-:ts . A '"")<br />
Gleams and is gone; <strong>the</strong> cliffs of Engle:md stand<br />
Glin1me1irtg· and vc1st out in <strong>the</strong> tranquil baJl<br />
Con1e <strong>to</strong> <strong>the</strong> vvindovv; siveet is <strong>the</strong> nf.._Rht-air!<br />
Onl..,v, from <strong>the</strong> long· Jine of spra .. v<br />
Q<br />
, , , lmlll' , ' ,<br />
wastebasket<br />
called a hanging indent) at <strong>the</strong> beginning of every paragraph.<br />
Outdents are commonly used in outlines.<br />
When you display <strong>the</strong> Margin/Tab Ruler, a new<br />
menu title appears on <strong>the</strong> menu bar: Ruler. It's shown<br />
in Figure 4-21.<br />
As you can see, <strong>the</strong> Ruler menu lets you decide<br />
whe<strong>the</strong>r you want <strong>the</strong> ruler marked in inches or centimeters;<br />
more importantly, it gives you a wide variety<br />
of tab s<strong>to</strong>ps and fill patterns <strong>to</strong> choose from. (A fill pattern<br />
is what shows up between <strong>the</strong> columns of information<br />
you have at each tab s<strong>to</strong>p. The dots, dashes or<br />
underlines make it easier for your eye <strong>to</strong> follow a row<br />
across <strong>the</strong> page than when <strong>the</strong> space between each column<br />
is blank.)
112 Introduction <strong>to</strong> <strong>the</strong> Lisa<br />
Figure 4-23<br />
File/Print Edit Search Type Style Format 1f Page Layout Page Ruler<br />
llffiiOover Beach 111111<br />
:. I<br />
Dover Beach<br />
Ma ttlzei.v L4111olli<br />
1.,7_<br />
..,<br />
·:-<br />
, -,<br />
.-. . :- 7.. t·- 'oj- t.<br />
11e .)ed J.) cct.1.lll un.-) l .<br />
'<br />
-<br />
r: ·T'7- - t ' -l - >:,• '' ll. t'J -<br />
J<br />
- - ·-, h' (,' j·: ' ., .<br />
.i 1 lt:! Jut:! J._ ll , . lt:! rn uu n e._ r.Ul<br />
lfJ)Ofl <strong>the</strong> stiait.s; --on <strong>the</strong> French ccJast <strong>the</strong> light<br />
Gle.m1s and is gone; <strong>the</strong> cliffs of England stand<br />
. - ,<br />
The last of <strong>the</strong> formatting menus is Page Layout,<br />
shown in Figure 4-22. With it you can display <strong>the</strong> Page<br />
Ruler, which is <strong>the</strong> vertical equivalent of <strong>the</strong> Margin/<br />
Tab Ruler. It also lets you Preview Pages-that is, you<br />
see on <strong>the</strong> screen how each page will look, complete<br />
with headers and footers (text that appears at <strong>the</strong> <strong>to</strong>p<br />
or bot<strong>to</strong>m of every page) and <strong>to</strong>p and bot<strong>to</strong>m margins.<br />
In Figure 4-23, I've selected Preview Pages and<br />
Show Page Ruler. The Page Ruler is marked in inches<br />
but, as with <strong>the</strong> Margin/Tab Ruler, you can have it in<br />
centimeters if you want (by using <strong>the</strong> Page Ruler menu<br />
which has just appeared on <strong>the</strong> menu bar). Notice that<br />
<strong>the</strong> text has moved far<strong>the</strong>r down on <strong>the</strong> screen than it
113 Word Processing with LisaWrite<br />
Figure 4-24<br />
File/Print Edit Search Type Style Format ,r Page Layout Page Ruler<br />
LJ<br />
Lav like <strong>the</strong> foltt5 of a briRht Rirclle furlti<br />
<br />
But nolv I onlrl" hear<br />
" Its melanc:holj1 long: i-Fithdra1T/·fng roc11<br />
&:<br />
M<br />
i<br />
I . ,<br />
m Ret1 't.::t t111 .. ti_, <strong>the</strong> b1eath<br />
. _ .. 7· •• . . ) _ __ .<br />
0\ Of <strong>the</strong> night-n-1n(t. do1-T1i <strong>the</strong> 1,,.ast e((ge..;;_· d .. rear<br />
ill And naked<br />
)<br />
. 11<br />
114 Introduction <strong>to</strong> <strong>the</strong> Lisa<br />
low <strong>the</strong> 11-inch mark on <strong>the</strong> Page Ruler indicates <strong>the</strong><br />
page break. The B and F triangles at <strong>the</strong> bot<strong>to</strong>m of <strong>the</strong><br />
first page indicate, of course, <strong>the</strong> bot<strong>to</strong>m line of text<br />
and <strong>the</strong> footer line (which works just like <strong>the</strong> header<br />
line).<br />
You can insert a page number in ei<strong>the</strong>r <strong>the</strong> header<br />
or <strong>the</strong> footer; just as <strong>the</strong> headers and footers are inserted<br />
au<strong>to</strong>matically on every page, so <strong>the</strong> page number will<br />
change au<strong>to</strong>matically.<br />
And that more or less covers <strong>the</strong> main features of<br />
LisaWrite. Weak as it is in editing speed and convenience,<br />
LisaWrite can produce really beautiful prin<strong>to</strong>uts-light<br />
years beyond anything that can be done on<br />
<strong>the</strong> average word processor, or even on dedicated word<br />
processors that cost $10,000 and more (with <strong>the</strong> exception,<br />
of course, of <strong>the</strong> Xerox Star 8010, after which <strong>the</strong><br />
Lisa is modeled).<br />
Figure 4-25 gives an example of such a prin<strong>to</strong>ut.<br />
(You didn't think I was going <strong>to</strong> tease you with that<br />
poem and not show you all of it, did you 0 ye of little<br />
faith.)<br />
Now that you have a feeling for how Lisa Write<br />
works, it's time <strong>to</strong> go on <strong>to</strong> <strong>the</strong> o<strong>the</strong>r <strong>to</strong>ols. Don't expect<br />
an equally extensive treatment for each of <strong>the</strong>m. If I<br />
did that, I'd never finish <strong>the</strong> book.<br />
Figure 4-25<br />
Dover Beach<br />
Ma ttl1ew AITllJilf<br />
Th e ,..c,-vea J:c,"' calin <strong>to</strong>11.igh l<br />
Ti1e tide .i..c,"' full ti1e IllOOil lies f aiI·<br />
[/jJOil tile StI-ait...c,:·--oil tile FreilCil COB,$'{ tile ligil t<br />
Glean1s mui .i..c; gf.111e: ti1e cliffs of En .. JJa.Jui staiui<br />
Glimme.1tng· and vas out in <strong>the</strong> fJ-m1quil bacy.
115 Word Processing with LisaWrite<br />
Q71ne <strong>to</strong> ti1e wiiuio w; ,5·weet i'>"' tJ1e I1.{lf]Jt-ai.r!<br />
(J11J.y, fltJn1 ti1e lo1tJ' li1 1e of ,5·111.v<br />
U'l1eIC ti1e ,5·ea 111eet • ..'>"' ti1e 1nooI1 -blaJ1ci1 '"' 1ni1ui ti1e tu1·biti ebb a1ui flo w;<br />
(Jf h u111a11 1111:'>C1:v: we<br />
Fli1d also 111 th e so1111d a thou,g:h t.<br />
Hea1-t11f it b.Y ti11".., tiista.J1t 11or<strong>the</strong>111 s·ea.<br />
Ti1e A.'iea of Faiti1<br />
TtVa,..c,"' 0I1ce. <strong>to</strong>t at ti1e full, aJui I'Ol/IJ
116 Introduction <strong>to</strong> <strong>the</strong> Lisa<br />
A.Sb vaiiOU5', ...<br />
"c.J bea utiful, s·o J1e w:<br />
Ha th reaJJ.y Izeitlzer .. ft.y, IloI· Jo v IloI· 11.._'.!1z t;<br />
MJI· ceI·tftzui. J101·1Jeace. I101· J1elJJ foI·1m1i1:<br />
A.Jui we a1--e lzeI't a.$' 011 a liar.k:liizg· JJlain<br />
Swep t with confused alarnzs of s·t.rug_"'.!{le and fli,_l{h t,<br />
UllzeI't J,_S{l 10I-an t aITnies clash b.Y Jzig1z t
5 Managing a Data<br />
Base with Lisalist<br />
After word processing, <strong>the</strong> most common task a computer<br />
is used for is probably data base management<strong>the</strong><br />
handling of large amounts of information. Thjs information<br />
can be <strong>the</strong> names and addresses of all your<br />
credi<strong>to</strong>rs, weekly sales figures for each of your seven<br />
marketing regions, <strong>the</strong> horoscopes of <strong>the</strong> wives of all<br />
<strong>the</strong> vice presidents of <strong>the</strong> United States, or just about<br />
anything else you want <strong>to</strong> keep track of. Whatever <strong>the</strong><br />
data is, <strong>the</strong> usual (and easiest) way <strong>to</strong> handle it is in<br />
<strong>the</strong> form of a list.<br />
When you "tear off a sheet" of LisaList Paper and<br />
open <strong>the</strong> document thus created, you get a window that<br />
looks like Figure 5-1. The first thing <strong>to</strong> do is name each<br />
of <strong>the</strong> columns you're going <strong>to</strong> use; I've done this in<br />
Figure 5-2, as if this were a list of overdue accounts<br />
you plan <strong>to</strong> send a collection letter <strong>to</strong>.<br />
Notice that we have a new kind of pointer down<br />
in <strong>the</strong> grey part of <strong>the</strong> screen. It's called-descriptively<br />
enough-<strong>the</strong> hollow cross-hair pointer and it's used <strong>to</strong><br />
select things within <strong>the</strong> list itself-as opposed <strong>to</strong> our<br />
old friend, <strong>the</strong> arrow pointer, which is used <strong>to</strong> select<br />
icons, scroll controls and menu items that aren't within<br />
<strong>the</strong> list itself.<br />
After you've named <strong>the</strong> columns, you tell LisaList<br />
what kind of data you want <strong>to</strong> put in each one. Notice<br />
117
118 Introduction <strong>to</strong> <strong>the</strong> Lisa<br />
Figure 5-1<br />
File/Print Edit Type Style L i st<br />
LJ<br />
Enter column titles and t ypes; <strong>the</strong>n choose Show New List.<br />
0<br />
Text Text Text Text Text<br />
LJ<br />
Figure 5-2<br />
File/Print Edit Type Style List Data Type of Column<br />
lliiim 111 111 111 111 111B111 llEllll 111i<br />
Enter column . ti.ties and type s : <strong>the</strong>n choose Show New List.<br />
Nane Address City State Zip Phone CUITent Balance Last Payment<br />
Text<br />
.......<br />
i Text i T...L .. ).Tx.ti<br />
....<br />
T....t .................... ..I..X. .. t .................... .................... ..!.... .... .<br />
0<br />
ll
119 Managing a Data Base with Lisalist<br />
that a new menu title has appeared-Data Type of Column.<br />
This menu, displayed in Figure 5-3, lets you<br />
change <strong>the</strong> data type of each column from <strong>the</strong> default<br />
(Text) <strong>to</strong> one of <strong>the</strong> o<strong>the</strong>r alternatives.<br />
Figure 5-3<br />
Number<br />
Money<br />
Date<br />
Time<br />
Telephone<br />
Zip Code<br />
Social Security<br />
Text is <strong>the</strong> catch-all category and covers ei<strong>the</strong>r letters<br />
and numbers mixed (as in a street address) or just<br />
letters (as in a name). The o<strong>the</strong>r seven data types don't<br />
allow letters. Number is <strong>the</strong> general category; and <strong>the</strong><br />
o<strong>the</strong>rs are specialized number formats.<br />
When you pick a data type, <strong>the</strong> Lisa supplies a default<br />
format in <strong>the</strong> Data Format row (as in Figure<br />
5-4). You can edit <strong>the</strong> format if you want-<strong>to</strong> allow for<br />
nine-digit zip codes, for example. (Notice that <strong>the</strong> table<br />
has scrolled left <strong>to</strong> accommodate <strong>the</strong> new, wider<br />
columns.)<br />
Figure 5-4<br />
File/Print Edit Type Style List<br />
Lj<br />
Enter column titles and types: <strong>the</strong>n choose Show New List.<br />
ess City State Zip Phone Current Balance Last Payment<br />
0<br />
ll
120 Introduction <strong>to</strong> <strong>the</strong> Lisa<br />
What's <strong>the</strong> point of specifying data types Well, sorting<br />
is one of <strong>the</strong> main things you'll want <strong>to</strong> do with<br />
LisaList, and it needs <strong>to</strong> know what kind of data it's<br />
sorting in order <strong>to</strong> do an accurate job. LisaList can do<br />
sophisticated kinds of sorts if it knows <strong>the</strong> data type;<br />
for example, it understands that 10 A.M. comes before<br />
5 P.M.<br />
LisaList also reviews <strong>the</strong> information you enter in<br />
a column <strong>to</strong> make sure it fits <strong>the</strong> data type you've selected-so<br />
if you try <strong>to</strong> enter a seven-digit number when<br />
<strong>the</strong> data type is Social Security, you'll get an error message<br />
(since social security numbers always have nine<br />
digits).<br />
LisaList will even try <strong>to</strong> correct an entry for you.<br />
For example, if you enter a number when <strong>the</strong> data type<br />
is Money, but leave <strong>the</strong> dollar sign off, LisaList will<br />
supply it. And you can type in phone numbers and social<br />
security numbers without having <strong>to</strong> bo<strong>the</strong>r with <strong>the</strong> hyphens<br />
and paren<strong>the</strong>ses; here again, LisaList will supply<br />
<strong>the</strong>m.<br />
Before you can begin entering information on a<br />
list, you have <strong>to</strong> select Show New List from <strong>the</strong> List<br />
menu (Figure 5-5). This locks in <strong>the</strong> data type for each<br />
column (although you can rename <strong>the</strong> columns if you<br />
want), makes <strong>the</strong> Data Type and Data Format rows dis-<br />
Figure 5-5
121 Managing a Data Base with Lisalist<br />
LJ<br />
Figure 5-6<br />
File/Print Edit Type Style list<br />
appear, and gives you a blank row <strong>to</strong> begin typing on<br />
(Figure 5-6).<br />
To start putting in <strong>the</strong> data, you place <strong>the</strong> hollow<br />
cross-hair pointer in a field-<strong>the</strong> little box at <strong>the</strong> intersection<br />
of a column and a row-and click <strong>the</strong> but<strong>to</strong>n.<br />
The field highlights and a text pointer appears in it.<br />
When you've finished in one field, you use <strong>the</strong> tab key<br />
<strong>to</strong> move <strong>to</strong> <strong>the</strong> next.<br />
Once you've finished a list, LisaList lets you sort<br />
<strong>the</strong> information on it in a number of different ways.<br />
You can sort:<br />
• alphabetically or numerically<br />
• in ascending or descending order<br />
• on any column<br />
• on several different columns at <strong>the</strong> same time.<br />
You can also search through a list for a particular<br />
item, or for all <strong>the</strong> items of a particular kind. And you<br />
can combine search specifications. So you could search<br />
for all <strong>the</strong> accounts in Alaska and Hawaii who owe you<br />
more than $5000 and who haven't paid anything for<br />
<strong>the</strong> last three months or more.<br />
LisaList also lets you:<br />
• scroll through a list,<br />
• correct mistakes in it,<br />
• delete rows,<br />
• add and delete columns,<br />
• change column widths,<br />
• move columns around,
122 Introduction <strong>to</strong> <strong>the</strong> Lisa<br />
Figure 5-7<br />
./12 Pitch Modern<br />
12 Pitch Elite<br />
10 Pitch Modern<br />
10 Pitch Courier<br />
./Show Actual S ize<br />
Show Smal I Type<br />
Show Medium Type<br />
Show Large Type<br />
• hide columns you don't want <strong>to</strong> appear on a particular<br />
report,<br />
• choose between three different type faces and three<br />
different sizes,<br />
• make any of <strong>the</strong>m appear in <strong>the</strong> o<strong>the</strong>r two sizes (Figure<br />
5-7), and<br />
• print out <strong>the</strong> results of all of this.<br />
You can specify as many as a hundred columns<br />
in a list, and a row can have as many as 990 characters.<br />
Whole lists can contain up <strong>to</strong> about 600,000 characterssix<br />
thousand rows of a hundred characters each, for<br />
example.<br />
In o<strong>the</strong>r words, LisaList does most things you can<br />
think of that relate <strong>to</strong> <strong>the</strong> keeping, altering, finding and<br />
reorganizing of records.<br />
But for all its power, LisaList can only deal with<br />
<strong>the</strong> past and <strong>the</strong> present. To deal with <strong>the</strong> future, you<br />
use LisaCalc.
6 Predicting <strong>the</strong> Future<br />
with LisaCalc<br />
The best-selling personal computer program ever is Visi<br />
Cale; it was also <strong>the</strong> first <strong>to</strong> sell in really significant<br />
numbers. Despite its early popularity, VisiCale was only<br />
available on Apple Ils for quite a while-so you had<br />
<strong>to</strong> buy an Apple II if you wanted <strong>to</strong> use it. Some people<br />
attribute <strong>the</strong> entire success of <strong>the</strong> Apple Computer Company<br />
<strong>to</strong> that fact.<br />
In more recent years, VisiCale has been adapted<br />
<strong>to</strong> run on several different machines and o<strong>the</strong>r companies<br />
have brought out many, many imitations of it.<br />
Sometimes known as VisiClones, almost all of <strong>the</strong>m<br />
have "Cale" in <strong>the</strong>ir names somewhere.<br />
The proper name for "Cale" programs is electronic<br />
spreadsheets. They're used for financial (and o<strong>the</strong>r sorts<br />
of) modeling-predicting <strong>the</strong> effect of one or more present<br />
changes on one or more future conditions. In o<strong>the</strong>r<br />
words, <strong>the</strong>y let you examine "what if" possibilities <strong>to</strong><br />
see <strong>the</strong> impact of complex alternate scenarios. Huh<br />
Well, it's easier <strong>to</strong> explain with an example, so let me<br />
go right in<strong>to</strong> that.<br />
When you tear off a sheet of LisaCale Paper and<br />
open <strong>the</strong> document thus created, you get a window that<br />
looks like Figure 6-1. The bot<strong>to</strong>m part of this screen<br />
shows part of <strong>the</strong> spreadsheet you're going <strong>to</strong> be filling<br />
in; you can see ten columns (labeled A through J) and<br />
seventeen numbered rows. The little boxes at <strong>the</strong> inter-<br />
123
124 Introduction <strong>to</strong> <strong>the</strong> Lisa<br />
Figure 6-1<br />
Fi le/Print Edit Type Style Page Layout Format Protect Calculate<br />
[j<br />
s G Cells:<br />
, ,<br />
1111) I l st Spreadsheet<br />
111111<br />
Va lue:<br />
f<br />
G<br />
sections of <strong>the</strong> columns and <strong>the</strong> rows-called "fields"<br />
in LisaList-are called cells in LisaCalc.<br />
The <strong>to</strong>p part of <strong>the</strong> window is called <strong>the</strong> status<br />
panel. The area marked "Cells:" indicates <strong>the</strong> number<br />
of <strong>the</strong> cell that's selected (you select it by moving <strong>the</strong><br />
pointer <strong>to</strong> it and clicking <strong>the</strong> mouse but<strong>to</strong>n). In Figure<br />
6-1, <strong>the</strong> hollow cross-hair pointer (which you doubtless<br />
remember from LisaList) is in cell Al. If you click <strong>the</strong><br />
but<strong>to</strong>n while <strong>the</strong> pointer's <strong>the</strong>re, that cell will highlight<br />
and "Al" will appear after "Cells:" in <strong>the</strong> status panel.<br />
It also works <strong>the</strong> o<strong>the</strong>r way. If you move <strong>the</strong> pointer<br />
<strong>to</strong> <strong>the</strong> Cells area, type "Al" and hit <strong>the</strong> Enter key, cell<br />
Al will highlight. Both procedures produce <strong>the</strong> same<br />
effect, which is shown in Figure 6-2.
125 Predicting <strong>the</strong> Future with LisaCalc<br />
Figure 6-2<br />
File/Print Edit Type Style Page Layout Format Pro tect Calculate<br />
LJ<br />
et G Cells: A1<br />
et M Formula:<br />
Va lue ( Blank) :<br />
c D E F G H I J<br />
Notice that right before <strong>the</strong> word "Cells:" <strong>the</strong>re's<br />
an Apple symbol followed by <strong>the</strong> letter G. This tells you<br />
that you can get <strong>to</strong> <strong>the</strong> Cells area without moving <strong>the</strong><br />
mouse, by holding down <strong>the</strong> Apple key and <strong>the</strong> G key<br />
simultaneously.<br />
The next area in <strong>the</strong> status panel is labeled "Value".<br />
A value is what you put in a cell. It can be ei<strong>the</strong>r a<br />
number or a label. In Figure 6-2, <strong>the</strong> word "(Blank)"<br />
has appeared after "Value". That's because <strong>the</strong> selected<br />
cell (Al) is blank; it contains nei<strong>the</strong>r a label or a number.<br />
Let's fix that by putting a label in it.<br />
The fact that this is cell Al suggests what <strong>the</strong> label<br />
should be (Figure 6-3). Notice that it appears both in<br />
<strong>the</strong> cell and after <strong>the</strong> word "Value:" in <strong>the</strong> status panel.<br />
Figure 6-3<br />
File/Print Edit Type Style Page Layout Format Protect. Calculate<br />
LJ<br />
et G Cells: A1<br />
et M Formula:<br />
1 ::,.uce<br />
2<br />
3<br />
4<br />
5<br />
6<br />
c<br />
Va lue:<br />
D<br />
S::i.uce<br />
E F G H I J
126 Introduction <strong>to</strong> <strong>the</strong> Lisa<br />
Now let's go down <strong>to</strong> cell A3, select it, and type<br />
in "Number of Bottles Sold" (Figure 6-4). Cell A3 isn't<br />
wide enough <strong>to</strong> accommodate that label, so it just shows<br />
as much as it can. But you can see <strong>the</strong> whole label in<br />
<strong>the</strong> Value area.<br />
Figure 6-4<br />
file/Print Edit Type Style Page Layout format Protect Calculate<br />
u<br />
w G Cells: A3<br />
1<br />
2<br />
3<br />
4<br />
5<br />
6<br />
w M formula:<br />
Va lue:<br />
Number of Bottles Sold<br />
c E f G H I J<br />
Let's widen column A so it can accommodate this<br />
label. You do that by putting <strong>the</strong> pointer on <strong>the</strong> line<br />
between columns A and B, holding down <strong>the</strong> mouse<br />
but<strong>to</strong>n and moving it as far right as you want (Figure<br />
6-5). Notice <strong>the</strong> double arrow that appears between columns<br />
A and B <strong>to</strong> remind you that you're widening (or<br />
narrowing) a column-although if you forget so quickly,<br />
you need a neurologist, not a double arrow.<br />
Figure 6-5<br />
file/Print Edit Type Style Page Layout format Protect Calculate<br />
u 11111 I Spread , lst sheet 11111<br />
et G Cells: AIB<br />
Va lue:<br />
et M Formula:<br />
A D E f<br />
1 S8.uce<br />
2<br />
3<br />
4<br />
5<br />
6<br />
G I J<br />
"'"'"""'"""'"'"""" i""""'"""""""'""""' """" '"""'"""""""'"""""'"""'""'"'"""'''"""""'"""""'""""'""""""'"""""""""'' "'"""""'"""""""""""""""'""""""""""' """""""""""""'"""""'"'"'""""'""""
127 Predicting <strong>the</strong> Future with LisaCalc<br />
Figure 6-6 shows how <strong>the</strong> window looks when you<br />
release <strong>the</strong> mouse but<strong>to</strong>n. All <strong>the</strong> o<strong>the</strong>r columns have<br />
shifted right <strong>to</strong> accommodate <strong>the</strong> new, wider column<br />
A. Figure 6-6 also shows that you may have <strong>to</strong> experiment<br />
<strong>to</strong> get <strong>the</strong> column <strong>the</strong> right width for <strong>the</strong> labels<br />
you want. The easiest way <strong>to</strong> do that is <strong>to</strong> make <strong>the</strong><br />
column wider than you could possibly need it <strong>to</strong> be,<br />
<strong>the</strong>n narrow it so it just contains <strong>the</strong> longest label.<br />
Figure 6-7 shows a typical spreadsheet, partly filled<br />
in. Notice that <strong>the</strong> retail price of our hypo<strong>the</strong>tical sauce<br />
Figure 6-6<br />
File/Print Edit Type Style Page Layout Format Protect Calculate<br />
Lj<br />
et G Cells: AIB<br />
1<br />
2<br />
3<br />
4<br />
et M Formula:<br />
Va lue:<br />
A " B c D E F G H<br />
S ei. u c e<br />
...................... .........................................<br />
ti.1.:1.P.X. .... i=.iL.§qtt...L ..:. 1 ...................................................................,.............. ..................,................................ ,. ... ......... ... ............. ...... .. ............................ ,,.. ............................ ...,................ mm<br />
Figure 6-7<br />
File/Print Edit Type Style Page Layout Format Protect Calculate<br />
Lj<br />
et G Cells: 87 Va lue (Blank) :<br />
10<br />
et M Formula:<br />
A B C D E F ·''<br />
1 :;;Y'············································....................... . ....... '.Xt . . qi,1.!..! Jt]1 •••.• q1J:;:;g . .9Y..t..:r'.1.t.. 91:!.tJ:: . ,1..!... Jq.t.. <br />
2<br />
) ... ......................................... 1. ..<br />
3<br />
·<br />
4 ·..... P.:r . ... P. ..... 9.t .. .t<br />
5<br />
.<br />
..<br />
.·. . e . ·.· · .<br />
. ···<br />
. · ··· ········.·.··.·1$ .<br />
.•. . .. · ··<br />
· .<br />
'<br />
. . . ·<br />
. . ·.··•·•····•·<br />
•···.·.<br />
•·•·•·•···<br />
.. ·• . • . ::<br />
. .·ị·.··<br />
··.··.·.b·'.····. :_• . ..·<br />
. · . ... .. . ..<br />
1 . 9 7 $ ............ .... J ..:.. .. L.<br />
. .·<br />
..·.• .·· ..<br />
·'$·!· ..<br />
.<br />
1;gL.P.;: J,g!t ... ..<br />
'i :<br />
. . _ .... . 9: .. .. 7:3' 1i ; .... . 9:...J. .. . o.71 · ....... .... ..... ....... . .<br />
6<br />
Gross s e i<br />
.l es re1..1 en u es<br />
·<br />
7<br />
· · ' ········································ ··········· · ··············· +··· ···········································<br />
''''"''"''"""''"''"'"'"'"''"' .·.·.·.·.·.·.·.·.·.·.·.·.·.: -.·.·. ......... ........ .. ............... "" ''''' '''"'"'' ''"'''"""''"''' . ................................... ...............................<br />
B 1;9.·•t. 9f. 9.0.9§ ... 9J ................. , . ......<br />
9 1)..1 erheei.d .. ...... .. ... ,...<br />
•....... ................................. .... .... ..... ..............
128 Introduction <strong>to</strong> <strong>the</strong> Lisa<br />
rose in <strong>the</strong> third quarter and <strong>the</strong> cost of producing each<br />
bottle rose in <strong>the</strong> second and again in <strong>the</strong> fourth quarter.<br />
So far, you've seen that you can enter ei<strong>the</strong>r labels<br />
or numbers in a cell. But if that were all electronic<br />
spreadsheets could do, <strong>the</strong>y would be very dumb programs<br />
indeed. The key <strong>to</strong> <strong>the</strong> power of this software<br />
lies in <strong>the</strong> fact that you can also enter a formula in a<br />
cell.<br />
For example, <strong>the</strong> amount in cell B7 (gross sales<br />
revenues) is always going <strong>to</strong> equal <strong>the</strong> amount in cell<br />
B3 (number of bottles sold) times <strong>the</strong> amount in cell<br />
B4 (sales price per bottle). So, with cell B7 selected,<br />
you go up <strong>to</strong> <strong>the</strong> "Formula:" area of <strong>the</strong> status panel,<br />
click <strong>the</strong> but<strong>to</strong>n, type "b3*b4", and hit <strong>the</strong> Enter key.<br />
(It doesn't matter if you capitalize <strong>the</strong> letter part of <strong>the</strong><br />
cell name; LisaCalc understands it ei<strong>the</strong>r way and translates<br />
lowercase letters in<strong>to</strong> caps for you. * is widely<br />
used in computer programs <strong>to</strong> indicate multiplication.)<br />
The instant you hit <strong>the</strong> Enter key, LisaCalc does<br />
<strong>the</strong> calculation (in this case, 14,000 x $1.73) and puts<br />
<strong>the</strong> result in<strong>to</strong> <strong>the</strong> cell, as it did in Figure 6-8. (LisaCalc<br />
displays <strong>the</strong> raw number, just <strong>the</strong> way you typed it in,<br />
Figure 6-8<br />
File/Print Edit Type Style Page Layout Format Protect Calculate<br />
LJ<br />
et G Cells: 87 Va lue (Number): 24220<br />
et M Formula: 83*84<br />
·.·.!<br />
.·.·.·.·.·.·.·.·.·.·.·.·.··<br />
3<br />
A B C D E F ,,<br />
········ .·.·.·.·.·.·.·.·.·.·.·.·.·.·.·.·.·······<br />
· ·<br />
·<br />
········· ·····<br />
······<br />
·········<br />
·<br />
·..• . ·.·l:j• . . ··g····q1.!;.t.!i...d. .... q.Ll.J: . . · ,. . , :t .h.... q1. . !..: ...,!.1.... tQ. .. .. <br />
j urntier of l'.! ottles so le! . .... . HQQQ L .. 5I .. ;(9 . L . . . J.,X9 .. L .......... .. .f.f;Q ..... L ..... · .<br />
4 seie price ·p·e;:r· ·6Ciffie . $ 1.73 $ i.13 $ i.91 $ 1.97 ,<br />
s .¢.§I.•... P..:. 9ft.J.· .. ···.·.·· .·.··.·.··.·.·.·....·.·.·.·.·.·.·.·. ····················1..:..§I $ .•.• ....·.·.·.• 9 ..-. @ ·.ffe·...·...... ¢.:·.$$ ..· ············ .· .9.-.ff·...·;·······<br />
... .<br />
QE.9§§ §J§ !Y1les ···--- .. .. ..... _ .. + ; .... ........ .. .<br />
B gt qf_gqg,d. 9 d. ,,,,,,,, ,,,,,,,... L ...,,,,,,,,,,,,,,,,,,,,' ' .L ' ;. ,,,,,,,,,,,,,,,,,,,,,,,,,,,,,,,,,,,,,,,,,, '<br />
9 Overhee.d . .<br />
, ... . ... . . .. . . ... . . . . • .<br />
. .. .. .. . ... . .. .... ..........;........<br />
10<br />
............................................ f..... ... . ............................ ....... ... ... .......... + ......<br />
11 Pro fit<br />
............. +. . .................................<br />
'''"''""'"''""'''"''"+
129 Predicting <strong>the</strong> Future with LisaCalc<br />
in <strong>the</strong> selected cell; when you select ano<strong>the</strong>r cell, it inserts<br />
dollar signs, commas and whatever else you've<br />
specified.)<br />
Most of <strong>the</strong> o<strong>the</strong>r cells in this spreadsheet require<br />
formulas-<strong>the</strong> exceptions ' are cells B9, C9, D9 and E9,<br />
which require numbers, and cells F4 and F5, which require<br />
labels (ei<strong>the</strong>r a dash or "NA" for "not applicable").<br />
For example, <strong>the</strong> formula for cell F3 is b3 + c3 + d3<br />
+ e3; <strong>the</strong> formula for B11 is b7 - b8 - b9.<br />
Figure 6-9 shows <strong>the</strong> spreadsheet completely filled<br />
in. There are a number of conclusions you can draw<br />
from <strong>the</strong> information in it. But <strong>the</strong> really sophisticated<br />
applications of LisaCalc come when you ask "what if"<br />
questions. Let's say you're considering <strong>the</strong> advisability<br />
of raising <strong>the</strong> price per bottle <strong>to</strong> $2.35, and that you<br />
figure this would reduce <strong>the</strong> number of bottles sold by<br />
25%.<br />
To see <strong>the</strong> effect of this change on your profits,<br />
you'd change <strong>the</strong> numbers in cells B3, C3, D3, E3, B4,<br />
C4, D4 and E4-figuring that next year will be pretty<br />
much <strong>the</strong> ame as this year in terms of seasonal variations<br />
in sales, overhead and costs. (I know I'm making<br />
1<br />
2<br />
3<br />
4<br />
5<br />
<br />
Figure 6-9<br />
File/Print Edit Type Style Page Layout Format Protect Calculate<br />
s G Cells: I Va lue (Blank) :<br />
s M Formula:<br />
A B c D E F<br />
Sauce ''' ........................... ''''''''''' ''' ..... iJt. qi,1t!. .n.9<br />
j un1b·e.1:·<br />
···c;r····bottte.s····soid: ... ... . . t.4; .. 999 .... t .. ....... Jt . f.99 .... : ... .<br />
... 9.1:!.i.!. ..... 9...t!:.4. .... 9... .if.. ... J.9..t:.l..<br />
'. . . '. .... .9, . ..9.'.'.t· .<br />
::tr::·:·::I:t·t-:t-t::: ·:::·:: .. ... .¢.:..··" ..· · .......<br />
.... ¢..: ·.·... .. ¢·:· . k·.l· ·""""····"·" ···¢.: ·i·<br />
·<br />
.'.· . . '.'.'... ...;.. f.9 .... T ...... .. ....... 94., . . .99.<br />
i!m[[t:i!] ;:1:]H]&JlHH!_ BH!i H !'.4i'.g<br />
9 Dve..:9 ...... ................... .................. J . .. 9, .. Q99.: )9 .... $ . .. :9Q ,99 .. §J.L..Q9.:.99.J.g .. .9..9..:.9.9..J .... 4.},,QQ.,.QQ.<br />
10 . . . L L . .. L ... .. .<br />
11 Profit ··············· ..<br />
· . .. ··<br />
. .. : .. J ... .. ., .. 4.99 .. ,.99 ..... $<br />
..... .,, .. '.7.'.:.99 .. ... ,..4..9. .. : . 9 ... ... J •. J§.f. ,.99 .. . ... }, .99. .. : .. .9.
130 Introduction <strong>to</strong> <strong>the</strong> Lisa<br />
a number of unwarranted assumptions, but this is just<br />
an example. Give me a break, OK)<br />
LisaCalc au<strong>to</strong>matically recalculates all <strong>the</strong> o<strong>the</strong>r<br />
cells affected by <strong>the</strong>se changes (namely F3, B7, C7, D7,<br />
E7, F7, BB, CB, DB, EB, FB, Bll, Cll, Dll, Ell and Fll).<br />
Figure 6-10 shows <strong>the</strong> results. Gross sales revenues are<br />
down, but profits are up.<br />
Figure 6-10<br />
File/Print Edit Type Style Page Layout Format Protect Calculate<br />
u<br />
et G Cells: I<br />
et M Formula:<br />
A<br />
Va lue (Blank) :<br />
B c D E F<br />
This scenario drives your president berserk with<br />
greed and he suggests raising <strong>the</strong> price <strong>to</strong> $8 a bottleconceding<br />
that this will reduce sales <strong>to</strong> 10% of <strong>the</strong>ir<br />
current levels. Figure 6-1 1 shows why this is not a good<br />
idea (paren<strong>the</strong>ses indicate negative values, of coursenot<br />
<strong>the</strong>se, <strong>the</strong> ones in <strong>the</strong> spreadsheet).
131 Predicting <strong>the</strong> Future with LisaCalc<br />
Figure 6-1 1<br />
File/Print Edit Type Style Page Layout Format Protect Calculate<br />
Ll<br />
It G Cells:<br />
It M Formula:<br />
.········· .. ..... . ... ..<br />
Va lue:<br />
lllll<br />
' ' ' '<br />
I l5t Spreod 5heet 11111<br />
A B C D E F .{)<br />
·.·:or.·:·:·.:·:::····r.<br />
<br />
.<br />
<br />
.<br />
:·.·<br />
.<br />
.<br />
.. ·: .. .··.··:; .<br />
.·<br />
.<br />
9.t.<br />
.<br />
. .<br />
Y. .Jqt.L. <br />
3 Number of bottles sold 140 : 11:, : 163 : 228 : 646<br />
<br />
!l:ii19\:i::::::::z:i:::]:i:::::Hi:::: ::11r r: :=:: :<br />
o 9.Y..:r....9... ............................ .................. .. J91. .. QQQ :.9.9 .. .. ,J99.:..9.9. .... <br />
........................................................................................:................................................ .. ...... ..<br />
11 .P.:r..9.fH ... .............. ...... ............. ..... .......... .......... .... .L1. . ..<br />
.§ .. : .. .9)J<br />
... . g .. .9.9..,..9.9 ... . . 4.}., ... 91 ..:.9.9..<br />
.. ........ ...... ...... ........ ....:................................................!. ......... ..... ....... ..... ....... .... ....... ... L. ...........................................<br />
.. C§, ..§..§ :.. .9.J..L!9.1.J9.t.. 4..l..$ .. U.9,...§.....: ..§.§.J..L.1.....J.. J...<br />
.. n,JQ9..:.9.9. .... <br />
From this somewhat simple-minded example, you<br />
can get an idea of <strong>the</strong> kind of things LisaCalc is good<br />
for.<br />
A LisaCalc spreadsheet can be enormous-up <strong>to</strong><br />
255 rows by 255 columns, for a <strong>to</strong>tal of more than 65,000<br />
cells. Its calculations are figured <strong>to</strong> fifteen digits-which<br />
is more precision than you're likely <strong>to</strong> need.<br />
LisaCalc also lets you alter how a spreadsheet looks.<br />
Like LisaList, it gives you a choice of five common typefaces,<br />
and lets you enlarge and reduce <strong>the</strong>m as well<br />
(its Type Style menu is identical <strong>to</strong> LisaList's, shown<br />
in Figure 5-7).<br />
The Format menu (Figure 6-12) provides o<strong>the</strong>r options.<br />
You can have <strong>the</strong> contents of a cell flush right,<br />
flush left or centered, or you can have <strong>the</strong> words flush<br />
left and <strong>the</strong> numbers flush right. You can have <strong>the</strong> contents<br />
repeat until <strong>the</strong>y fill <strong>the</strong> cell (useful for making<br />
lines-of stars, say-across <strong>the</strong> spreadsheet).<br />
Finally, you can format numbers in many different<br />
styles-with and without dollar signs, decimal points,<br />
commas, etc. As with LisaList, LisaCalc will au<strong>to</strong>matically<br />
convert <strong>the</strong> raw numbers you type in<strong>to</strong> <strong>the</strong> format<br />
you've selected.
132 Introduction <strong>to</strong> <strong>the</strong> Lisa<br />
Figure 6-12<br />
Protect Calcul<br />
Wo rds Left/Nos. Right<br />
Left Flush<br />
•L<br />
Center<br />
.tK •<br />
Right Fltish •R .<br />
Fill Pattern<br />
Floating Decimal<br />
No D ec ima l<br />
Fixed Decimal<br />
Scien tific . . .<br />
$1,2 34. 56<br />
1,234.56<br />
$ 1234. 56<br />
1234. 56<br />
$1,235<br />
1.235<br />
$ 1235<br />
1235<br />
The Protect menu (Figure 6-13) lets you prevent<br />
certain cells, or all cells, from being accidentally<br />
changed-unless and until you unprotect <strong>the</strong>m.<br />
Figure 6-13<br />
Calculate<br />
Unprotect<br />
Protect Formulas & Va lues<br />
Protect Formulas Only<br />
The Calculate menu (Figure 6-14) gives you a slew<br />
of o<strong>the</strong>r options. For example, when you change a value<br />
in a cell, LisaCalc's default is <strong>to</strong> au<strong>to</strong>matically change<br />
all <strong>the</strong> o<strong>the</strong>r values affected by that change. But if you<br />
select Calculate Manually, LisaCalc holds off on recalculating<br />
<strong>the</strong> o<strong>the</strong>r cells until you tell it <strong>to</strong> (which you<br />
do by selecting Calculate Now).
133 Predicting <strong>the</strong> Future with LisaCalc<br />
Figure 6-14<br />
tect<br />
v'Calculate Au<strong>to</strong>matically<br />
Calculate Manually<br />
Calculate Now<br />
Show Formulus Er Va lues<br />
../Show Va lues O nly<br />
v'Don ' t Circle Va lues<br />
Circle Missing Va lues<br />
Function Hints . . .<br />
Show Formulas & Values makes <strong>the</strong> cells bigger<br />
so each can display <strong>the</strong> formula it uses <strong>to</strong> compute <strong>the</strong><br />
value in it, as well as <strong>the</strong> value itself. Figure 6-15 shows<br />
what that looks like. Quite a mess, isn't it Well, it's<br />
useful when you want <strong>to</strong> be reminded what LisaCalc<br />
is up <strong>to</strong> and how it's coming <strong>to</strong> its conclusions.<br />
If you want LisaCalc <strong>to</strong> tell you when a cell's value<br />
is missing or incorrectly entered, select Circle Missing<br />
Values from <strong>the</strong> Calculate menu.<br />
Function Hints . . . displays an extensive onscreen<br />
help menu that lists all <strong>the</strong> various functions<br />
you can use in a LisaCalc formula. They include:<br />
• basics like averages and squares,<br />
• more sophisticated ones like trigonometric and logarithmic<br />
functions, and financial functions like NPV<br />
(net present value), annuity and compound interest,<br />
• relatively abstruse ones like "logical and," "logical or"<br />
and "logical not."<br />
LisaCalc tables can be pasted in<strong>to</strong> Lisa Write or<br />
LisaGraph, where <strong>the</strong>y can be jazzed up (it's sort of like<br />
taking your car <strong>to</strong> <strong>the</strong> paint shop after all <strong>the</strong> dents<br />
are out). You already know about Lisa Write, so I'll use<br />
<strong>the</strong> next chapter <strong>to</strong> tell you about LisaGraph.
134 Introduction <strong>to</strong> <strong>the</strong> Lisa<br />
1<br />
2<br />
3<br />
4<br />
5<br />
6<br />
7<br />
8<br />
9<br />
Figure 6-15<br />
File/Print Edit Type Style Page Layout Format Protect Calculate<br />
LJ<br />
et G Cells: DIE Va l ue :<br />
et M Formula:<br />
A B c D E<br />
Sa . uc e ............................. ......... . .... Js t 91.:r;t:r; i 2nd .91J!.t.Q.g .. 9:r;t. .<br />
.......................................................... .................................... ........................................ ... . ..... . . . . ... ...... ............... .... ..... ........ ..... ..... ........ ..... ........... ''"' .... .... ... .....<br />
iB3+C3+D3+E3<br />
Number of bottles . sold 140! 11:. 163 .. 22s: 64<br />
·$·r···ii.I··ii...' foiftI·.:·.··<br />
s . oo $ s . 06 $ s . oo . . .: .. 66'"·!· ... ........................<br />
1;q§J.P.! qgttJ. .<br />
..<br />
. . J.. (I . 63 J$ ' . " .... .. 1:; :I w<br />
.<br />
. .<br />
' ...............<br />
.<br />
. . ...... $<br />
0 . 68 . O.J<br />
....)................................................ 1 .........................................) ..... ....................... .. .<br />
.. L .................<br />
. ...... .......................... .......<br />
83*64= C 3*C4= D3*D4= E3*E4= :B7+C7+D7+E7<br />
............................................................ Gross sa.l es revenues ····················:s·3*ss;;··· $ 1, 120. .............. 00 ... Tc3·*cs·;;· \t 920 · .··············;c;3·*c;s;; 00 $ 1, 304 ..... ............ . 00 · t3*. 1 s;; 824 . .................... . 00 1s·s+c8+c;s+ts<br />
:$ 5 168. 00<br />
··· E<br />
gt . . 9f. 9999 sol d . ... J ..:.'. . :9 @. 110.84 .. :..<br />
. . .. .. .. . ... $.<br />
. . . .<br />
}.:J...<br />
1)1erhe8.1J<br />
. .................. ............ ....... . J<br />
..... 9."99.Q :99..$<br />
....<br />
: . 99.: .99 . .. ...@ ...<br />
L (;)9 .. :99<br />
......<br />
)., .. .9.9. : . 9.9 .....<br />
;i;t<br />
.......<br />
...1(1.t,;,.. 10<br />
. .. . +. . .............. ...<br />
'<br />
........ . .... . .. .. .. ... .<br />
87-68-69= 'C7-C8-C9= D7-D8-D9= E7-E8-E9= 811+C ll+D11<br />
11<br />
Pxq.f.t ....... ........ ... .... ........ ............................ .. .. . . J .. , ... §§<br />
: .. 9.l $.C§,,.§.... : .. ..9.J..(.mJ9.9 .. J4.J ... (J.9,J.2.., . .<br />
.L.g <br />
c;J DJ
7 Making Business<br />
Charts with LisaGraph<br />
This is one of my favorite Lisa programs. It takes raw<br />
data and turns it in<strong>to</strong> any of five kinds of graphs-bar,<br />
line, mixed bar /line, pie and scatter. Because you can<br />
switch from one kind of chart <strong>to</strong> ano<strong>the</strong>r simply by<br />
selecting an item from a menu, you can see which of<br />
several different charts makes your point in <strong>the</strong> clearest<br />
and most effective way. LisaGraph makes information<br />
easier <strong>to</strong> understand-not only for <strong>the</strong> people you show<br />
<strong>the</strong> charts <strong>to</strong>, but also for yourself.<br />
When you tear off a sheet of LisaGraph Paper and<br />
open <strong>the</strong> document thus created, you get a window that<br />
looks like Figure 7-1. The spreadsheet-like data table<br />
on <strong>the</strong> left is where you enter your information-ei<strong>the</strong>r<br />
directly or by pasting a LisaCalc table in <strong>the</strong>re. As in<br />
LisaCalc, <strong>the</strong> little boxes in this data table are called<br />
cells.<br />
Let's say you want <strong>to</strong> chart your sales for <strong>the</strong> last<br />
three years. First you put <strong>the</strong> years in column A. Since<br />
<strong>the</strong> hollow cross-hair pointer is in cell Al, all you have<br />
<strong>to</strong> do is click <strong>the</strong> mouse but<strong>to</strong>n and start typing. When<br />
you enter items in column A, LisaGraph au<strong>to</strong>matically<br />
enters <strong>the</strong>m on <strong>the</strong> x (horizontal) axis (Figure 7-2).<br />
135
136 Introduction <strong>to</strong> <strong>the</strong> Lisa<br />
i. LJ<br />
\<br />
t<br />
:.<br />
Figure 7-1<br />
File /Print Edit Type Style Pc1ge Layout Format Gra ph Cus<strong>to</strong>mize<br />
et G Cells:<br />
A<br />
111111 Easy as Pie 111111<br />
\' A::
137 Making Business Charts with LisaGraph<br />
Figure 7-2<br />
File/Pr int Edit Type Style Page Layout Format Graph Cus<strong>to</strong>mize<br />
Ll<br />
1981 ................................<br />
1982! ;<br />
................ i'9'8'3T ..... .... ............. ...... r-······<br />
................................ r .. ·····<br />
SJbti tie<br />
Y Axis Ti tie<br />
1-5 .-----..-,<br />
1.2 I-<br />
0.8 f-<br />
The Cells: and Values: areas above <strong>the</strong> data table<br />
work just <strong>the</strong> way <strong>the</strong>y do in LisaCalc-<strong>the</strong>y display<br />
<strong>the</strong> currently selected cell and what you're entering in<strong>to</strong><br />
it. (By <strong>the</strong> time I'd printed out Figure 7-2, I'd moved<br />
on <strong>to</strong> cell Bl, which is blank, but when cells Al, A2<br />
and A3 were selected, those numbers appeared in <strong>the</strong><br />
Cells area and 1981, 1982 and 1983 appeared in <strong>the</strong><br />
Value area.)<br />
In Figure 7-3, I've widened column B and entered<br />
<strong>the</strong> first sales figure-$720,000 for 1981 (you can assume<br />
three zeros have been dropped from <strong>the</strong> end of it if<br />
you like <strong>to</strong> think big). LisaGraph not only immediately<br />
creates a bar that symbolizes that amount, it also
138 Introduction <strong>to</strong> <strong>the</strong> Lisa<br />
Figure 7-3<br />
Fil e/Print Edit Type Style Page Layout Format Graph Cus<strong>to</strong>mize<br />
Lj 111111 Easy as Pie 1 11111<br />
Y Axis Ti tle<br />
800000 ...----.<br />
Legend<br />
D<br />
1961 1962 1983<br />
x Axis Title<br />
changes <strong>the</strong> values on <strong>the</strong> y (vertical) axis <strong>to</strong> adjust <strong>to</strong><br />
it.<br />
In Figure 7- 4, I've entered <strong>the</strong> sales figures for <strong>the</strong><br />
o<strong>the</strong>r two years and LisaGraph has created bars for<br />
<strong>the</strong>m <strong>to</strong>o. Since <strong>the</strong> sales figure for 1983-$930,000-<br />
would be off <strong>the</strong> chart using <strong>the</strong> y-axis values from Figure<br />
7-3, LisaGraph also changes <strong>the</strong>m <strong>to</strong> accommodate<br />
this new, larger number. (You can also alter <strong>the</strong> y-axis<br />
values yourself.)<br />
Now, with almost no effort, I've created a bar graph<br />
that presents <strong>the</strong> relevant information. But maybe some<br />
o<strong>the</strong>r kind of graph would tell <strong>the</strong> s<strong>to</strong>ry more dramatically.<br />
So I go <strong>to</strong> <strong>the</strong> Graph menu (Figure 7-5) and ask
139 Making Business Charts with LisaGraph<br />
Figure 7-4<br />
File/Print Edit Type Style Page Layout<br />
LJ,.._-------<br />
ti G Cells: 64<br />
A<br />
111111 Easy OS Pie 11111<br />
Format Graph Cus<strong>to</strong>mize<br />
Figure 7-5
140 Introduction <strong>to</strong> <strong>the</strong> Lisa<br />
m!""!!O<br />
Figure 7-6<br />
File/Print Edit Type Styl e Page Layout Format Graph Cus<strong>to</strong>mize<br />
LI----------<br />
w u Cells: 84<br />
A<br />
B<br />
111111 Easy as Pie 11111<br />
--------.<br />
SJbtitle<br />
\I AXi5 Ti tie<br />
1000000 ...----,<br />
800000 <br />
Legend<br />
D<br />
600000<br />
00000<br />
zooooo<br />
O '------' i _____. i ___._i ___i..._ _ __.<br />
1980 1981 1982 1983 198 1985
141 Making Business Charts with LisaGraph<br />
Figure 7-7<br />
File/Print Edit Type Style Page Layout Format Graph Cus<strong>to</strong>mize<br />
u<br />
11/111 Easy as P i e !11111<br />
et G Cells: 64<br />
A<br />
1 1981$<br />
2 i982$<br />
3 ··.··.·.·.·.··i§$.$<br />
4<br />
5<br />
6<br />
7<br />
8<br />
9<br />
10<br />
11<br />
12<br />
13<br />
14<br />
15<br />
16<br />
17<br />
18<br />
B<br />
I' Axis Title<br />
1000000<br />
800000 I-<br />
500000 t-<br />
00000 I-<br />
200000 I-<br />
D<br />
0 J.<br />
1980 1961<br />
D<br />
9.Jti tle<br />
D<br />
_J_ _J_ J.<br />
1982 1983 <strong>1984</strong> 1985<br />
x Axis Title<br />
Legend<br />
D<br />
for a line graph (shown in Figure 7-6). Notice that Lisa<br />
Graph adds <strong>the</strong> years 1980, <strong>1984</strong> and 1985 <strong>to</strong> <strong>the</strong> x axis<br />
so <strong>the</strong> line will float, ra<strong>the</strong>r than being flush against<br />
each edge of <strong>the</strong> chart area.<br />
It's just as simple <strong>to</strong> get a ' scattergram (Figure<br />
7-7) or a pie chart (Figure 7-8). LisaGraph drops <strong>the</strong><br />
extra years when <strong>the</strong>re's no need for <strong>the</strong>m anymore,<br />
as in <strong>the</strong> pie chart.
142 Introduction <strong>to</strong> <strong>the</strong> Lisa<br />
Figure 7-8<br />
Fi le/Print Edit Type Style Page Layout Format Graph Cus<strong>to</strong>mize<br />
L1<br />
ei G Cells: 84<br />
111111 Easy as Pie 111111<br />
1<br />
Graph Ti tie<br />
2<br />
S\Jbti tie<br />
3<br />
. 4<br />
5<br />
.<br />
6<br />
7<br />
· B<br />
9<br />
10<br />
11<br />
.. 12<br />
13<br />
. 14<br />
. 15<br />
16<br />
17<br />
. 18
143 Making Business Charts with LisaGraph<br />
Figure 7-9<br />
File/Print Edit Type Style Page Layout Format Graph Cus<strong>to</strong>mize<br />
u<br />
.tG Cells: EIF<br />
D E<br />
110 000 $ 150. 000<br />
................... 1 ................ ... 9 ...................(............... .. ..<br />
.<br />
................... 120<br />
(.................... 000<br />
: $<br />
................... 90<br />
1 .................. 000 .<br />
330. 000 $ 140 . 000<br />
................... .c ....... ............'''"'''''"''''"'''"''''''.."'''"'<br />
······················· r.··.:(F ..... .<br />
.................................. f·····"""'<br />
....................... t···"····<br />
....................... +····"·'<br />
.. .. .. ............ .......... .................... .........<br />
.<br />
111111 Easy as Pie 111111<br />
Greph Ti tie<br />
9.Jb ti tie<br />
v Axi; Ti tie<br />
00000 .-----,<br />
Legend<br />
0<br />
LegeM<br />
!2!!ll<br />
Legend<br />
D<br />
Legend<br />
III]<br />
. ;<br />
.. ........ + .................... ..<br />
Producing a mixed line/bar chart is only slightly<br />
more complicated. But <strong>to</strong> do it, you need more than<br />
one set of figures on <strong>the</strong> y axis (since you obviously<br />
can't mix just one thing). So let's assume you have four<br />
sales reps. First, you list <strong>the</strong>ir individual sales figures<br />
in columns B, C, D and E, respectively. (The data table<br />
scrolls over <strong>to</strong> accommodate <strong>the</strong>se new values; you can<br />
scroll it back if you want.)<br />
Figure 7-9 shows <strong>the</strong> result. Not only has LisaGraph<br />
made bars for each sales rep, it's assigned a different<br />
pattern <strong>to</strong> each bar. It's also put a little box of each<br />
pattern off <strong>to</strong> <strong>the</strong> right, labeled "Legend". In <strong>the</strong> unlikely<br />
event that all four of your sales reps are named Legend,
..<br />
144 Introduction <strong>to</strong> <strong>the</strong> Lisa<br />
Figure 7-10<br />
File/Print Edit Type Style Page Layout<br />
....----------<br />
.S G Cells:<br />
D E 0<br />
llllllEasy as P i e 1 11111<br />
Format Graph Cus<strong>to</strong>mize<br />
.... ........................ +.....<br />
"":::::::::::<br />
..................................... =.:::.:.=.:<br />
.. .. : .:. ::::::<br />
............. ........ t .....................................:.·:::-:·:·<br />
........ ...... ........ +<br />
Yearly sates Totals<br />
1100000 .----.....,<br />
300000<br />
LUnds troM<br />
D<br />
Perrotta<br />
<br />
snine<br />
D<br />
Stubbs<br />
[!I]<br />
.................................. + ........... .<br />
..... . ............... ....... +<br />
.........................................<br />
..................... ..... .. . .<br />
...........................................<br />
... . .......... ............ + .... .<br />
<strong>the</strong>re's nothing more you need <strong>to</strong> do. If not, you'll want<br />
<strong>to</strong> change <strong>the</strong>se labels.<br />
To do that, you just move <strong>the</strong> pointer <strong>to</strong> a label,<br />
which turns it in<strong>to</strong> a text pointer. Then you click <strong>the</strong><br />
but<strong>to</strong>n <strong>to</strong> deposit an insertion point and type in <strong>the</strong> new<br />
name, as I've done in Figure 7-10. (While I was at it,<br />
I changed <strong>the</strong> o<strong>the</strong>r titles and eliminated <strong>the</strong> footnote.<br />
You can also insert your own titles anywhere in <strong>the</strong><br />
graph part of <strong>the</strong> window.)<br />
Now we're ready for mixed bar and line graphs.<br />
To display one or more of <strong>the</strong> sales reps' records as a<br />
line instead of a bar, you first select that rep's column<br />
in <strong>the</strong> data table (by putting <strong>the</strong> pointer in <strong>the</strong> letter
---f"'I<br />
145 Making Business Charts with LisaGraph<br />
Figure 7-1 1<br />
File/Print Edit Type Style Page Layout Format<br />
Ll llllllEasy as Pie 11111<br />
'9.1 es by :;:,,.1 es Rep<br />
1931-83<br />
"ies.rly S:..les Totals<br />
00000 .----t<br />
Hide Legends<br />
Y-Rxis Range<br />
/ ··HY\':<br />
cell at <strong>the</strong> head of that column, as I've done for column<br />
E in Figure 7-11). Then you select Show as Line from<br />
<strong>the</strong> Cus<strong>to</strong>mize menu.<br />
This produces Figure 7-12, with Stubbs' sales<br />
shown as a line superimposed on <strong>the</strong> bars representing<br />
Lundstrom's, Perrotta's and Shine's. You can change<br />
as many bars as you want <strong>to</strong> lines, even <strong>to</strong> <strong>the</strong> point<br />
of converting <strong>the</strong> bar chart <strong>to</strong> a line chart piece by piece<br />
(although this is certainly <strong>the</strong> hard way <strong>to</strong> do it).<br />
Figure 7-13 shows everybody's sales but Lundstrom's<br />
converted <strong>to</strong> lines. Note how LisaGraph, always<br />
thinking ahead, has assigned a different symbol <strong>to</strong> each
146 Introduction <strong>to</strong> <strong>the</strong> Lisa<br />
Figure 7-12<br />
File/Print Edit Type Style Page Layout Format Graph Cus<strong>to</strong>m ize<br />
u llllllEasy as Pie 1 11111<br />
1981 1·•82 1983<br />
CoMpar i s•:•n of ale' Reps<br />
line-an up-pointing triangle for Perrotta, a diamond<br />
for Shine and a down-pointing triangle for Stubbs.<br />
This is just a fraction of <strong>the</strong> complexity LisaGraph<br />
can handle. You can have up <strong>to</strong> eight sets of data, instead<br />
of just <strong>the</strong> four shown here. Negative as well as positive<br />
values are permitted. The columns run all <strong>the</strong> way up<br />
<strong>to</strong> IU (i.e., A <strong>to</strong> Z, <strong>the</strong>n AA <strong>to</strong> AZ, BA <strong>to</strong> BZ, etc.), allowing<br />
you <strong>to</strong> compare up <strong>to</strong> 255 different values. Put this all<br />
<strong>to</strong>ge<strong>the</strong>r and it means that LisaGraph can display more<br />
than two thousand separate data points.<br />
LisaGraph lets you change <strong>the</strong> size and shape of<br />
a graph when you print it out, by using <strong>the</strong> Page Layout<br />
menu (Figure 7-14). The half-page (horizontal) format
147 Making Business Charts with LisaGraph<br />
Figure 7-13<br />
File/Print Edit Type Style Page Layout<br />
""-------<br />
" U<br />
11111 Easy as Pie 111111<br />
!<br />
Format Graph Cus<strong>to</strong>mize<br />
8".l es b\' ::!'9.1 es Pep<br />
'<strong>to</strong>8.rl )1 S'S.Ii; Tot>
148 Introduction <strong>to</strong> <strong>the</strong> Lisa<br />
Figure 7-15<br />
File/Print Edit Type Style Page Layout Format Graph Cus<strong>to</strong>mize<br />
' LJ 111111 Easy as Pie 111111<br />
400000<br />
vean \" 28.l es Totals Lund:. tror1<br />
Cl<br />
Perrot t8.<br />
fll'l<br />
S-1 1ne<br />
CJ<br />
::;t1Jt't,;.<br />
[!I]<br />
is standard and that's what you've been seeing so far.<br />
The third-page format is also horizontal (Figure 7-15),<br />
but <strong>the</strong> quarter-page and <strong>the</strong> full-page formats are vertical.<br />
(By <strong>the</strong> way, you can also print out <strong>the</strong> data table<br />
itself, as well as <strong>the</strong> graph.)<br />
LisaGraph's default is <strong>to</strong> reduce <strong>the</strong> chart so all<br />
of it will fit in <strong>the</strong> graph area in <strong>the</strong> window, but you<br />
can ask <strong>to</strong> see it <strong>the</strong> actual size it will appear on a sheet<br />
of paper. In Figure 7-16, I've asked for a full-page chart<br />
actual size. Since you now need <strong>to</strong> scroll <strong>to</strong> see all of<br />
<strong>the</strong> graph, scroll bars appear on <strong>the</strong> graph section of<br />
<strong>the</strong> window (as you may have noticed, only <strong>the</strong> data<br />
table section had scroll bars up till now).
149 Making Business Charts with LisaGraph<br />
Figure 7-16<br />
File/Print Edit Type Style Page Layout<br />
"'"'=u ....------ ---<br />
Va lue:<br />
111111 Easy as Pie llJIJ<br />
Format<br />
Graph<br />
Cus<strong>to</strong>mize<br />
19:31<br />
1982<br />
192:3<br />
Compsri son of Sal es Peps
150 Introduction <strong>to</strong> <strong>the</strong> Lisa<br />
Figure 7-17<br />
Under I ine<br />
Bold<br />
Italic<br />
Hollow<br />
Shadow<br />
Page Lay<br />
.SP<br />
.su<br />
.SB<br />
•1<br />
15 Pitch Gothic<br />
v'l2 Pitch Modern<br />
12 Pitch Elite<br />
10 Pitc h Modern<br />
10 Pitch Courier<br />
PS Modern<br />
PS Executive<br />
PS 1/ 4 inch Modern<br />
PS 1/ 4 inc h Classic<br />
PS 1/3 inch Modern<br />
PS 1/3 inch Classic<br />
When a chart is reduced <strong>to</strong> fit, you don't get <strong>to</strong><br />
choose various type styles or see <strong>the</strong>m on <strong>the</strong> screen.<br />
To take advantage of <strong>the</strong> extensive Type Styles menu<br />
(Figure 7-17), which produces 264 possible combinations<br />
of type face, size and style, you have <strong>to</strong> go <strong>to</strong> actual<br />
size. (Figure 4-1 5-in <strong>the</strong> Lisa Write chapter-shows <strong>the</strong><br />
type faces and sizes; Figure 9-1 7-in <strong>the</strong> LisaDraw chapter-shows<br />
<strong>the</strong> type style possibilities.)<br />
The Format menu works as it does in LisaCalc,<br />
letting you decide how you want decimal points, dollar<br />
signs and commas <strong>to</strong> be handled in <strong>the</strong> data table, and<br />
whe<strong>the</strong>r you want <strong>the</strong> information in a cell <strong>to</strong> be centered,<br />
flush left or flush right.
151 Making Business Charts with LisaGraph<br />
Figure 7-18<br />
Fi le/Print Edit Type Style Page Layout Format Graph Cus<strong>to</strong>mize<br />
u<br />
111111 Easy as Pie 111111<br />
.·<br />
1<br />
2<br />
3<br />
4<br />
5<br />
6<br />
7<br />
8<br />
vean11 SS.les Totals<br />
i!OOOOO .----,<br />
UJnds troM<br />
D<br />
Perrotta<br />
g;jl<br />
St1irre<br />
.<br />
D<br />
One o<strong>the</strong>r feature of <strong>the</strong> Cus<strong>to</strong>mize menu (Figure<br />
7-1 1) is worth mentioning-<strong>the</strong> ability <strong>to</strong> add grid lines.<br />
Figure 7-18 shows how this looks.<br />
For fur<strong>the</strong>r cus<strong>to</strong>mization, you can move Lisa<br />
Graph charts in<strong>to</strong> LisaDraw, <strong>the</strong> queen of <strong>the</strong> Lisa <strong>to</strong>ols.<br />
But before I cover that, I want <strong>to</strong> describe ano<strong>the</strong>r kind<br />
of charting program that can also be cus<strong>to</strong>mized in Lisa<br />
Draw-LisaProject.
8 Scheduling and<br />
Job Tracking with<br />
LisaProject<br />
LisaProject helps you plan and/ or keep track of any<br />
kind of project by creating wall charts up <strong>to</strong> 32 square<br />
feet in size (using as many as sixty different sheets of<br />
paper).<br />
When you tear off a sheet of LisaProject Paper and<br />
open <strong>the</strong> document thus created, you get a window that<br />
looks like Figure 8-1. You'll notice that we have a new<br />
kind of pointer-a small, solid cross. This is called <strong>the</strong><br />
drawing pointer and it's used <strong>to</strong> draw boxes and lines.<br />
If your project is very simple, you just draw a line<br />
from <strong>the</strong> circle labeled "start" <strong>to</strong> <strong>the</strong> one labeled "end".<br />
But most projects are somewhat more complicated<br />
than that.<br />
The first thing you need <strong>to</strong> know is how <strong>to</strong> move<br />
circles and o<strong>the</strong>r visual elements around. You select<br />
one <strong>the</strong> same way you select anything on <strong>the</strong> Lisa-by<br />
moving <strong>the</strong> pointer <strong>to</strong> it and clicking <strong>the</strong> but<strong>to</strong>n. But<br />
it's a little more tricky than that. If you put <strong>the</strong> drawing<br />
pointer inside a circle, it turns in<strong>to</strong> a text pointer (that's<br />
so you can change <strong>the</strong> text inside <strong>the</strong> circle if you want).<br />
If you move it just <strong>to</strong> <strong>the</strong> edge of <strong>the</strong> circle, however,<br />
it turns in<strong>to</strong> an arrow-that's when you have <strong>to</strong> click<br />
<strong>to</strong> select <strong>the</strong> circle.<br />
153
154 Introduction <strong>to</strong> <strong>the</strong> Lisa<br />
LJ<br />
Figure 8-1<br />
Fi le/Print Edit Type Style Page Layout Cus<strong>to</strong>mize Chart<br />
lllD'll\\ll!l.\!lllZVJllmmlllml:llllmmalllll:llll--ml'IBEIBllllD\il<br />
Title<br />
SubTitle<br />
/_,,,- .. ,,\<br />
/ \<br />
l s t8.rt ,i<br />
\ I<br />
\ . ... ___ .J>,,,,·
155 Scheduling and Job Tracking with LisaProject<br />
Figure 8-2<br />
File/Print Edit Type Style Page Layout Cus<strong>to</strong>mize Chart<br />
mm.l'lmllmlllmlllliDlZmmllmlllml!/£llmllllm:llll:mmlllllil'llll'l!=m:m=imi<br />
LJ<br />
Titl e<br />
SubTitle<br />
,.-,,-- ... ...<br />
()<br />
Lisa.caic<br />
In LisaProject, things don't show <strong>the</strong>y're selected<br />
by becoming highlighted. Instead, <strong>the</strong>y turn grey and<br />
grow two <strong>to</strong> eight little bumps-which are called handles.<br />
Figure 8-2 shows you what a selected object looks<br />
like.
lB'lllZl\lll=m:lll7/l"1llmlllElllllEll:mlmll&:amlllimBlllDlllli<br />
156 Introduction <strong>to</strong> <strong>the</strong> Lisa<br />
<br />
Figure 8-3<br />
File/Print Edit Type Style Page Layout Cus<strong>to</strong>mize Chart<br />
Title<br />
SubTitle<br />
.\<br />
( end)<br />
\...__<br />
Lisaca1c
157 Scheduling and Job Tracking with LisaProject<br />
u<br />
Figure 8-4<br />
F i le/Print Edit Type Style Page Layout Cus<strong>to</strong>mize Chart<br />
,,, ; ' ,<br />
Ill.II 111111<br />
Untitled<br />
llillllrllmmllllEmmEl'lllllmlmml!IEmmlllll'llll'lllll--mllllji<br />
Title<br />
SubTitle<br />
Lisacalc LlsaPro ect LisaJ·Jrite L!saflr · Lisanraw Lisa.List Calcula<strong>to</strong>r<br />
When you move a selected circle (by holding <strong>the</strong><br />
but<strong>to</strong>n down and moving <strong>the</strong> pointer), it leaves a shadow<br />
in its original location (Figure 8-3). When you release<br />
<strong>the</strong> mouse but<strong>to</strong>n, <strong>the</strong> circle disappears from <strong>the</strong> old<br />
location and <strong>the</strong> pointer turns back in<strong>to</strong> a cross (Figure<br />
8-4).<br />
Circles like <strong>the</strong> one I've been moving around are<br />
called miles<strong>to</strong>ne circles, because <strong>the</strong>y represent important<br />
events in your project. LisaProject uses two o<strong>the</strong>r<br />
basic visual elements-"task boxes" and "arrows".<br />
Task boxes are rectangles that represent one particular<br />
job. They also indicate <strong>the</strong> resources needed <strong>to</strong> do<br />
that job and <strong>the</strong> time it takes each resource <strong>to</strong> make
158 Introduction <strong>to</strong> <strong>the</strong> Lisa<br />
u<br />
Figure 8-5<br />
File/Print Edit Type Style Page Layout Cus<strong>to</strong>mize Chart<br />
l'lllWIDDlmlillmlilWillllmllSll\lll'lll'IAl!llllJl'llmE'llll'lll'IAl!ll'llEIEllmlllllmEllji<br />
Title<br />
SubTitle<br />
Lisacaic<br />
its contribution. (Miles<strong>to</strong>ne circles don't indicate ei<strong>the</strong>r<br />
of <strong>the</strong>se things).<br />
To draw a task box, you place <strong>the</strong> drawing pointer<br />
where you want one corner of <strong>the</strong> box <strong>to</strong> be, <strong>the</strong>n hold<br />
<strong>the</strong> but<strong>to</strong>n down and move <strong>the</strong> pointer <strong>to</strong> where you<br />
want <strong>the</strong> opposite (diagonal) corner of <strong>the</strong> box <strong>to</strong> be.<br />
You can make <strong>the</strong> box any size you want, as Figures<br />
8-5 and 8-6 demonstrate.
159 Scheduling and Job Tracking with LisaProject<br />
u<br />
Figure 8-6<br />
Fi I e /Print Edit Type Sty I e Page Layout Cus<strong>to</strong>mize Chart<br />
lll'lmll\l:ml&'l.=Dl11mEm=zw11m11/m/m=mllZl51l'ZIDllDl>llllmlm1<br />
/,----...<br />
/<br />
,..<br />
I, :. ort<br />
'"\,,<br />
Title<br />
\,_ _ _..,../<br />
/,,.,-- ..._,<br />
( \<br />
(: end )<br />
''-._.,,,/<br />
Lisaclc
160 Introduction <strong>to</strong> <strong>the</strong> Lisa<br />
LJ<br />
Figure 8-7<br />
File/Print Edit Type Style Page Layout Cus<strong>to</strong>mize Chart<br />
=wm=wmllll'iZlllll'lll:mlmSll/ml\l!a=llll!l/llllmllllmmlmmlllll'llll'lllllillll-<br />
0<br />
[]<br />
/-- ... ,<br />
. ( \<br />
\ star t )<br />
Title<br />
Sut1Ti tle<br />
\',...._ ____ _,./<br />
Lisacaic<br />
creation of tr1e world<br />
...............................................<br />
When you release <strong>the</strong> but<strong>to</strong>n, LisaProject draws a<br />
dotted line across <strong>the</strong> box and puts an insertion point<br />
in it (Figure 8-7). The <strong>to</strong>p half of <strong>the</strong> box is for <strong>the</strong><br />
name of <strong>the</strong> task, <strong>the</strong> bot<strong>to</strong>m half for <strong>the</strong> resources and<br />
<strong>the</strong> time required.<br />
Once you have a box, you can stretch or shrink it<br />
by grabbing one of <strong>the</strong> handles and pulling or pushing.<br />
The four handles in <strong>the</strong> middle of <strong>the</strong> sides leave <strong>the</strong><br />
o<strong>the</strong>r dimension unchanged; <strong>the</strong> four at <strong>the</strong> corners<br />
change both height and width at <strong>the</strong> same time.<br />
You can also move a box, keeping it <strong>the</strong> same shape,<br />
by grabbing it anywhere but on one of <strong>the</strong> handles. If<br />
you want a bunch of identical boxes, you can use Copy
161 Scheduling and Job Tracking with LisaProject<br />
Figure 8-8<br />
Fi le/Print Edit Type Style Page Layout Cus<strong>to</strong>mize Chart<br />
BllllEllllEllllElllllElll<br />
u<br />
11111 i Untitl e d 111111<br />
0<br />
[]<br />
Title<br />
SubTitle<br />
B<br />
I ------------ j I<br />
- ------ ----- - -----------j 1-------------------------j<br />
- -----------<br />
!---- -----------------------------------.<br />
-<br />
- - - - - ---1 I<br />
on <strong>the</strong> Edit menu (as described in <strong>the</strong> LisaWrite<br />
chapter).<br />
I used all <strong>the</strong>se techniques <strong>to</strong> produce Figure 8-8.<br />
In Figure 8-9, I changed <strong>the</strong> title of <strong>the</strong> chart, <strong>the</strong> subtitle,<br />
and <strong>the</strong> text in <strong>the</strong> miles<strong>to</strong>ne circles, and filled in<br />
appropriate information in <strong>the</strong> task boxes (with <strong>the</strong> help<br />
of King James and friends).<br />
The resources section of a task box usually indicates<br />
<strong>the</strong> person or people responsible for <strong>the</strong> task, or<br />
<strong>the</strong> equipment needed <strong>to</strong> complete it. But <strong>the</strong> responsible<br />
"person" for every task in Figure 8-9 is God, and<br />
it wouldn't be very interesting simply <strong>to</strong> repeat that in<br />
each box. So I've used <strong>the</strong> resources sections <strong>to</strong> indicate
162 Introduction <strong>to</strong> <strong>the</strong> Lisa<br />
u<br />
Figure 8-9<br />
File/Print Edit Type Style Page Layout Cus<strong>to</strong>mize Chart<br />
+<br />
-=m===z::::l&\lmEl'll'lmli:mlll\llll-.i!Di<br />
//"----,\<br />
( beginning ,)<br />
\,...___..,,/<br />
Creation of <strong>the</strong> World<br />
First Week<br />
'aters 1<br />
Li grit<br />
D8r
163 Scheduling and Job Tracking with LisaProject<br />
u<br />
Figure 8-10<br />
File/Print Edit Type Style Page Layout Cus<strong>to</strong>mize Chart<br />
ll\lllll'lllmll23/QlllD///lill\lllll'lllll\lllll'lll'1.l:mll\lllll'lllll2illllirlllll&'l\Dll'!lllli<br />
0<br />
[]<br />
/,,.---,·,,,<br />
I<br />
'.<br />
( t,egirf1ir11 .:1<br />
\... '1 ,/'<br />
1<br />
Darl
13131llZ1lmllllZllilm=mlmlmlll\WlDl'lllm1lll<br />
164 Introduction <strong>to</strong> <strong>the</strong> Lisa<br />
u<br />
Figure 8-1 1<br />
File/Print Edit Type Style Page Layout Cus<strong>to</strong>mize Chart<br />
0<br />
tJ<br />
/,..,..- ....__<br />
( \<br />
( oeg inr11ng )<br />
(<br />
Li gri t<br />
OarKness 1<br />
Heaven<br />
1,1aters 1<br />
7<br />
• . "I<br />
L<br />
\<br />
sun/Moon/Stars<br />
\<br />
wa.ters 1<br />
Crea. lion of <strong>the</strong> World<br />
First Week<br />
l...eJ'1d an i Mal S/r1uMan Bei ngs<br />
.-"·<br />
/<br />
si:a an i Ma.ls!Birds<br />
flaters 1<br />
!Mages 1<br />
,7<br />
Figure 8-12<br />
../Schedule<br />
Resource<br />
Task
165 Scheduling and Job Tracking with LisaProject<br />
LJ<br />
Figure 8-13<br />
File/Print Edit Type Style Page Layout Cus<strong>to</strong>mize Chart<br />
l/ll/lml:D=zllll=zllllZmlllll/a'1l&ll!mrmEmmmmlmllllmllm<br />
1/3;'53 1/10/3 1/17/83 1./31/83<br />
Title<br />
SubTi tle<br />
S!Jrvl10•)fl/St8l·$<br />
8. 8rt ine.ls/Ci i ri::ls<br />
rkness<br />
ters<br />
[Wa'tm<br />
'--'<br />
I f.1e.ters I<br />
@lages<br />
8-1 1 shows all <strong>the</strong> boxes and circles connected with<br />
such lines.<br />
Well, that should give you a good basic idea of how<br />
you create a LisaProject chart. (I should add that you<br />
don't have <strong>to</strong> be as doggedly linear as I-and Godwere<br />
here; you can draw lines from more than one box<br />
<strong>to</strong> more than one box-as I have, for example, in Figure<br />
8-15.)<br />
But LisaProject is just getting started. So far we've<br />
just created one of <strong>the</strong> three kinds of LisaProject<br />
charts-as <strong>the</strong> Chart menu in Figure 8-12 indicates.<br />
The Schedule chart is <strong>the</strong> only one you create yourself;<br />
LisaProject creates <strong>the</strong> o<strong>the</strong>r two for you.
166 Introduction <strong>to</strong> <strong>the</strong> Lisa<br />
Figure 8-13 shows <strong>the</strong> Task chart LisaProject made<br />
from <strong>the</strong> "Creation of <strong>the</strong> World" Schedule chart. It<br />
places your project in a time frame and shows when<br />
each task will be completed (as well as when each resource<br />
will be used).<br />
Since we haven't <strong>to</strong>ld it any different, LisaProject<br />
assumes <strong>the</strong> creation of <strong>the</strong> world began on Monday,<br />
January 3, 1983. It also assumes that God works a fiveday<br />
week, which is why it shows <strong>the</strong> creation of sea<br />
animals and birds (day five) as lasting from Fridaywhen<br />
it begins-through Saturday and Sunday.<br />
Both <strong>the</strong>se misapprehensions can be corrected, of<br />
course. We can inform LisaProject that <strong>the</strong> project began<br />
in 4004 B.c., not 1983 A.D., and that God works Monday<br />
through Saturday but takes Sunday off (or begins<br />
on Sunday and takes Saturday off, if you prefer). Lisa<br />
Project lets you specify a work week of from one <strong>to</strong><br />
seven days (an easy choice) and you can also insert<br />
up <strong>to</strong> twenty vacation days in<strong>to</strong> a project schedule.<br />
(As you can see from Figure 8-13, LisaProject needs<br />
<strong>to</strong> be given a new title and subtitle for each type of<br />
chart; <strong>the</strong> changes made on <strong>the</strong> Schedule chart don't<br />
transfer.)<br />
Figure 8-14 shows <strong>the</strong> Resource chart LisaProject<br />
made from <strong>the</strong> "Creation of <strong>the</strong> World" Schedule chart.<br />
Here <strong>the</strong> tasks are grouped by resource, giving you a<br />
clear picture of how much each resource will be used.<br />
For example, this particular chart makes it clear that<br />
"<strong>the</strong> waters" (both those above and below <strong>the</strong> firmament)<br />
get quite a workout, while o<strong>the</strong>r resources are<br />
used more sparingly. In more down-<strong>to</strong>-earth applications,<br />
<strong>the</strong> Resource chart helps you see which people,<br />
pieces of equipment and so on, are being over- or underutilized.<br />
Both <strong>the</strong> Resource and Task charts indicate when<br />
a task has slack time-that is, when it can be late without<br />
making <strong>the</strong> whole project late. If a task has no slack<br />
time, it's critical.<br />
LisaProject gives you <strong>the</strong> same selection of type<br />
fonts as LisaWrite (Figures 4- 14 and 4-15)-without,
=-=--=--==mil<br />
167 Scheduling and Job Tracking with LisaProject<br />
LJ<br />
Figure 8-14<br />
File/Print Edit Type Style Page Layout Cus<strong>to</strong>mize Chart<br />
1/31133<br />
1/10./83 1/17/33<br />
1/31/83<br />
!Mages<br />
n.111oon/S'.tars<br />
i !<br />
Bnd an i Ma.I s/HuMan; beings<br />
of course, subscripting and superscripting. The Page<br />
Layout menu lets you see charts actual size or reduced<br />
<strong>to</strong> fit <strong>the</strong> window. The latter is useful when you have<br />
large charts that extend on<strong>to</strong> many pages and you simply<br />
want <strong>to</strong> get an idea of <strong>the</strong>ir overall shape. Figure<br />
8-15 shows such a chart reduced <strong>to</strong> fit; <strong>the</strong> text has been<br />
dropped because <strong>the</strong>re isn't room for it.<br />
You can reduce charts <strong>to</strong> 70% of <strong>the</strong>ir current size,<br />
and you can do that over and over again (until Lisa<br />
Project reaches <strong>the</strong> limit of what it can display intelligibly<br />
on <strong>the</strong> screen).<br />
The Cus<strong>to</strong>mize menu is where you change time<br />
frames and ask <strong>to</strong> have dates displayed on a Schedule
168 Introduction <strong>to</strong> <strong>the</strong> Lisa<br />
Figure 8-15<br />
File/Print Edit Type Style Cus<strong>to</strong>mize Chart<br />
r-·1 1--------------1<br />
'-\ 1··;···:···1<br />
/<br />
1 . ... . .... ..... 1 l··---·----·---l :::·I ----------: ... 1<br />
\1. . .--·----- <br />
/
9 Drawing Diagrams<br />
and Pictures with<br />
LisaDraw<br />
LisaDraw is probably Lisa's most impressive program.<br />
Unlike Lisa Graph and LisaProject, which prepare specific<br />
kinds of graphic presentations, LisaDraw is a relatively<br />
unstructured and unrestricted <strong>to</strong>ol that you can<br />
use <strong>to</strong> create just about any kind of diagram, chart, illustration,<br />
map or symbol you're capable of imagining.<br />
Few graphics programs-at any price, on any computer-have<br />
more capabilities.<br />
When you tear off a sheet of LisaDraw Paper and<br />
open <strong>the</strong> document thus created, you get a window that<br />
looks like Figure 9-1. The symbols arranged down <strong>the</strong><br />
left side of <strong>the</strong> window-called <strong>the</strong> palette-represent<br />
a library of predrawn graphic elements. You select <strong>the</strong><br />
one closest <strong>to</strong> what you want and <strong>the</strong>n modify its shape<br />
and size with <strong>the</strong> pointer.<br />
In Figure 9-1, <strong>the</strong> <strong>to</strong>p box (<strong>the</strong> one with <strong>the</strong> arrow<br />
pointer in it) is grey-which means that it's currently<br />
selected. As a result, <strong>the</strong> pointer is in <strong>the</strong> shape of an<br />
arrow. In LisaDraw, you use <strong>the</strong> arrow pointer <strong>to</strong> alter<br />
an object you've already drawn, or <strong>to</strong> select a new type<br />
of object from <strong>the</strong> palette.<br />
Let's move <strong>the</strong> pointer <strong>to</strong> <strong>the</strong> circle box and click<br />
<strong>the</strong> but<strong>to</strong>n (Figure 9-2). The circle box turns grey (and<br />
<strong>the</strong> arrow-pointer box turns white). When you move<br />
<strong>the</strong> pointer back out of <strong>the</strong> box on<strong>to</strong> <strong>the</strong> drawing space,<br />
it becomes a small, solid cross; as you know from Lisa<br />
Project, this is <strong>the</strong> drawing pointer.<br />
169
170<br />
Introduction <strong>to</strong> <strong>the</strong> Lisa<br />
Figure 9-1<br />
Edit Type Style Page Layout Arrangement Lines Shades<br />
111111 Untitled<br />
!!Ill<br />
Ti;_xt<br />
+<br />
"""<br />
D<br />
0<br />
0<br />
<br />
Jl,<br />
t:-··-1<br />
-..J<br />
··.'.' .............. .<br />
'!!ii!llili<br />
Calcula<strong>to</strong>r<br />
Figure 9-2<br />
n<br />
iilli<br />
-....\
171 Drawing Diagrams and Pictures with LisaDraw<br />
.u<br />
Figure 9-3<br />
Fi le/Print Edit Type Style Page Layout Arrangement Lines Shades<br />
ifffl Untit led 111111<br />
0<br />
[]<br />
+<br />
·· .... _<br />
·· . .,<br />
D<br />
()<br />
!II<br />
.... ---: ..<br />
( )<br />
. . ":---.-"':' + .<br />
--,\<br />
(\<br />
' - -'<br />
t' .. <br />
L.,..·· /<br />
--J<br />
Once <strong>the</strong> circle box is selected, you're ready <strong>to</strong> create<br />
a circle or oval of any size or shape. You simply:<br />
1. move <strong>the</strong> drawing pointer <strong>to</strong> where you want<br />
<strong>to</strong> "stick" one edge of <strong>the</strong> object;<br />
2. press <strong>the</strong> mouse but<strong>to</strong>n; and<br />
3. move <strong>the</strong> pointer.<br />
In Figure 9-3, I've done that and created a horizontal<br />
oval. Now let's alter that shape:<br />
As soon as you let up on <strong>the</strong> but<strong>to</strong>n, <strong>the</strong> shape you've<br />
drawn is selected. (You can also select any object at<br />
any later time by moving <strong>the</strong> arrow pointer <strong>to</strong> it and<br />
clicking <strong>the</strong> but<strong>to</strong>n.) Note that <strong>the</strong> pointer becomes an
172 Introduction <strong>to</strong> <strong>the</strong> Lisa<br />
Figure 9-4<br />
Fi le/Print Edit Type Style Page Layout Arrangement Lines Shcides<br />
p0 ... -- ... ... ...m; ..., ....,_<br />
_ ... ...,; ... ... ... ... ..., ... ... ... ... ... ...<br />
1·,.,i:1i1i<br />
lrll 11 lint it I ed 111111<br />
+<br />
"'<br />
D<br />
0 ..... ..... ... .. ... .. .. .<br />
0<br />
.... 3::: .................................. .<br />
. .<br />
Lisacalc L1saPro ect LisaWrite L1saGr n Lisallraw LisaList<br />
arrow again and <strong>the</strong> arrow pointer box is au<strong>to</strong>matically<br />
reselected.<br />
As with LisaProject, two <strong>to</strong> eight small square boxes<br />
called handles appear all around a shape <strong>to</strong> show it's<br />
selected (see Figure 9-4-1 moved <strong>the</strong> pointer away so<br />
you'd have a clear view of <strong>the</strong>m).<br />
Now let's say you want <strong>to</strong> turn this drawing in<strong>to</strong><br />
a vertical oval. You just grab <strong>the</strong> handle that's at <strong>the</strong><br />
bot<strong>to</strong>m and pull (i.e. you put <strong>the</strong> tip of <strong>the</strong> pointer right<br />
on <strong>the</strong> handle and hold down <strong>the</strong> mouse but<strong>to</strong>n while<br />
you move <strong>the</strong> pointer). Figure 9-5 shows one of <strong>the</strong><br />
many possible results. (The handles disappear while<br />
you're changing <strong>the</strong> shape of <strong>the</strong> object, but reappear<br />
as soon as you release <strong>the</strong> mouse but<strong>to</strong>n.)
173 Drawing Diagrams and Pictures with LisaDraw<br />
Figure 9-5<br />
Edit Type Style Page Layout Arrangement Lines Shades<br />
11111 1 Untitled 1 11111<br />
+ . .<br />
""<br />
D<br />
0 ... .. ...... .. ... ..<br />
0<br />
r\:<br />
I .<br />
. :,. ................<br />
I<br />
I<br />
. . . . . • ..<br />
I • I<br />
·<br />
· · · · · · · · t<br />
J<br />
\(<br />
Lisa.Gale L1sa.orci ect Lisa.Write Lisa.Gr n Lisanra.w Lisa.List<br />
.... ..... .<br />
Calcula<strong>to</strong>r<br />
<br />
· o<br />
[j "5l
174 Introduction <strong>to</strong> <strong>the</strong> Lisa<br />
Figure 9-6<br />
File/Print Edit Type Style Page Layout Arrangement Lines Shades<br />
u ... ... ... ... ... ... ... .._<br />
11111 Untitled lllill<br />
+<br />
<br />
D<br />
0<br />
. /,<br />
·<br />
/ \<br />
,' :\<br />
I<br />
·<br />
I 1<br />
I • 1<br />
· I<br />
1' ;I<br />
I J . .<br />
I<br />
.<br />
: I<br />
1 I<br />
r .. : 1 ·<br />
\ I<br />
I<br />
I<br />
:. I<br />
I<br />
· · · · · · · · · · · · ·<br />
. . . . . . . . . . . .<br />
. . . . . . . . . • 1. . . . . . . . 1 · · · · · · · · · · · · · · • · · · · · · · · · · · · · · • · · • · · · · · · · · . . . . . . . . . • . . • . . . .<br />
I · I<br />
I<br />
I ·I<br />
\ /<br />
You can also stretch <strong>the</strong> oval up by grabbing <strong>the</strong><br />
<strong>to</strong>p handle (Figure 9-6) or pull it sideways in<strong>to</strong> a circle<br />
(Figure 9-7). And, of course, you can move any object<br />
you draw wherever you want, just by grabbing it anywhere<br />
but on a handle.<br />
The box right above <strong>the</strong> circle box in <strong>the</strong> palette<br />
contains a rectangle with rounded corners; this shape<br />
is useful for drawing flowcharts, labels and <strong>the</strong> like.<br />
The procedure is <strong>the</strong> same as with <strong>the</strong> circle; you just<br />
place <strong>the</strong> drawing pointer where you want one corner<br />
of <strong>the</strong> shape <strong>to</strong> be and pull. Figure 9-8 shows an example<br />
of <strong>the</strong> result.
. /<br />
175 Drawing Diagrams and Pictures with LisaDraw<br />
Figure 9-7<br />
File/Print Edit Type Style Page Layout Arrangement Lines Shades<br />
P.u !!!'"""' ... ... ... ... ... .. ..., .. _<br />
1··:1::11:<br />
_ ..<br />
11111 Lint it I ed. 1 11111<br />
... ... ... .. ... ... ... ... ... .. """"i<br />
+<br />
D<br />
n<br />
LisaJ:c<br />
L1sa.oro ect<br />
Figure 9-8<br />
..<br />
. . . . l ...
176 Introduction <strong>to</strong> <strong>the</strong> Lisa<br />
Figure 9-9<br />
Edit Type Style Page Layout Arrangement Lines Shades<br />
111111Untitled 111111<br />
·r:<br />
. . . . . .<br />
LisaDraw LisaList Calcula<strong>to</strong>r<br />
The next box up contains a regular, square-cornered<br />
rectangle. Both <strong>the</strong>se kinds of rectangles can be<br />
stretched, shrunk and expanded once <strong>the</strong>y've been created,<br />
in just <strong>the</strong> way that circles can. LisaDraw also<br />
lets you superimpose any shape on any o<strong>the</strong>r, as I have<br />
in Figure 9-9.<br />
(In Figure 9-8, I printed <strong>the</strong> screen before I had<br />
released <strong>the</strong> but<strong>to</strong>n, which is why <strong>the</strong> pointer is still a<br />
cross; in Figure 9-9, I released <strong>the</strong> but<strong>to</strong>n but <strong>the</strong>n deselected<br />
<strong>the</strong> square-by clicking elsewhere in <strong>the</strong> drawing<br />
area-so you wouldn't be distracted by <strong>the</strong> handles.)<br />
The next box up in <strong>the</strong> palette is for diagonal lines.<br />
When you select this box, move <strong>the</strong> pointer out in<strong>to</strong>
177 Drawing Diagrams and Pictures with LisaDraw<br />
Figure 9-10<br />
File/Print Edit Type Style Page Layout Arrangement<br />
Lines<br />
Shades<br />
u ... ... ... ... ... ... ... .. ... ... ... .. ... ... ... ... .. ... .. 111<br />
1.::1:11:<br />
111111 lint it I ed 111111<br />
+<br />
"""···<br />
D<br />
n<br />
t. ""/i/<br />
--.1<br />
Lisaceic<br />
LlsaPro ect<br />
Calcula<strong>to</strong>r<br />
<strong>the</strong> drawing area and hold down <strong>the</strong> mouse but<strong>to</strong>n, you<br />
stick one end of a line <strong>to</strong> a particular spot. As you move<br />
<strong>the</strong> pointer, a line grows from that original spot until<br />
you release <strong>the</strong> but<strong>to</strong>n (Figure 9-10). I left <strong>the</strong> handles<br />
on this time, so you can see how lines look when <strong>the</strong>y're<br />
selected.<br />
The diagonal line box doesn't restrict you <strong>to</strong> lines<br />
that run at angles; you can also use it <strong>to</strong> make horizontal<br />
and vertical lines if you want. But <strong>to</strong> make lines that<br />
you know for sure are perfectly horizontal or vertical,<br />
use <strong>the</strong> next box up. If you move <strong>the</strong> pointer at an angle<br />
with this box selected, LisaDraw will figure out whe<strong>the</strong>r<br />
you're moving it closer <strong>to</strong> horizontal or vertical and<br />
draw <strong>the</strong> line that way. Huh
178 Introduction <strong>to</strong> <strong>the</strong> Lisa<br />
Figure 9-1 1<br />
File/Print Edit Type Style Page Layout Arrangement Lines<br />
Shades<br />
P.u!!!!'!"""' .. ... .. ...m.;-- ....,_ ---==m.... ... ... ... ... ... ... ... ... ... 1111"'1!<br />
<br />
D<br />
n<br />
()<br />
For example, in Figure 9-1 1, I stuck <strong>the</strong> beginning<br />
of <strong>the</strong> line near <strong>the</strong> left edge of <strong>the</strong> drawing area, right<br />
between <strong>the</strong> horizontal/vertical line box and <strong>the</strong> diagonal<br />
line box. Then I moved <strong>the</strong> pointer just a little bit<br />
<strong>to</strong> <strong>the</strong> south of sou<strong>the</strong>ast-and LisaDraw drew a straight<br />
north-south line.<br />
If I were <strong>to</strong> move <strong>the</strong> pointer all <strong>the</strong> way east <strong>to</strong><br />
<strong>the</strong> o<strong>the</strong>r side of <strong>the</strong> big circle-but not move it ano<strong>the</strong>r<br />
millimeter south-<strong>the</strong> line wouldn't change. It will only<br />
respond <strong>to</strong> north-south movement. If I moved <strong>the</strong><br />
pointer all <strong>the</strong> way <strong>to</strong> <strong>the</strong> <strong>to</strong>p of <strong>the</strong> screen (regardless<br />
of how far <strong>to</strong> <strong>the</strong> left or right it was), <strong>the</strong> line would<br />
shrink right up <strong>to</strong> <strong>the</strong> beginning point and would <strong>the</strong>n<br />
begin <strong>to</strong> extend north.
179 Drawing Diagrams and Pictures with LisaDraw<br />
Figure 9-1 2<br />
File/Print Edit Type Style Page Layout Arrangement Lines<br />
P.LJ !!!!"""' ... ... .. ....- ... .. _<br />
.11·<br />
11:11·<br />
+<br />
"-.._,<br />
D<br />
n<br />
....... ......... _..<br />
•<br />
.<br />
--.:.....:._:_<br />
--...,,:<br />
<br />
L ' .<br />
' ' ' ' ' ' ' ' ' ' ' ' ' ' '\' ''<br />
\ \'<br />
·<br />
y<br />
. : ·<br />
11111 1 Untitled 111111<br />
Shades<br />
_ ... ... ... ... ... ... ... ... ... ... ... ..._<br />
·<br />
........ · . '\.•... ·<br />
. /<br />
/<br />
. . / \ ....... ... .<br />
I \<br />
l<br />
/<br />
..... -....<br />
.<br />
·- -<br />
,<br />
""-.... ____ ,_<br />
/<br />
__/(<br />
Lisacalc L1saPro ect Lisawrite L1saGr h Lisaoraw LisaList Calcula<strong>to</strong>r<br />
If I had originally moved <strong>the</strong> pointer more <strong>to</strong>ward<br />
<strong>the</strong> east than <strong>the</strong> south-<strong>to</strong>ward <strong>the</strong> <strong>to</strong>p of <strong>the</strong> rectangle<br />
with <strong>the</strong> rounded corners, for example-LisaDraw<br />
would have locked in<strong>to</strong> horizontal, ra<strong>the</strong>r than vertical,<br />
mode. From <strong>the</strong>n on it would only have responded <strong>to</strong><br />
<strong>the</strong> east-west component in <strong>the</strong> pointer's movement and<br />
would have ignored <strong>the</strong> north-south component.<br />
If you happen <strong>to</strong> accidentally begin in <strong>the</strong> wrong<br />
direction-and thus find yourself stuck with a horizontal<br />
line, say, ra<strong>the</strong>r than a vertical one-just release <strong>the</strong><br />
but<strong>to</strong>n (which au<strong>to</strong>matically completes <strong>the</strong> line and selects<br />
it), go up <strong>to</strong> <strong>the</strong> Edit menu, Cut <strong>the</strong> line, and begin<br />
again. (It's quite handy that LisaDraw au<strong>to</strong>matically se-
180 Introduction <strong>to</strong> <strong>the</strong> Lisa<br />
IF.!!!!<br />
F<br />
!""<br />
l e<br />
i '""<br />
... l<br />
P .. r i nt<br />
... ... ..<br />
E<br />
..... ... d ... • t ·<br />
T ...<br />
... Y=P ..<br />
Figure 9-13<br />
e s t ... .a .. y I e ...<br />
Ll 11111 ! Untitled 11111<br />
Page Layout A ...<br />
r .. ra<br />
... .. n ... g e m ... .. e ... n t L ... ... ... i n e s s ...<br />
...<br />
...<br />
h a ... .. d ... es ... ... ... .,. ...<br />
·<br />
T!i.,Xt ' " ' ' i; <br />
g <br />
"" ' --· /<br />
· · ··· · · ··········· ··<br />
+ . .. .. .. I<br />
...<br />
i . . .<br />
..<br />
_<br />
"""'\ .-r.-<br />
.. "":t:."".=.".. ===+----·----- ---- ------ --- -------l- • ···•.....•...<br />
.<br />
.<br />
"--- _ __/<br />
•<br />
• · - '<br />
. • . - --- --'\<br />
<br />
· · ····o<br />
Calcula<strong>to</strong>r<br />
ODJ<br />
lects what you've just finished drawing, so you can edit<br />
it or delete if you decide it isn't what you want.)<br />
Now let's jump down <strong>to</strong> <strong>the</strong> box below <strong>the</strong> circle<br />
box on <strong>the</strong> palette, <strong>the</strong> one that contains a curved line.<br />
It works <strong>the</strong> same way as <strong>the</strong> diagonal line-except<br />
when you draw it, LisaDraw au<strong>to</strong>matically curves <strong>the</strong><br />
line (Figure 9-12).<br />
How much a line curves can vary, of course, and<br />
that's why you get eight handles <strong>to</strong> work with instead<br />
of <strong>the</strong> two you get with a straight line. In Figure 9-13,<br />
I've grabbed <strong>the</strong> curve by <strong>the</strong> middle handle on <strong>the</strong> right<br />
side and stretched it all <strong>the</strong> way out <strong>to</strong> <strong>the</strong> right edge<br />
of <strong>the</strong> window (thus making it much less curved).
181 Drawing Diagrams and Pictures with LisaDraw<br />
The next box down in <strong>the</strong> palette contains <strong>the</strong> freehand<br />
symbol; it's used <strong>to</strong> draw lines that are nei<strong>the</strong>r<br />
straight or regularly curved. You just draw on <strong>the</strong> screen<br />
with <strong>the</strong> pointer. It takes a pretty steady hand <strong>to</strong> take<br />
advantage of this freehand capability; as you can see<br />
from Figure 9-14, I don't have one.<br />
Figure 9-14<br />
The next box down is used <strong>to</strong> draw polygons o<strong>the</strong>r<br />
than rectangles; <strong>the</strong>y can be as complex and/ or bizarre<br />
as you want <strong>the</strong>m <strong>to</strong> be (Figure 9-15). The polygon symbol<br />
works somewhat differently than <strong>the</strong> o<strong>the</strong>r palette<br />
items. You click at each corner and LisaDraw keeps<br />
generating lines until you return <strong>to</strong> <strong>the</strong> starting point.<br />
Figure 9-15<br />
\<br />
I<br />
J ": ..----\<br />
1 . .. .. .':-::(······\\ ...<br />
I ,. / . )<br />
1·'<br />
''·<br />
/<br />
. /.<br />
J > /· /<br />
; f · ·' ·<br />
/ . \ : ____ _,..,,..<br />
-----/-..:;.__ ··<br />
/'<br />
.. . ...<br />
\ '
Introduction <strong>to</strong> <strong>the</strong> Lisa<br />
You can also complete a polygon by double-clicking<br />
at any point. This allows you <strong>to</strong> draw open, straightline<br />
shapes much more easily than if you used diagonal<br />
lines. A modest example is shown in Figure 9-16.<br />
Figure 9-16<br />
The empty space below <strong>the</strong> polygon symbol in <strong>the</strong><br />
palette is . . . empty space, awaiting new and exciting<br />
predrawn shapes that will doubtless be included in later<br />
versions of LisaDraw.<br />
Unlike Lisa Write, which gives you a measly 88 type<br />
fonts (face, size and style combinations) <strong>to</strong> choose from,<br />
LisaDraw (and LisaGraph) give you 264! You get <strong>the</strong><br />
same eleven type faces and sizes, but instead of a mere<br />
eight type styles in each face and size, you get 24 (thanks<br />
<strong>to</strong> <strong>the</strong> addition of <strong>the</strong> hollow and shadow type styles).<br />
Figure 9-17 displays <strong>the</strong> possibilities (and Figure 4-15<br />
shows <strong>the</strong> eleven type faces and sizes you can combine<br />
<strong>the</strong>m with).<br />
You may notice that I haven't combined hollow<br />
and shadow; that's because shadow is simply an enhancement<br />
of hollow. Hollow shadow is just like<br />
shadow-<strong>the</strong>re's no difference between <strong>the</strong>m.<br />
The shadow underline styles look much better on<br />
<strong>the</strong> screen than <strong>the</strong>y do on paper. In fact, <strong>the</strong>y look<br />
so bad on paper that I'm not sure we should really count<br />
<strong>the</strong>m. If <strong>the</strong>y're eliminated, LisaDraw and LisaGraph<br />
are only capable of producing a paltry 220 distinct type<br />
fonts.<br />
There are two ways <strong>to</strong> enter text in LisaDraw. If<br />
you want it centered within an object, you just select<br />
<strong>the</strong> object and start typing. If you don't, you click in
183 Drawing Diagrams and Pictures with LisaDraw<br />
Figure 9-17<br />
w 241 llm<br />
(each available in eleven type faces and sizes)<br />
regular<br />
bold<br />
italic<br />
bold italic<br />
hollow<br />
1bxc>lkdl 100llllaFw<br />
italic lloUow<br />
/IJJoiJr/l idl8J/lJit: ll!Joll/bv<br />
l1tnMlaw<br />
1bxm1kdl<br />
regular underline<br />
bold underline<br />
italic underline<br />
bold italic underline<br />
mnow 'UllXll«fterllme<br />
MJkdl JDlJt!ltdherrlb1Jme<br />
JtN!clloOow WlderUne<br />
/IJJoiJr/l idl8J/lJit: ll!Joll/bv <br />
-llibrne<br />
lmmlkdl--<br />
Ja/IJJt: .dwdtJr JmllJc llll!JldtJJV Wl/l/l!/JedJne<br />
/IJJoiJr/l J/tZrJ//Jlt: _/i/tJiJil_//Zrlll!lt:_li.lmlJIJJJT <br />
<strong>the</strong> box marked "Text." This gives you a text pointer,<br />
with which you can deposit an insertion point.<br />
The small black up-pointing triangle (or caret) between<br />
<strong>the</strong> "e" and "x" in <strong>the</strong> Text box tells you that<br />
what you type will be centered around <strong>the</strong> insertion<br />
point, which is <strong>the</strong> default. (This doesn't mean it will<br />
be centered within an object-that depends on where<br />
you put <strong>the</strong> insertion point.) You can also choose <strong>to</strong><br />
have <strong>the</strong> text pour out <strong>to</strong> <strong>the</strong> left or right side of <strong>the</strong><br />
insertion point (if you do, <strong>the</strong> caret will shift <strong>to</strong> indicate<br />
it).<br />
Whe<strong>the</strong>r you use <strong>the</strong> Text box or <strong>the</strong> au<strong>to</strong>matic<br />
text entry function, you can grab <strong>the</strong> text you've entered<br />
at any later point and reposition it wherever you want.
184 Introduction <strong>to</strong> <strong>the</strong> Lisa<br />
u<br />
Figure 9-18<br />
Fi le/Print Edit Type Style Page Layout Arrangement Lines Shades<br />
illlll Unt1tled 111111<br />
Txt<br />
+<br />
'-..-..<br />
D<br />
0<br />
()<br />
--..:..._"""- • . . . . . . . . . . . . . . .<br />
, .<br />
'"'-\ ................. .<br />
-- \ : :<br />
--- \<br />
( Great !de8S<br />
I j<br />
rr+----- = &!<br />
<br />
--t--cin:_p-=[g :::<br />
Lessoo One:<br />
·<br />
--- ..... ....... .. ...<br />
"- ·<br />
\2<br />
·· ..
185 Drawing Diagrams and Pictures with LisaDraw<br />
Figure 9-19<br />
File/Print Edit Type Style Page Layout Arrangement Lines Shades<br />
Round Corners:<br />
D 11 16" • 1/8" D 3/16" D 114" D 3/B"<br />
( Cancel J<br />
( OK J<br />
---....<br />
•"'\<br />
. /<br />
In Figure 9-18, I've added some text <strong>to</strong> this rapidly<br />
devolving drawing of mine, and altered <strong>the</strong> type fonts<br />
for a truly classy look (hey! chacun a son gout, buddy).<br />
It feels almost strange <strong>to</strong> use <strong>the</strong> keyboard again after<br />
so long away from it. LisaDraw really is one <strong>to</strong>ol where<br />
you hardly need anything but <strong>the</strong> mouse.<br />
Are you impressed with what this <strong>to</strong>ol can do Well,<br />
you ain't seen nothing yet. Covering all of LisaDraw's<br />
capabilities would take a whole book, so I'll just mention<br />
some of <strong>the</strong> more interesting ones-like <strong>the</strong> Round Corners<br />
. . . item on <strong>the</strong> Edit menu. This lets you choose<br />
how rounded you want <strong>the</strong> corners on a rounded-corner<br />
rectangle <strong>to</strong> be! (You check your preference on <strong>the</strong> dialog<br />
box it produces, shown in Figure 9-19. The default<br />
is Ys-inch; I'll pick %-inch just <strong>to</strong> see what it looks like.)<br />
Ano<strong>the</strong>r item on <strong>the</strong> Edit menu is Smooth-it takes<br />
<strong>the</strong> kinks out of a freehand drawing. In Figure 9-20,<br />
I've smoo<strong>the</strong>d my freehand drawing-<strong>the</strong> one in <strong>the</strong><br />
lower left corner that looks sort of like a buxom anteater<br />
with wings-<strong>to</strong> make it more exquisitely wraith-like.<br />
(Figure 9-20 also shows how <strong>the</strong> %-inch rounded corners<br />
look.)
186 Introduction <strong>to</strong> <strong>the</strong> Lisa<br />
Figure 9-20<br />
File/Print Edit Type Style Page Layout Arrangement Lines Shades<br />
LJ fllil Uttit led 111111<br />
As with LisaWrite, you can have horizontal and<br />
vertical rulers displayed on <strong>the</strong> screen (through <strong>the</strong> Page<br />
Layout menu). But, as always, LisaDraw does Lisa Write<br />
one better-in this case by letting you cus<strong>to</strong>mize <strong>the</strong><br />
rulers so that <strong>the</strong>y measure in picas, say, or cubits, or<br />
anything you want. (I've turned <strong>the</strong> rulers on for you<br />
<strong>to</strong> look at in Figure 9-2 1.)<br />
The Page Layout menu will also let you:<br />
• turn <strong>the</strong> grid lines on and off (<strong>the</strong>y don't print out<br />
in any case);<br />
• give you <strong>the</strong> exact dimensions of any object in <strong>the</strong><br />
window;
187 Drawing Diagrams and Pictures with LisaDraw<br />
Figure 9-21<br />
file/Print Edit Type Style Page Layout Arrangement Lines<br />
F.u !!!"""' ... ... ... ... .. _<br />
Shades<br />
_ ...., ....,; ... ... ... ... ... ... ... ... ... ... ..<br />
1:1111:1:11!-::::t-'-'-.._._.__._ _..._.__,....---,-.__.__..,._<br />
Greet !de s<br />
in fimericen<br />
Lessoo One:<br />
······· · · ·········· · · · · · ·<br />
Calcula<strong>to</strong>r<br />
• show you where <strong>the</strong> page breaks will fall if your drawing<br />
is larger than one page; and<br />
• change <strong>the</strong> size of <strong>the</strong> drawing so that it occupies more<br />
pages or fewer.<br />
(Like LisaProject, LisaDraw can create drawings<br />
up <strong>to</strong> 32 square feet in size-about 60 pages. The default<br />
size is 8 X 10 inches. When you change it, it only affects<br />
<strong>the</strong> prin<strong>to</strong>ut-<strong>the</strong> drawing continues <strong>to</strong> appear on <strong>the</strong><br />
screen at <strong>the</strong> same size you created it.)<br />
The Arrangement menu lets you do <strong>the</strong> following<br />
things <strong>to</strong> objects:<br />
• shuffle which ones are on <strong>to</strong>p of which o<strong>the</strong>rs;
188 Introduction <strong>to</strong> <strong>the</strong> Lisa<br />
• group <strong>the</strong>m so you can move <strong>the</strong>m around <strong>to</strong>ge<strong>the</strong>r,<br />
change <strong>the</strong>m all at once, copy <strong>the</strong>m in one piece, etc.;<br />
• "lock" <strong>the</strong>m so you can't accidentally move, delete or<br />
change <strong>the</strong>m;<br />
• align <strong>the</strong>m by <strong>the</strong>ir <strong>to</strong>ps, bot<strong>to</strong>ms, left edges or right<br />
edges (this is useful for bulleted lists, or for lining<br />
up boxes in a flow chart);<br />
• center <strong>the</strong>m (left <strong>to</strong> right or <strong>to</strong>p <strong>to</strong> bot<strong>to</strong>m); and<br />
• align <strong>the</strong>m <strong>to</strong> <strong>the</strong> grid lines.<br />
What would you pay for all <strong>the</strong>se amazing features<br />
But wait, <strong>the</strong>re's more! For a limited time only, included<br />
absolutely free with each copy of LisaDraw are <strong>the</strong> fabulous<br />
Lines and Shades menus.<br />
The Lines menu gives you a choice of:<br />
• four line thicknesses<br />
• in black, grey or white<br />
• with or without arrowheads, at <strong>the</strong> right end or at<br />
both ends.<br />
This makes 36 possibilities in all. The default is<br />
<strong>the</strong> thinnest black line, without arrowheads.<br />
Figure 9-22
189 Drawing Diagrams and Pictures with LisaDraw<br />
Figure 9-23<br />
File/Print Edit Type Style Page Layout Arrangement<br />
Lines Shades<br />
_.. .. .. .. .. .. """'""I<br />
LJ IJil 1 1 Lint it I ed 111111<br />
# ............. ... ..<br />
In Figure 9-2 1, I changed <strong>the</strong> vertical line <strong>to</strong> <strong>the</strong><br />
widest thickness (I know that's a clumsy phrase, but<br />
try <strong>to</strong> find synonyms for "thick" in your <strong>the</strong>saurus), put<br />
arrowheads at both ends, and made it grey (white lines<br />
won't show up on a white background, of course). I<br />
changed <strong>the</strong> curved line <strong>to</strong> <strong>the</strong> next heaviest thickness,<br />
and <strong>the</strong> diagonal line <strong>to</strong> <strong>the</strong> third heaviest; I also gave<br />
it arrowheads at both ends (you can't see <strong>the</strong> one on<br />
<strong>the</strong> right because it's buried). The wraith I left alone,<br />
on <strong>the</strong> <strong>the</strong>ory that <strong>the</strong> less <strong>the</strong>re is of an ugly thing,<br />
<strong>the</strong> better.<br />
Impressive as it is, <strong>the</strong> Lines menu doesn't hold a<br />
candle <strong>to</strong> <strong>the</strong> Shades menu (Figure 9-22). The number
190 Introduction <strong>to</strong> <strong>the</strong> Lisa<br />
of choices is <strong>the</strong> same (36) but <strong>the</strong> effect of <strong>the</strong> different<br />
patterns is much more dramatic.<br />
To fill in an object, you just select it, <strong>the</strong>n go <strong>to</strong><br />
<strong>the</strong> Shades menu and select a shade. As you can see<br />
from Figure 9-23, an object doesn't have <strong>to</strong> be closed<br />
<strong>to</strong> be filled in. The wraith and <strong>the</strong> lower of <strong>the</strong> two<br />
polygons are both open, but LisaDraw has no trouble<br />
putting patterns in<strong>to</strong> <strong>the</strong>m. Also note that text is placed<br />
on a white background, so that you don't go crazy trying<br />
<strong>to</strong> read it against a bunch of stripes or checks.<br />
Sometimes you want <strong>to</strong> make <strong>the</strong> same change on<br />
a number of different objects. There are two ways <strong>to</strong><br />
have <strong>the</strong>m all selected at <strong>the</strong> same time. One is <strong>to</strong> shiftclick<br />
(hold <strong>the</strong> shift key down as you click on each<br />
object). The o<strong>the</strong>r is <strong>to</strong> use <strong>the</strong> little hand. Little hand<br />
What little hand<br />
If you press down <strong>the</strong> mouse but<strong>to</strong>n when <strong>the</strong> arrow<br />
pointer isn't on an object, hold <strong>the</strong> but<strong>to</strong>n down<br />
and move <strong>the</strong> mouse, <strong>the</strong> arrow turns in<strong>to</strong> a little hand;<br />
it draws a box just <strong>the</strong> way <strong>the</strong> drawing pointer does<br />
when <strong>the</strong> rectangle box is selected.<br />
This is called <strong>the</strong> selection box, because you put<br />
it around <strong>the</strong> objects you want <strong>to</strong> select, as I have in<br />
Figure 9-24. Unlike a normal rectangle, <strong>the</strong> selection<br />
Figure 9-24 Figure 9-25<br />
box doesn't hang around; once you've got <strong>the</strong> objects<br />
you want surrounded, you release <strong>the</strong> but<strong>to</strong>n and it disappears,<br />
leaving handles around each object (Figure<br />
9-25). Then you can do something <strong>to</strong> all of <strong>the</strong>m at <strong>the</strong><br />
same time (in Figure 9-26, I put a thicker line around<br />
<strong>the</strong>m).
191 Drawing Diagrams and Pictures with LisaDraw<br />
Figure 9-26<br />
File/Print Edit Type Style Page Layout Arrangement Lines Shades<br />
II"'!!!! ... .. .. ... ... ... ... ... .. mm;<br />
u<br />
· .<br />
. . . f/J7 . .<br />
/7\ .<br />
. · w ·<br />
Whe<strong>the</strong>r it makes more sense <strong>to</strong> shift-dick or use<br />
<strong>the</strong> little hand depends on <strong>the</strong> number of objects you<br />
want <strong>to</strong> select and where <strong>the</strong>y are in <strong>the</strong> window. Both<br />
methods group objects temporarily; once you've done<br />
something <strong>to</strong> <strong>the</strong>m, <strong>the</strong>y come unglued. If you want<br />
<strong>to</strong> permanently bond a number of objects <strong>to</strong>ge<strong>the</strong>r (until<br />
you specifically tell LisaDraw <strong>to</strong> separate <strong>the</strong>m), you<br />
use <strong>the</strong> Group Objects item from <strong>the</strong> Arrangements<br />
menu.<br />
Figure 9-26 shows at a glance why I'm a writer<br />
and not a visual artist. But hopefully it's served <strong>to</strong> demonstrate<br />
a few of LisaDraw's many capabilities, which<br />
talented artists like yourself can put <strong>to</strong> higher ends.
192 Introduction <strong>to</strong> <strong>the</strong> Lisa<br />
LisaDiaw does lots of o<strong>the</strong>r things but you've seen<br />
enough <strong>to</strong> appreciate how useful a <strong>to</strong>ol it is for creating<br />
flow charts, floor plans, organizational charts, and just<br />
about anything else that's clearer as a picture than as<br />
a bunch of words. LisaDraw is also great for cus<strong>to</strong>mizing<br />
LisaGraph and LisaProject charts-changing <strong>the</strong><br />
shades in <strong>the</strong> slices of a pie chart, for example, or altering<br />
<strong>the</strong> arrows in a job schedule <strong>to</strong> indicate different<br />
relationships.<br />
For <strong>the</strong> first year after <strong>the</strong> Lisa was announced,<br />
<strong>the</strong>re were six basic programs-<strong>the</strong> ones I've just discussed.<br />
Then in late 1983, a seventh was announced<br />
LisaTerminal. The next chapter describes it.
10 Communicating with<br />
Lisa Terminal<br />
When <strong>the</strong> Lisa was originally introduced, it was clear<br />
<strong>to</strong> everybody that something was missing-<strong>the</strong> ability<br />
<strong>to</strong> communicate with o<strong>the</strong>r computers. About a year<br />
later, this gap was filled . . . sort of. The new telecommunications<br />
program-LisaTerminal-is fairly primitive<br />
and limited in its capabilities (at least in <strong>the</strong> initial<br />
release).<br />
Basically, LisaTerminal allows <strong>the</strong> Lisa <strong>to</strong> pretend<br />
it's a terminal (a keyboard and a screen, ra<strong>the</strong>r than<br />
a stand-alone computer) so it can connect <strong>to</strong> ano<strong>the</strong>r<br />
computer. One use for this is <strong>to</strong> access public data bases<br />
like CompuServe, Dow Jones and The Source-ei<strong>the</strong>r<br />
directly, or through telecommunications networks like<br />
Telenet or Tymnet (all of which are, of course, actually<br />
computers).<br />
LisaTerminal was officially released in late 1983,<br />
but it continued <strong>to</strong> change for months afterwards; <strong>the</strong><br />
program wasn't really available until early <strong>1984</strong>. As a<br />
result (and as I expected), Apple was unable <strong>to</strong> get a<br />
copy of it <strong>to</strong> me before this book went <strong>to</strong> press (although<br />
I was able <strong>to</strong> locate a draft copy of <strong>the</strong> manual). So<br />
this chapter will tell you how LisaTerminal works in<br />
general, but I'm afraid you'll have <strong>to</strong> do without illustrations<br />
of <strong>the</strong> screen (and details of <strong>the</strong> functions).<br />
LisaTerminal is capable of simulating three common<br />
types of terminals: a DEC VT52 or VTlOO, or a<br />
193
194 Introduction <strong>to</strong> <strong>the</strong> Lisa<br />
TTY (not all <strong>the</strong> ones you'd hope for, but better than<br />
none). To communicate with a distant computer, you<br />
have <strong>to</strong> choose which of <strong>the</strong>se terminals you want <strong>the</strong><br />
Lisa <strong>to</strong> mimic, and you also have <strong>to</strong> adapt <strong>to</strong> <strong>the</strong> idiosyncracies<br />
(called pro<strong>to</strong>cols) of <strong>the</strong> o<strong>the</strong>r computer. Lisa<br />
Terminal uses a standard Lisa approach <strong>to</strong> doing this:<br />
First you tear off a piece of LisaTerminal Paper<br />
and open <strong>the</strong> window. Then you set up <strong>the</strong> document<br />
thus created <strong>to</strong> meet <strong>the</strong> pro<strong>to</strong>cols of <strong>the</strong> distant computer-let's<br />
say it's CompuServe. Finally you make a<br />
stationery pad out of <strong>the</strong> document, so <strong>the</strong> next time<br />
you want <strong>to</strong> communicate with CompuServe, all you<br />
have <strong>to</strong> do is tear off a sheet of cus<strong>to</strong>mized CompuServe<br />
Paper.<br />
You can arrange things one of two ways: so that<br />
all your interactions with <strong>the</strong> remote computer are recorded,<br />
or so that <strong>the</strong> Lisa acts just like a regular terminal,<br />
with <strong>the</strong> information scrolling off <strong>the</strong> <strong>to</strong>p of <strong>the</strong><br />
screen and in<strong>to</strong> <strong>the</strong> e<strong>the</strong>r when you're done reading<br />
it. You can also arrange <strong>to</strong> have <strong>the</strong> remote computer<br />
au<strong>to</strong>matically dialed.<br />
In addition <strong>to</strong> <strong>the</strong> File/Print and Edit menus, Lisa<br />
Terminal has two o<strong>the</strong>rs. The Setup menu accesses <strong>the</strong><br />
dialog box you use <strong>to</strong> select "computer compatibility"<br />
characteristics (so you can communicate with a particular<br />
computer). LisaTerminal offers defaults for all <strong>the</strong>se<br />
compatibility characteristics and, if you're lucky, <strong>the</strong><br />
defaults just might work (in any case, it's worth a try).<br />
If not, you use <strong>the</strong> dialog box <strong>to</strong> change <strong>the</strong>m.<br />
The Setup menu also lets you select "comfort characteristics"<br />
(like whe<strong>the</strong>r <strong>the</strong> interactions get recorded<br />
or not), cus<strong>to</strong>m functions and tab s<strong>to</strong>ps.<br />
You use <strong>the</strong> Phone menu <strong>to</strong> give <strong>the</strong> Lisa <strong>the</strong> number<br />
of <strong>the</strong> computer you want <strong>to</strong> connect with, and <strong>to</strong><br />
disconnect from it when you're finished.<br />
In addition <strong>to</strong> <strong>the</strong> LisaTerminal software, you need<br />
a modem-a device that lets computers talk <strong>to</strong> one ano<strong>the</strong>r<br />
over phone lines. Apple recommends <strong>the</strong> Hayes<br />
Smartmodem; in fact, if you have ano<strong>the</strong>r brand of modem,<br />
you can't use <strong>the</strong> Phone menu.
195 Communicating with LisaTerminal<br />
Ei<strong>the</strong>r <strong>the</strong> 300- or <strong>the</strong> 1200-baud model will work<br />
(baud is equivalent <strong>to</strong> bits per second), but get <strong>the</strong> 1200-<br />
baud model if you can afford it; as I've said elsewhere,<br />
"if you can stand <strong>to</strong> watch text come on<strong>to</strong> a screen at<br />
300 baud, ei<strong>the</strong>r you have no central nervous system<br />
or you're <strong>the</strong> Buddha."<br />
You connect <strong>the</strong> modem <strong>to</strong> one of <strong>the</strong> serial ports<br />
on <strong>the</strong> back panel of <strong>the</strong> console. As with any external<br />
device, you have <strong>to</strong> open Preferences and go <strong>to</strong> <strong>the</strong> Device<br />
Connections display <strong>to</strong> tell <strong>the</strong> Lisa that you're<br />
hooking it up (and what kind of modem it is).<br />
Well, that covers <strong>the</strong> seven basic Lisa <strong>to</strong>ols. But<br />
<strong>the</strong>y're only <strong>the</strong> beginning of what you can do with a<br />
Lisa, as <strong>the</strong> next chapter makes obvious.
11 Doing More with a Lisa<br />
Before I talk about ways you can make a Lisa more<br />
powerful, I'll describe <strong>the</strong> improvements Apple itself<br />
made in January, <strong>1984</strong>, when it announced <strong>the</strong> Lisa 2.<br />
The major hardware change was <strong>the</strong> replacement of<br />
<strong>the</strong> two 5Y4-inch floppy disk drives with a 3Yz-inch floppy<br />
drive like <strong>the</strong> one in <strong>the</strong> Macin<strong>to</strong>sh and optional, builtin<br />
hard disk drives that (<strong>the</strong>y say) hold five or ten megabytes.<br />
One advantage of <strong>the</strong> smaller floppy is that it makes<br />
<strong>the</strong> Lisa compatible with <strong>the</strong> Mac (which is bound <strong>to</strong><br />
be a much bigger seller, with much more software written<br />
for it). You get a "Mac Mode" icon on <strong>the</strong> screen<br />
that opens in<strong>to</strong> a window where you can run any Mac<br />
program.<br />
There are o<strong>the</strong>r advantages <strong>to</strong> <strong>the</strong> 3Yz-inch diskit<br />
fits in a shirt pocket and, thanks <strong>to</strong> its rigid package,<br />
it's <strong>to</strong>ugh enough not <strong>to</strong> get damaged <strong>the</strong>re. There's also<br />
a metal plate that covers <strong>the</strong> read/write slot, making<br />
it almost impossible <strong>to</strong> lose data as a result of physical<br />
abuse of <strong>the</strong> disk.<br />
When introduced, <strong>the</strong> 3Yz-inch disk only held<br />
400K-as opposed <strong>to</strong> 860K for a 5Y4-inch disk-but SOOK<br />
versions are coming and will probably be standard by<br />
<strong>the</strong> time you read this.<br />
If you have a Lisa 1, you can upgrade it for free<br />
<strong>to</strong> a Lisa 2/5 (with a built-in 5-meg hard disk drive)<br />
197
198 Introduction <strong>to</strong> <strong>the</strong> Lisa<br />
until June 1, <strong>1984</strong>. (It costs $600 after that.) Or you<br />
can upgrade it <strong>to</strong> a Lisa 2/10 (with a built-in 10-meg<br />
hard disk drive) for $2500. In ei<strong>the</strong>r case you can get<br />
some money by selling your used ProFile, or you can<br />
use it for supplemental, backup s<strong>to</strong>rage.<br />
There are o<strong>the</strong>r hardware differences between <strong>the</strong><br />
two models: <strong>the</strong> Lisa 2 has a different front panel, a<br />
slightly different mouse and half as much memory. But<br />
<strong>the</strong> most significant difference is in <strong>the</strong> software-at<br />
announcement, <strong>the</strong> new Lisa software ran twice as fast<br />
as <strong>the</strong> old version, and plans were <strong>to</strong> have it running<br />
four times as fast by April.<br />
There are also hardware enhancements you can<br />
make that have nothing <strong>to</strong> do with <strong>the</strong> differences between<br />
<strong>the</strong> Lisa 1 and Lisa 2. For example, <strong>the</strong>re'll be<br />
an expansion board for <strong>the</strong> Lisa that allows it <strong>to</strong> run<br />
MS DOS programs written for <strong>the</strong> IBM PC. An external<br />
5\14-inch floppy disk drive that reads IBM PC disks will<br />
also be available. (PC compatibility is becoming a sine<br />
qua non for computers nowadays-although <strong>the</strong> Mac<br />
won't have it.)<br />
The new Imagewriter dot-matrix printer comes<br />
standard with <strong>the</strong> Lisa 2, replacing Apple's old dotmatrix<br />
printer. Hopefully soon <strong>the</strong>re'll be a plotter that<br />
LisaDraw can drive. But you're more likely <strong>to</strong> want <strong>to</strong><br />
add software than hardware <strong>to</strong> your Lisa.<br />
Fortunately, Apple isn't <strong>the</strong> only company that<br />
writes software for <strong>the</strong> Lisa. UNIX-one of <strong>the</strong> most<br />
popular and flexible operating systems on minicomputers-is<br />
available, as are a number of applications programs.<br />
There's software for accounting, tax processing<br />
and, most significantly, word processing-vitally<br />
needed given how clumsy LisaWrite is at entering and<br />
editing text.<br />
My favorite of <strong>the</strong>se third-party programs is something<br />
called Art Department-a library of more than<br />
300 professionally rendered graphic images you can<br />
Paste in<strong>to</strong> LisaDraw. As <strong>the</strong>ir flyer puts it, "most Lisa<br />
users have nei<strong>the</strong>r <strong>the</strong> time nor <strong>the</strong> skill [<strong>the</strong>y pause<br />
and look meaningfully at me] <strong>to</strong> produce high-quality
199 Doing More with a Lisa<br />
graphics for presentation." If you know what a clip book<br />
is, this is sort of an electronic version of one; but unlike<br />
clip art, you can cus<strong>to</strong>mize <strong>the</strong> images, using LisaDraw<br />
<strong>to</strong> change <strong>the</strong>ir shape, size, shading, etc.<br />
Apple has two new pieces of development software<br />
that are going <strong>to</strong> greatly increase <strong>the</strong> number of programs<br />
that run on <strong>the</strong> Lisa. One is called QuickPort<br />
and it allows any program written in Pascal or C <strong>to</strong><br />
be very quickly transferred <strong>to</strong> <strong>the</strong> Lisa. The program<br />
runs virtually unchanged, and you can Cut and Paste<br />
<strong>the</strong> results of its computations in<strong>to</strong> any o<strong>the</strong>r Lisa<br />
document.<br />
The only problem with QuickPort is that it limits<br />
what you can do with Lisa's menus and editing functions;<br />
in fact, it's sometimes called <strong>the</strong> "vanilla window"<br />
(since it restricts you <strong>to</strong> standard Lisa functions).<br />
For more flexibility, <strong>the</strong>re's a collection of <strong>to</strong>ols<br />
called Toolkit/32 (which were used <strong>to</strong> build <strong>the</strong> Lisa<br />
Desk<strong>to</strong>p, among o<strong>the</strong>r things). It takes much longer <strong>to</strong><br />
adapt a program <strong>to</strong> <strong>the</strong> Lisa when you use Toolkit/32<br />
instead of QuickPort, but you can cus<strong>to</strong>mize it much<br />
more extensively and do flashier things with it.<br />
A lot of companies who want <strong>to</strong> get <strong>the</strong>ir programs<br />
up and running on <strong>the</strong> Lisa are probably going <strong>to</strong> do<br />
an original version with QuickPort and <strong>the</strong>n use <strong>the</strong><br />
money <strong>the</strong>y get from selling that <strong>to</strong> finance work on<br />
an enhanced, fancier version built with Toolkit/32.<br />
As I said earlier, <strong>the</strong> Mac will be ano<strong>the</strong>r source<br />
of Lisa programs, since many more programmers are<br />
going <strong>to</strong> be writing for <strong>the</strong> Mac and since Mac programs<br />
will run on <strong>the</strong> Lisa under Mac Mode.<br />
But <strong>the</strong>re's no reason <strong>to</strong> limit yourself <strong>to</strong> programs<br />
o<strong>the</strong>r people write; you can write your own, with any<br />
of <strong>the</strong> many programming languages available on <strong>the</strong><br />
Lisa. (Readers who know nothing about programming<br />
are excused from <strong>the</strong> next two paragraphs. If your eyes<br />
began <strong>to</strong> swim when I talked about <strong>the</strong> "vanilla window,"<br />
this means you.)<br />
Three languages were introduced with <strong>the</strong> Lisa 1:<br />
a BASIC patterned after DEC's BASIC Plus, a COBOL
200 Introduction <strong>to</strong> <strong>the</strong> Lisa<br />
that meets <strong>the</strong> ANSI Standard X3.23 and GSA High<br />
Level, and a very powerful and complete Pascal that<br />
includes-in addition <strong>to</strong> a compiler and code genera<strong>to</strong>r-an<br />
edi<strong>to</strong>r, linker, assembler, debugger and a number<br />
of o<strong>the</strong>r utilities (this Pascal is what Apple used <strong>to</strong><br />
write <strong>the</strong> basic Lisa <strong>to</strong>ols).<br />
O<strong>the</strong>r companies now offer FORTRAN, C, APL,<br />
INTERLISP, an MBASIC compiler, and <strong>the</strong> language<br />
whose name is my favorite, Franz LISP. Modula 2 will<br />
also be available. This is a truly machine-independent<br />
language and operating environment developed by Niklaus<br />
Wirth, <strong>the</strong> fa<strong>the</strong>r of Pascal, who got tired of hearing<br />
complaints about his first baby and decided <strong>to</strong> do it<br />
really right this time (although even with Pascal, he<br />
did it righter than anyone else).<br />
Well, that just about wraps things up for this introduc<strong>to</strong>ry<br />
book on <strong>the</strong> Lisa. You've been a great reader<br />
and it's been a real pleasure working with you. Let's<br />
do it again sometime.
Index<br />
accent marks, 21<br />
active windows, 33, 62<br />
alphabetical display of documents,<br />
72-75<br />
Altairian police ships, 75<br />
analysis and planning (with<br />
LisaCalc), 123-33<br />
annuity (calculated by Lisa<br />
Calc), 133<br />
APL (programming language),<br />
200<br />
Apple key, 21<br />
Apple key commands, 40<br />
applications programs, 42<br />
Arnold, Mat<strong>the</strong>w, poem by,<br />
115-16<br />
Arrangement menu (Lisa<br />
Draw), 187-88<br />
arrowheads (LisaDraw),<br />
188-89<br />
arrow keys, 21<br />
arrow pointer, 26<br />
in LisaDraw, 169<br />
arrows (LisaProj ect), 163-65<br />
Art Department (program),<br />
198<br />
Auden, W H., poem by, 49-57<br />
au<strong>to</strong>matic dimming of<br />
screen, 8<br />
background printing, 19, 70<br />
backup copies, 43<br />
BASIC (programming language),<br />
199, 200<br />
baud rate (LisaTerminal), 195<br />
binary number system, 16<br />
bit-mapped screen, 18<br />
bits, 16<br />
block (measure of s<strong>to</strong>rage<br />
space), 17, 43<br />
burning in of hardware, 14<br />
bytes, 16<br />
C (programming language),<br />
199, 200<br />
Calculate Manually, Calculate<br />
Now (LisaCalc menu<br />
items), 132<br />
Calculate menu (LisaCalc), 132<br />
Calcula<strong>to</strong>r (<strong>to</strong>ol), 42-43<br />
Caps Lock key, 21<br />
caret (indicating text placement<br />
in LisaDraw), 183<br />
Cases Must Agree, Cases<br />
Need Not Agree (Lisa<br />
Write menu items), 99<br />
cells<br />
LisaCalc, 124-26<br />
LisaGraph, 135-37<br />
centered text (Lisa Write), 108<br />
Change & Find Next, Change<br />
This Occurrence,<br />
Change To (Lisa Write<br />
menu items), 100<br />
201
202 Introduction <strong>to</strong> <strong>the</strong> Lisa<br />
character, 16<br />
Chart menu (LisaProj ect),<br />
165-66<br />
charts (prepared by Lisa<br />
Graph), 135-5 1<br />
check pointer, 33<br />
chronological display of documents,<br />
75-77<br />
Circle Missing Values (Lisa-<br />
Calc menu item), 133<br />
circles (LisaDraw), 169-74<br />
Clear key; 21<br />
Clipboard, 26<br />
Clock (<strong>to</strong>ol), 42-43<br />
clock, real-time, 22<br />
closing windows, 37-39<br />
COBOL (programming language),<br />
199-200<br />
Coleridge, Samuel, epigram<br />
by, 20<br />
communicating with o<strong>the</strong>r<br />
computers, 19-2 1<br />
using LisaTerminal, 193-95<br />
compound interest (calculated<br />
by LisaCalc), 133<br />
CompuServe, 193<br />
console, 5<br />
contrast, on screen, 8<br />
Convenience Settings display<br />
(Preferences), 33-35<br />
Copy (Edit menu item), 97<br />
created, when documents<br />
were, 73-77<br />
creation of <strong>the</strong> world, 161-63<br />
cursor, 8<br />
curved lines (LisaDraw), 180<br />
Cus<strong>to</strong>mize menu<br />
LisaGraph, 145<br />
LisaProject, 167-68<br />
Cut (Edit menu item), 96-97<br />
data base management (with<br />
LisaList), 117-122<br />
data files, 24, 43<br />
Data Format (LisaList), 119<br />
Data Type of Column (Lisa-<br />
List), 119<br />
DEC VT52 terminal, 193<br />
defaults, 33<br />
Desk<strong>to</strong>p, 24<br />
Desk<strong>to</strong>p Manager, 25<br />
Development System, 23<br />
Device Connections display<br />
(Preferences), 35<br />
diagonal lines (LisaDraw),<br />
176-77<br />
dialog boxes, 69<br />
dimming of screen, au<strong>to</strong>matic,<br />
8<br />
disk drives, 5<br />
documents, 43-52<br />
size of, 73-75<br />
dot-matrix printer, 7, 14,<br />
19, 198<br />
installation of, 86-87<br />
double-clicking, 41<br />
when drawing polygons in<br />
LisaDraw, 182<br />
"Dover Beach" (poem), 115-16<br />
Dow Jones Information Service,<br />
193<br />
draft mode (for prin<strong>to</strong>uts),<br />
19, 70<br />
dragging objects, 47<br />
drawing diagrams and pictures<br />
(with LisaDraw),<br />
169-192<br />
drawing pointer<br />
LisaDraw, 169-7 1<br />
LisaProject, 153<br />
duplicating, 39-40<br />
ease of service (Lisa hardware),<br />
14-15<br />
ease of use (Lisa hardware),<br />
7-12<br />
editing (Lisa Write), 93-103<br />
Edit menu, 82, 93<br />
eight-bit chips, 15<br />
8088 (chip), 15<br />
8/1 6-bit chips, 15<br />
electronic spreadsheets, 123<br />
eleva<strong>to</strong>rs (for scrolling),<br />
52-54
203 Index<br />
Empty Folders icon, 77-8 1<br />
Enter key, 21<br />
ergonomics, 7<br />
error messages, 12<br />
expandability, 21-22<br />
eyestrain, lack of, 7 -8<br />
"Eye, The" (poem), 106-108<br />
field (LisaList), 121<br />
File/Print menu, 29<br />
fill patterns (in Lisa Write<br />
tables), 111<br />
financial functions (calculated<br />
by LisaCalc), 133<br />
Find & Change All (Lisa Write<br />
menu item), 101<br />
find & replace (Lisa Write),<br />
98-102<br />
Find Next Occurrence (Lisa<br />
Write menu item), 99<br />
Find What (Lisa Write menu<br />
item), 98<br />
"finished quality" prin<strong>to</strong>uts,<br />
70<br />
5114-inch minifloppies, 5, 197<br />
flicker, 7 -8<br />
floppies (floppy disks), 5, 13<br />
floppy disk drives, 16, 197-98<br />
flush left (text format in<br />
LisaWrite), 106<br />
flush right (text format in<br />
LisaWrite), 107<br />
folders, 43, 78-81<br />
fonts<br />
LisaDraw, 182<br />
LisaWrite, 105<br />
footers (LisaWrite), 112-14<br />
Format for Printer (File/<br />
Print menu item), 69<br />
Format menu<br />
LisaCalc, 131<br />
LisaGraph, 150<br />
Format menu (Lisa Write),<br />
106<br />
formatting (Lisa Write),<br />
103-16<br />
formed-character printers, 7<br />
formulas (LisaCalc), 128-30<br />
FORTRAN (programming<br />
language), 200<br />
Franz LISP (programming<br />
language), 200<br />
freehand symbol (LisaDraw),<br />
181<br />
Function Hints . .. (LisaCalc),<br />
133<br />
function keys, 21<br />
ghost images (on <strong>the</strong> screen), 8<br />
gloves, magic, 10-1 1<br />
grabbing objects, 47<br />
Graph menu (LisaGraph),<br />
138-44<br />
grasping obj ects, 47<br />
grid lines (LisaGraph), 151<br />
handles<br />
LisaDraw, 172<br />
LisaProject, 155<br />
hard disk drive, 5, 197-98<br />
hardware (<strong>the</strong> Lisa's), 5-22<br />
headers (LisaWrite), 112-14<br />
Hide Dialog Box (Lisa Write<br />
Search menu item), 99<br />
highlighting, 27, 94<br />
high-resolution mode (for<br />
prin<strong>to</strong>uts), 18-19, 69<br />
high-resolution screen, 18<br />
hollow cross-hair pointer<br />
(LisaList), 117<br />
hollow (LisaDraw type style),<br />
182<br />
horizontal (format for prin<strong>to</strong>uts),<br />
70<br />
horizontal lines (LisaDraw),<br />
177-80<br />
hourglass pointer, 46<br />
human engineering, 7<br />
IBM PC, 198<br />
icons, 24-27, 73<br />
idiot-proofing, 12-13<br />
Imagewriter (dot-matrix<br />
printer), 7, 19, 198
204 Introduction <strong>to</strong> <strong>the</strong> Lisa<br />
indents (LisaWrite), 110<br />
initializing a disk, 85-86<br />
insertion point, 48, 94<br />
integration of software, 45<br />
INTERLISP (programming<br />
language), 200<br />
Jeffers, Robinson, poem by,<br />
106-108<br />
job tracking (with Lisa<br />
Project), 153-68<br />
justification (of text in Lisa<br />
Write), 106-109<br />
justified text, <strong>to</strong> both margins<br />
(in Lisa Write), 109<br />
K (abbreviation for kilobyte),<br />
16, 43<br />
Kafka, Franz, ix<br />
keyboard, 8-9<br />
kilobytes, 16<br />
King James (and friends), 161<br />
landscape (format for prin<strong>to</strong>uts),<br />
70<br />
lines (LisaProject), 163-65<br />
Lines menu (LisaDraw),<br />
188-89<br />
line spacing (Lisa Write),<br />
109-10<br />
Lisa 1, 1, 5-6, 197<br />
picture of, 6<br />
Lisa 2, 5-7, 198<br />
Lisa 2/5, 5, 197<br />
Lisa 2/10, 5, 197, 198<br />
software on, 1-2, 15, 198<br />
picture of, 6<br />
LisaCalc, 123-33<br />
LisaDraw, 169-92<br />
LisaGraph, 135-51<br />
LisaGuide, 23-24, 87-91<br />
LisaList, 117 -22<br />
LisaProject, 153-68<br />
LisaTerminal, 42, 193-95<br />
LisaWrite, 93-1 16<br />
evaluation of for editing,<br />
102-103<br />
evaluation of for formatting,<br />
103<br />
list management (with Lisa-<br />
List), 117-22<br />
Lisa menu (LisaList), 120<br />
little hand (LisaDraw), 190-9 1<br />
logarithmic functions (calculated<br />
by LisaCalc), 133<br />
logical and, logical or, logical<br />
not (LisaCalc), 133<br />
Mac (Apple Macin<strong>to</strong>sh computer),<br />
5-7, 197-199<br />
Mac Mode (on Lisa 2),<br />
197, 199<br />
margins (Lisa Write), 110<br />
"Master & Bos'n," poem,<br />
49-57<br />
MBASIC (programming<br />
language), 200<br />
meg, megabyte, 16<br />
memory, 16, 198<br />
menus, 28-32<br />
menu bar, 28<br />
menu items, 29-30<br />
menu titles, 28<br />
Mice & Menus, Of, 87<br />
miles<strong>to</strong>ne circles (Lisa<br />
Project), 157-58<br />
modems, 194<br />
modified, last time documents<br />
were, 73-77<br />
Modula 2 (programming language),<br />
200<br />
Mo<strong>to</strong>rola 68000 (chip), 15<br />
mouse, 9-1 1, 198<br />
picture of, 6<br />
mouse/icon user interface,<br />
24-25<br />
MS DOS (operating system),<br />
198<br />
New Yo rk City Board of Education,<br />
ix<br />
noise<br />
acoustic, 12<br />
electromagnetic, 14
205 Index<br />
normal mode (for prin<strong>to</strong>uts),<br />
18-20, 69<br />
NPV. net present value (calculated<br />
by LisaCalc), 133<br />
numeric keypad, 9<br />
Office System, 23<br />
installation of, 86<br />
offset connec<strong>to</strong>rs, 13<br />
Of Mice & Menus, 87<br />
opening icons, 26<br />
using double-clicking, 41<br />
using <strong>the</strong> File/Print menu, 31<br />
operating system, 25<br />
Option keys, 21<br />
outdents (Lisa Write), 110-1 1<br />
ovals (LisaDraw), 172-7 4<br />
Owner's Guide, 23-24, 85-87,<br />
89-90<br />
Page Layout menu<br />
LisaDraw, 186-87<br />
LisaGraph, 146-48<br />
LisaProject, 167<br />
LisaWrite, 112<br />
Page Ruler, Page Ruler menu<br />
(LisaWrite), 112<br />
palette (LisaDraw), 169<br />
parallel interface boards, 21<br />
Pascal (programming language),<br />
199, 200<br />
passive aggression, worldclass,<br />
ix<br />
Paste (Edit menu item), 96-97<br />
PC compatibility, 198<br />
persistence of vision, 8<br />
Phone menu (LisaTerminal),<br />
194<br />
phosphor, 7-8<br />
pic<strong>to</strong>rial display of documents,<br />
72-73<br />
pixels, 18<br />
planning (with LisaCalc),<br />
123-33<br />
pointer, 8, 26<br />
polygons o<strong>the</strong>r than rectangles<br />
(LisaDraw), 181-82<br />
portrait (format for prin<strong>to</strong>uts),<br />
70<br />
power of <strong>the</strong> Lisa, 15-2 1<br />
predicting <strong>the</strong> future (with<br />
LisaCalc), 123-33<br />
Preferences, 26, 33-36<br />
Preview Pages (Lisa Write<br />
menu item), 112<br />
Print . .. (File/Print menu<br />
item), 70<br />
printers, 7<br />
printing out documents,<br />
69-72<br />
printing <strong>the</strong> screen, 18<br />
prin<strong>to</strong>uts, levels of quality,<br />
18-19<br />
ProFile (hard disk drive),<br />
6, 17-18, 198<br />
capacity of, 16-18<br />
MTBF (mean time between<br />
failures), 14<br />
size and weight, 12<br />
window, 41-42<br />
programs, 24<br />
Protect menu (LisaCalc), 132<br />
pro<strong>to</strong>cols (LisaTerminal), 194<br />
QuickPort, 199<br />
RAM disk, 18<br />
Rangoon, Burma, 1<br />
rearranging windows on <strong>the</strong><br />
Desk<strong>to</strong>p, 57-68<br />
rectangles (LisaDraw)<br />
with rounded corners,<br />
174, 185-86<br />
with square corners, 176<br />
reference cards, 9<br />
refresh rate, 7-8<br />
reliability, 14-15<br />
Resource charts (Lisa-<br />
Project), 166<br />
resources section of a task<br />
box (LisaProject), 161-163<br />
rewriting <strong>the</strong> screen, 7-8<br />
Round Corners . .. (LisaDraw<br />
menu item), 185-86<br />
Ruler (Lisa Write), 111
206 Introduction <strong>to</strong> <strong>the</strong> Lisa<br />
safety, 12-13, 83<br />
Save & Continue (menu<br />
item), chart, 68<br />
Save & Put Away (menu<br />
item), chart, 68<br />
Schedule charts (Lisa<br />
Project), 165-66<br />
scheduling (with Lisa-<br />
Project), 153-68<br />
screen, <strong>the</strong> Lisa's, 8, 18<br />
scroll arrows, 55<br />
scroll bars, 52<br />
scrolling, 52-57<br />
search and replace (Lisa-<br />
Write), 98-102<br />
Search menu (Lisa Write), 98<br />
selecting objects, 26-27, 39<br />
selecting text (Lisa Write),<br />
94-96<br />
selection boxes (LisaDraw),<br />
190-9 1<br />
self-testing, 13<br />
Set Aside (menu item), 39<br />
chart, 68<br />
Set Aside Everything, 67<br />
Setup menu (LisaTerminal),<br />
194<br />
Shades menu (LisaDraw),<br />
189-90<br />
shadow (LisaDraw type<br />
style), 182<br />
shadows, 47-48<br />
shielding, 14<br />
shift-clicking (LisaDraw),<br />
190-9 1<br />
Show as Line (LisaGraph<br />
menu item), 145<br />
Show Formulas & Values<br />
(LisaCalc menu item), 133<br />
Show Margin/Tab Ruler<br />
(Lisa Write menu item),<br />
110<br />
Show New List (LisaList<br />
menu item), 120<br />
16/32-bit chips, 15<br />
68000 (chip), 15<br />
size and weight<br />
of Lisa, 11<br />
of Profile, 12<br />
size control box, sizing, 57-58<br />
slack time (LisaProject), 166<br />
Smooth (LisaDraw menu<br />
item), 185<br />
software<br />
<strong>the</strong> Lisa's basic approach<br />
<strong>to</strong>, 23-84<br />
<strong>the</strong> Lisa's basic approach<br />
<strong>to</strong>, evaluated, 83-84<br />
solid flesh, this <strong>to</strong>o <strong>to</strong>o, 101<br />
Source, The, 193<br />
speaker, 22<br />
special characters, 21<br />
split controls (Lisa Write), 102<br />
startup device, 86<br />
Startup display (Preferences),<br />
36<br />
stationery pads, 43<br />
status panel (LisaCalc),<br />
124-26<br />
Sun Also Rises, The, 17<br />
symbols, 21<br />
tall (format for prin<strong>to</strong>uts), 70<br />
task boxes (LisaProj ect),<br />
157-161<br />
Ta sk charts (LisaProject), 166<br />
Tear Off Stationery (menu<br />
item), 45, 78<br />
telecommunications, 193-195<br />
Telenet, 193<br />
terminals, 193<br />
text placement (LisaDraw),<br />
183<br />
text pointer, 51, 94-95<br />
3 Yi microfloppies, 5, 197<br />
title bar, 62<br />
<strong>to</strong>ll-free number (<strong>to</strong> ask<br />
Apple questions), 15<br />
Toolkit/32, 199<br />
<strong>to</strong>ols, 2, 42-43<br />
trigonometric functions (calculated<br />
by LisaCalc), 133
207 Index<br />
TTY (type of terminal), 193-94<br />
Tymnet, 193<br />
type faces (LisaList), 122<br />
Type Style menu<br />
LisaCalc, 131<br />
LisaGraph, 150<br />
Lisa Write, 105-106<br />
undo command, 82<br />
UNIX (operating system), 198<br />
updating <strong>the</strong> screen, 7-8<br />
user interface, 24-25<br />
vacation days (LisaProject),<br />
166<br />
values<br />
LisaCalc, 125-26<br />
LisaGraph, 137<br />
vertical (format for prin<strong>to</strong>uts),<br />
70<br />
vertical lines (LisaDraw),<br />
177-80<br />
view but<strong>to</strong>ns, 55-56<br />
View menu, 72-73<br />
VT lOO terminal, 193<br />
Wastebasket, 26<br />
"what if" questions (Lisa<br />
Calc), 129-30<br />
wide (format for prin<strong>to</strong>uts),<br />
70<br />
windows, 31-42<br />
rearranging windows on<br />
<strong>the</strong> Desk<strong>to</strong>p, 57-68<br />
Wirth, Nicklaus, 200<br />
word processing (with Lisa<br />
Write), 93-116<br />
work week (LisaProject), 166<br />
x (horizontal) axis (Lisa<br />
Graph), 135<br />
y (vertical) axis (LisaGraph),<br />
138<br />
zero insertion force connec<strong>to</strong>rs,<br />
22
O<strong>the</strong>r books in <strong>the</strong> Microcomputer Books Series, available<br />
from your local computer s<strong>to</strong>re or books<strong>to</strong>re. For more<br />
information write:<br />
Microcomputer Books and Consumer Software Division<br />
Addison-Wesley Publishing Company, Inc.<br />
Reading, Massachusetts 0186 7<br />
(6 17) 944-3700<br />
10242 Executive VisiCalc for 11358 Database: A Primer<br />
<strong>the</strong> Apple Computer<br />
Roger E. Clark<br />
C. J. Date<br />
01245 1-2-3 Go!<br />
05663 BASIC Business Julie Bingham<br />
Subroutines for <strong>the</strong><br />
Apple II and Ile<br />
Alan Porter and<br />
10924 Starting with UNIX<br />
P. J. Brown<br />
Martin Rezmer 08848 The Business Guide <strong>to</strong><br />
05092 Microcomputer<br />
Graphics for <strong>the</strong> Apple<br />
Computer<br />
<strong>the</strong> UNIX System<br />
Jean L. Yates and<br />
Sandra L. Emerson<br />
Roy E. Meyers 10355 CP/M and <strong>the</strong> Personal<br />
06599 Basic Money: Managing<br />
Personal Finances on<br />
Your Microcomputer<br />
Computer<br />
Thomas A. Dwyer and<br />
Margot Critchfield<br />
Charles Seiter 05248 Executive Computing<br />
John M. Nevison<br />
16482 As<strong>to</strong>unding Games for<br />
Your Apple Computer 11208 The Beginner's Guide<br />
Hal Renko and<br />
Sam Edwards<br />
<strong>to</strong> Computers<br />
Robin Bradbeer,<br />
Peter DeBono,<br />
14775 Applesoft BASIC Toolbox and Peter Laurie<br />
Larry G. Wintermeyer<br />
06577 Pascal for BASIC<br />
14652 Introducing Logo Programmers<br />
Peter Ross<br />
07769 Discovering Apple Logo<br />
Charles Seiter<br />
and Robert Weiss<br />
David D. Thornburg 05247 The Little Book of<br />
16453 The Addison-Wesley<br />
Book of Apple Software<br />
BASIC Style<br />
John M. Nevison<br />
<strong>1984</strong> 01589 BASIC and <strong>the</strong> Personal<br />
J. Stan<strong>to</strong>n, R. We lls, Computer<br />
S. Rochowansky, and Thomas A. Dwyer and<br />
M. Mellin Margot Critchfield
. I