

Philips CD Soundmachine - User manual - ENG
Philips CD Soundmachine - User manual - ENG
Philips CD Soundmachine - User manual - ENG

You also want an ePaper? Increase the reach of your titles
YUMPU automatically turns print PDFs into web optimized ePapers that Google loves.
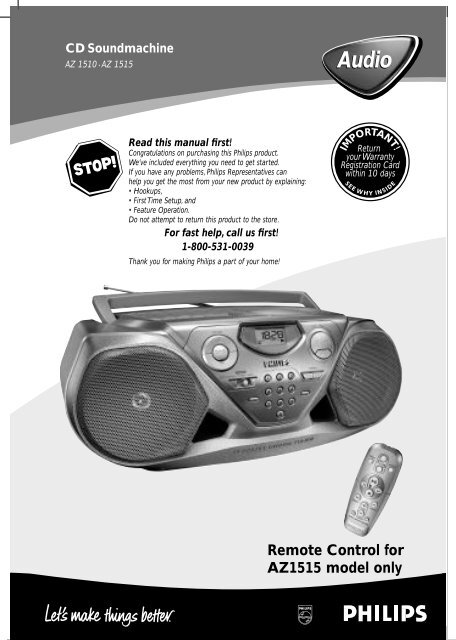
<strong>CD</strong> <strong>Soundmachine</strong><br />
AZ 1510 • AZ 1515<br />
Audio<br />
Read this <strong>manual</strong> first!<br />
Congratulations on purchasing this <strong>Philips</strong> product.<br />
We’ve included everything you need to get started.<br />
If you have any problems, <strong>Philips</strong> Representatives can<br />
help you get the most from your new product by explaining:<br />
• Hookups,<br />
• First Time Setup, and<br />
• Feature Operation.<br />
Do not attempt to return this product to the store.<br />
For fast help, call us first!<br />
1-800-531-0039<br />
Thank you for making <strong>Philips</strong> a part of your home!<br />
Return<br />
your Warranty<br />
Registration Card<br />
within 10 days<br />
IMPORTANT!<br />
SEE W HY<br />
INSIDE<br />
Remote Control for<br />
AZ1515 model only
$ #@ ! 0 9 8<br />
1<br />
1 2 34<br />
%<br />
^<br />
&<br />
*<br />
40 PRESET DIGITAL TUNER<br />
9<br />
8<br />
7<br />
6<br />
REPEAT<br />
SHUFFLE<br />
VOLUME<br />
SEARCH +<br />
PRESET<br />
TUNING<br />
-<br />
SEARCH<br />
5 6 7<br />
1<br />
2<br />
3<br />
4<br />
5<br />
Remote Control for<br />
AZ1515 model only
2<br />
8<br />
DBB<br />
3<br />
AM<br />
4<br />
X<br />
PROG<br />
FM<br />
5<br />
SHUFFLE PROG<br />
DBB<br />
6<br />
C<br />
B<br />
A<br />
A<br />
PROG<br />
7<br />
9
Canada<br />
English:This digital apparatus does not exceed the Class B limits for radio noise emissions<br />
from digital apparatus as set out in the Radio Interference Regulations of the Canadian<br />
Department of Communications.<br />
Français: Cet appareil numérique n'émet pas de bruits radioélectriques dépassant les<br />
limites applicables aux appareils numériques de Classe B prescrites dans le Règlement sur<br />
le Brouillage Radioélectrique édicté par le Ministère des Communications du Canada.<br />
The set complies with the FCC-Rules, Part 15 and with 21 CFR 1040.10.<br />
Operation is subject to the following two conditions:<br />
1.This device may not cause harmful interference, and<br />
2.This device must accept any interference received, including interference that<br />
may cause undesired operation.<br />
L’appareil répond aux normes FCC, Part 15 et 21 CFR 1040.10.<br />
Fonctionnement soumis aux deux conditions suivantes :<br />
1. Cet appareil ne doit pas provoquer d’interférences nuisibles, et<br />
2. Cet appareil doit accepter toute interférence reçue, y compris les interférences<br />
susceptibles de provoquer un fonctionement peu satisfaisant.<br />
El aparato cumple las normas FCC, Parte 15 y 21 CFR 1040.10.<br />
Funcionamiento dependiente de dos condiciones siguientes:<br />
1. Este aparato no puede provocar interferencia dañina, y<br />
2. Este aparato debe aceptar cualquier interferencia recibida, incluyendo las<br />
interferencias que pueden provocar un funcionamiento insuficiente.
Return your Warranty Registration card today to<br />
ensure you receive all the benefits you’re entitled to.<br />
• Once your <strong>Philips</strong> purchase is registered,<br />
you’re eligible to receive all the privileges<br />
of owning a <strong>Philips</strong> product.<br />
Warranty<br />
Verification<br />
Registering your product<br />
within 10 days confirms<br />
your right to maximum<br />
protection under the<br />
terms and conditions of<br />
your <strong>Philips</strong> warranty.<br />
Know these<br />
safety symbols<br />
CAUTION<br />
RISK OF ELECTRIC SHOCK<br />
DO NOT OPEN<br />
CAUTION: TO REDUCE THE RISK OF ELECTRIC SHOCK, DO NOT<br />
REMOVE COVER (OR BACK). NO USER-SERVICEABLE PARTS<br />
INSIDE. REFER SERVICING TO QUALIFIED SERVICE PERSONNEL.<br />
This “bolt of lightning” indicates<br />
uninsulated material<br />
within your unit may cause<br />
an electrical shock. For the safety of<br />
everyone in your household, please do<br />
not remove product covering.<br />
The “exclamation point” calls<br />
attention to features for<br />
which you should read the<br />
enclosed literature closely to prevent<br />
operating and maintenance problems.<br />
Owner<br />
Confirmation<br />
Your completed Warranty<br />
Registration Card serves<br />
as verification of ownership<br />
in the event of product<br />
theft or loss.<br />
• So complete and return the Warranty<br />
Registration Card enclosed with your<br />
purchase at once, and take advantage<br />
of these important benefits.<br />
Model<br />
Registration<br />
Returning your Warranty<br />
Registration Card right<br />
away guarantees you’ll<br />
receive all the information<br />
and special offers which<br />
you qualify for as the<br />
owner of your model.<br />
For Customer Use<br />
Enter below the Serial No. which is located<br />
on the rear of the cabinet. Retain this<br />
information for future reference.<br />
Model No. _______________________<br />
Serial No. ________________________<br />
WARNING: TO PREVENT<br />
FIRE OR SHOCK HAZARD, DO<br />
NOT EXPOSE THIS EQUIPMENT TO<br />
RAIN OR MOISTURE.<br />
CAUTION: To prevent electric<br />
shock, match wide blade of plug to<br />
wide slot, and fully insert.<br />
IMPORTANT SAFETY INSTRUCTIONS<br />
1. Read these instructions.<br />
2. Keep these instructions.<br />
3. Heed all warnings.<br />
4. Follow all instructions.<br />
5. Do not use this apparatus near<br />
water.<br />
6. Clean only with dry cloth.<br />
7. Do not block any ventilation openings.<br />
Install in accordance with the<br />
manufacturer´s instructions.<br />
8. Do not install near any heat sources<br />
such as radiators, heat registers, stoves, or<br />
other apparatus (including amplifiers) that<br />
produce heat.<br />
9. Do not defeat<br />
the safety<br />
purpose of the<br />
AC Polarized<br />
polarized or<br />
Plug<br />
grounding-type plug. A polarized plug has<br />
two blades with one wider than the other.<br />
A grounding type plug has two blades and<br />
a third grounding prong.The wide blade or<br />
the third prong are provided for your safety.<br />
If the provided plug does not fit into<br />
your outlet, consult an electrician for<br />
replacement of the obsolete outlet.<br />
10. Protect the power cord from being<br />
walked on or pinched, particularly at plugs,<br />
convenience receptacles, and the point<br />
where they exit from the apparatus.<br />
11. Only use attachments/accessories<br />
specified by the manufacturer.<br />
12. Use only with the cart,<br />
stand, tripod, bracket, or table<br />
specified by the manufacturer or<br />
sold with the apparatus. When a<br />
cart is used, use caution when<br />
moving the cart/apparatus combination<br />
to avoid injury from<br />
tip-over.<br />
13. Unplug this apparatus during lightning<br />
storms or when unused for long periods of<br />
time.<br />
14. Refer all servicing to qualified service<br />
personnel. Servicing is required when the<br />
apparatus has been damaged in any way,<br />
such as power-supply cord or plug is damaged,<br />
liquid has been spilled or objects<br />
have fallen into the apparatus, the apparatus<br />
has been exposed to rain or moisture,<br />
does not operate normally, or has been<br />
dropped.<br />
15. Battery usage CAUTION – To prevent<br />
battery leakage which may result in bodily<br />
injury, property damage, or damage to the<br />
unit:<br />
● Install all batteries correctly, + and - as<br />
marked on the unit.<br />
● Do not mix batteries (old and new or<br />
carbon and alkaline, etc.).<br />
● Remove batteries when the unit is not<br />
used for a long time.<br />
EL 6475-E004: 02/8<br />
MAC5097<br />
Class II equipment symbol<br />
This symbol indicates that the unit has a double insulation system.
LIMITED WARRANTY<br />
PORTABLE AUDIO<br />
One Year Free Exchange<br />
This product must be carried in for an exchange.<br />
WHO IS COVERED?<br />
You must have proof of purchase to exchange the product.<br />
A sales receipt or other document showing that you purchased<br />
the product is considered proof of purchase.Attach<br />
it to this owner’s <strong>manual</strong> and keep both nearby.<br />
WHAT IS COVERED?<br />
Warranty coverage begins the day you buy your product.<br />
For one year thereafter, a defective or inoperative product<br />
will be replaced with a new, renewed or comparable product<br />
at no charge to you.A replacement product is covered<br />
only for the original warranty period.When the warranty<br />
on the original product expires, the warranty on the<br />
replacement product also expires.<br />
WHAT IS EXCLUDED?<br />
Your warranty does not cover:<br />
• labor charges for installation or setup of the product,<br />
adjustment of customer controls on the product, and<br />
installation or repair of antenna systems outside of the<br />
product.<br />
• product repair and/or part replacement because of<br />
misuse, accident, unauthorized repair or other cause<br />
not within the control of <strong>Philips</strong>.<br />
• reception problems caused by signal conditions or<br />
cable or antenna systems outside the unit.<br />
• a product that requires modification or adaptation to<br />
enable it to operate in any country other than the<br />
country for which it was designed, manufactured,<br />
approved and/or authorized, or repair of products<br />
damaged by these modifications.<br />
• incidental or consequential damages resulting from the<br />
product. (Some states do not allow the exclusion of<br />
incidental or consequential damages, so the above<br />
exclusion may not apply to you.This includes, but is not<br />
limited to, prerecorded material, whether copyrighted<br />
or not copyrighted.)<br />
• a product used for commercial or institutional purposes.<br />
WHERE IS EXCHANGE AVAILABLE?<br />
You may exchange the product in all countries where the<br />
product is officially distributed by <strong>Philips</strong>. In countries<br />
where <strong>Philips</strong> does not distribute the product, the local<br />
<strong>Philips</strong> service organization will attempt to provide a<br />
replacement product (although there may be a delay if the<br />
appropriate product is not readily available).<br />
BEFORE REQUESTING EXCHANGE...<br />
Please check your owner's <strong>manual</strong> for assistance. If you<br />
have additional questions, call us at 1-800-531-0039.<br />
EXCHANGING A PRODUCT IN U.S.A.,<br />
PUERTO RICO, OR U.S.VIRGIN ISLANDS...<br />
Contact 1-800-531-0039 to arrange an exchange. Or, ship<br />
the product, insured and freight prepaid, and with proof of<br />
purchase enclosed, to the address listed below.<br />
<strong>Philips</strong> Exchange Program<br />
Suite A<br />
406 North Irish Street<br />
Greeneville TN 37745<br />
(In U.S.A., Puerto Rico, and U.S.Virgin Islands, all implied warranties,<br />
including implied warranties of merchantability and fitness<br />
for a particular purpose, are limited in duration to the<br />
duration of this express warranty. But, because some states do<br />
not allow limitations on how long an implied warranty may<br />
last, this limitation may not apply to you.)<br />
EXCHANGING A PRODUCT IN CANADA...<br />
Please contact <strong>Philips</strong> at:<br />
1-800-661-6162 (French Speaking)<br />
1-800-531-0039 (English or Spanish Speaking)<br />
(In Canada, this warranty is given in lieu of all other warranties.<br />
No other warranties are expressed or implied,<br />
including any implied warranties of merchantability or fitness<br />
for a particular purpose. <strong>Philips</strong> is not liable under any<br />
circumstances for any direct, indirect, special, incidental or<br />
consequential damages, howsoever incurred, even if notified<br />
of the possibility of such damages.)<br />
REMEMBER...<br />
Please record below the model and serial numbers found<br />
on the product.Also, please fill out and mail your warranty<br />
registration card promptly. It will be easier for us to notify<br />
you if necessary.<br />
MODEL #<br />
SERIAL #<br />
__________________________________<br />
__________________________________<br />
This warranty gives you specific legal rights.You may have other rights which vary from state/province to state/province.<br />
<strong>Philips</strong>, P.O. Box 520890, Miami, FL 33152, USA, (402) 536-4171<br />
EL6095T004 / 8-02
English CONTROL/POWER SUPPLY POWER SUPPLY DIGITAL TUNER<br />
ACCESSORIES<br />
1 x AC power cord<br />
1 x Remote Control (for AZ1515 model only)<br />
TOP AND FRONT PANEL (See 1)<br />
1 VOLUME 3 , 4 - to adjust volume level.<br />
2 DBB (Dynamic Bass Boost) - activates a more vivid<br />
bass response.<br />
3 POWER slider - selects TAPE/ RADIO / <strong>CD</strong> function<br />
and also the power off switch (TAPE/ OFF).<br />
4 BAND - selects waveband.<br />
5 0-9: - digit panel<br />
<strong>CD</strong>: - track selection and direct playback;<br />
RADIO: - selecting a preset station.<br />
6 PROGRAM<br />
<strong>CD</strong>: - programs tracks and reviews the program;<br />
Tuner: - programs preset radio stations.<br />
7 SEARCH ∞ , §<br />
<strong>CD</strong>: - searches backward and forward within a track;<br />
- skips to the beginning of a current track/ previous/<br />
later track.<br />
RADIO: - (down, up) tunes to radio stations.<br />
8 MODE - selects different play modes: e.g. REPEAT<br />
or SHUFFLE (random) order.<br />
9 2; - starts or pauses <strong>CD</strong> playback.<br />
0 9 - to stop playback;<br />
- erases a <strong>CD</strong> program.<br />
! Display - shows the status of the set.<br />
@ OPEN•CLOSE – opens/ closes the <strong>CD</strong>-tape door<br />
# REMOTE SENSOR - (for AZ1515 model only)<br />
infrared sensor for remote control.<br />
$ CASSETTE RECORDER keys:<br />
RECORD 0 - to start recording.<br />
PLAY 2 - to start playback.<br />
SEARCH 5 / 6 - fast rewinds/ winds tape.<br />
STOP 9 - stops tape.<br />
PAUSE ; - pauses playback or recording.<br />
BACK PANEL<br />
% Telescopic antenna - improves FM reception.<br />
^ p - 3.5 mm stereo headphone jack.<br />
Note: The speakers will be muted when headphones<br />
are connected to the set.<br />
& AC MAINS - inlet for power cord.<br />
* Battery compartment - for 6 batteries, type<br />
R-14, UM2 or C-cells.<br />
REMOTE CONTROL (for AZ1515 model only)<br />
1 VOLUME 3 , 4 - adjusts volume level.<br />
2 SHUFFLE - plays all <strong>CD</strong> tracks in random order.<br />
3 2; - starts or pauses <strong>CD</strong> playback.<br />
4 SEARCH 5 , 6 - searches backwards/<br />
forwards within a track.<br />
5 PRESET + ,- (up, down) - selects a preset radio<br />
station.<br />
6 TUNING ∞ , § (down, up) - tunes to tuner stations.<br />
7 9 - to stop playback;<br />
- erases a <strong>CD</strong> program.<br />
8 ¡ , - skips to the beginning of a current track<br />
previous/ subsequent track.<br />
9 REPEAT - repeats a track /program/ entire <strong>CD</strong>.<br />
CAUTION<br />
Use of controls or adjustments or performance of procedures<br />
other than herein may result in hazardous<br />
radiation exposure or other unsafe operation.<br />
POWER SUPPLY<br />
Whenever convenient, use the AC power supply to<br />
conserve battery life. Make sure you remove the<br />
power plug from the set and wall outlet before<br />
inserting batteries.<br />
Batteries (not included)<br />
• Insert 6 batteries, type R-14, UM-2 or C-cells, (preferably<br />
alkaline) with the correct polarity. (See 7)<br />
• Remote control (AZ1515 model only)<br />
Insert 2 batteries, type AAA, R03 or UM4 (preferably<br />
alkaline). (See 9)<br />
IMPORTANT!<br />
• Incorrect use of batteries can cause electrolyte leakage<br />
and will corrode the compartment or cause<br />
the batteries to burst.<br />
• Do not mix battery types: e.g. alkaline with carbon<br />
zinc. Only use batteries of the same type for the<br />
set.<br />
• When inserting new batteries, do not try to mix old<br />
batteries with the new ones.<br />
• Batteries contain chemical substances, so<br />
they should be disposed of properly.<br />
Using AC Power<br />
1. Check if the AC power supply, as shown on the<br />
type plate located on the bottom of the set,<br />
corresponds to your local power supply. If it does<br />
not, consult your dealer or service center.<br />
2. Connect the power cord to the wall outlet.<br />
3. To disconnect the power supply, unplug the set<br />
from the wall outlet.<br />
The type plate is located on the bottom of the<br />
set.<br />
BASIC FUNCTIONS<br />
Switching on and off and selecting function<br />
1. To switch on, adjust the POWER slider to select:<br />
<strong>CD</strong>, RADIO or TAPE function, and operate the<br />
respective function controls.<br />
2. To switch off, adjust the POWER slider to select<br />
TAPE/OFF and make sure all the<br />
cassette keys are released.<br />
Note : The DBB setting, tuner presets and the volume<br />
will be retained in the set's memory.<br />
Adjusting volume and sound (See 2)<br />
1. Press the VOLUME 3 or 4 controls to adjust the<br />
volume.<br />
2. Press DBB once or more to select dynamic bass<br />
boost on or off.<br />
DIGITAL TUNER<br />
Tuning to radio stations<br />
1. Adjust the POWER slider to RADIO.<br />
tu is displayed briefly and then the radio<br />
station frequency, waveband and, if programmed,<br />
a preset number are shown. (See 3)<br />
2. Press BAND once or more to select your waveband.<br />
3. Press and hold SEARCH ∞ or § until the<br />
frequency in the display starts running.<br />
The radio automatically tunes to a station of<br />
sufficient reception. Display shows Srch<br />
during automatic tuning.<br />
4. Repeat step 3 if necessary until you find the<br />
desired station.<br />
To tune to a weak station, press ∞ or § briefly and<br />
repeatedly until you have found optimal reception.<br />
To improve radio reception:<br />
• For FM, extend, incline and turn the telescopic<br />
antenna. Reduce its length if the signal is too<br />
strong.<br />
• For AM, the set uses a built-in antenna. Direct this<br />
antenna by turning the whole set.<br />
Programming radio stations<br />
You can store up to a total of 40 radio stations in the<br />
memory, <strong>manual</strong>ly or automatically (Autostore).<br />
Manual programming<br />
1. Tune to your desired station (see Tuning to radio<br />
stations).<br />
2. Press PROGRAM to activate programming.<br />
Display: Pr -- and PROG flashes.<br />
3. Use the digit panel on the set to key in a number,<br />
1-40, to select a preset station. E.g. press 1,1 if<br />
you want to store your station as preset 11. (See<br />
4)<br />
• Remote control (AZ1515 models only): Press<br />
PRESET + / - once or more to select a preset station.<br />
4. Press PROGRAM to confirm.<br />
5. Repeat steps 1-4 to store other stations.<br />
Note : You can erase a preset station by storing<br />
another frequency in its place.
DIGITAL TUNER <strong>CD</strong> PLAYER <strong>CD</strong> PLAYER CASSETTE RECORDER<br />
Autostore<br />
Autostore automatically starts programming radio stations<br />
from preset 1. Available stations are programmed<br />
in order of waveband reception strength: FM, followed<br />
by AM. Any previous presets e.g. <strong>manual</strong>ly programmed<br />
will be erased.<br />
• Press PROGRAM for 4 seconds or more to activate<br />
autostore programming.<br />
The display shows AUtO, PROG blinks,<br />
followed by the radio station details when<br />
stored.<br />
After all stations are stored, the first preset station<br />
will then automatically play.<br />
To listen to a preset station<br />
• Direct Easy Access: use the digit panel on the set<br />
to key in a number, 1-40, to select a preset station.<br />
• Remote control (AZ1515 models only): optionally,<br />
press PRESET + ,- to select your preset station.<br />
<strong>CD</strong> PLAYER<br />
Playing a <strong>CD</strong><br />
This <strong>CD</strong> player plays Audio Discs including <strong>CD</strong>-<br />
Recordables and <strong>CD</strong>-Rewritables.<br />
1. Adjust the POWER slider to <strong>CD</strong>.<br />
2. Insert a <strong>CD</strong> with the printed side facing up and<br />
close the door.<br />
noCd if no <strong>CD</strong> inserted/ <strong>CD</strong> dirty, incorrectly<br />
inserted or damaged.<br />
nFCd if you have inserted a non-finalized <strong>CD</strong>-<br />
R(W).<br />
3. Press 2; to start playback.<br />
dAtA if your <strong>CD</strong> contains non-audio i.e. data<br />
files.<br />
4. To pause playback press 2;. Press 2; again to<br />
resume play.<br />
Display: 2 flashes during pause.<br />
5. To stop <strong>CD</strong> playback, press the 9 button.<br />
Note : <strong>CD</strong> play will also stop when:<br />
- the <strong>CD</strong>-tape door is opened<br />
- the <strong>CD</strong> has reached the end<br />
- you select TAPE or RADIO function.<br />
Selecting a different track<br />
There are 2 ways:<br />
Direct Easy Access<br />
• Key in the number of the track using the digit panel<br />
on the set.<br />
SEARCH ∞ or §<br />
• Press SEARCH ∞ or § once or repeatedly to select<br />
your track.<br />
Finding a passage within a track<br />
1. Press and hold SEARCH ∞ or §.<br />
– The <strong>CD</strong> is played at high speed and low volume.<br />
2. When you recognize the passage you want,<br />
release ∞ or § to resume normal playback.<br />
Note : During a <strong>CD</strong> program or if SHUFFLE/ REPEAT<br />
active, searching is only possible within a track.<br />
Different play modes: SHUFFLE and REPEAT<br />
You can select and change the various play modes<br />
before or during playback, and combine the modes<br />
with PROGRAM. (See 5)<br />
SHUFFLE - tracks of the entire <strong>CD</strong>/ program are played<br />
in random order<br />
SHUFFLE REPEAT ALL - to repeat the entire <strong>CD</strong>/<br />
program continuously in random order<br />
REPEAT ALL - repeats the entire <strong>CD</strong>/ program<br />
REPEAT - plays the current track continuously<br />
1. To select play mode, press MODE once or more.<br />
2. Press 2; to start playback if in the stop position.<br />
3. To select normal playback, press MODE repeatedly<br />
until the various modes are no longer displayed.<br />
– You can also press the 9 button to cancel your<br />
play mode.<br />
Programming track numbers<br />
In the stop position, select and store your <strong>CD</strong> tracks in<br />
the desired sequence. Up to 20 tracks can be stored in<br />
the memory.<br />
1. Press SEARCH ∞ or § on the set to select your<br />
desired track number.<br />
2. Press PROGRAM.<br />
Display: PROG, Pr and your selected track<br />
number. (See 6)<br />
If you attempt to program without first<br />
selecting a track number, noSE is shown.<br />
3. Repeat steps 1-2 to select and store all desired<br />
tracks.<br />
Display: FULL if you try to program more<br />
than 20 tracks.<br />
Reviewing the program<br />
In the stop position, press and hold PROGRAM until<br />
the display shows all your stored track numbers in<br />
sequence.<br />
Erasing a program<br />
You can erase the program by:<br />
• pressing 9 twice<br />
CLr is displayed briefly and PROG<br />
disappears.<br />
• You select TAPE or RADIO function.<br />
CASSETTE RECORDER<br />
Cassette playback<br />
1. Adjust the POWER slider to TAPE.<br />
2. Insert a cassette as shown and close the door.<br />
3. Press 2 to start playback.<br />
Display: shows tAPE throughout tape<br />
operation.<br />
4. To pause playback press PAUSE ;. Press again to<br />
resume.<br />
5. Press SEARCH 5 or 6 to fast wind the tape.<br />
6. To stop the tape, press STOP 9.<br />
The keys are automatically released at the end of a<br />
tape and the set switched off, except if PAUSE ; has<br />
been activated.<br />
General information on recording<br />
• Recording is permissible insofar as copyright or.<br />
other rights of third parties are not infringed.<br />
• For recording, use only NORMAL type cassettes<br />
(IEC type I) on which the tabs have not yet been<br />
broken. This deck is not suited for recording on<br />
CHROME (IEC II) or METAL (IEC IV) type cassettes.<br />
• The best recording level is set automatically.<br />
Altering the VOLUME or DBB controls will not<br />
affect the recording.<br />
• To protect a tape from accidental erasure, break<br />
out the tabs. If you wish to record again, cover the<br />
tabs with a piece of adhesive tape.<br />
<strong>CD</strong> Synchro Start Recording<br />
1. Adjust the POWER slider to <strong>CD</strong>.<br />
2. Insert a <strong>CD</strong> and if desired, program track numbers.<br />
3. Insert a suitable tape into the cassette deck and<br />
close the door.<br />
4. Press RECORD 0 to start recording.<br />
– Playing of the <strong>CD</strong> program starts automatically<br />
from the beginning of the program. You don't<br />
need to start the <strong>CD</strong> player separately.<br />
To select and record a particular passage<br />
within a <strong>CD</strong> track:<br />
• Press SEARCH ∞ or §. Release the control when<br />
you recognize the passage you want.<br />
• To pause <strong>CD</strong> playback, press 2;.<br />
• Recording starts from this exact point in the track<br />
when you press RECORD 0.<br />
5. To pause recording, press PAUSE ;. Press<br />
PAUSE ; again to resume recording.<br />
6. To stop recording, press STOP 9.<br />
Recording from the Radio<br />
1. Tune to the desired radio station (see Tuning to<br />
radio stations).<br />
2. Follow steps 3-6, under <strong>CD</strong> Synchro Start<br />
Recording.
CASSETTE RECORDER SAFETY AND MAINTENANCE TROUBLESHOOTING<br />
SAFETY & MAINTENANCE INFORMATION<br />
(See 8)<br />
• Don't expose the set, batteries, <strong>CD</strong>s or cassettes to<br />
humidity, rain, sand or excessive heat.<br />
• Clean the set with a dry cloth. Don't use any cleaning<br />
agents containing alcohol, ammonia, benzene<br />
or abrasives as these may harm the set.<br />
• Place the set on a hard and flat surface so that the<br />
system does not tilt. Make sure there is good ventilation<br />
to prevent the set overheating.<br />
• The mechanical parts of the set contain<br />
self-lubricating bearings and must not be oiled or<br />
lubricated.<br />
<strong>CD</strong> player and <strong>CD</strong> handling<br />
• If the <strong>CD</strong> player cannot read <strong>CD</strong>s correctly, use a<br />
cleaning <strong>CD</strong> to clean the lens before taking the set<br />
to repair.<br />
• The lens of the <strong>CD</strong> player should never be touched!<br />
• Sudden changes in the surrounding temperature<br />
can cause condensation on the lens of your <strong>CD</strong><br />
player. Playing a <strong>CD</strong> is then not possible. Do not<br />
attempt to clean the lens but leave the set in a<br />
warm environment until the moisture evaporates.<br />
• Always close the <strong>CD</strong>-tape door to avoid dust on the<br />
lens.<br />
• To clean the <strong>CD</strong>, wipe in a straight line from the<br />
center towards the edge using a soft, lint-free<br />
cloth. Do not use cleaning agents as they may<br />
damage the disc.<br />
• Never write on a <strong>CD</strong> or attach any stickers to it.<br />
Tape deck maintenance<br />
To ensure quality recording and playback of the tape<br />
deck, clean parts A, B and C as shown, once a<br />
month. Use a cotton bud slightly moistened with alcohol<br />
or a special head cleaning fluid to clean the deck.<br />
1. Open the <strong>CD</strong>-tape door.<br />
2. Press PLAY 2 and clean the roller C.<br />
3. Press PAUSE ; and clean the heads A, and the<br />
capstan B.<br />
4. After cleaning, press STOP 9.<br />
Note:<br />
Cleaning of the heads can also be done by playing a<br />
cleaning cassette through once.<br />
Environmental information<br />
We have done our best to reduce the packaging and make it easy to separate into 3 materials:<br />
cardboard, expandable polystyrene, polyethylene.<br />
Your set consists of materials which can be recycled if disassembled by a specialized<br />
company. Please observe the local regulations regarding the disposal of packaging,<br />
dead batteries and old equipment.<br />
If a fault occurs, first check the points listed below before taking the set for repair.<br />
If you are unable to remedy a problem by following these hints, consult your dealer or service center.<br />
WARNING: Do not open the set as there is a risk of electric shock. Under no circumstances<br />
should you try to repair the set yourself, as this will<br />
invalidate the warranty.<br />
No sound /power<br />
– Volume not adjusted<br />
• Adjust the VOLUME<br />
– Power cord not securely connected<br />
• Connect the AC power cord properly<br />
– Batteries dead/ incorrectly inserted<br />
• Insert (fresh) batteries correctly<br />
– Headphones connected to the set<br />
• Disconnect headphones<br />
Severe radio hum or noise<br />
– Electrical interference: set too close to TV, VCR or<br />
computer<br />
• Move the set to increase the distance<br />
Poor radio reception<br />
– Weak radio signal<br />
• FM: Adjust the FM telescopic aerial<br />
noPr indication<br />
– During programming radio preset stations, you have<br />
keyed in a preset number that exceeds the maximum<br />
preset number i.e. 40<br />
• Key in a preset number from 1-40<br />
noCd indication<br />
– <strong>CD</strong> badly scratched or dirty<br />
• Replace/ clean <strong>CD</strong>, see Maintenance<br />
– Laser lens steamed up<br />
• Wait until lens has cleared<br />
nFCd indication<br />
– <strong>CD</strong>-R(W) is blank/ not finalized<br />
• Use a finalized <strong>CD</strong>-R(W)<br />
dAtA indication<br />
– <strong>CD</strong> contains non-audio files<br />
• Press SEARCH ∞ or § once or more to skip to a<br />
<strong>CD</strong> audio track, instead of the data file<br />
The <strong>CD</strong> skips tracks<br />
– <strong>CD</strong> damaged or dirty<br />
• Replace or clean <strong>CD</strong><br />
– SHUFFLE or PROGRAM is active<br />
• Switch off SHUFFLE / PROGRAM<br />
Poor cassette sound quality<br />
– Dust and dirt on the heads, etc.<br />
• Clean deck parts, see Maintenance<br />
– Use of incompatible cassette types (METAL or<br />
CHROME)<br />
• Only use NORMAL (IEC I) for recording<br />
Recording does not work<br />
– Cassette tab(s) may be broken<br />
• Apply adhesive tape over the missing tab space<br />
Remote control does not function properly (for<br />
AZ1515 model only)<br />
– Batteries dead/ incorrectly inserted<br />
• Insert (fresh) batteries correctly<br />
– Distance/ angle between the set too large<br />
• Reduce the distance/ angle
English Français Español<br />
PHILIPS CONSUMER ELECTRONICS NORTH AMERICA<br />
Knoxville, Tennessee 37914-1810, U.S.A.<br />
Meet <strong>Philips</strong> at the Internet<br />
http://www.philipsusa.com<br />
AZ 1510<br />
AZ 1515<br />
CLASS 1<br />
LASER PRODUCT<br />
3140 115 3028.1<br />
W<br />
Printed in China


